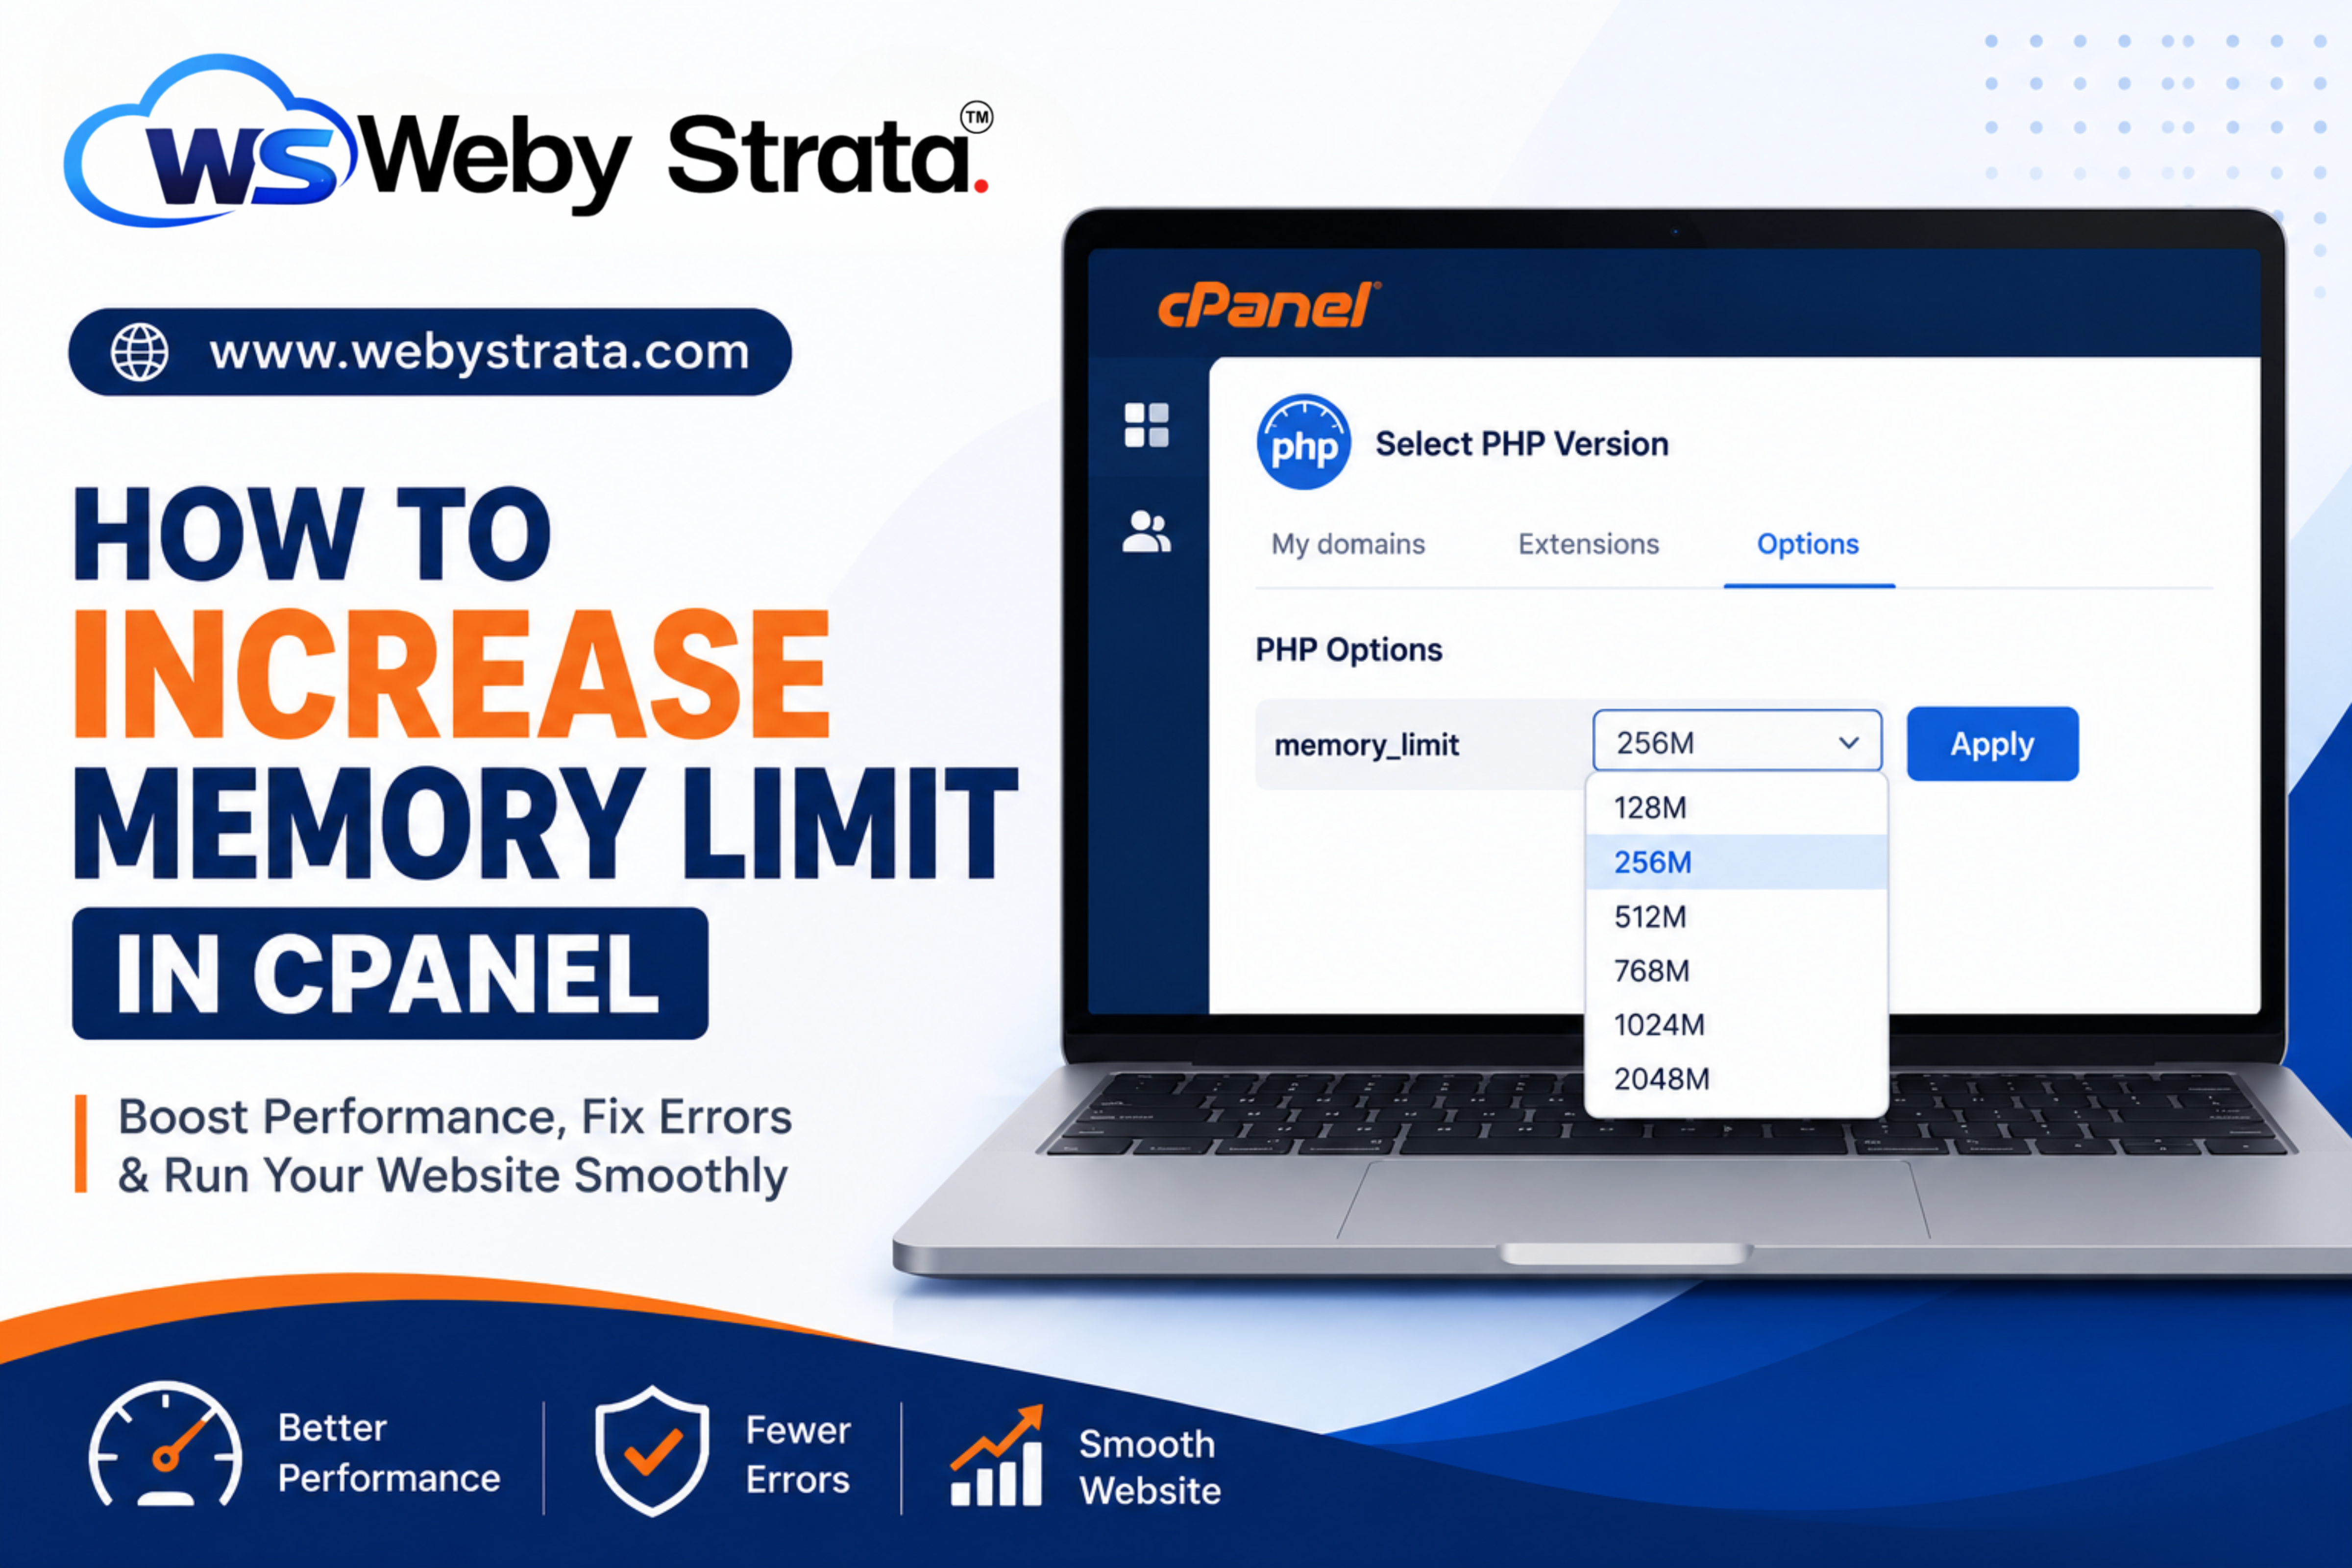
How to Increase PHP Memory Limit in cPanel
If your website is showing memory-related errors, loading slowly, or failing to run certain applications properly, you may need to increase the PHP memory limit. Many website owners face issues such as white screen errors, plugin failures, slow performance, or memory exhausted warnings because the default PHP memory allocation is too low for their website requirements.
Learning how to increase memory limit in cPanel can help improve website performance and ensure your applications run smoothly without interruptions. Whether you are using WordPress, Laravel, WHMCS, or any PHP-based application, increasing the memory limit is often one of the first troubleshooting steps.
In this guide, you will learn everything about PHP memory limits, why they matter, and how to safely increase them using cPanel.
What Is PHP Memory Limit?
PHP memory limit is the maximum amount of server memory a PHP script is allowed to use while executing. Hosting providers set default memory limits to prevent individual websites from consuming excessive server resources.
For example, your hosting account may have a default memory limit of:
- 64MB
- 128MB
- 256MB
- 512MB
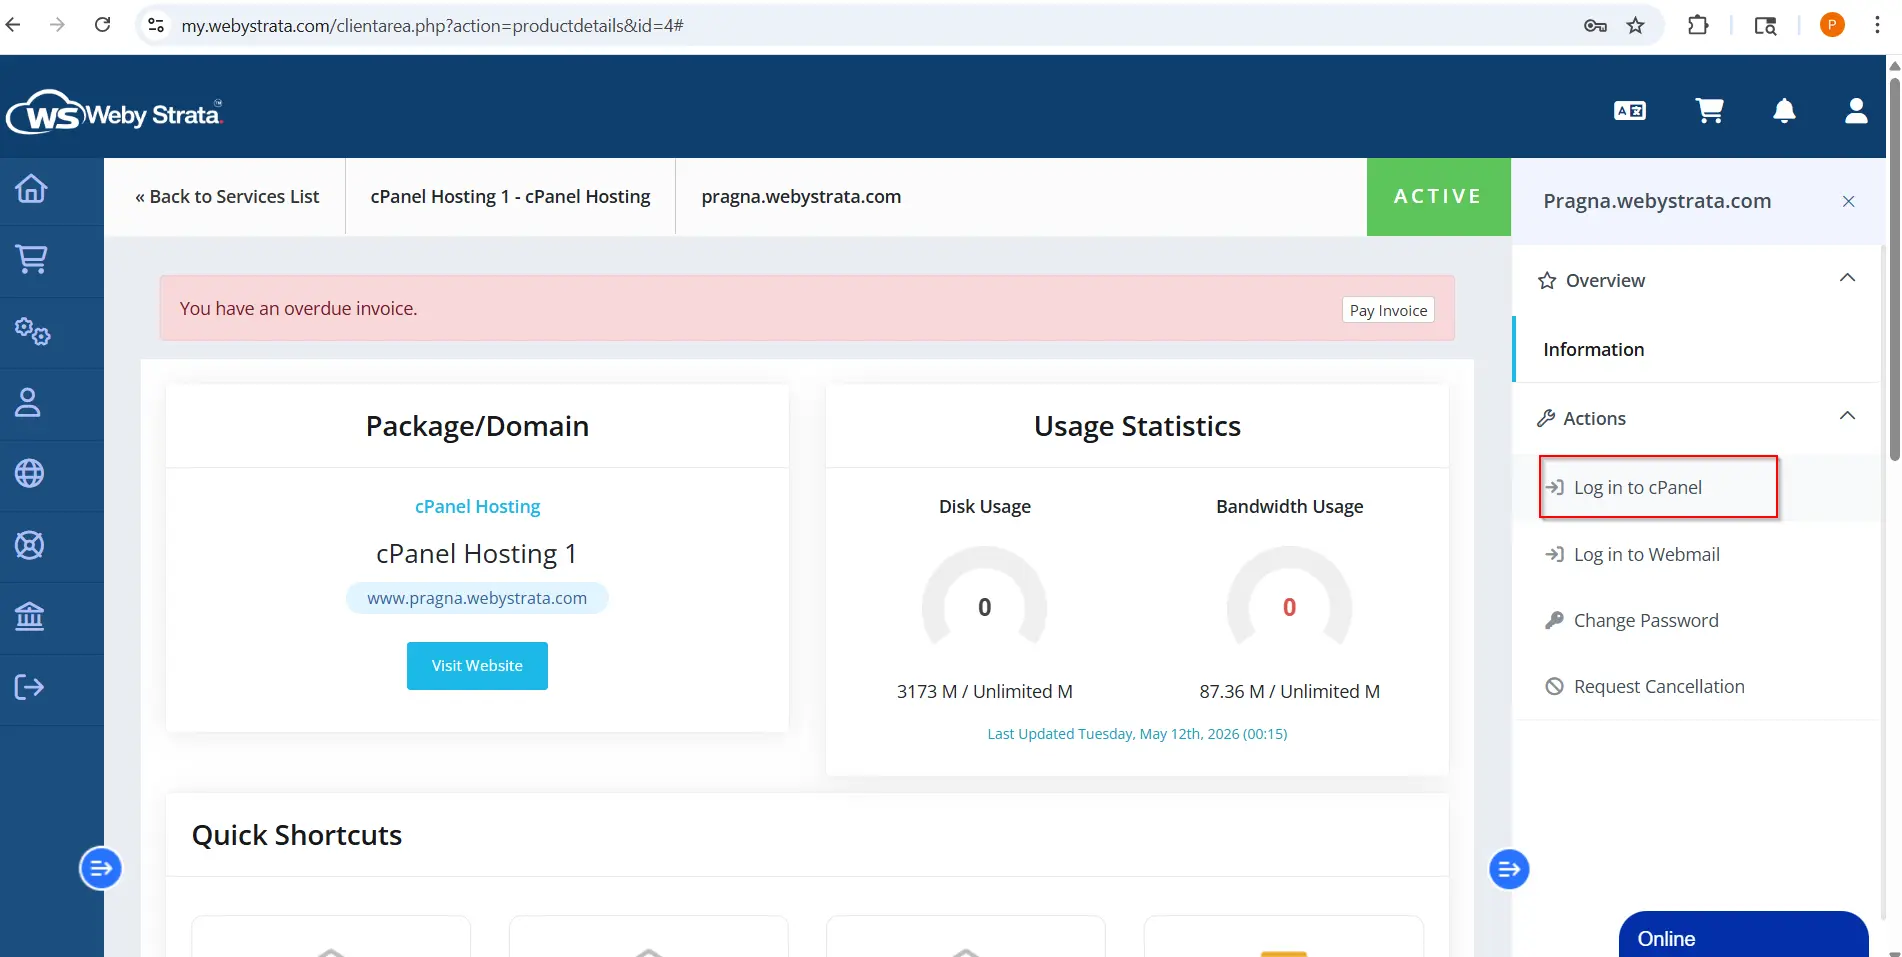
Step 1: Login to cPanel from Client Area
First, login to your client area account using WebyStrata Official Account
After logging in:
- Go to Services
- Click on My Services
- Select your active hosting service
- Click on Login to cPanel
Step 2: Open the “Select PHP Version” Option
After logging into cPanel:
- Scroll down to the Software section
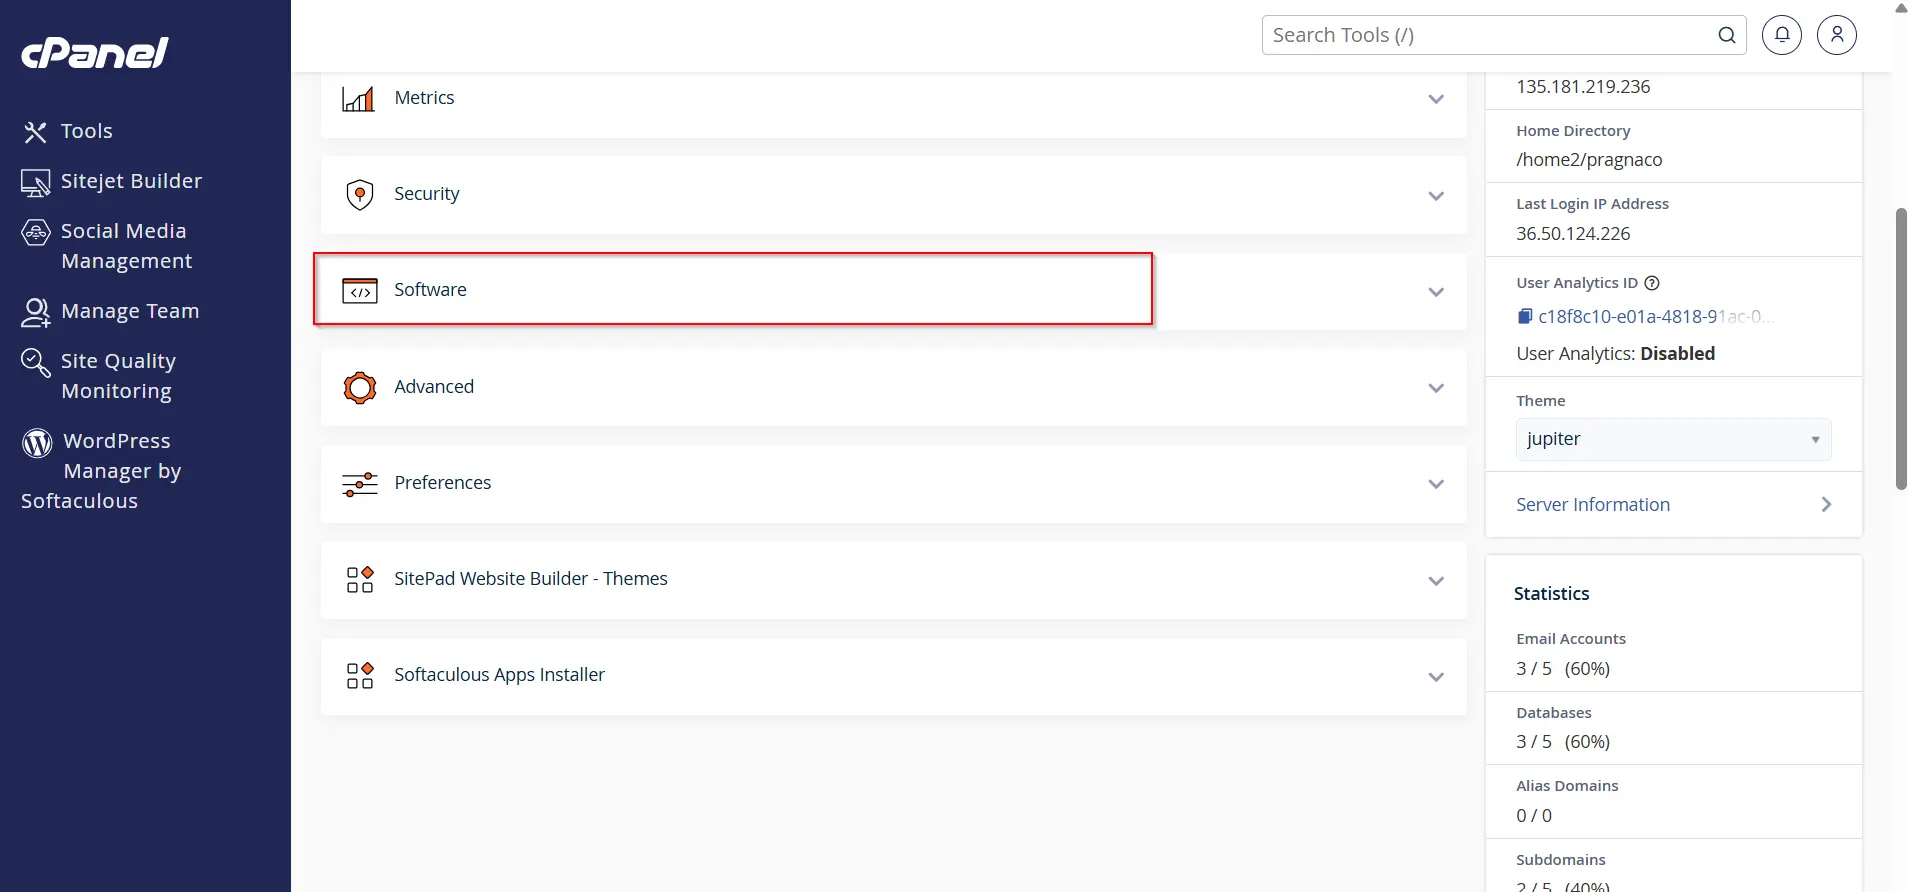
- Locate the option called Select PHP Version
- Click on it
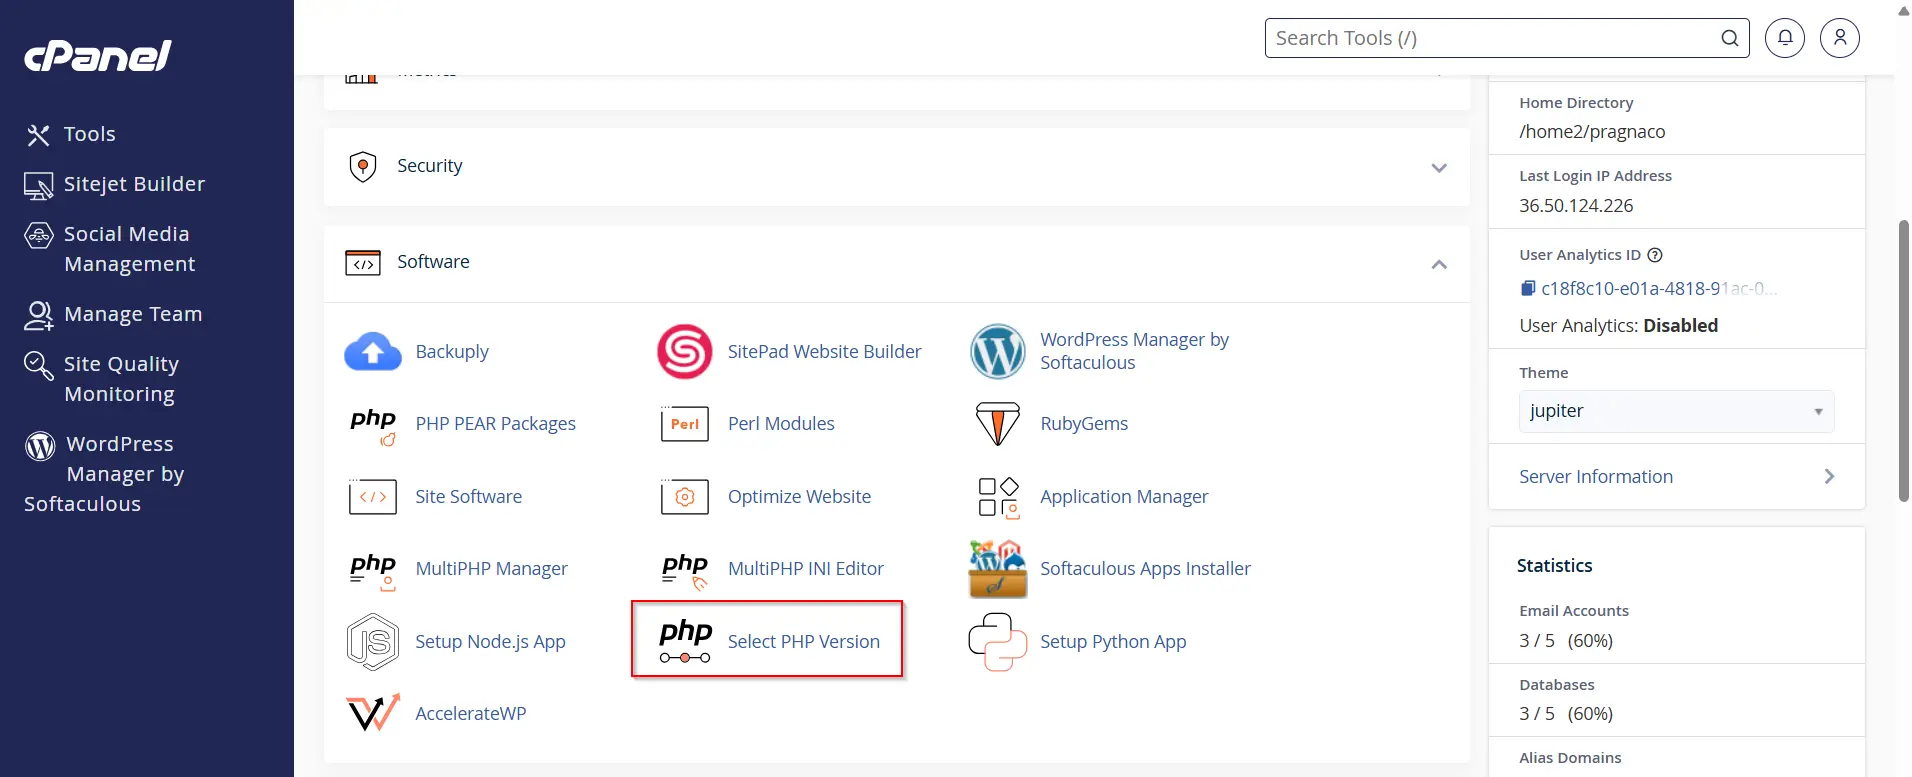
This feature allows you to manage your PHP configuration settings directly from cPanel without editing server files manually.
The PHP Selector interface is beginner-friendly and makes it easy to modify PHP settings safely.
Step 3: Open PHP Options
Inside the PHP Selector page:
- Click on the Options tab
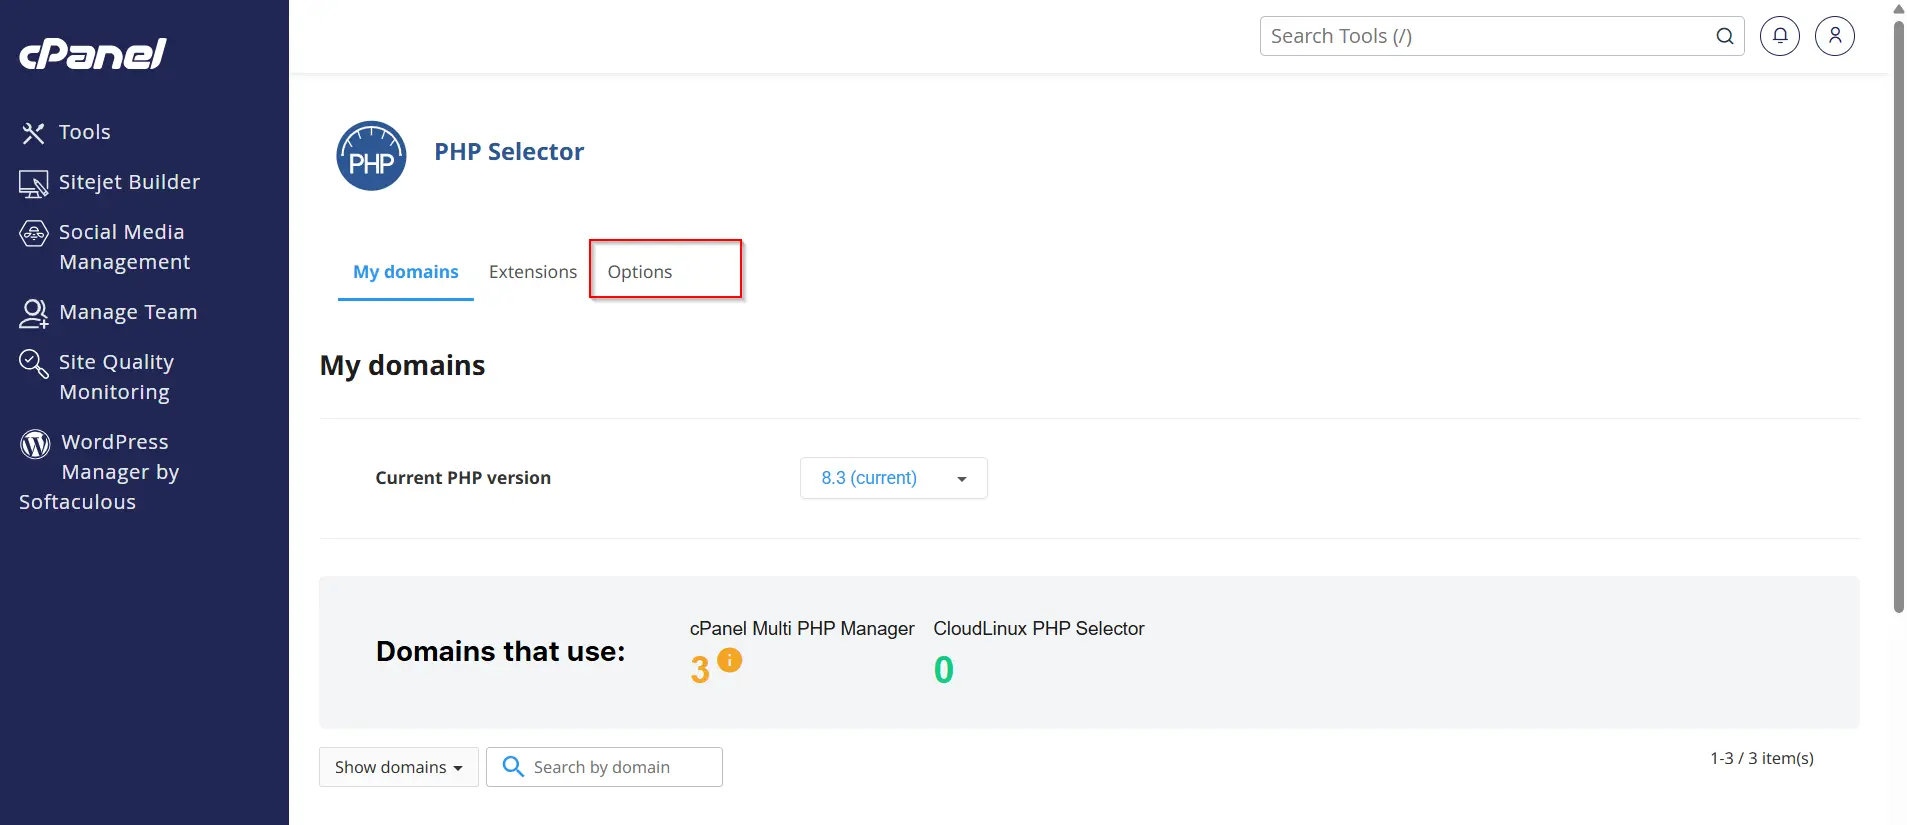
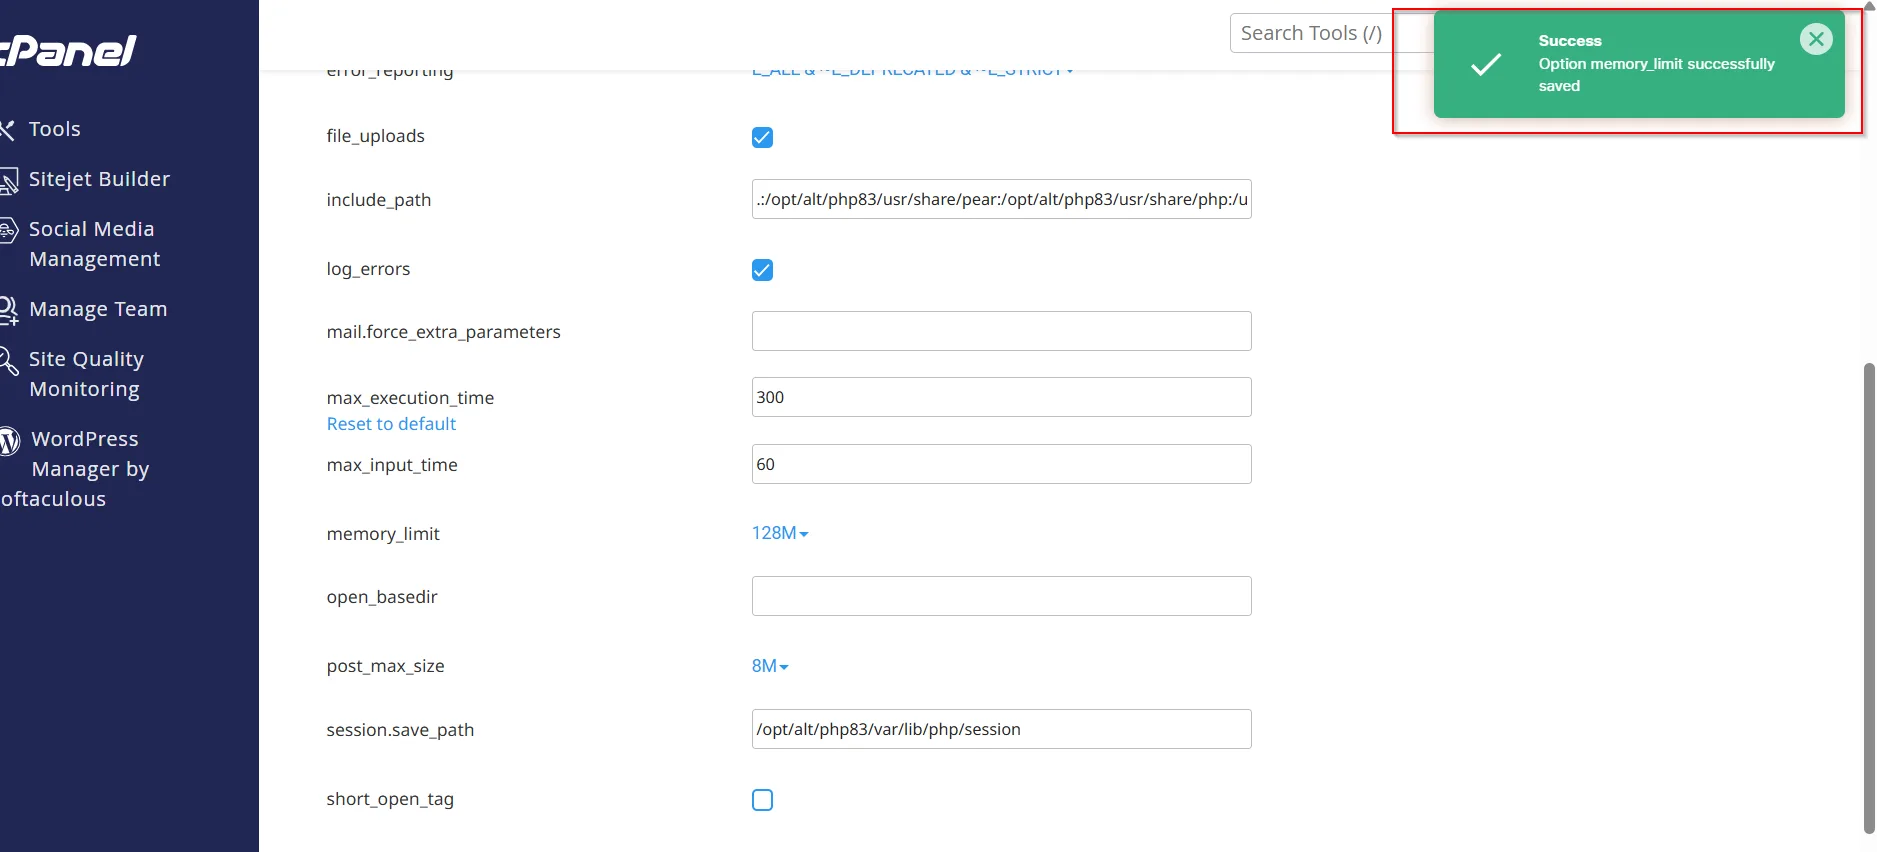
You will now see several configurable PHP settings including:
- upload_max_filesize
- post_max_size
- max_execution_time
- max_input_vars
- memory_limit
These settings control how PHP behaves on your hosting account.
Step 4: Find the memory_limit Setting
Locate the setting named:
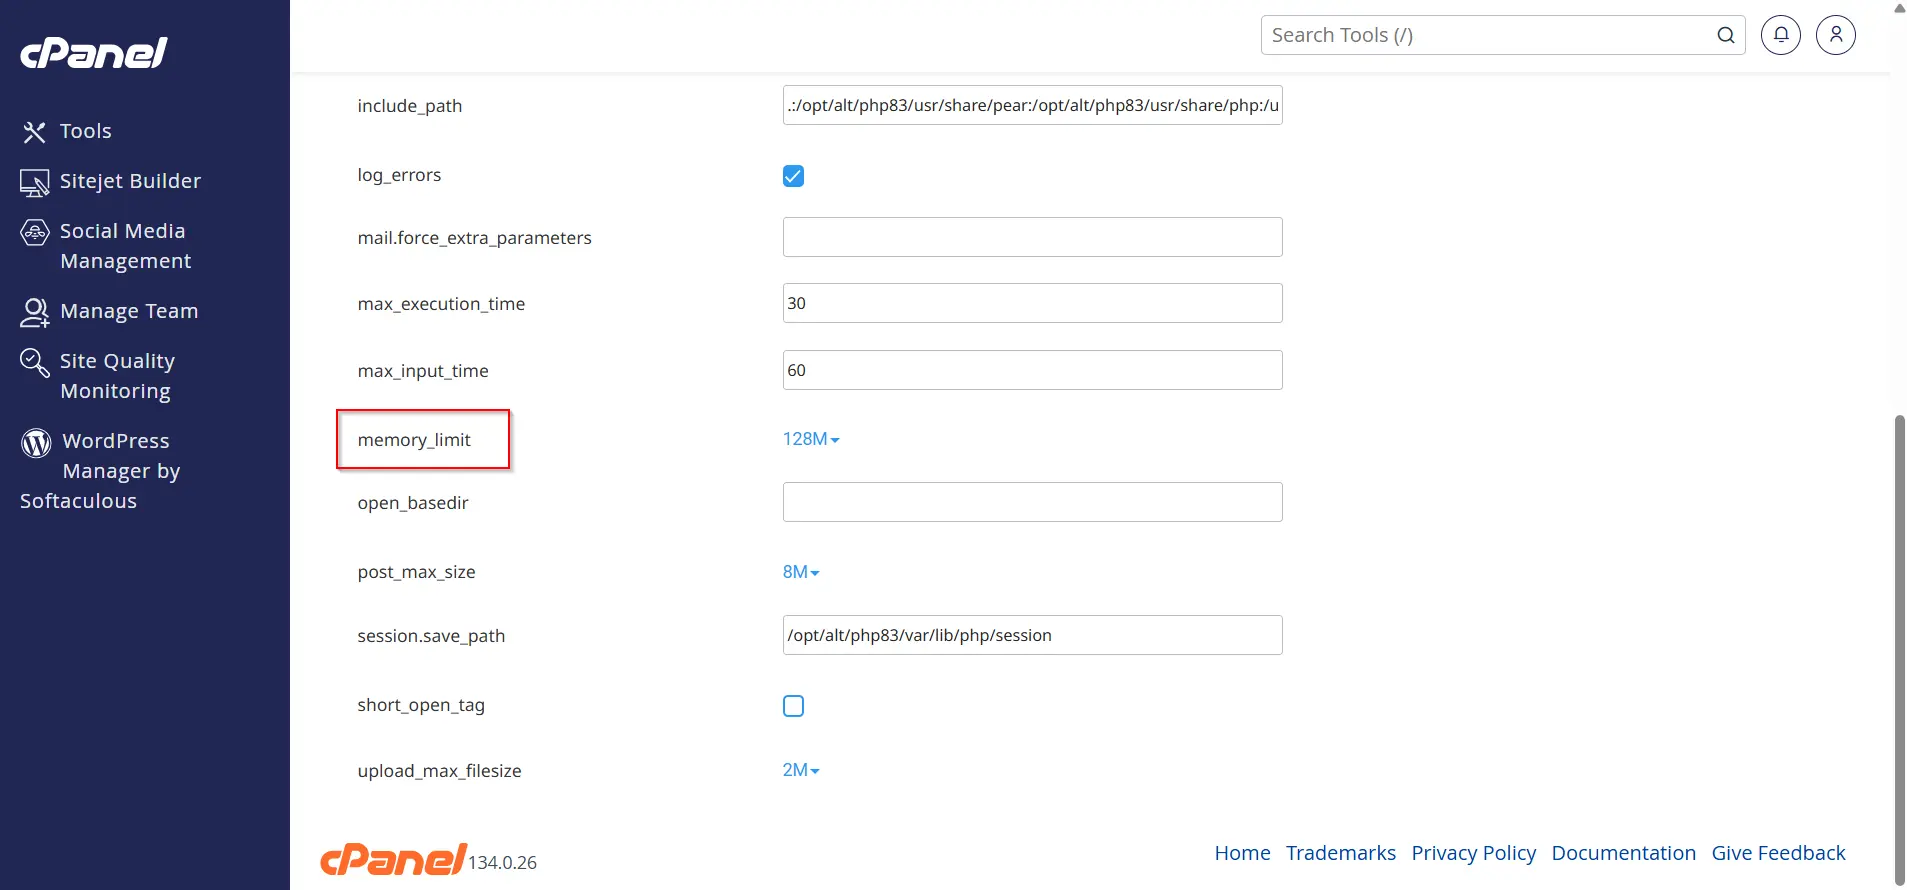
This setting controls the maximum amount of memory PHP scripts can use on your hosting account.
Common values include:
- 128M
- 256M
- 512M
Lower memory values may work for small websites, but larger websites often require more memory allocation.
Step 5: Increase the Memory Limit
To increase the memory limit:
- Click on the current value beside memory_limit
- Select a higher value such as:
- 256M
- 512M
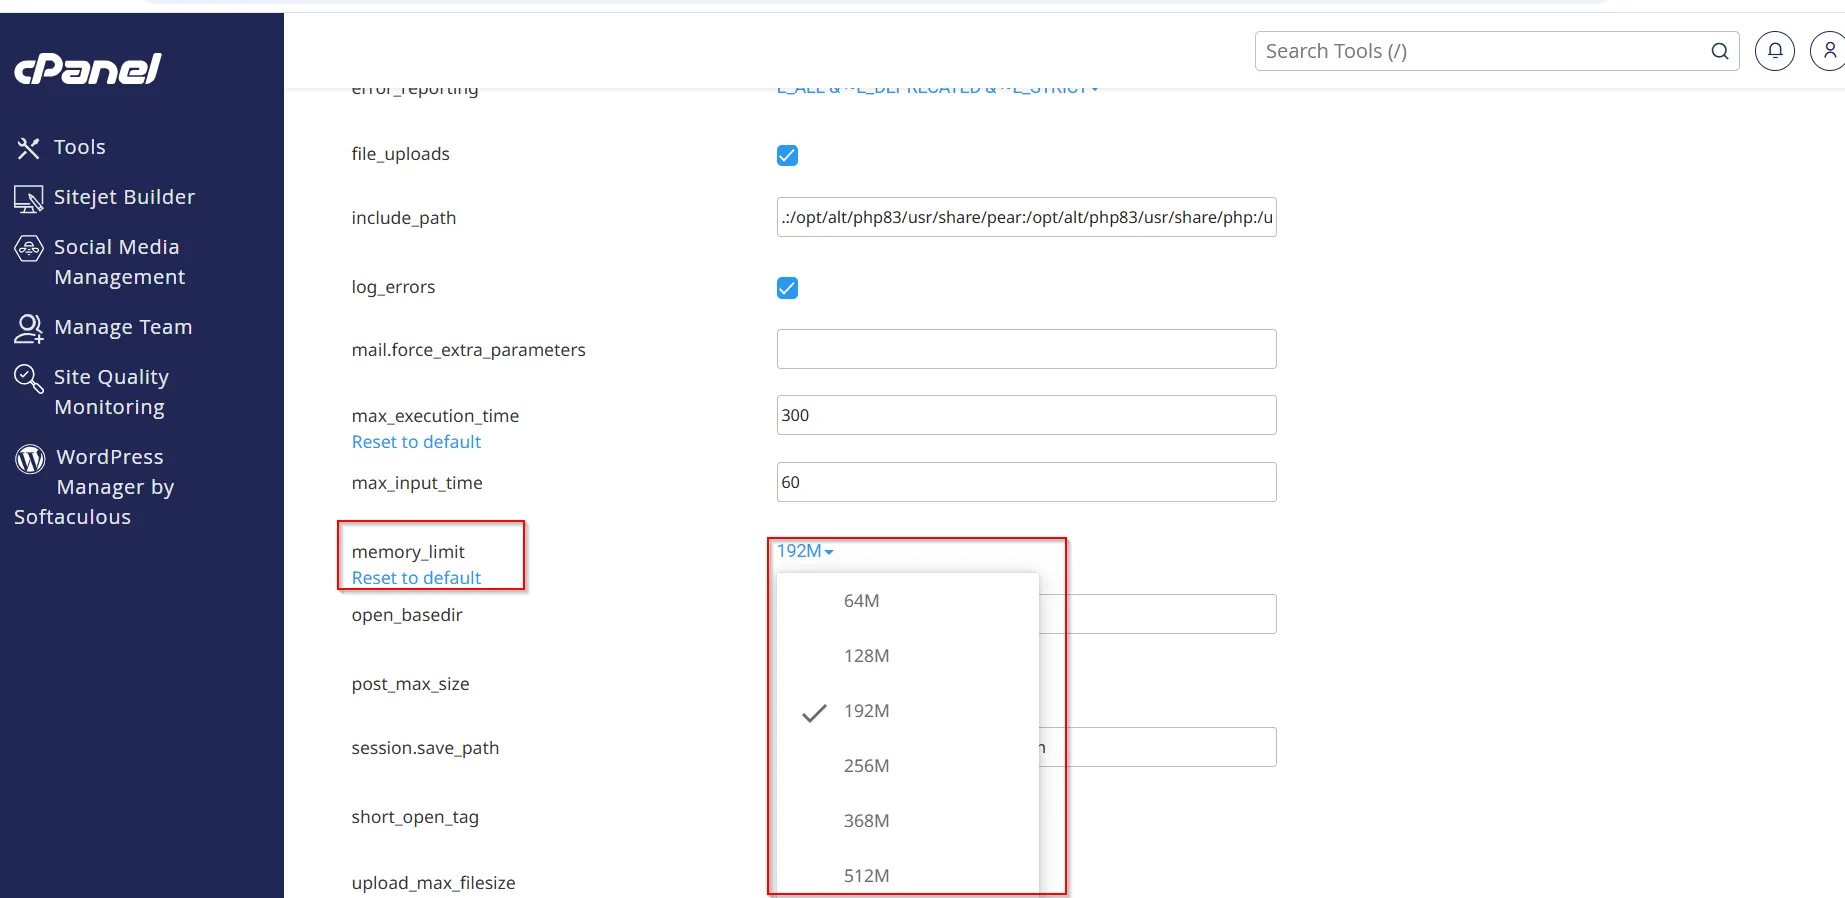
After selecting the new value, the changes are typically saved automatically.
Increasing the PHP memory allocation allows your website to process larger tasks more efficiently.
Step 6: Verify the Changes
After updating the value:
- Refresh the page
- Confirm that the new memory limit is displayed correctly
Your PHP memory limit has now been increased successfully.
Why You May Need to Increase PHP Memory Limit in cPanel
There are several situations where increasing the PHP memory limit becomes necessary.
Running Heavy WordPress Plugins
Some plugins require more server memory to function correctly. Backup plugins, page builders, security scanners, and WooCommerce extensions often consume high memory.
Examples include:
- Elementor
- WooCommerce
- Jetpack
- Backup plugins
- Security plugins
Benefits of Increasing PHP Memory Limit in cPanel
- Helps prevent memory exhausted errors
- Improves website performance and speed
- Supports large plugins, themes, and applications
- Makes backup, import, and migration processes run smoothly
What Happens If We Do Not Increase PHP Memory Limit in cPanel?
- Website may show memory exhausted errors
- Large plugins or themes may fail to install or update
- Website performance can become slow
- Backup, import, or migration processes may stop unexpectedly
Conclusion
Learning how to increase PHP memory limit in cPanel is an important step for improving website stability and performance. Websites running WordPress, WooCommerce, WHMCS, or other PHP applications often require additional memory to handle plugins, traffic, backups, and large tasks smoothly.
Using the Select PHP Version feature inside cPanel makes the process simple even for beginners. By increasing the PHP memory limit correctly and optimizing your website regularly, you can reduce errors, improve loading speed, and create a better experience for your website visitors.