cPanel
How to Create a Subdomain in cPanel
A subdomain is a part of your primary domain that can be used to create separate sections of your website. Subdomains are commonly used for blogs, forums, client portals, support sections, testing environments, and…

A subdomain is a part of your primary domain that can be used to create separate sections of your website. Subdomains are commonly used for blogs, forums, client portals, support sections, testing environments, and mobile versions of websites.
For example:
- Main Domain: yourwebsite.com
- Subdomain: blog.yourwebsite.com
Subdomains can be easily created in cPanel by following the steps below.
Step 1: Login to Your cPanel Account
Login to your cPanel account using your username and password.
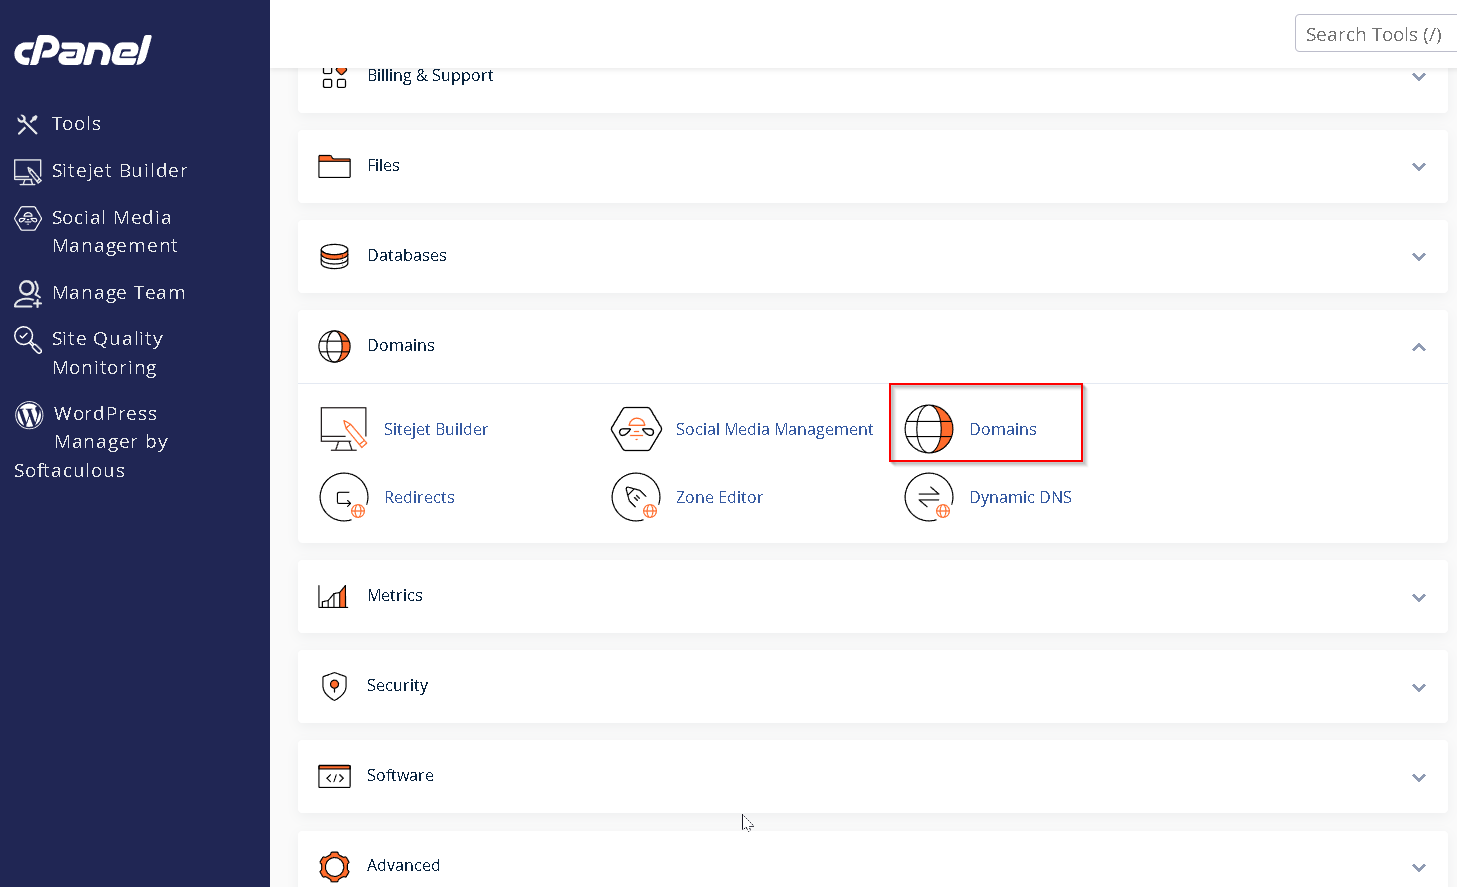
Step 2: Open the Domains Section
After logging into cPanel, the dashboard will appear.
- Go to the Domains section
- Click on Domains


Step 3: Click on “Create A New Domain”
Inside the Domains page, click on:
Create A New Domain

Step 4: Enter the Subdomain Name
Enter the subdomain you want to create.
Example:
- Mywebsite.com
Step 5: Disable Share Document Root Option
Untick the option:
Share document root (/home/username/public_html) with “domain.tld”
This allows the subdomain to have its own separate folder and files.

Step 6: Click on Submit
After entering all details, click on: Submit
Your subdomain will now be created successfully.
Note: Make sure you ignore the Subdomain option, above the submit button.
This is how you can create a subdomain in cPanel.
Related Articles