Latest Updates
How to Add Admin User to WordPress Database from phpMyAdmin
How to Add Admin User to WordPress Database from phpMyAdmin WordPress administrators occasionally face situations where they are unable to access the dashboard due to forgotten credentials, deleted administrator accounts, plugin conflicts, or security…
How to Add Admin User to WordPress Database from phpMyAdmin
WordPress administrators occasionally face situations where they are unable to access the dashboard due to forgotten credentials, deleted administrator accounts, plugin conflicts, or security issues. When traditional password recovery methods fail, phpMyAdmin provides a reliable way to create a new administrator account directly from the WordPress database.
By adding a new user record to the database and assigning administrator privileges, you can quickly regain full control of your website without modifying existing accounts. In this guide, you’ll learn how to add an admin user to the WordPress database using phpMyAdmin.
Prerequisites
Before proceeding, ensure that you have:
- Access to your hosting control panel.
- Access to phpMyAdmin.
- Knowledge of the WordPress database being used by your website.
- Backup of your database before making changes.
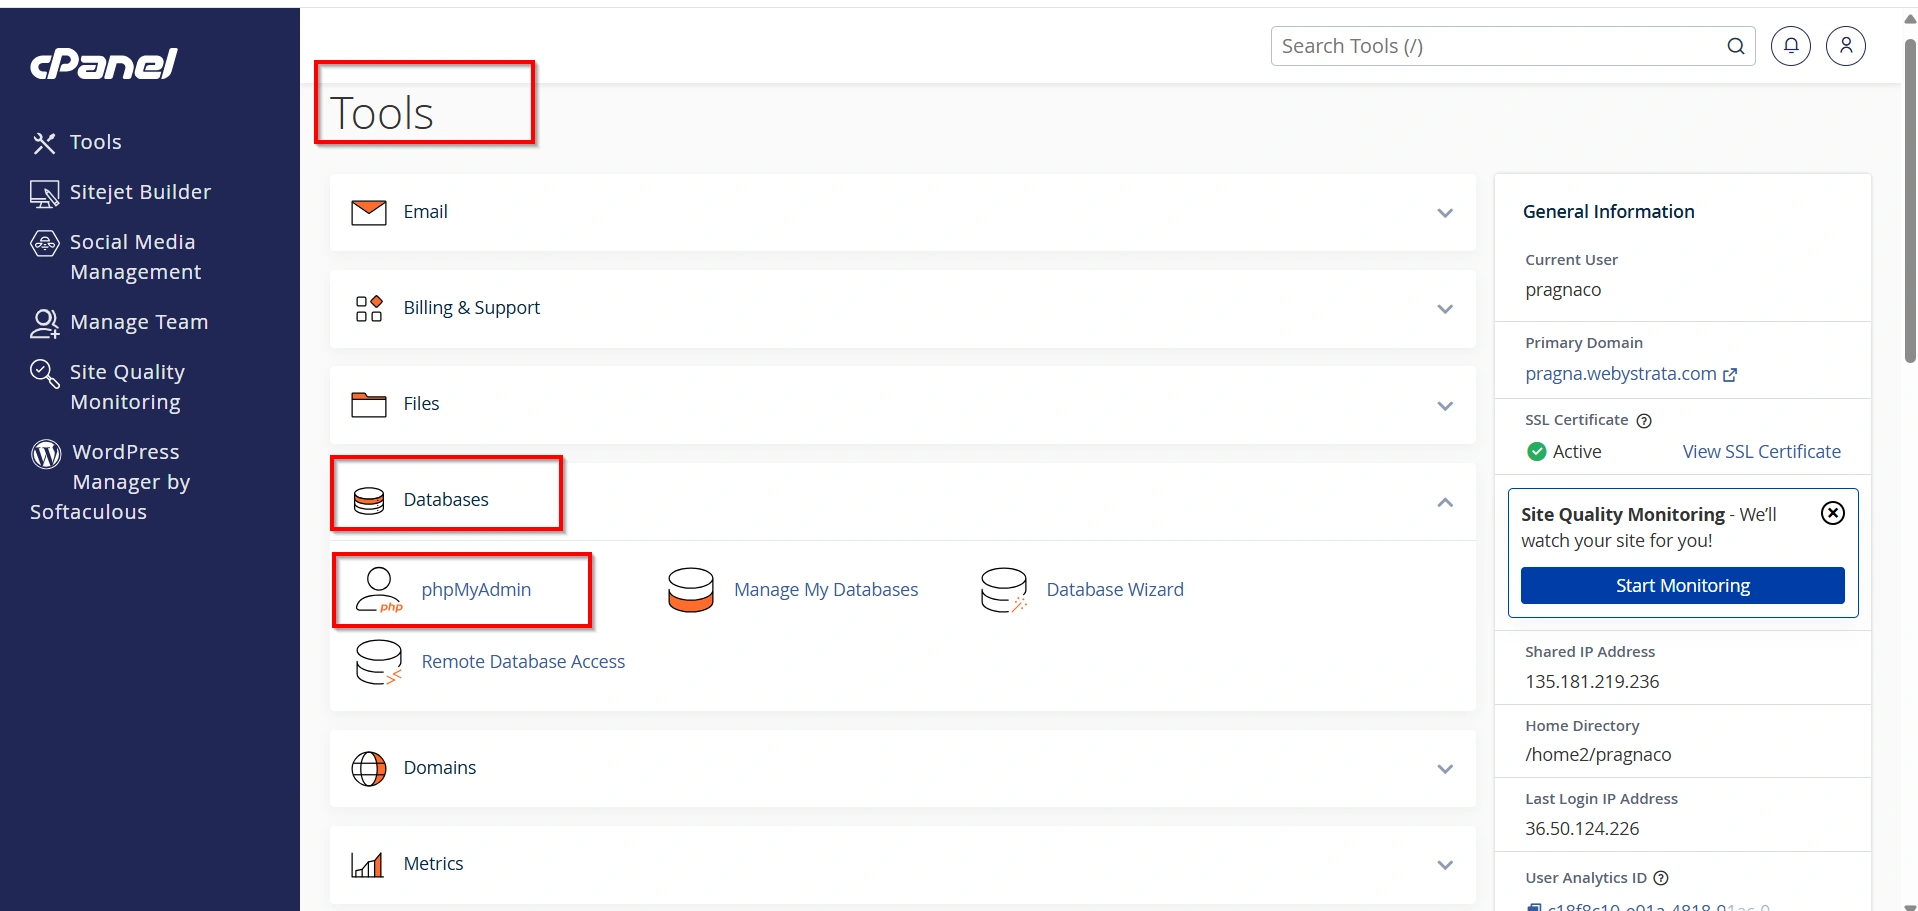
Step 1: Login to cPanel from WebyStrata Client Area
First, visit the WebyStrata website and log in to your client area account using your registered email address and password.
official Website www.webystrata.com
After logging in:
- Go to Services
- Click on My Services
- Select your active hosting service
- Click on Login to cPanel
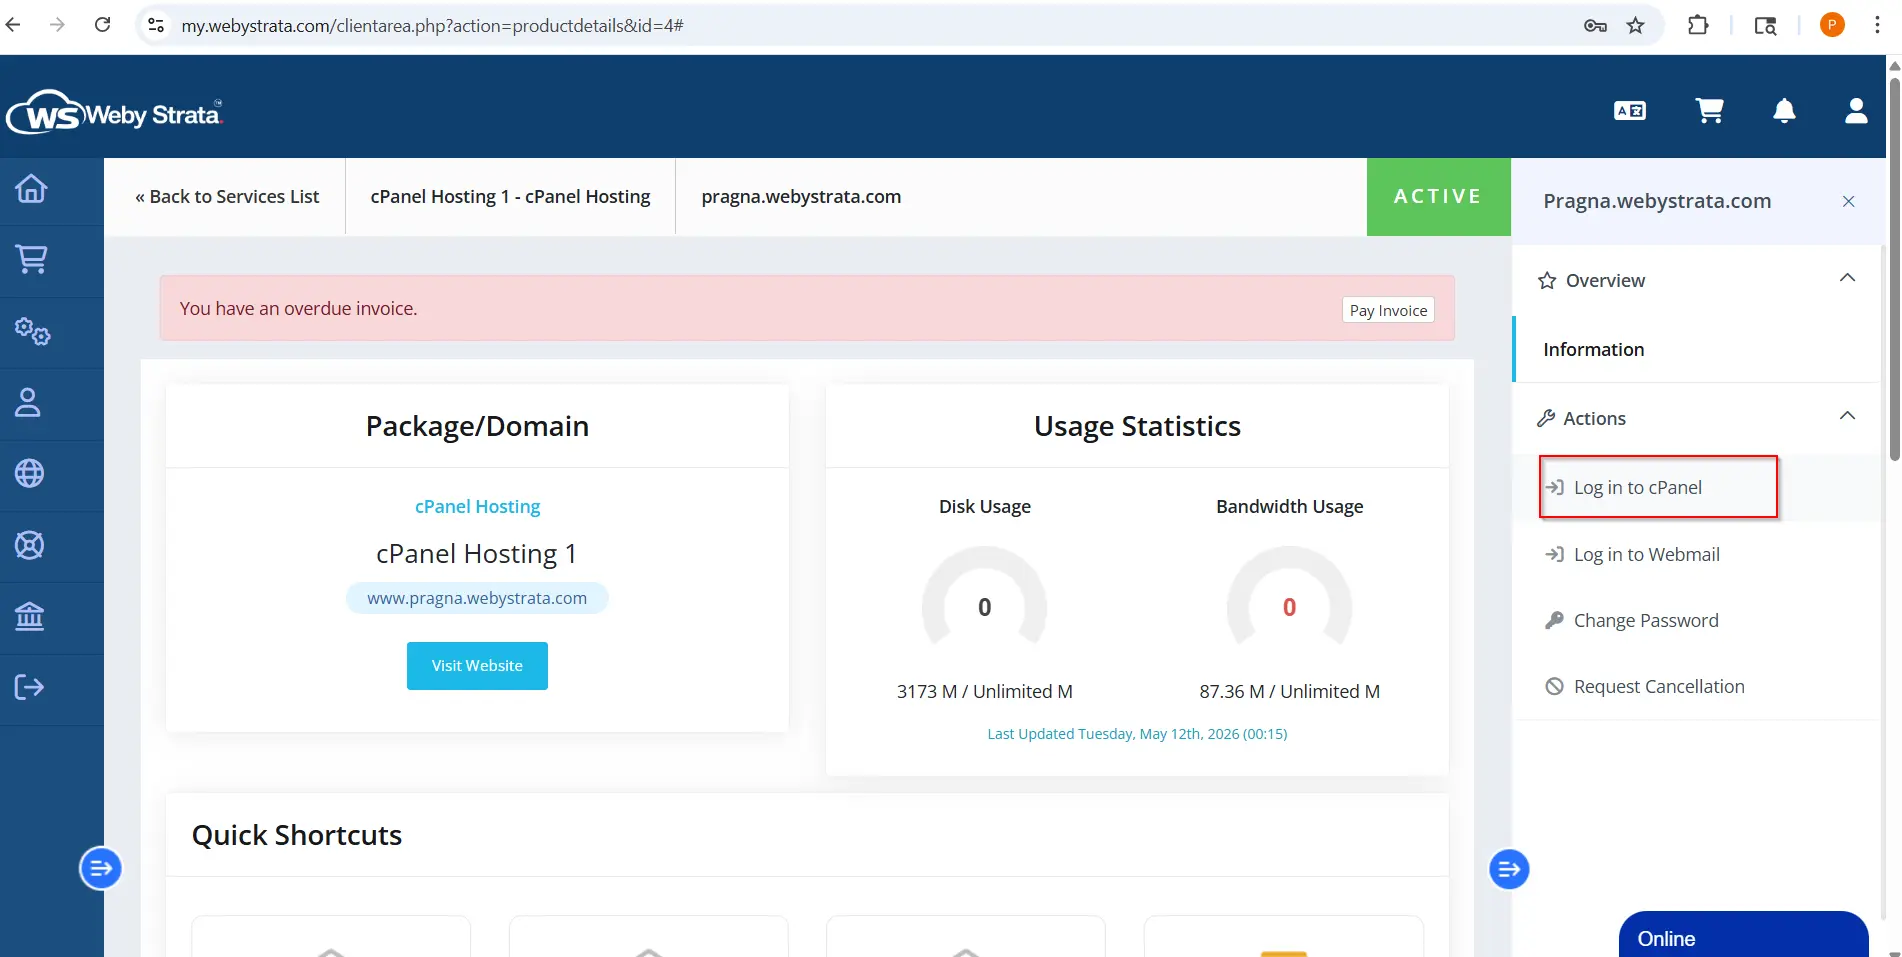
- Navigate to the Databases section. Click phpMyAdmin to launch the database management interface.
- From the left-hand menu, select the WordPress database associated with your website.
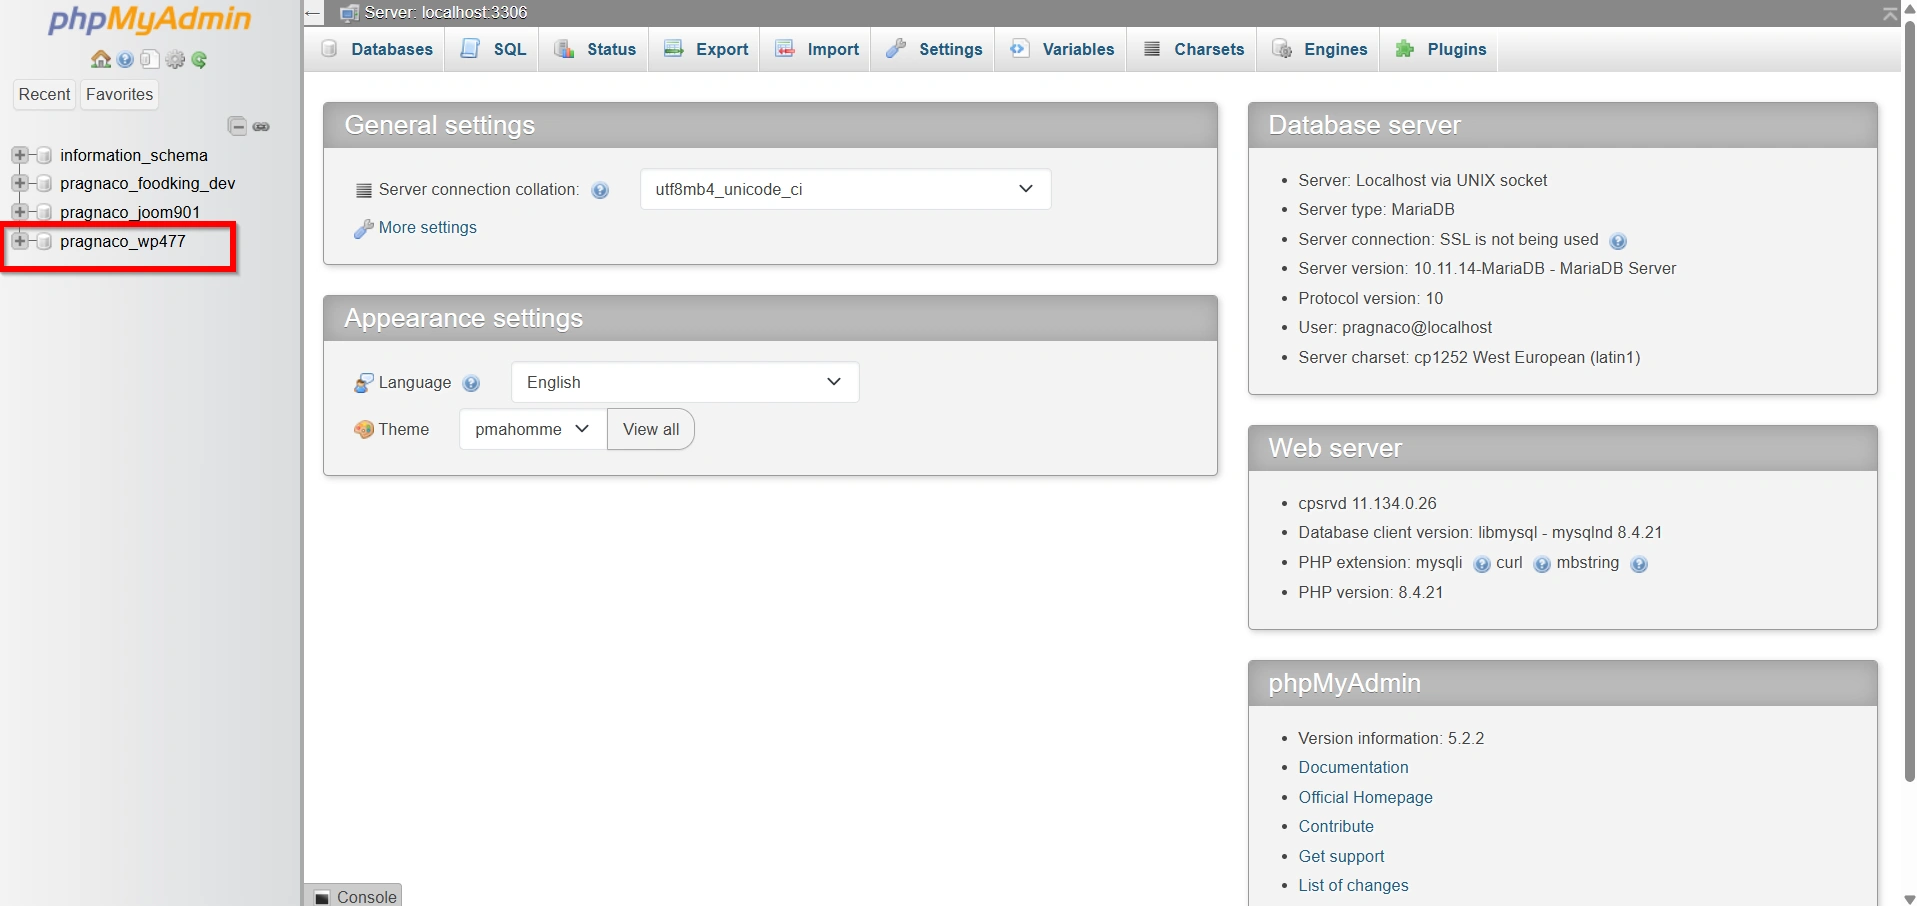
If you are unsure which database WordPress uses, check the wp-config.php file located in your WordPress installation directory.
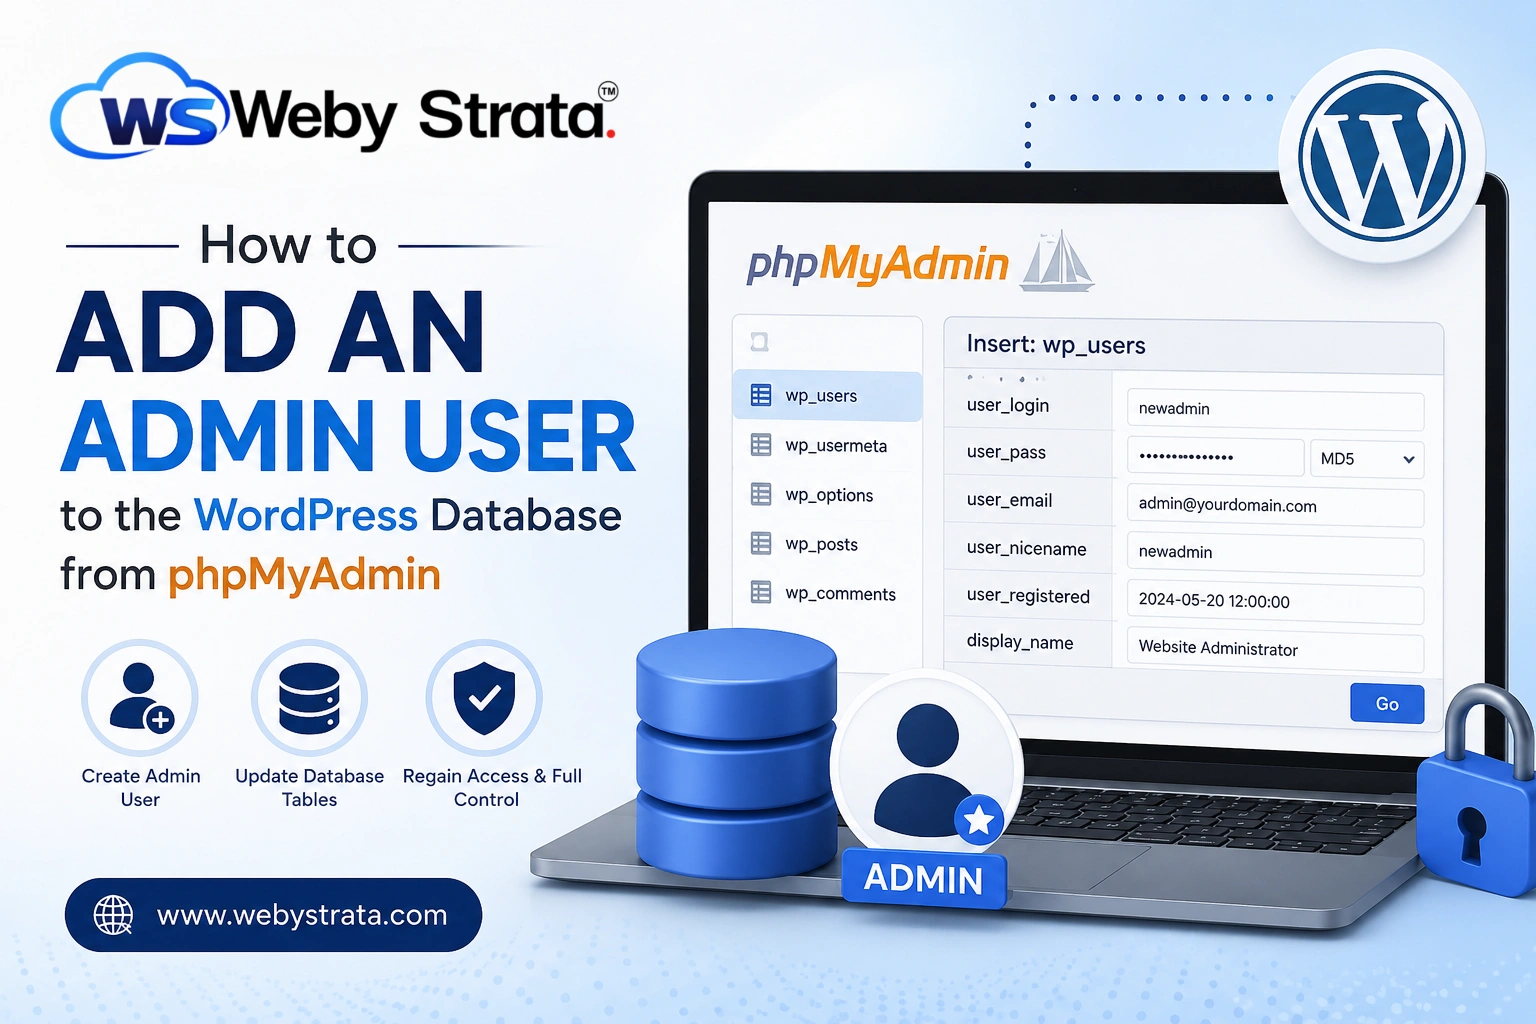
Step 2: Create a New User
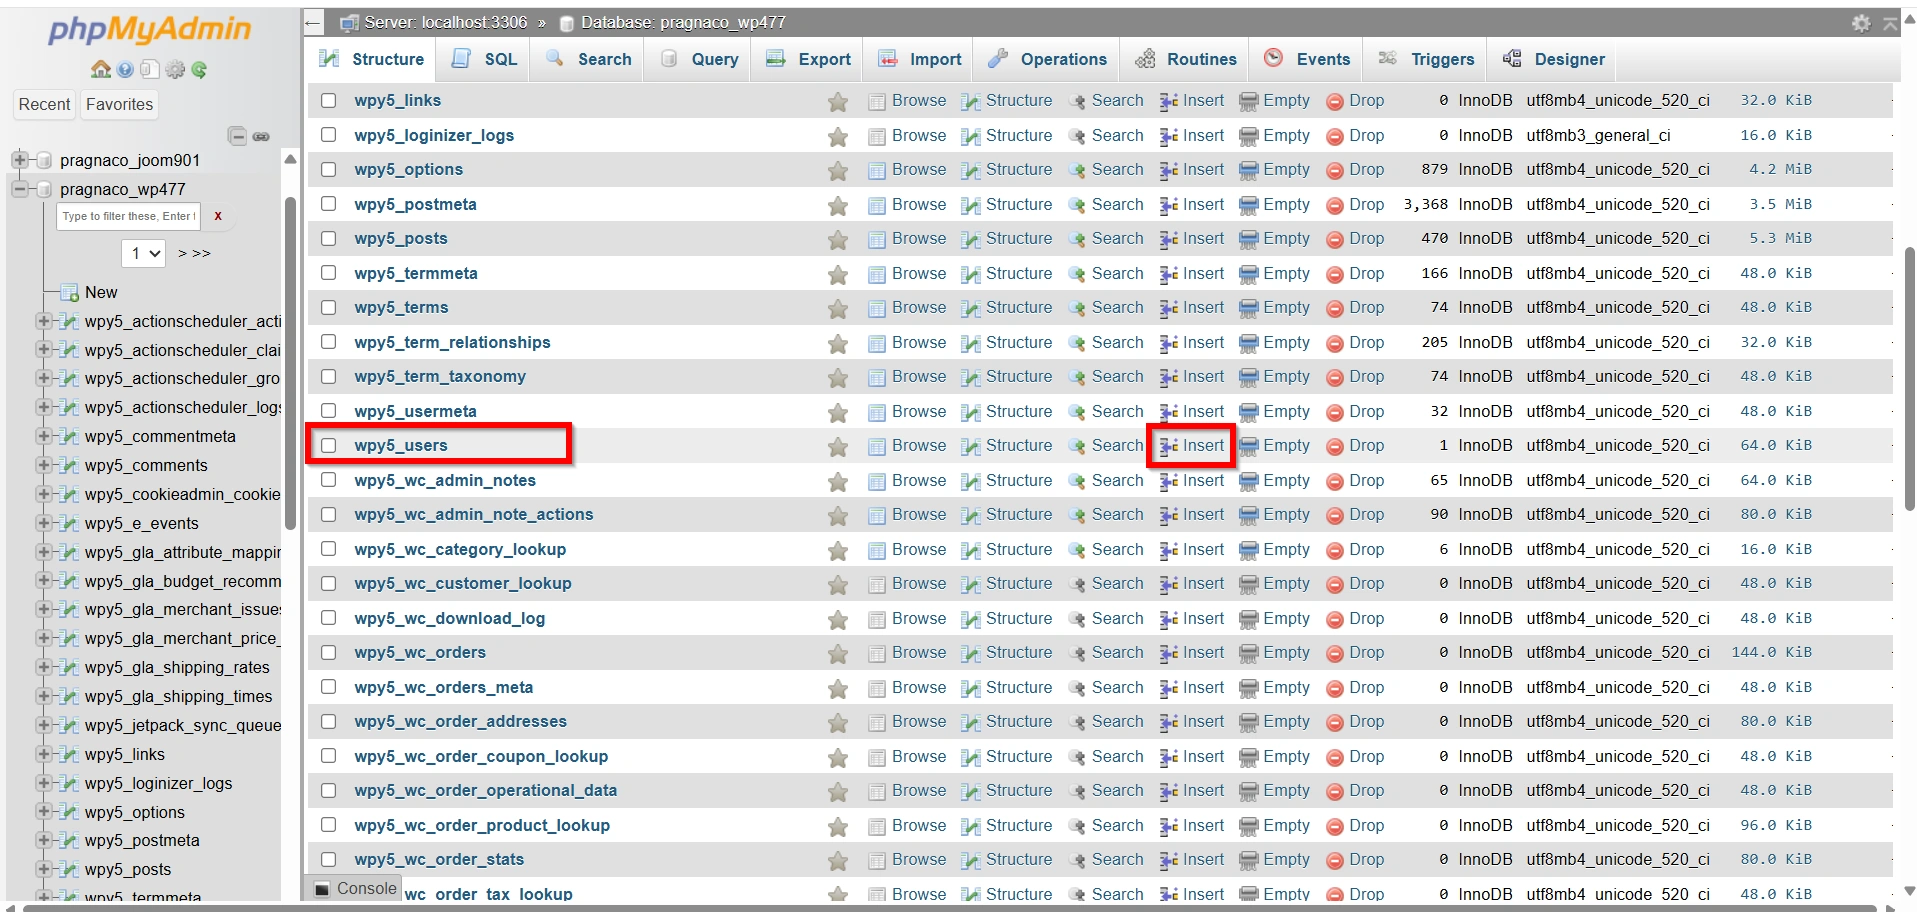
Locate the databasename_users table. In most WordPress installations, this table is named wp_users, although the prefix may differ depending on your configuration.
- Click the table and then select the Insert tab.
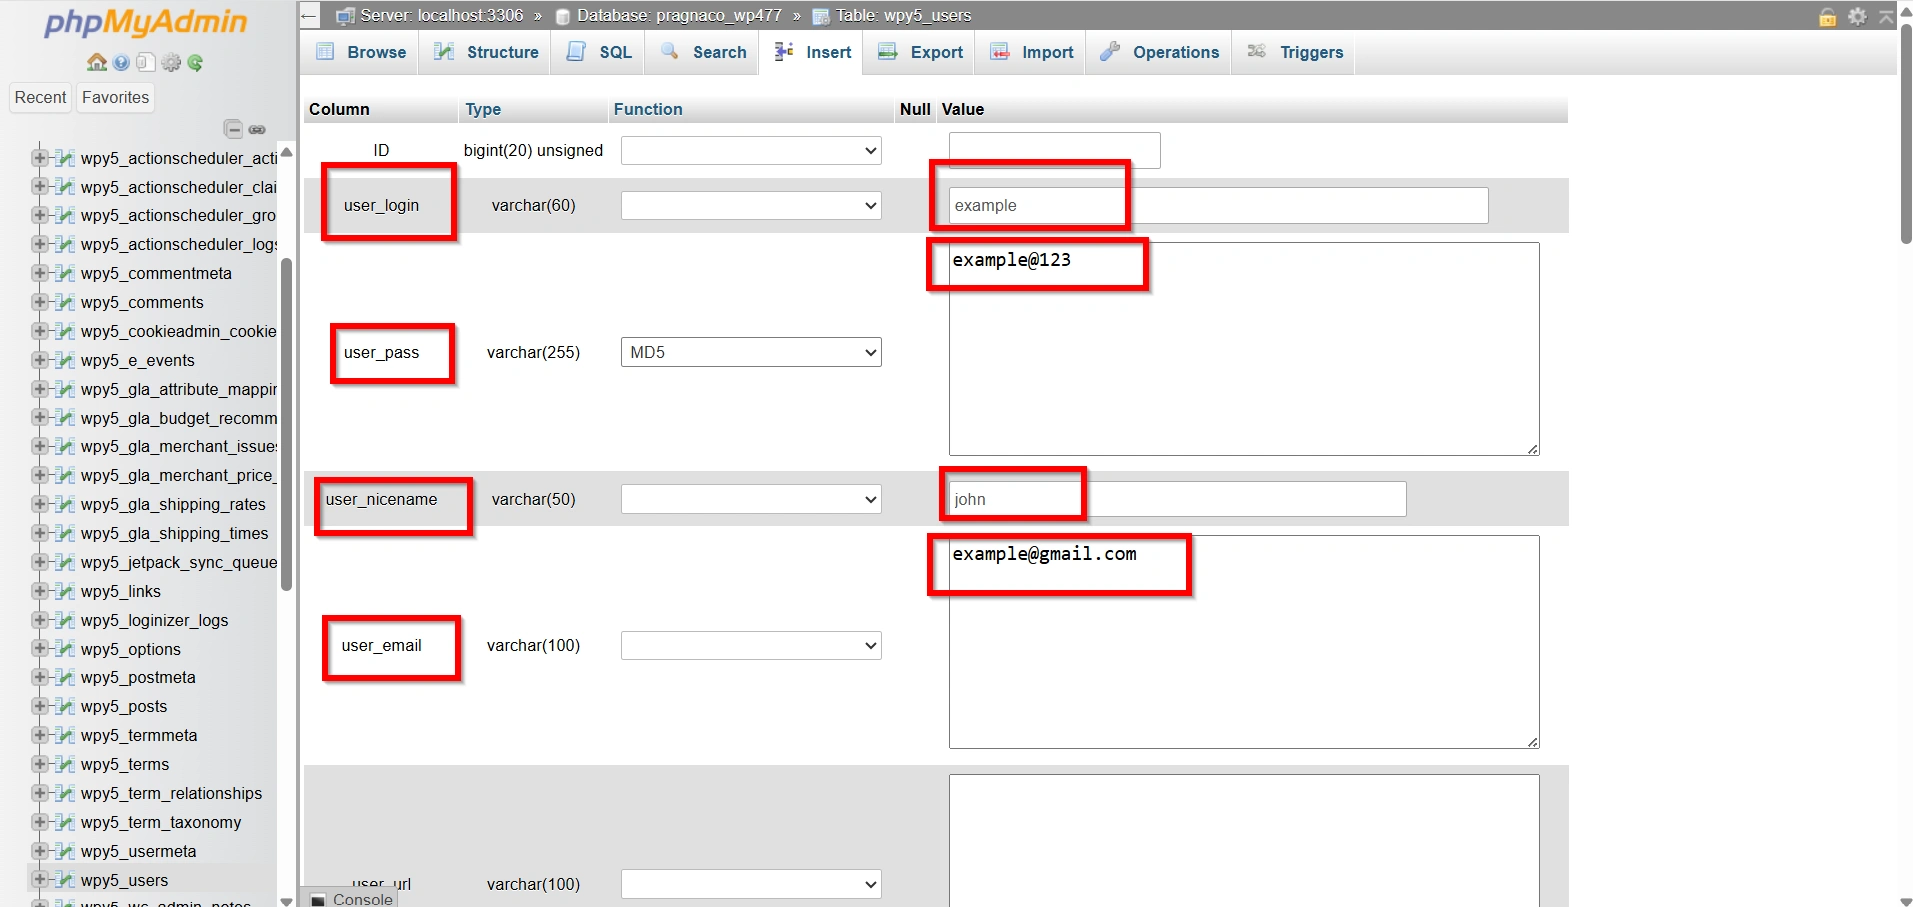
Enter the following information:
- user_login: Enter the username for the new administrator account.
- user_pass: Enter a password and select MD5 from the Function dropdown menu.
- user_nicename: Enter a nickname for the user.
- user_email: Enter a valid email address.
- user_registered: Enter the current date and time.
- display_name: Enter the display name that will appear within WordPress.
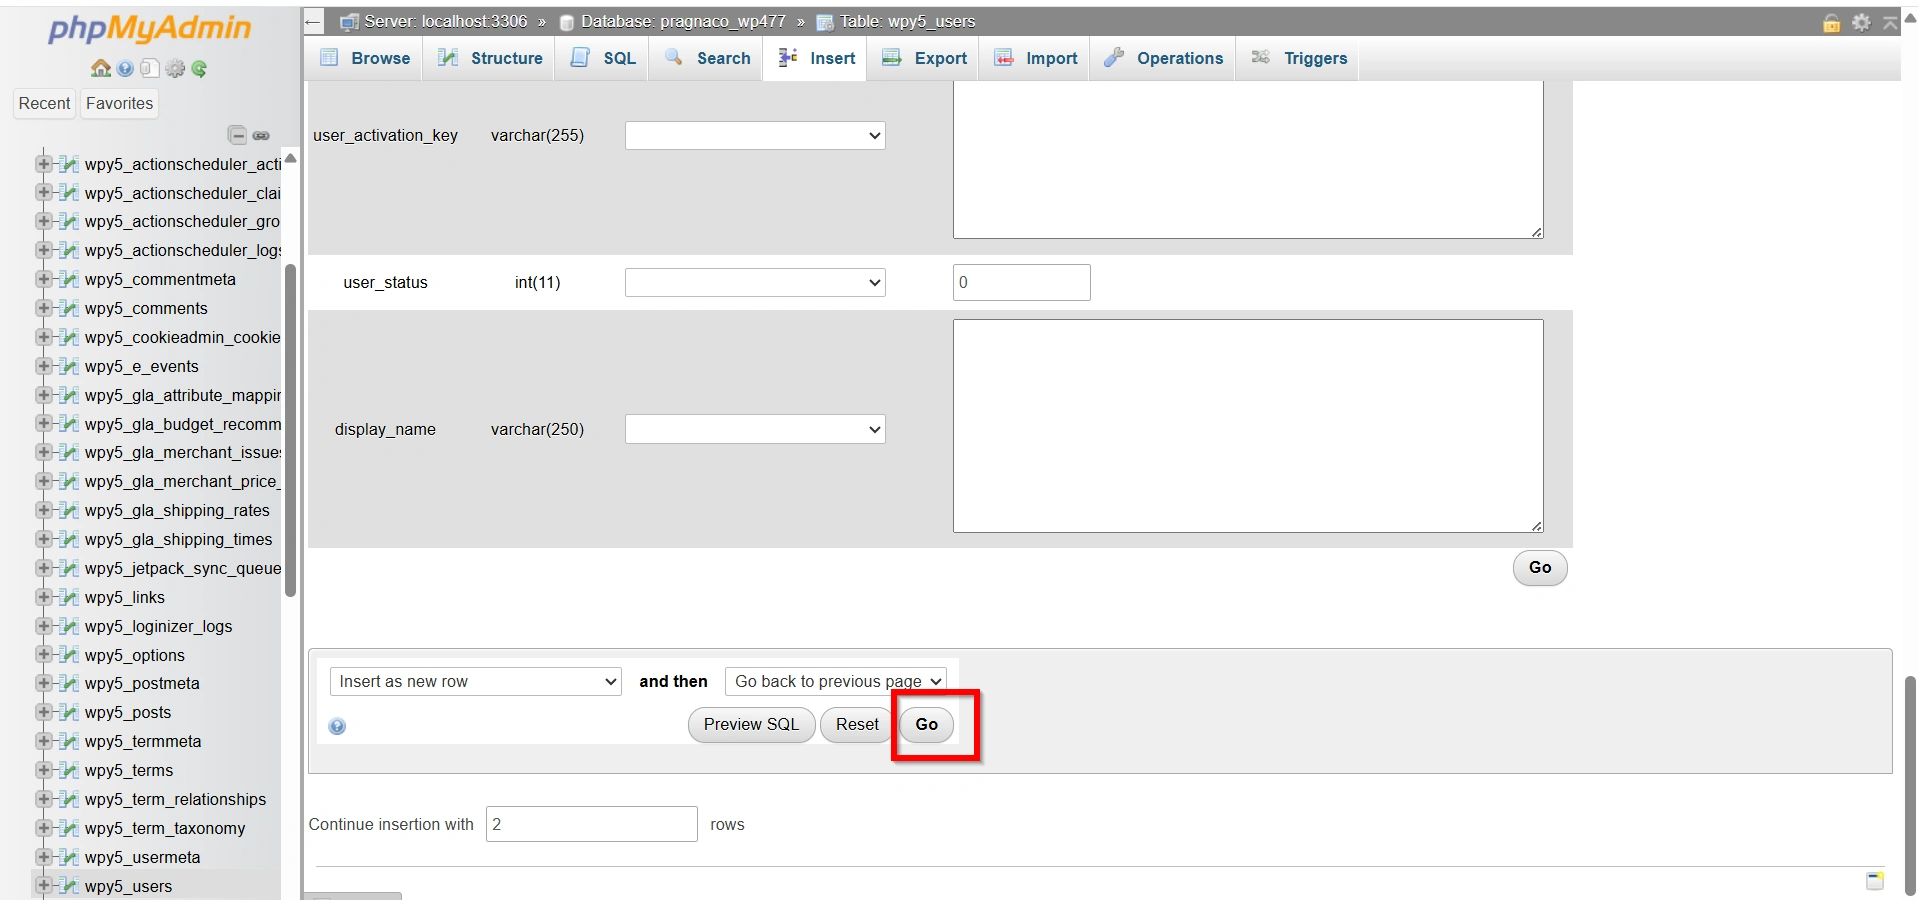
- After filling in the required fields, click Go to save the new user record.
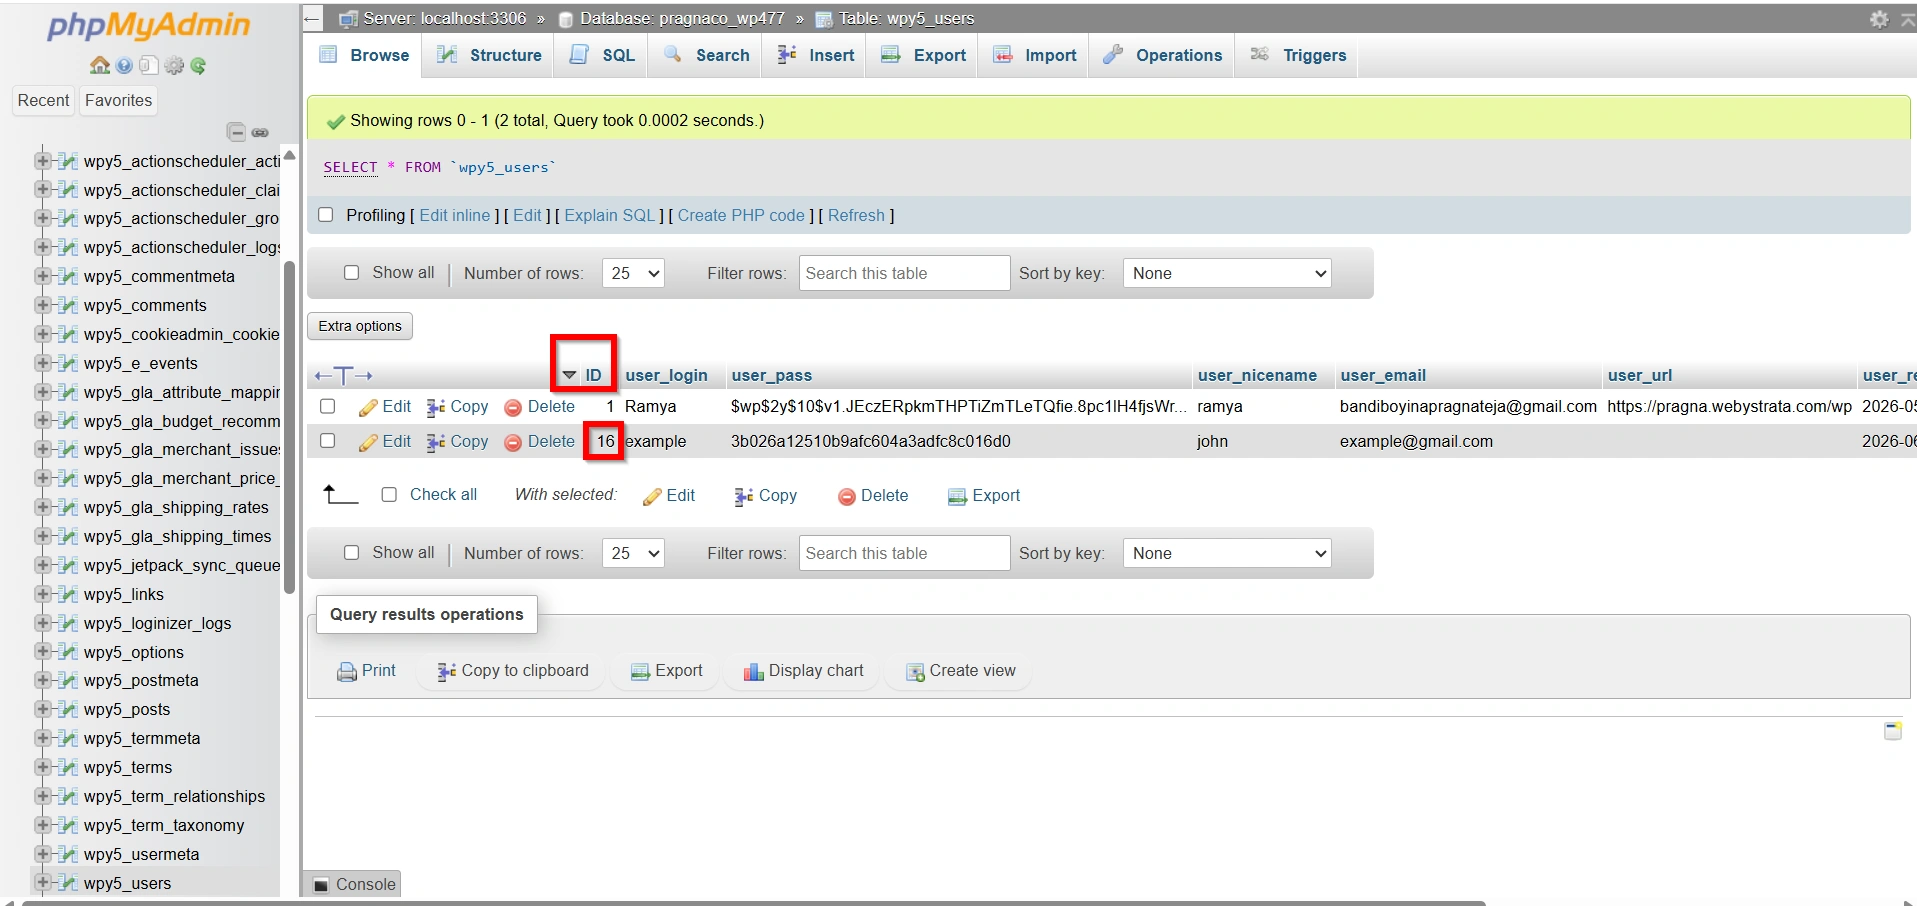
Step 3: Find the User ID
Return to the databasename_users table and locate the newly created user.
Make a note of the ID assigned to the user. This value is important because it will be used when assigning administrator privileges in the next steps.
Step 4: Assign Administrator Capabilities
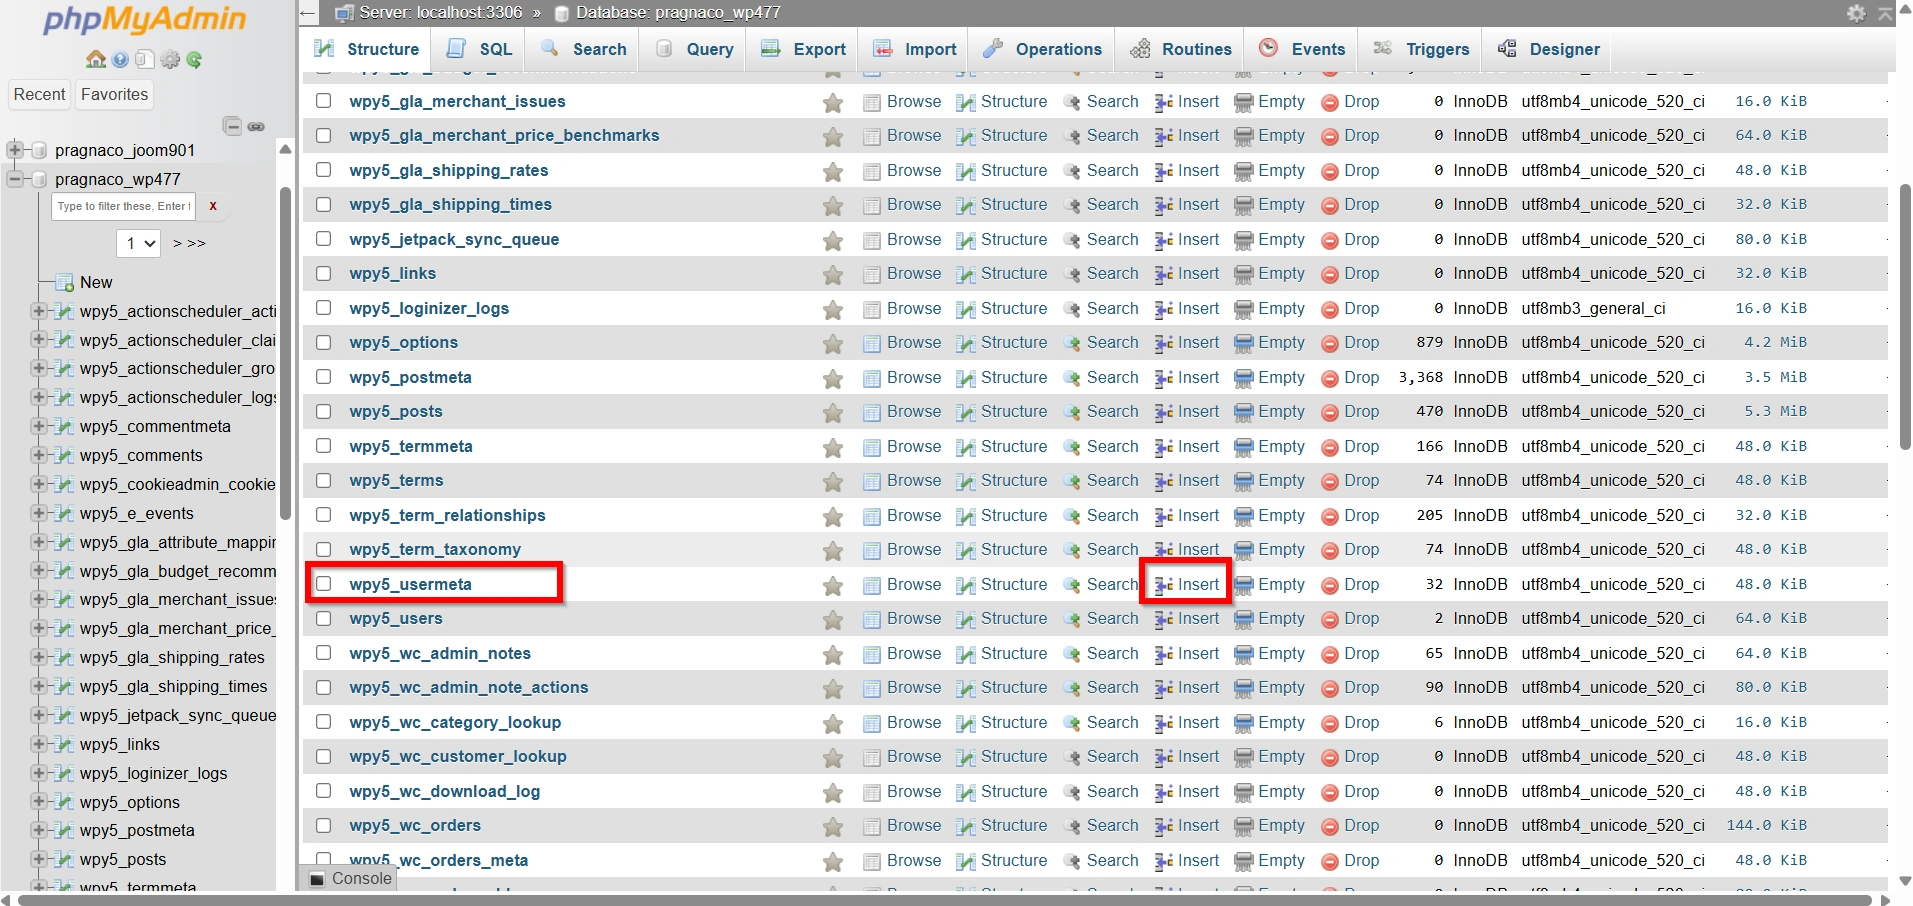
Next, locate and open the databasename_usermeta table.
- Click the Insert tab

Enter the following information:
- user_id: Enter the ID of the user created in the previous step.
- meta_key: Enter
databasename_capabilities. - meta_value: Enter:
a:1:{s:13:"administrator";s:1:"1";}
For example, if your table prefix is wp_, the meta_key should be:
wp_capabilities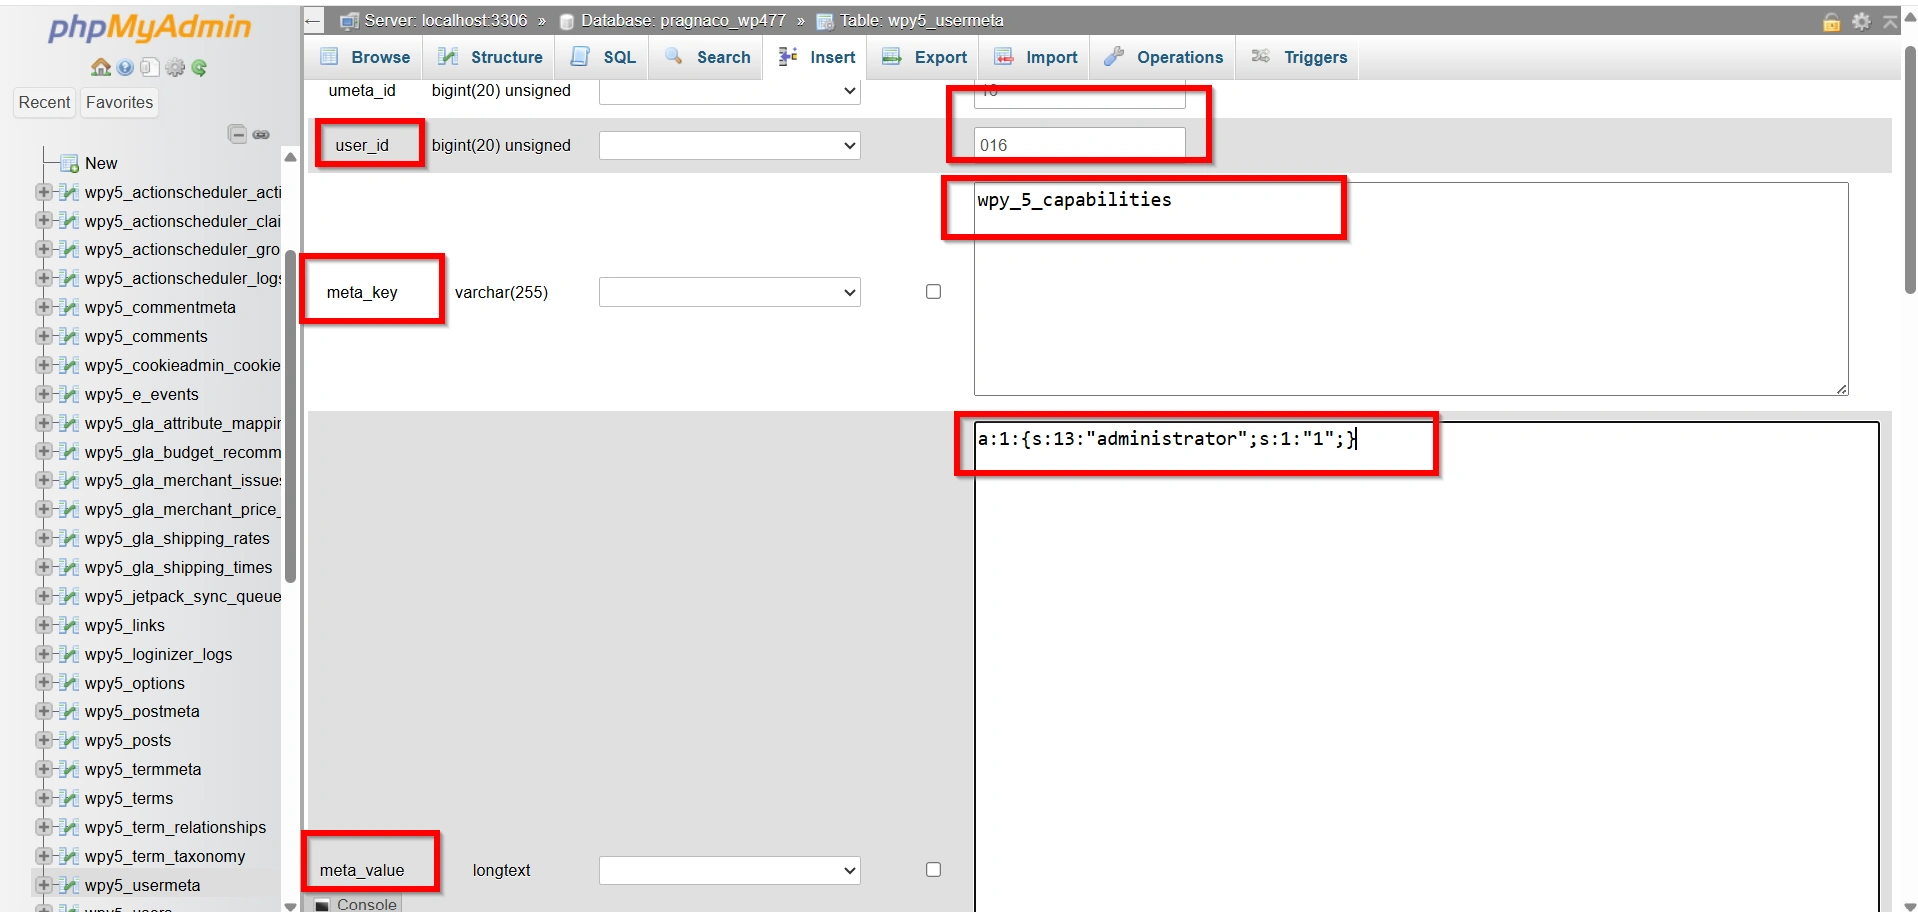
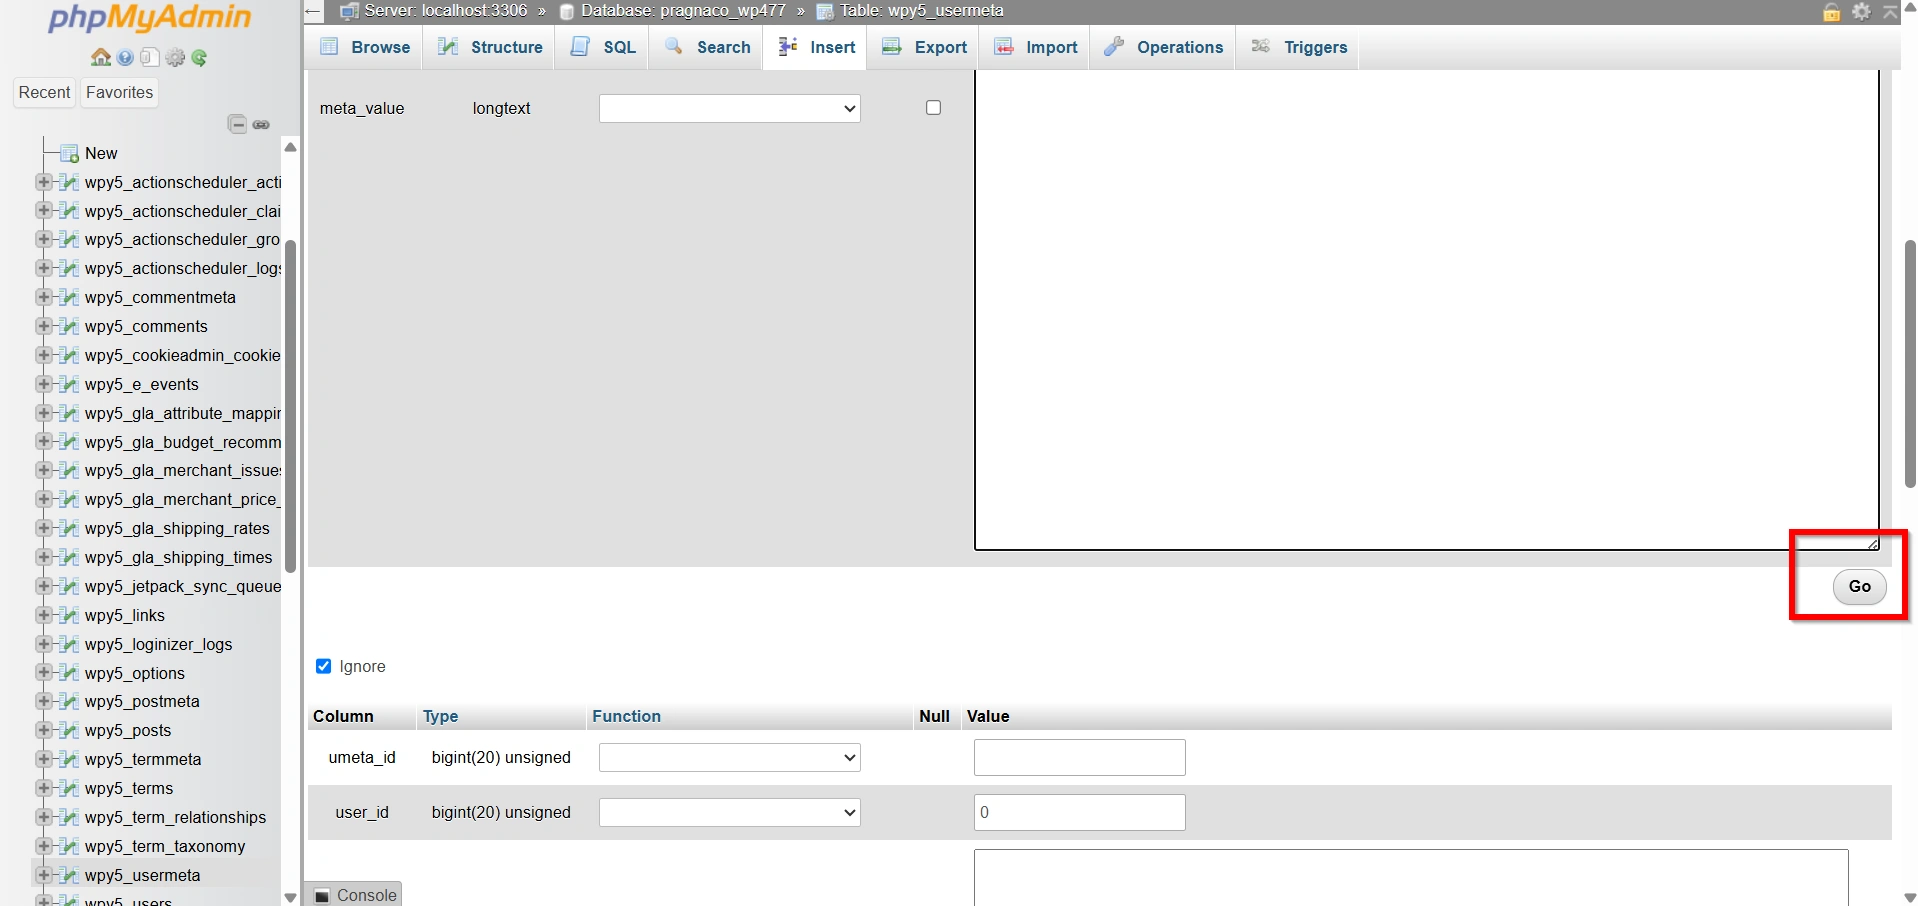
- Click Go to save the record.
Step 5: Set the Administrator User Level
Within the same databasename_usermeta table, click Insert again.
Enter the following values:
- user_id: Enter the same user ID.
- meta_key: Enter
databasename_user_level. - meta_value: Enter:
10
For example, if your table prefix is wp_, the meta_key should be:
wp_user_level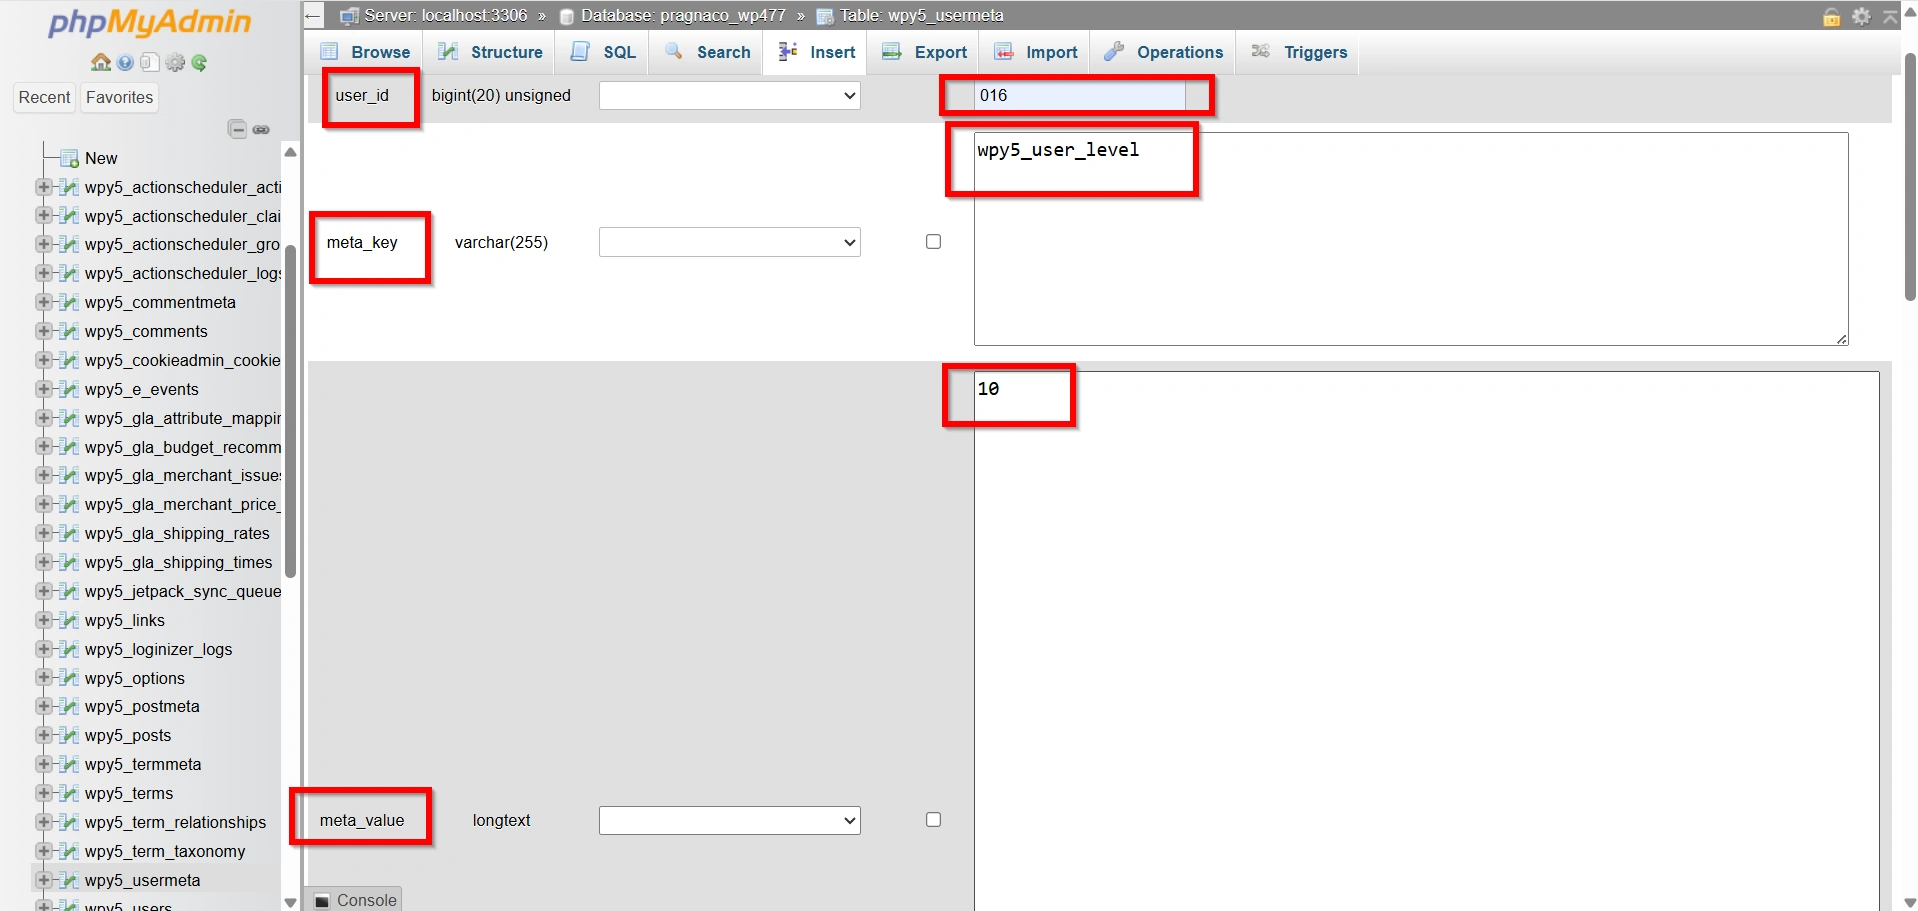
- Click Go to save the changes.
The newly created user now has administrator privileges.
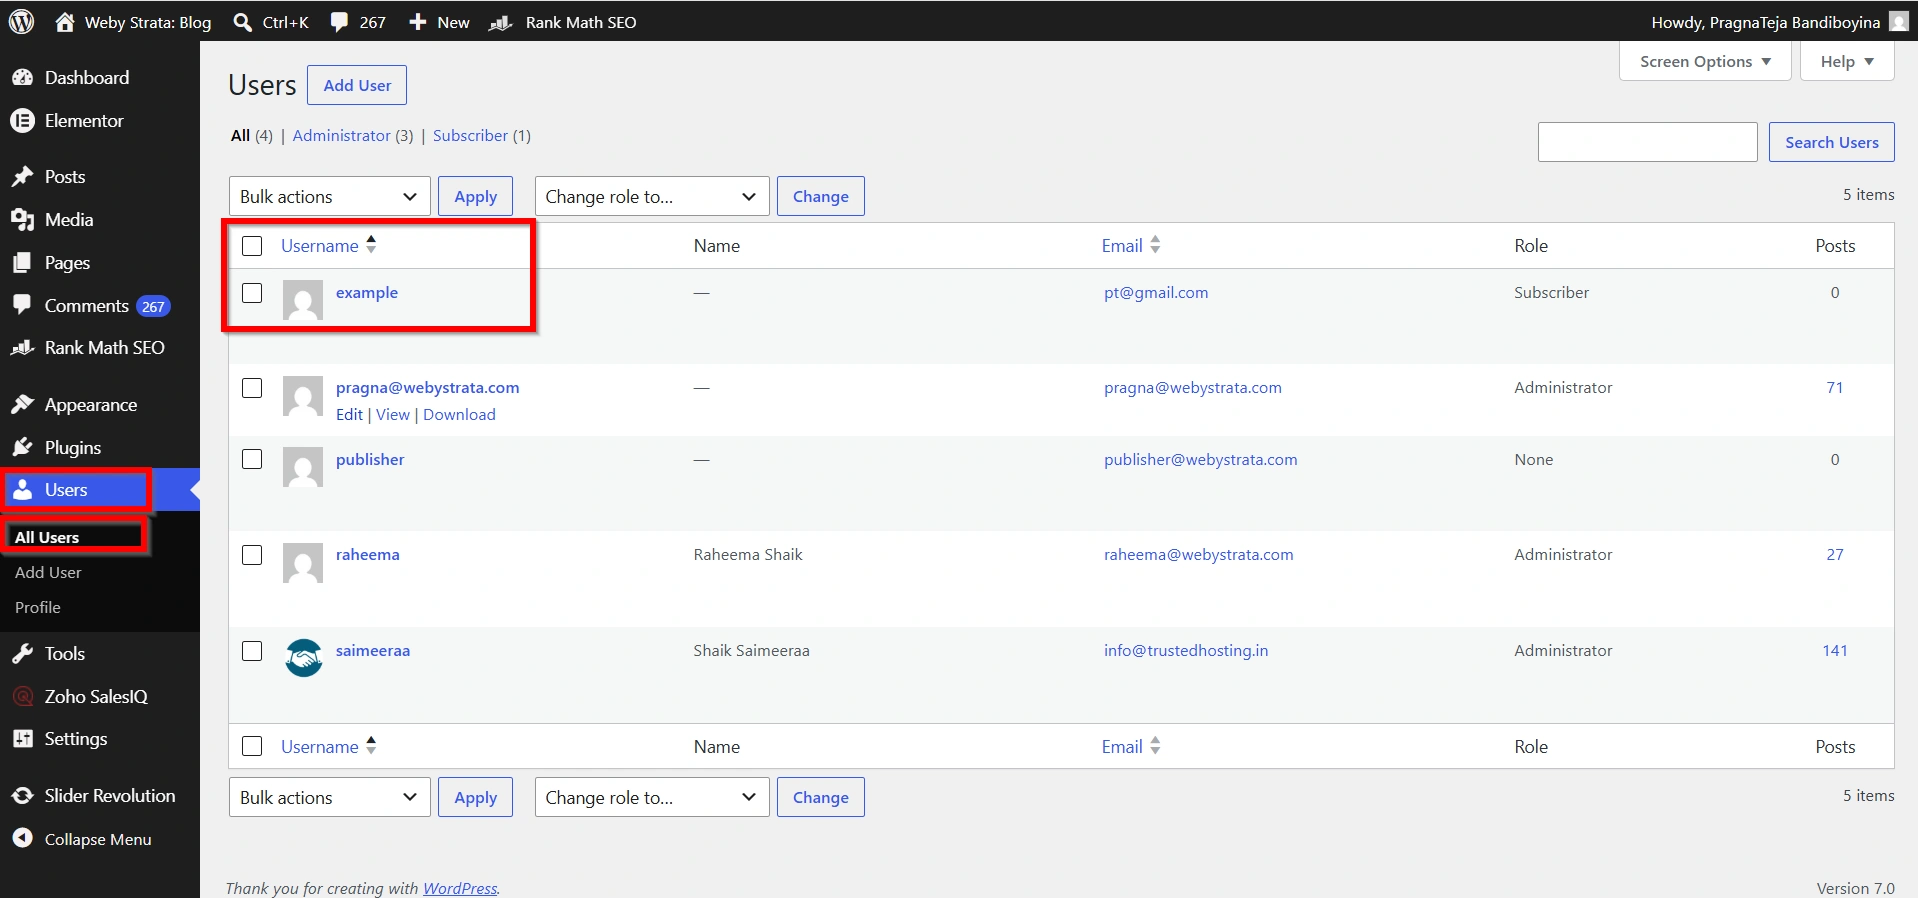
Step 6: Verify the New Administrator Account
Navigate to your WordPress login page and sign in using the username and password you created.
Once logged in:
- Open the WordPress Dashboard.
- Click Users from the left navigation menu.
- Select All Users.
Why to Add Admin User Through phpMyAdmin?
Creating a WordPress administrator account through phpMyAdmin can be useful in several situations:
- You have lost access to all administrator accounts.
- The administrator user was accidentally deleted.
- A plugin or theme conflict prevents access to the dashboard.
- Password reset emails are not being delivered.
- You need emergency access to troubleshoot website issues.
- You are recovering a compromised WordPress website.
Since phpMyAdmin interacts directly with the database, it allows you to manage users even when the WordPress dashboard is unavailable.
Benefits of This Method
- Quick Recovery
- No Dashboard Access Required
- Useful for Troubleshooting
- Secure Administrative Control
- Reliable Emergency Solution
Conclusion
Adding an administrator user through phpMyAdmin is a practical solution when you are locked out of WordPress or need to restore administrative access quickly. By creating a user in the users table and assigning administrator privileges through the usermeta table, you can regain full control of your website without requiring dashboard access. Following the steps outlined in this guide will help you safely create a new administrator account and continue managing your WordPress website with confidence.
Related Articles