cPanel
How to Add and Delete CNAME Records in cPanel
How to Add and Delete CNAME Records in cPanel Managing DNS records is an important part of website administration. Whether you are connecting a subdomain to a service, setting up a custom domain for…
How to Add and Delete CNAME Records in cPanel
Managing DNS records is an important part of website administration. Whether you are connecting a subdomain to a service, setting up a custom domain for a third-party platform, or creating aliases for easier access, CNAME records play a crucial role in DNS management.
cPanel provides a user-friendly interface for managing DNS records through the Zone Editor. With just a few clicks, you can add, edit, or delete CNAME records without requiring advanced technical knowledge.
In this guide, we will explain what CNAME records are, why they are used, and how to add and delete CNAME records in cPanel step by step.
What Is a CNAME Record?
A CNAME (Canonical Name) record is a DNS record that maps one domain name or subdomain to another domain name.
Unlike an A Record, which points directly to an IP address, a CNAME record points to another hostname.
Example
Suppose your website is:
example.com
You can create a CNAME record so that:
www.example.com
points to:
example.com
When users visit www.example.com, DNS automatically directs them to example.com.
How to Add a CNAME Record in cPanel
Step 1: Login to cPanel from Client Area
First, visit the WebyStrata website and log in to your client area account using your registered email address and password.
official Website www.webystrata.com
After logging in:
- Go to Services
- Click on My Services
- Select your active hosting service
- Click on Login to cPanel

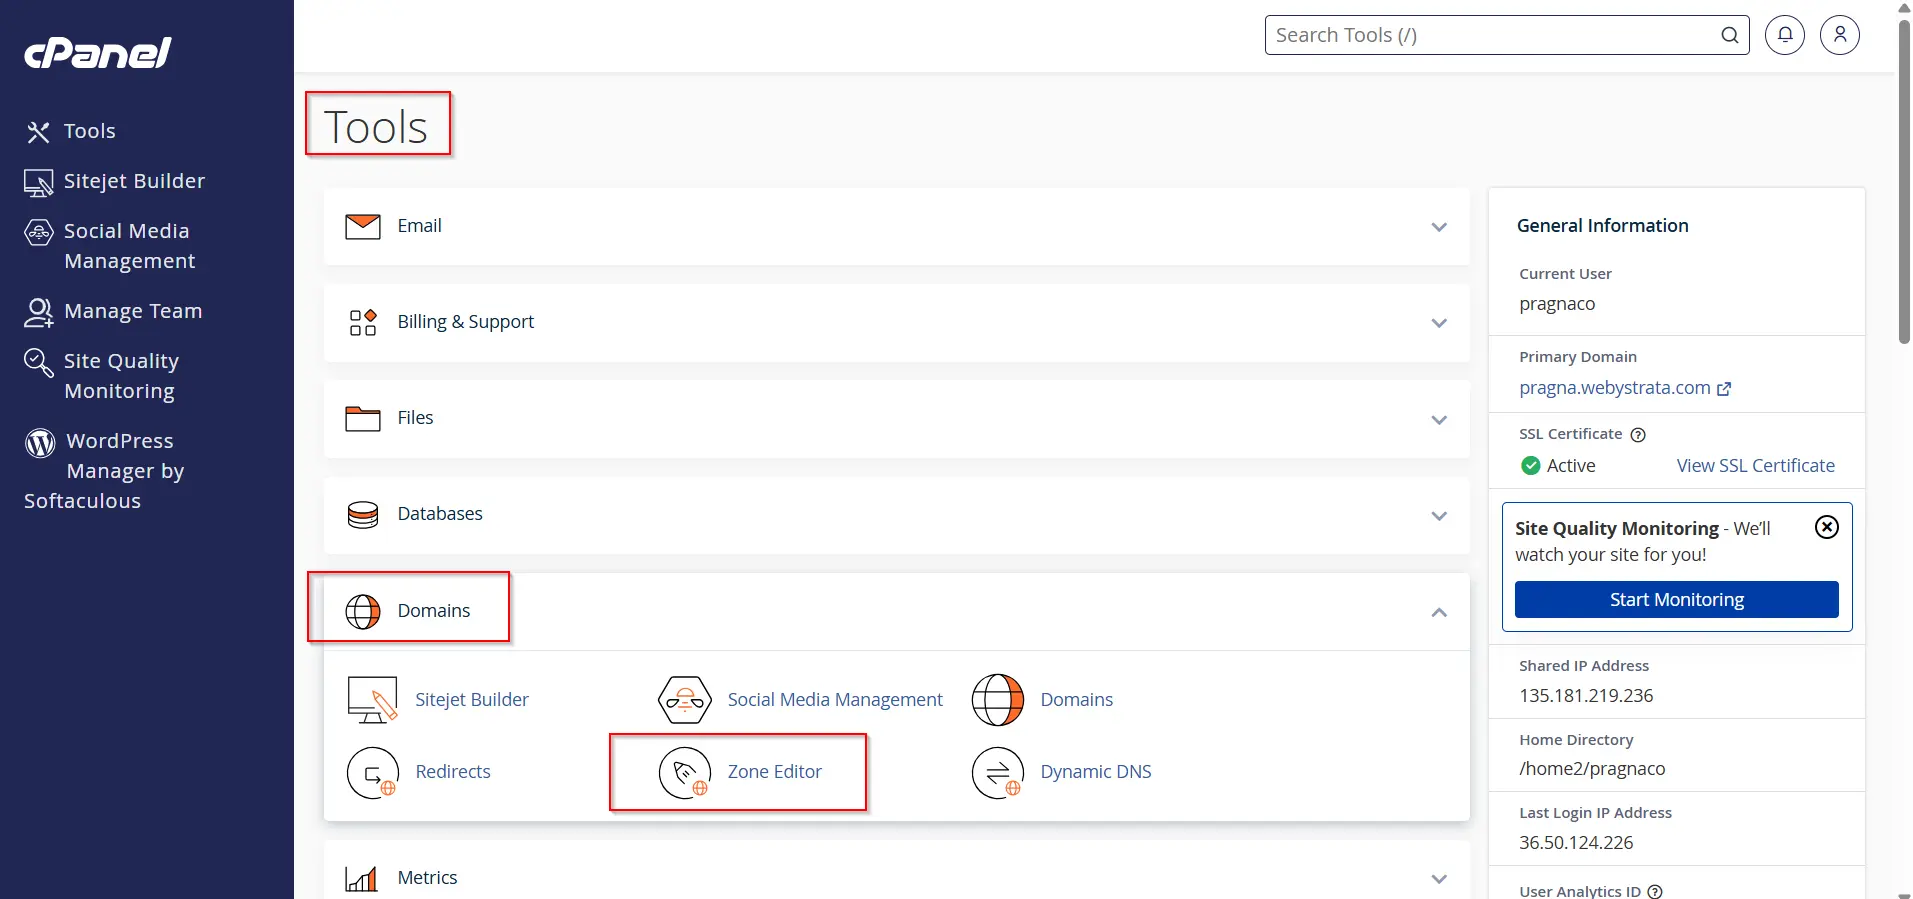
Step 2: Open the Zone Editor
Inside cPanel, scroll to the Domains section.
Click on Zone Editor.
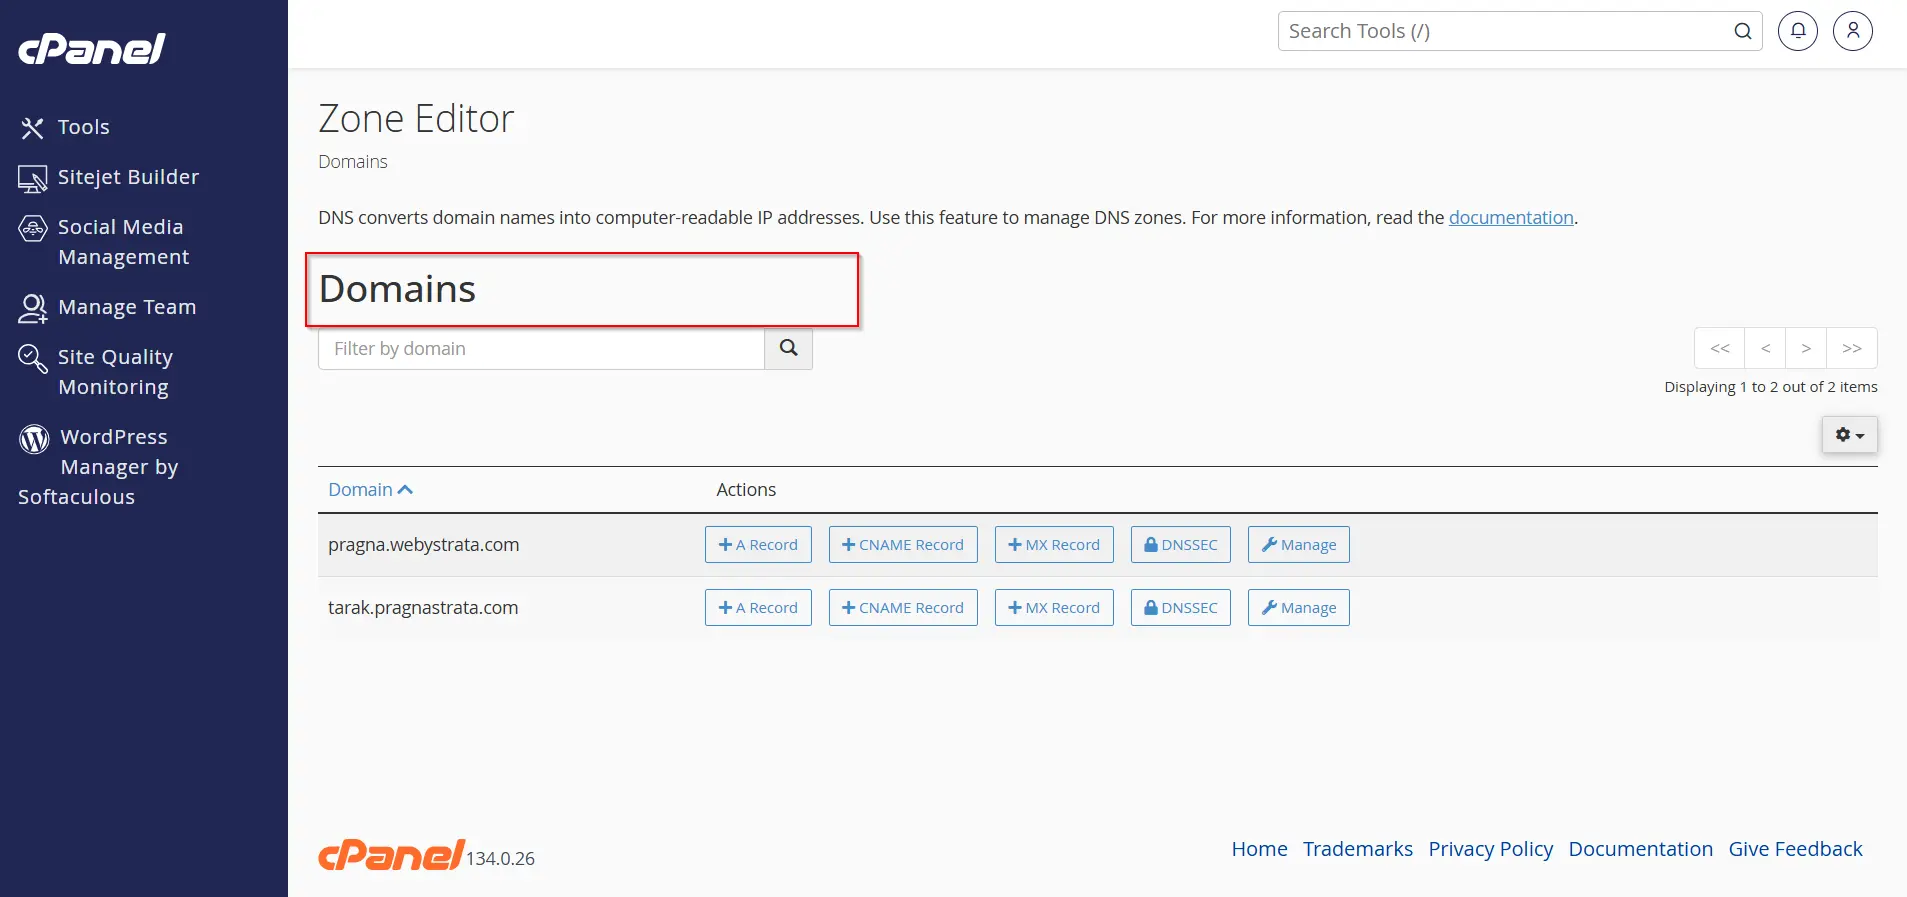
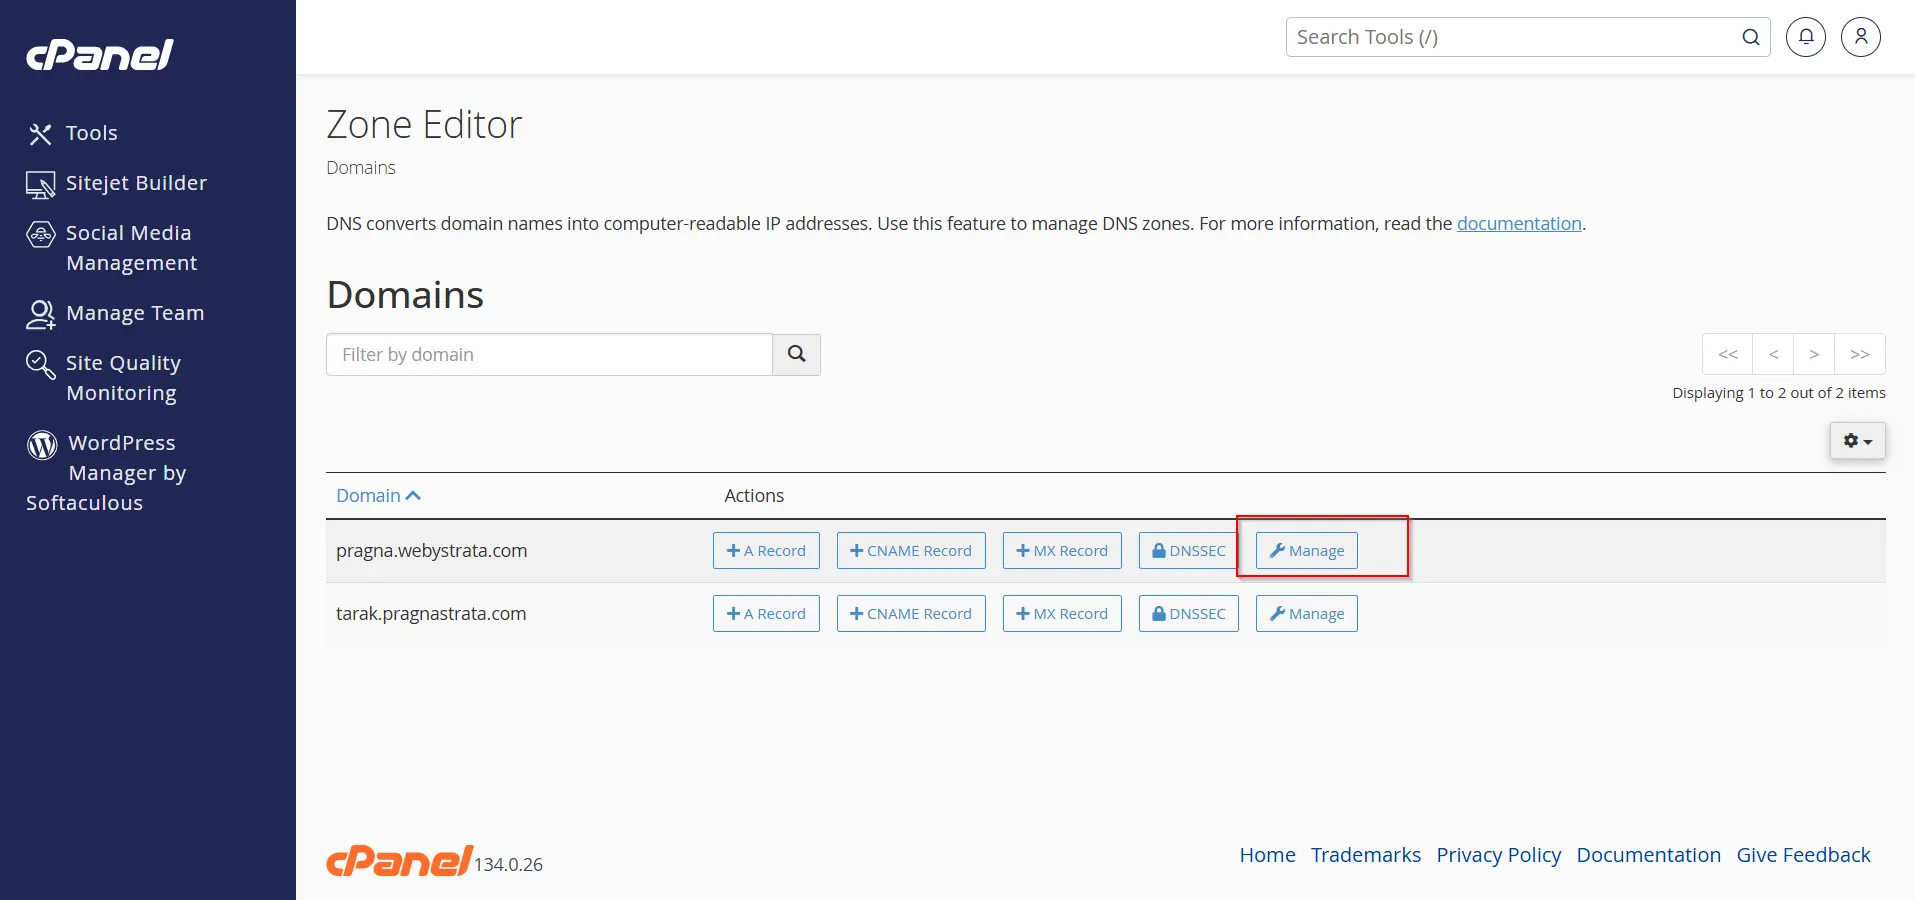
Step 3: Select the Domain
You will see a list of domains available in your hosting account.
Step 4: Add a New CNAME Record
Method 1: Using the “+ CNAME Record” Button (Quick Method)
- Click the + CNAME Record button beside the domain.

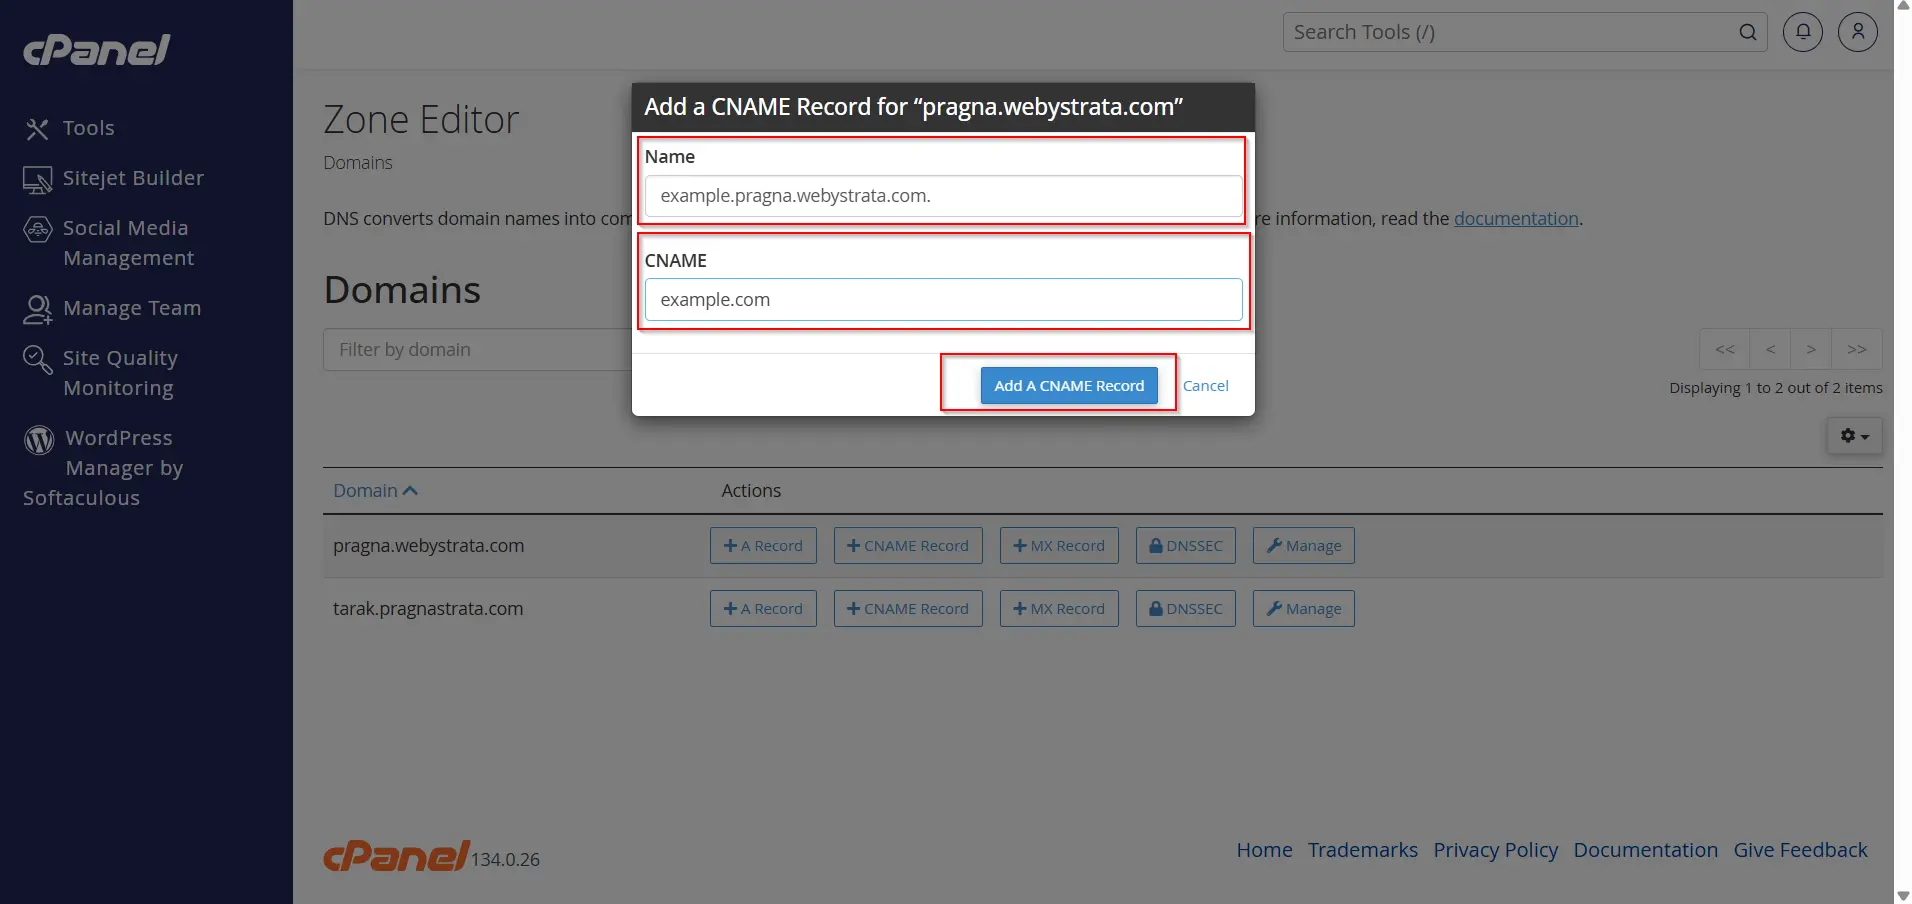
2. Enter:
- Name: The subdomain or alias (e.g.,
blog) - CNAME: The target domain name (e.g.,
example.com)
3. Click Add A CNAME Record
The record will be created immediately.
Method 2: Using the Manage Option
- Find your domain and click Manage.
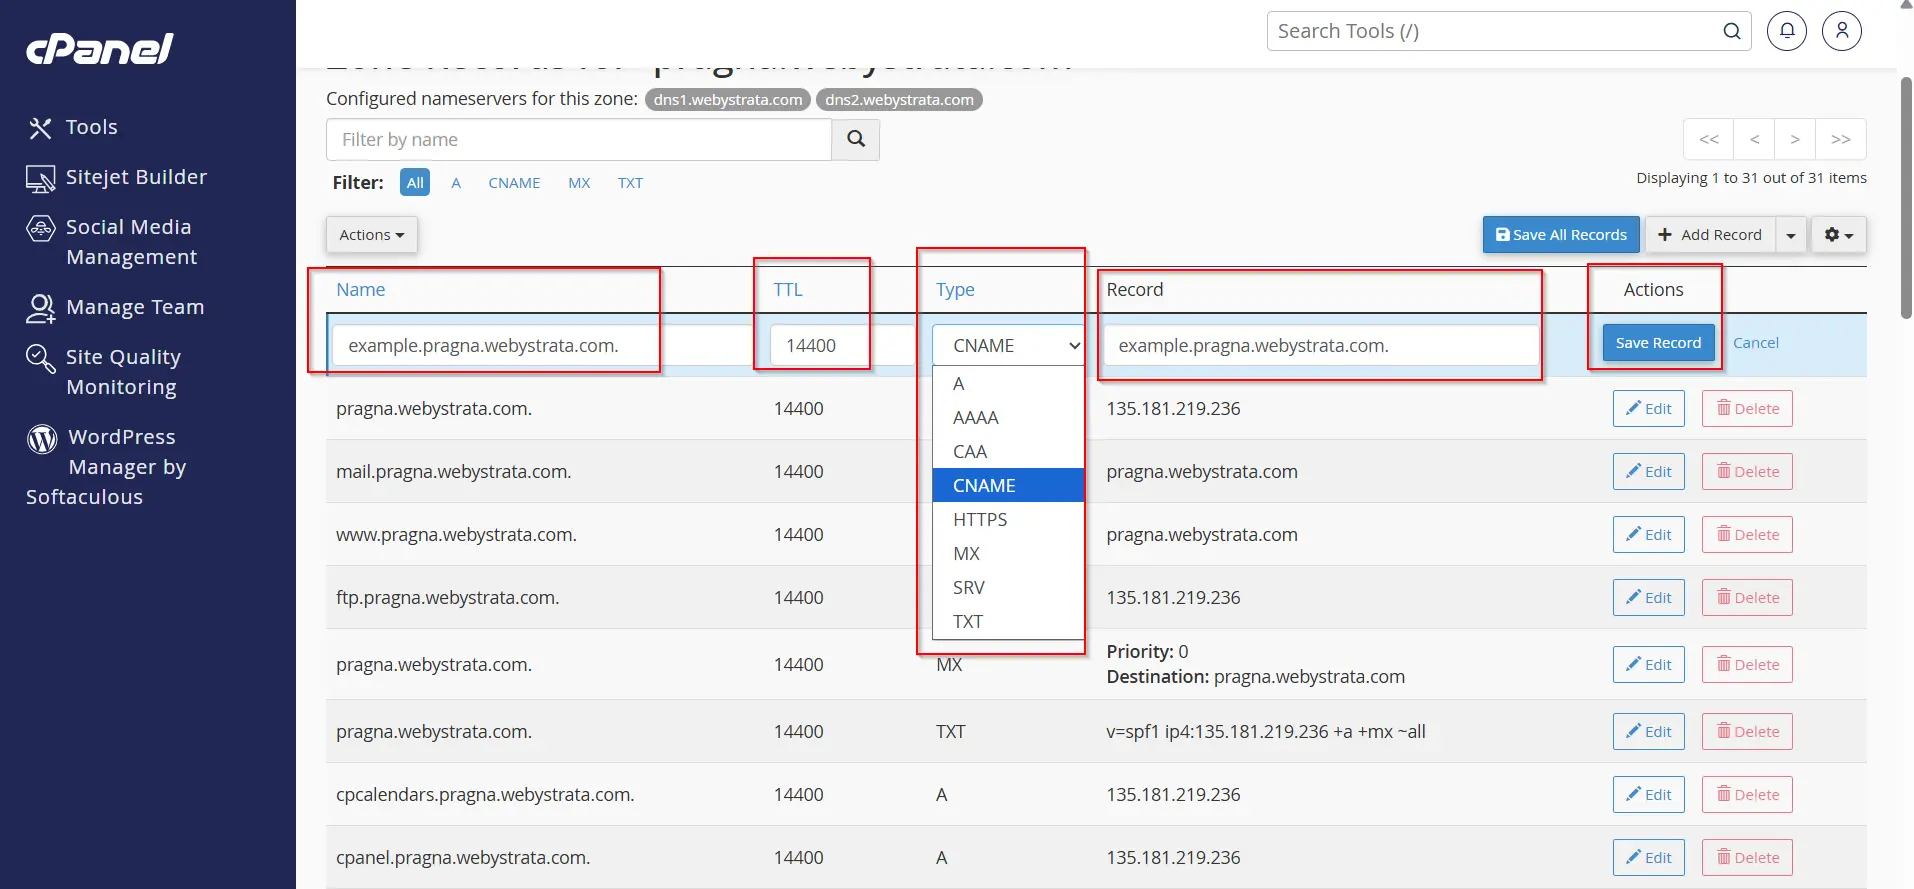
2. Click Add Record
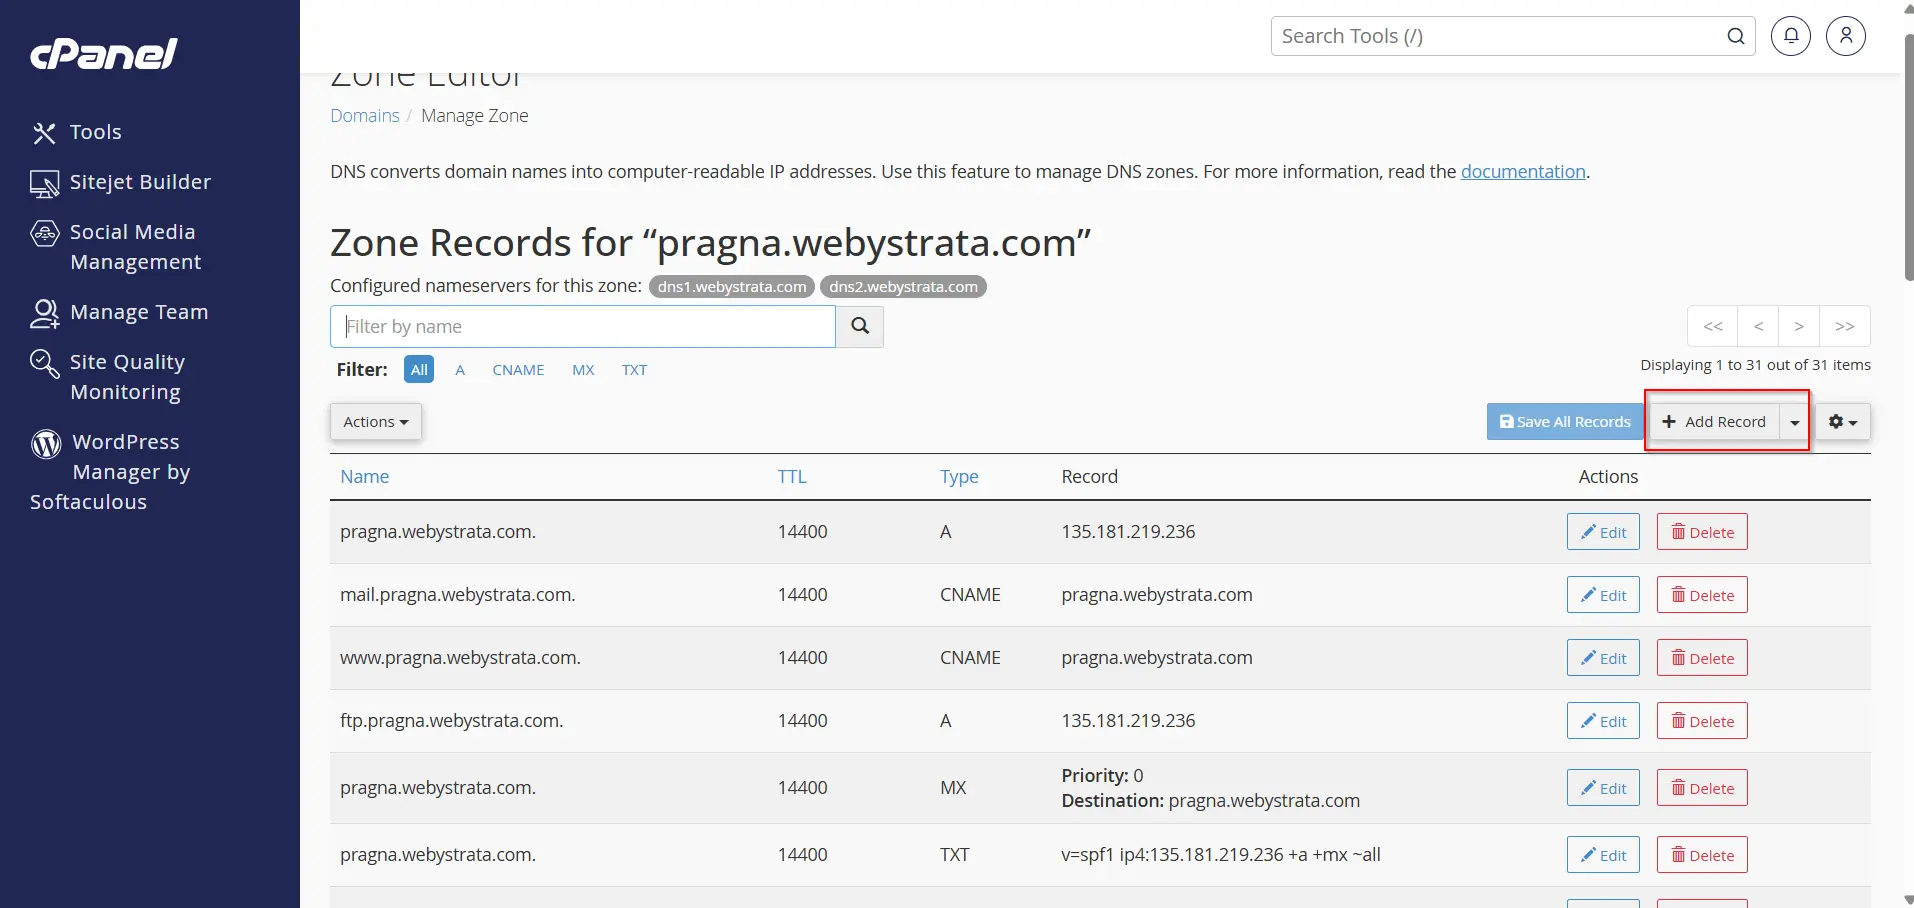
3. Enter the required details. Like
- Name
- TTL (optional)
- Type
- Record
4. Click Save the record.
How to Delete a CNAME Record in cPanel
Step 1: Open Zone Editor
Log in to cPanel and go to Zone Editor under the Domains section.
Step 2: Manage the Domain
Locate the domain containing the CNAME record.
Click Manage.
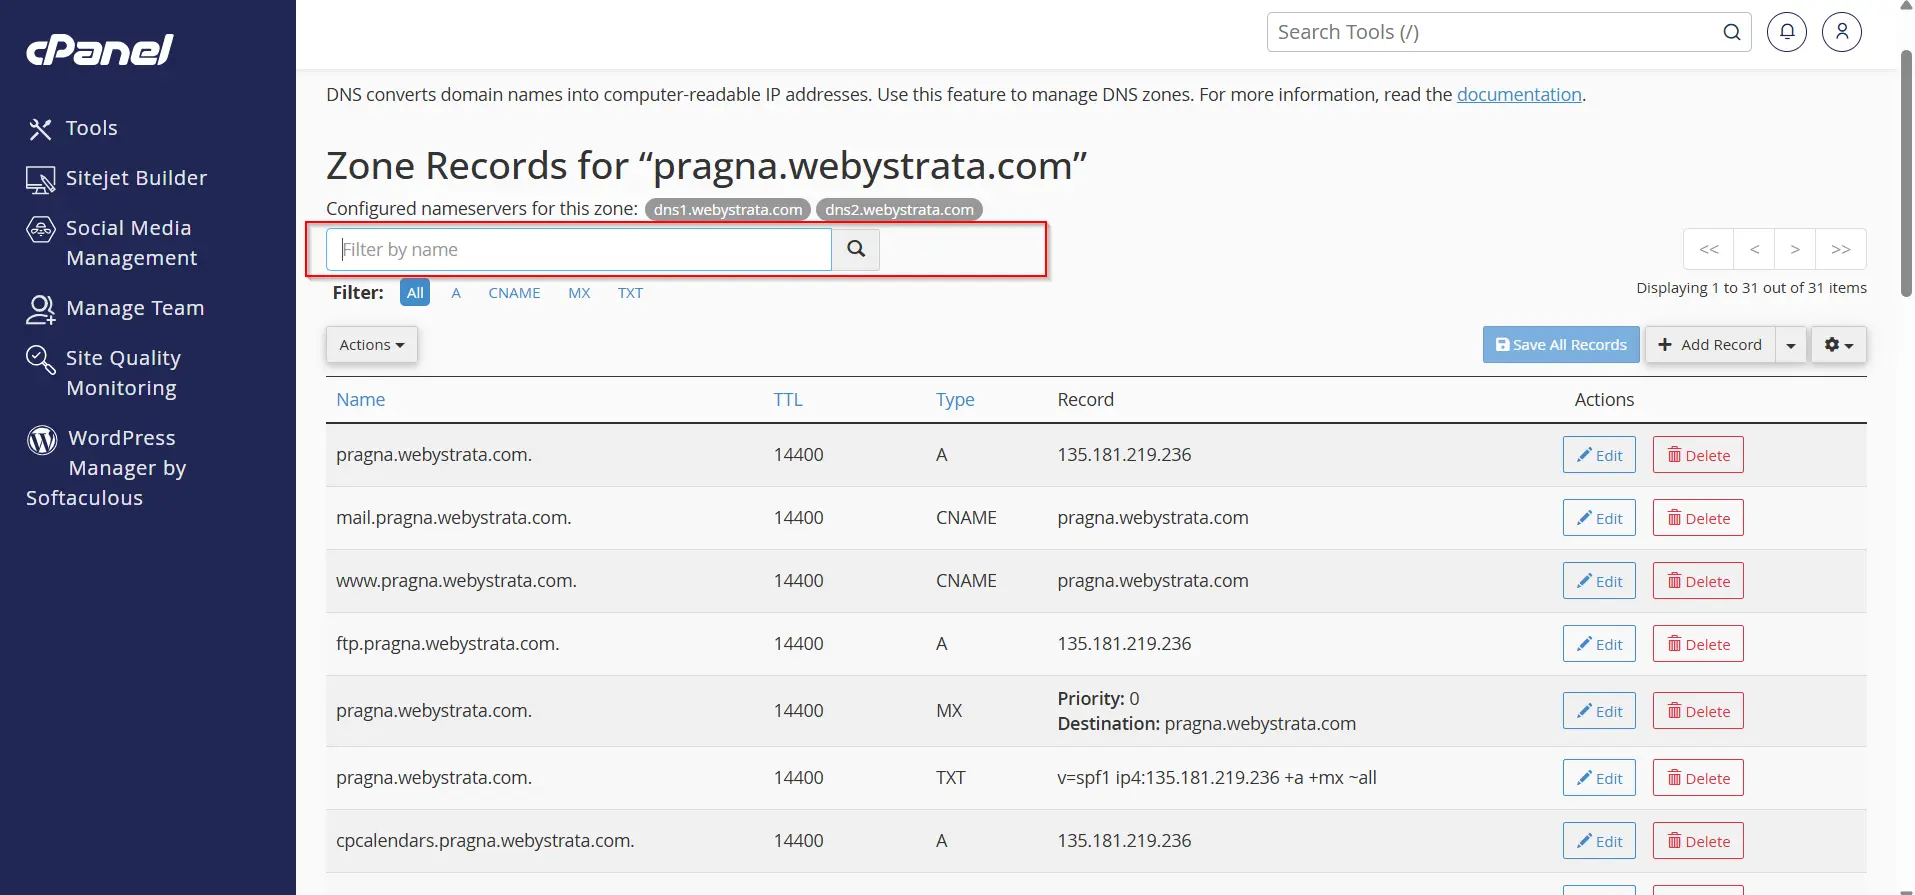
Step 3: Find the CNAME Record
Scroll through the DNS records list or use the search/filter option.
Locate the CNAME record you want to remove.
Step 4: Delete the Record
- Click the Delete option next to the CNAME record.
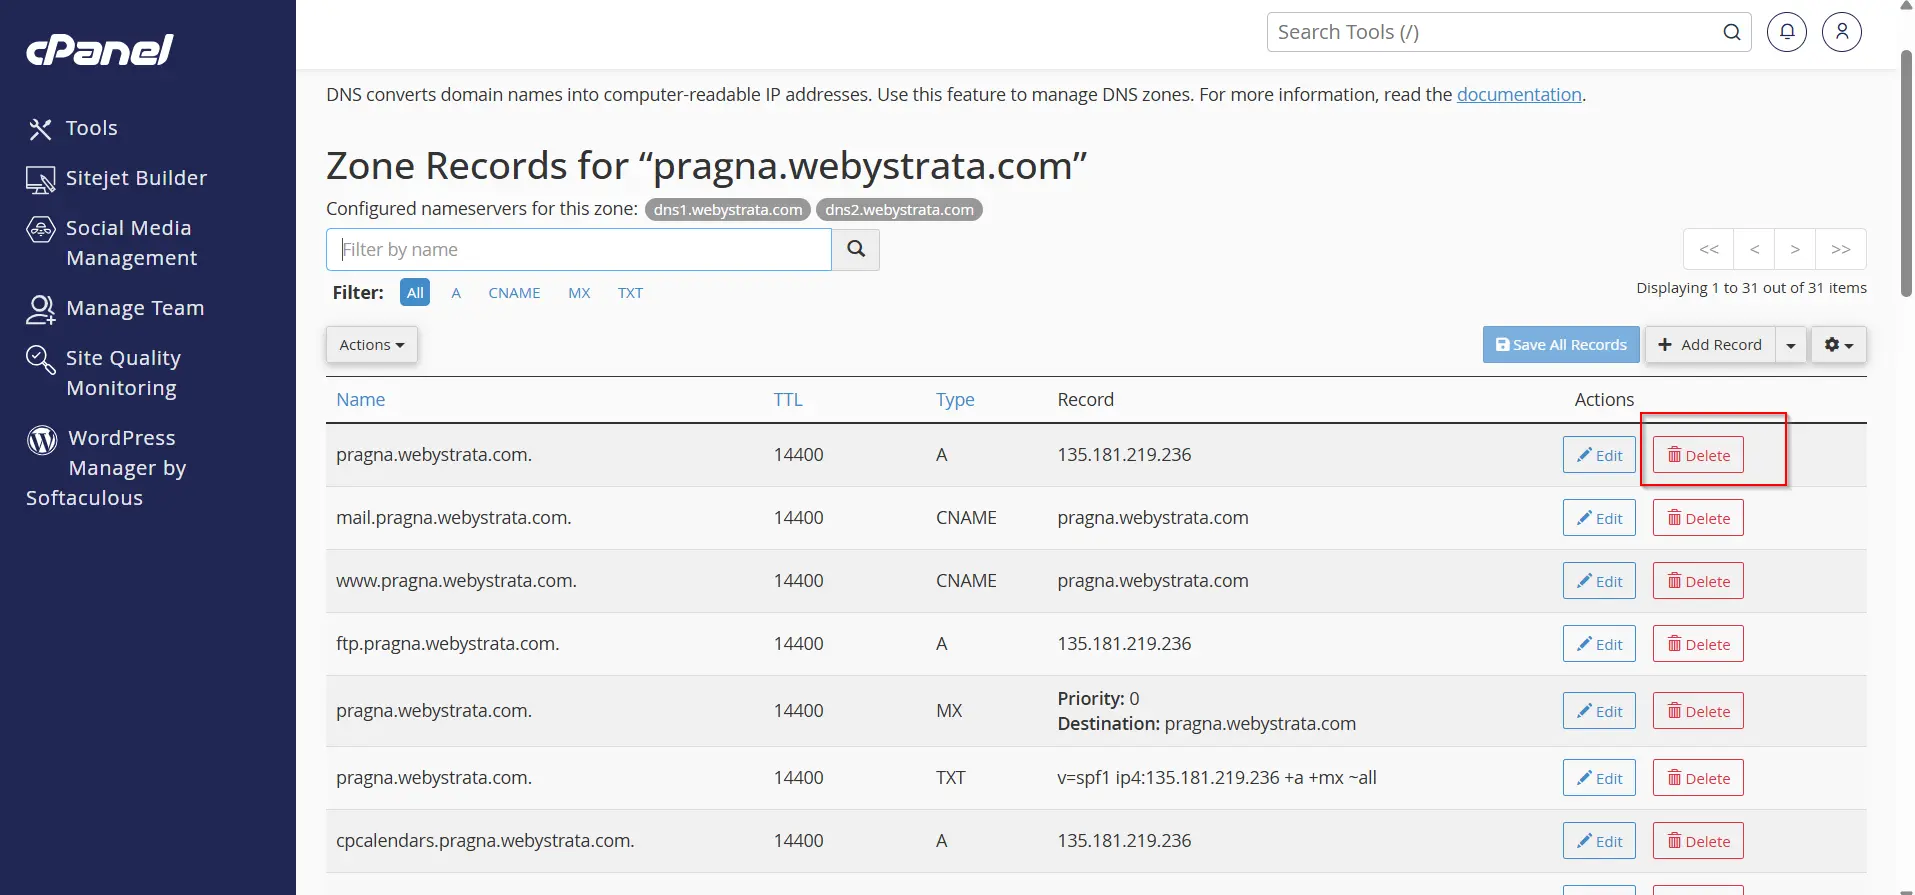
- A confirmation message may appear.
- Continue the deletion.
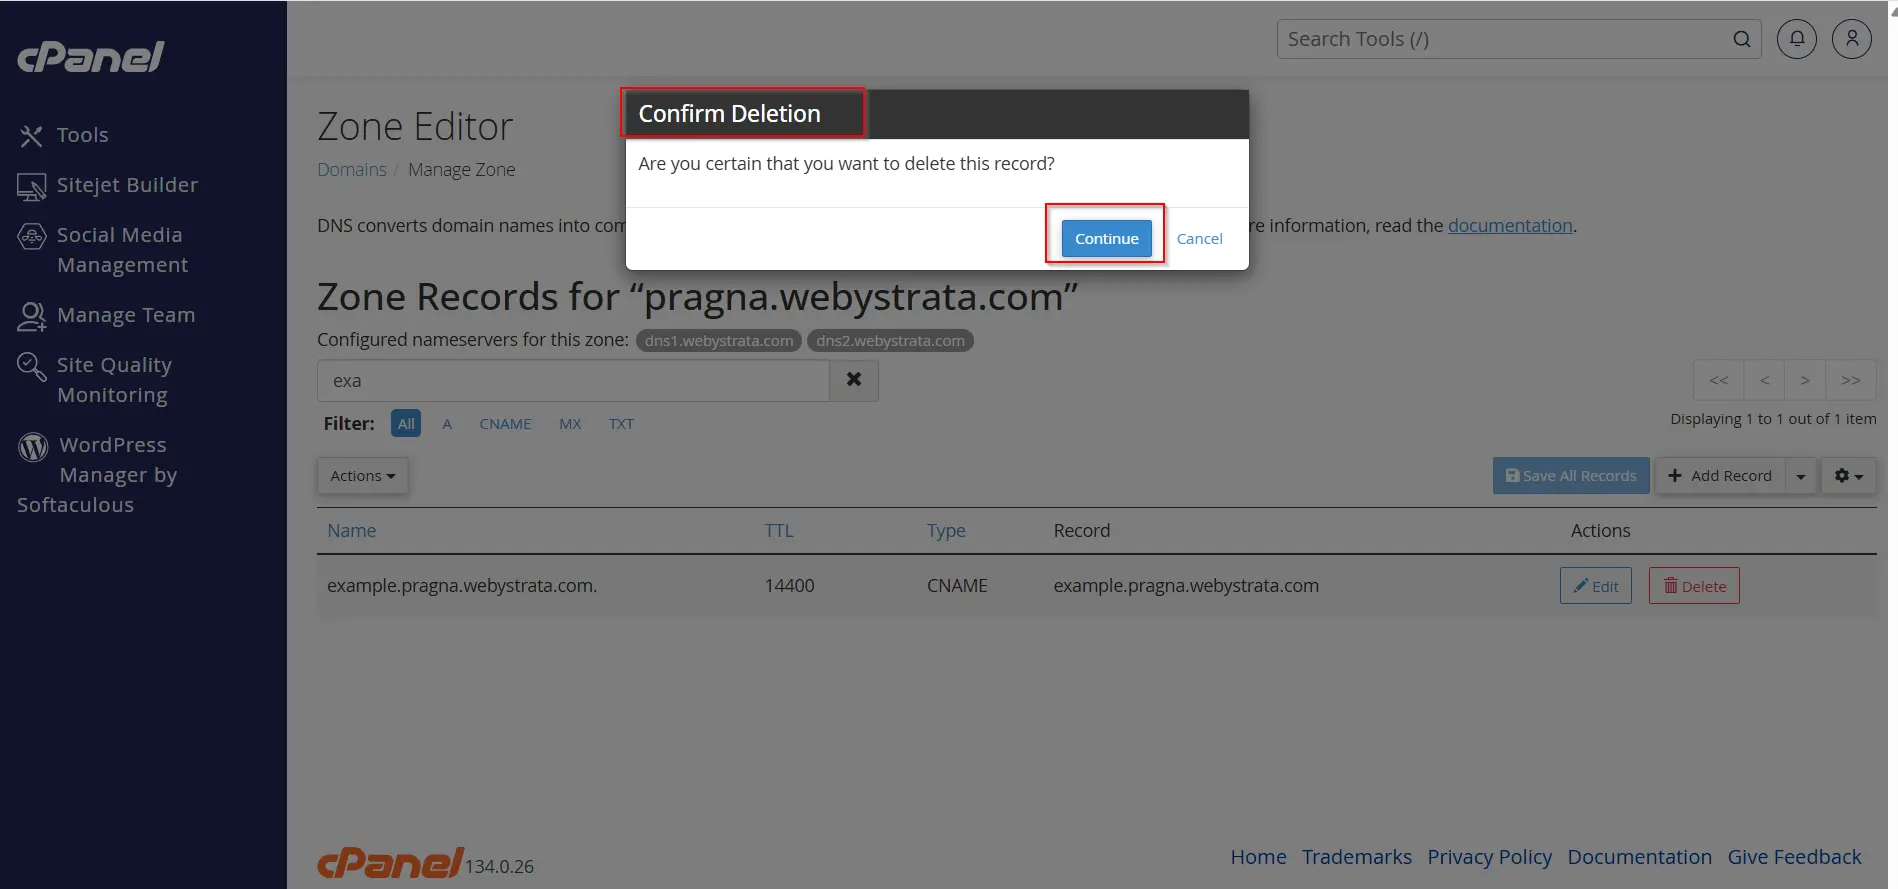
Step 5: Verify Changes
After deletion, the record will be removed from the DNS zone.
Allow some time for DNS propagation if the record was actively being used
Important Notes About CNAME Records
- A CNAME record cannot coexist with another record type on the same hostname.
- CNAME records point to domain names, not IP addresses.
- DNS changes may require propagation time.
- Incorrect CNAME settings can affect website or email services.
Common Uses of CNAME Records
CNAME records are commonly used for:
- Pointing www to the main domain
- Connecting domains to cloud applications
- Setting up custom domains for SaaS platforms
- Linking subdomains to external services
- Configuring website builders and hosting services
- Creating domain aliases
- Integrating email marketing tools
- Connecting CDN services
Conclusion
Learning how to add and delete CNAME records in cPanel is an essential skill for website owners and administrators. Through the Zone Editor, cPanel makes DNS management straightforward, whether you are creating aliases, connecting third-party services, or cleaning up outdated records.
By following the steps outlined in this guide, you can confidently manage CNAME records, maintain proper DNS functionality, and ensure your website and services remain accessible to users worldwide.
Related Articles