cPanel
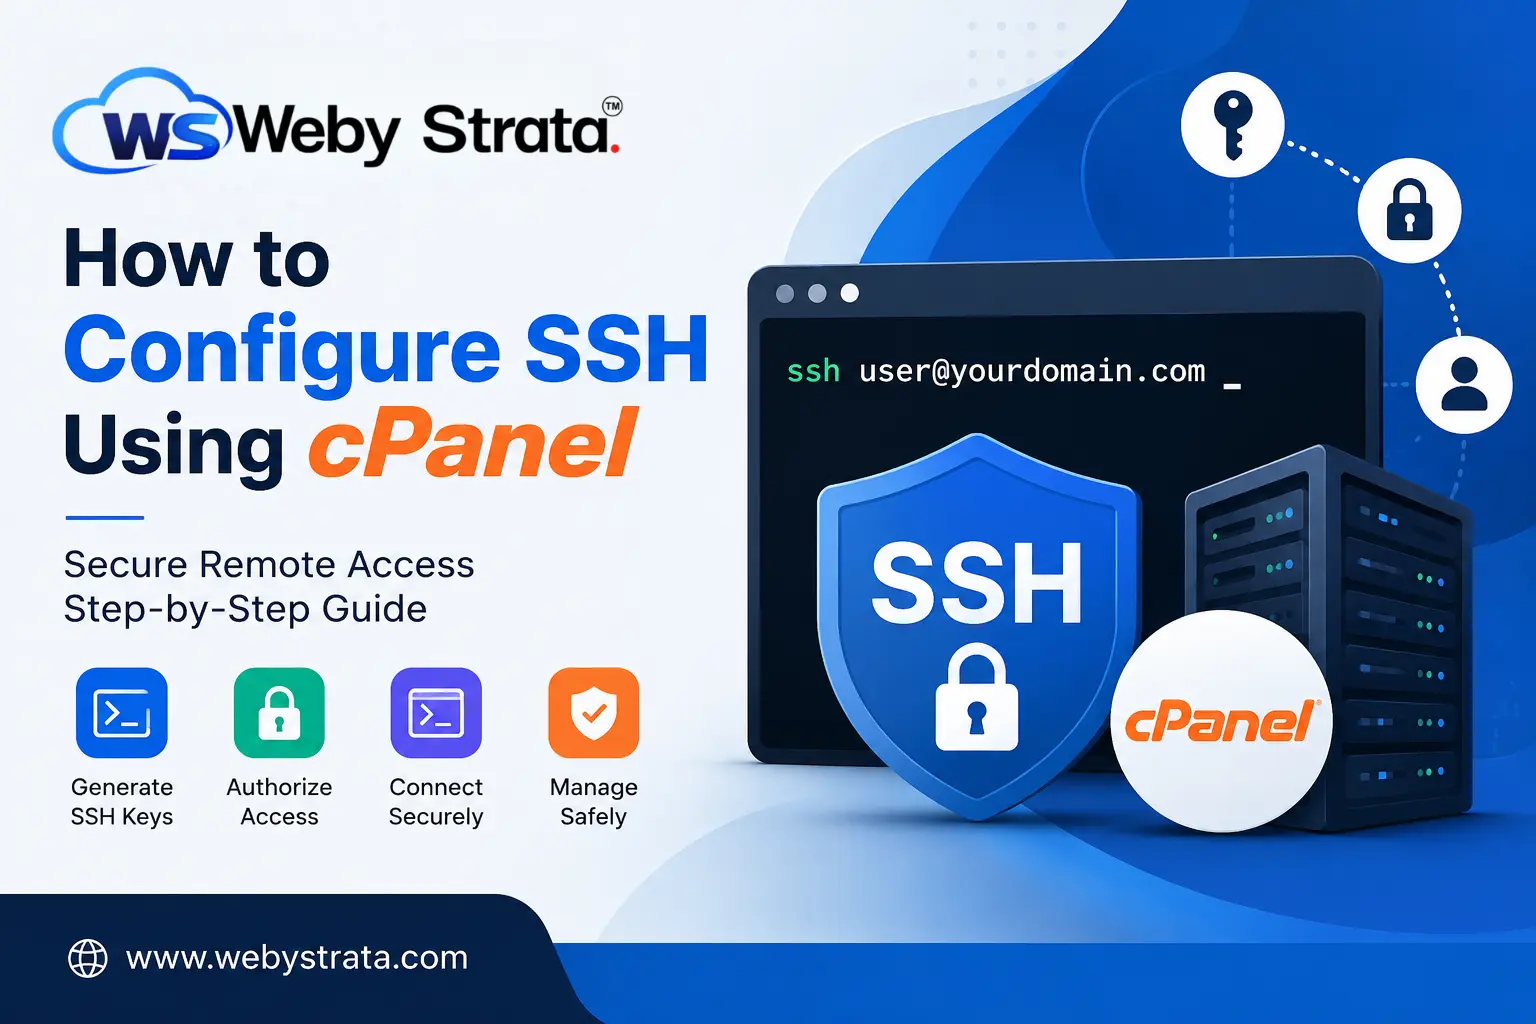
How to Configure SSH Using cPanel
How to Configure SSH Using cPanel Secure Shell (SSH) is one of the most powerful tools available for website owners, developers, and server administrators. It provides a secure and encrypted method to access your…
How to Configure SSH Using cPanel
Secure Shell (SSH) is one of the most powerful tools available for website owners, developers, and server administrators. It provides a secure and encrypted method to access your hosting account remotely and perform administrative tasks through a command-line interface.
Unlike traditional FTP access, SSH offers enhanced security, better performance, and advanced functionality. Whether you need to manage files, install applications, work with Git repositories, run scripts, or troubleshoot website issues, SSH provides direct access to your hosting environment.
Most modern hosting providers offer SSH functionality through cPanel, making it easy for users to generate SSH keys, authorize access, and establish secure remote connections.
In this comprehensive guide, you will learn how to configure SSH using cPanel, understand SSH authentication methods, generate secure SSH keys, and connect to your hosting account safely.
What is SSH?
SSH (Secure Shell) is a cryptographic network protocol that enables secure communication between a client device and a remote server over an encrypted connection.
SSH is commonly used for:
- Remote server administration
- Secure file transfers
- Running command-line operations
- Managing website files
- Installing software packages
- Executing maintenance scripts
- Managing Git repositories
- Database administration
- Application deployment
Because all communication is encrypted, SSH helps protect sensitive information from interception and unauthorized access.
Prerequisites Before Configuring SSH
Before proceeding, ensure you have:
- An active cPanel hosting account
- SSH access enabled by your hosting provider
- A stable internet connection
- Access to your cPanel credentials
- An SSH client installed on your computer
Recommended SSH Clients
Windows
- PuTTY
- Windows Terminal
- PowerShell
macOS
- Terminal
Linux
- Terminal
Understanding SSH Authentication
There are generally two methods of SSH authentication.
Password Authentication
Uses your hosting username and password to log in.
Advantages:
- Easy setup
- Beginner friendly
Disadvantages:
- Less secure
- Vulnerable to brute-force attacks
SSH Key Authentication
Uses a public and private key pair.
Advantages:
- Significantly more secure
- Faster authentication
- Recommended by security professionals
Most hosting providers encourage SSH key authentication.
Steps to Configure SSH using cPanel
Step 1: Login to cPanel from Client Area
First, visit the WebyStrata website and log in to your client area account using your registered email address and password.
official Website www.webystrata.com
After logging in:
- Go to Services
- Click on My Services
- Select your active hosting service
- Click on Login to cPanel

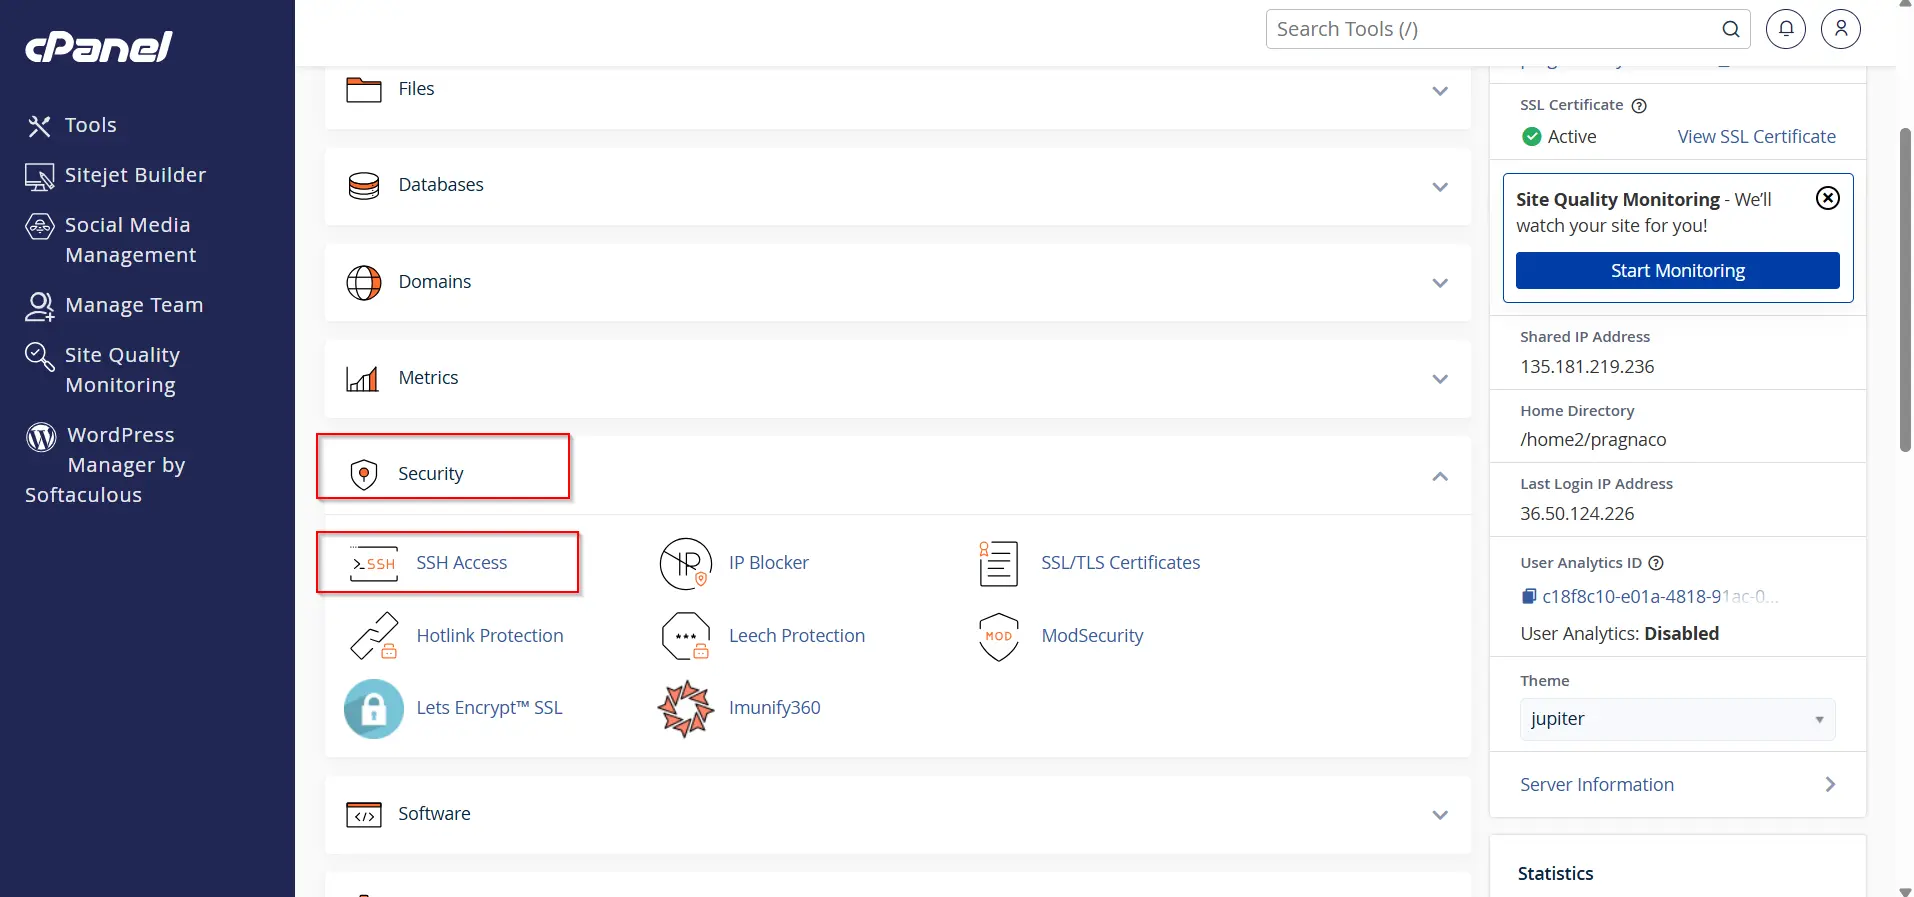
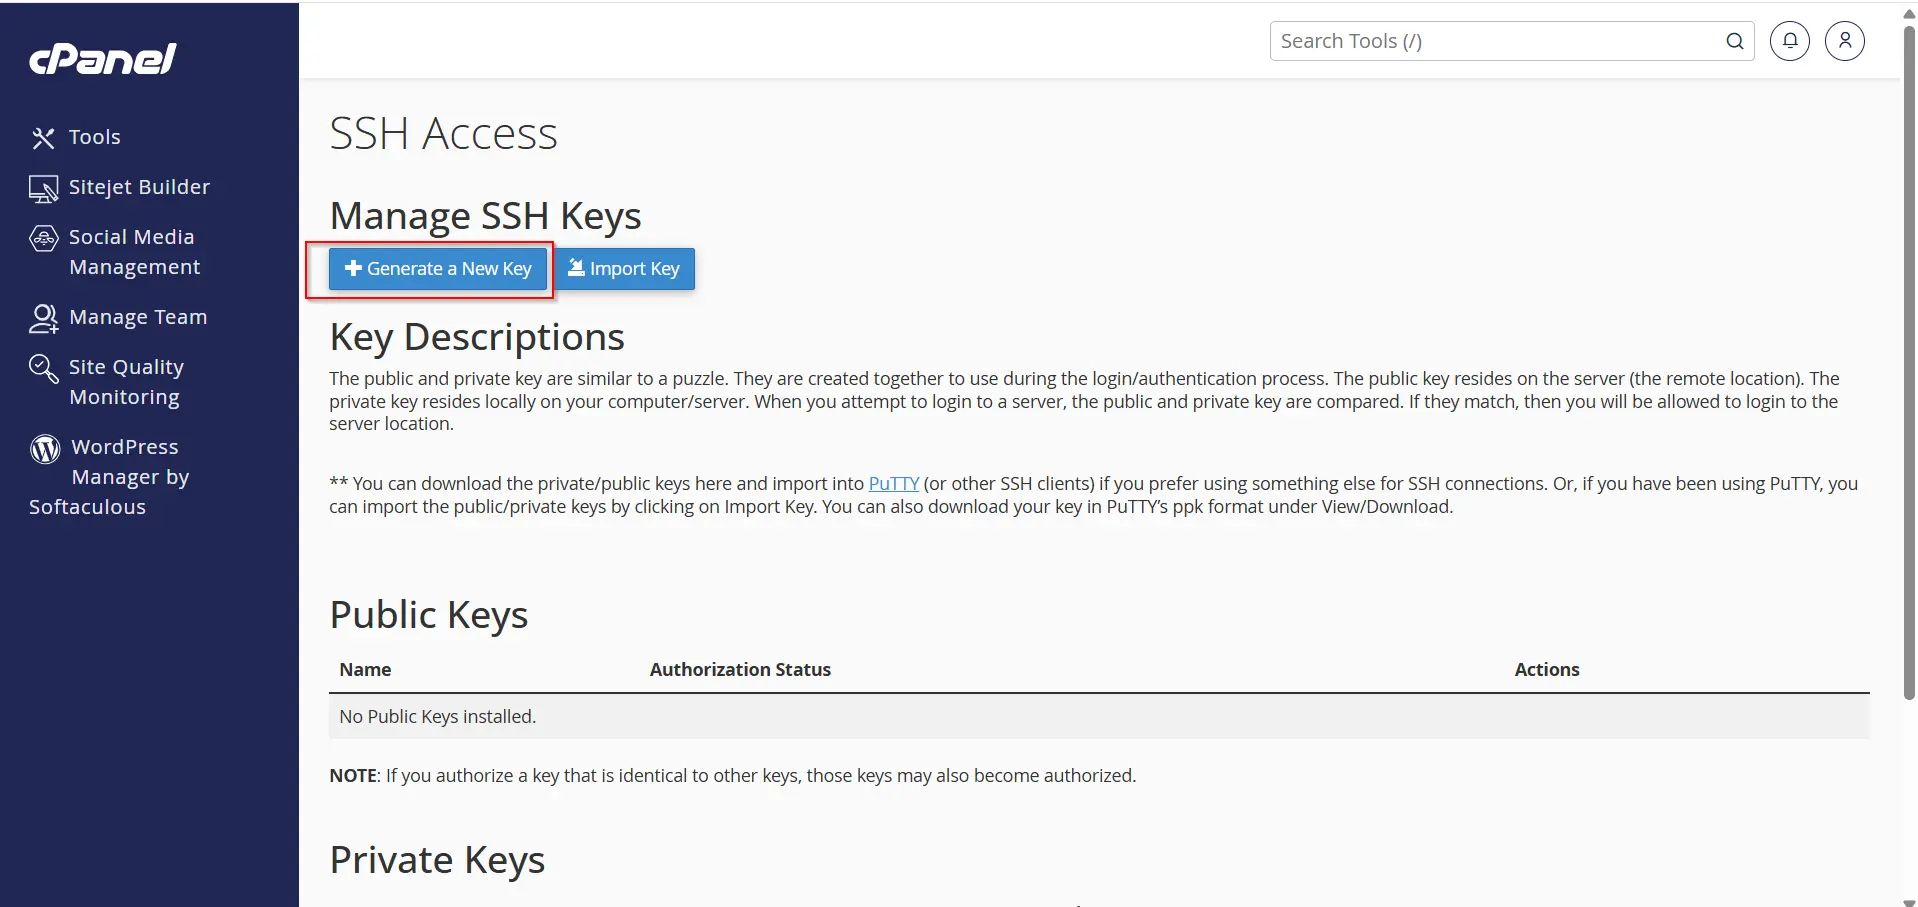
Step 2: Open SSH Access
- Locate SSH Access under the Security section.
- Click SSH Access.
You will see options for managing SSH keys and configuring secure authentication.
Step 3: Generate a New SSH Key
- Click Manage SSH Keys.
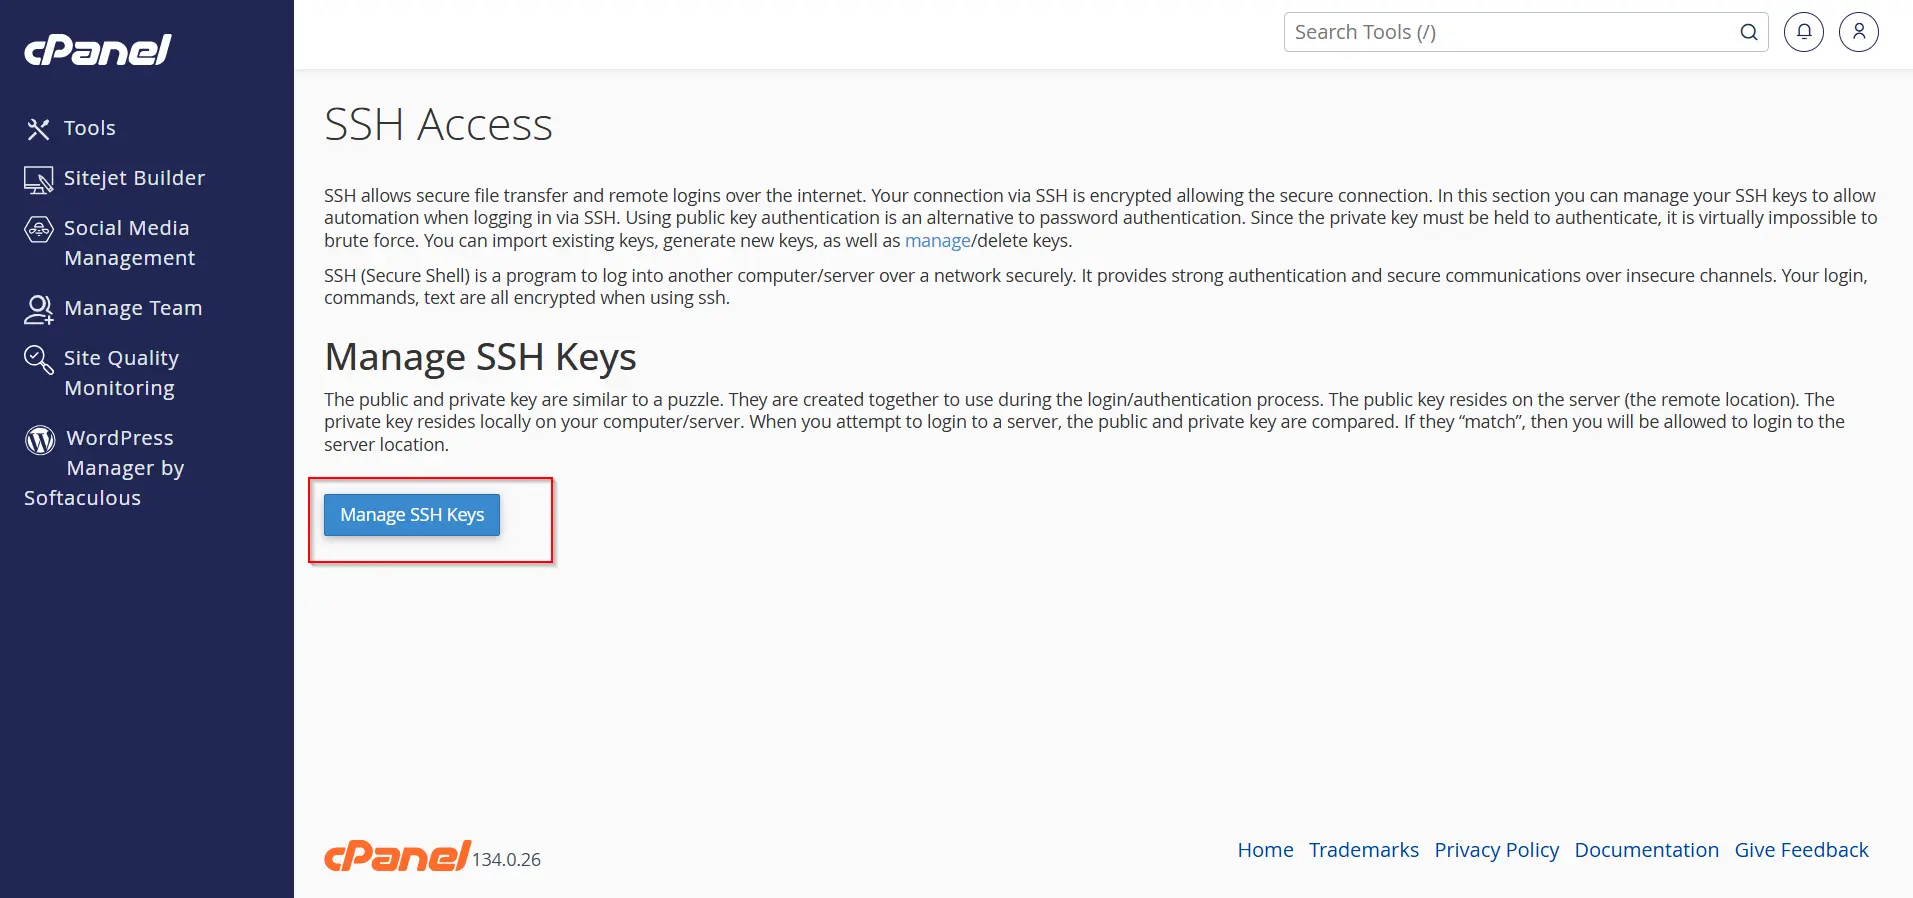
2. Select Generate a New Key.
3. Enter the following information:
Key Name
Choose a recognizable name for the key.
Key Password
Create a strong passphrase for additional security.
Key Type
Choose RSA (recommended).
Key Size
Use at least 2048 bits. For better security, select 4096 bits if available
- Click Generate Key.
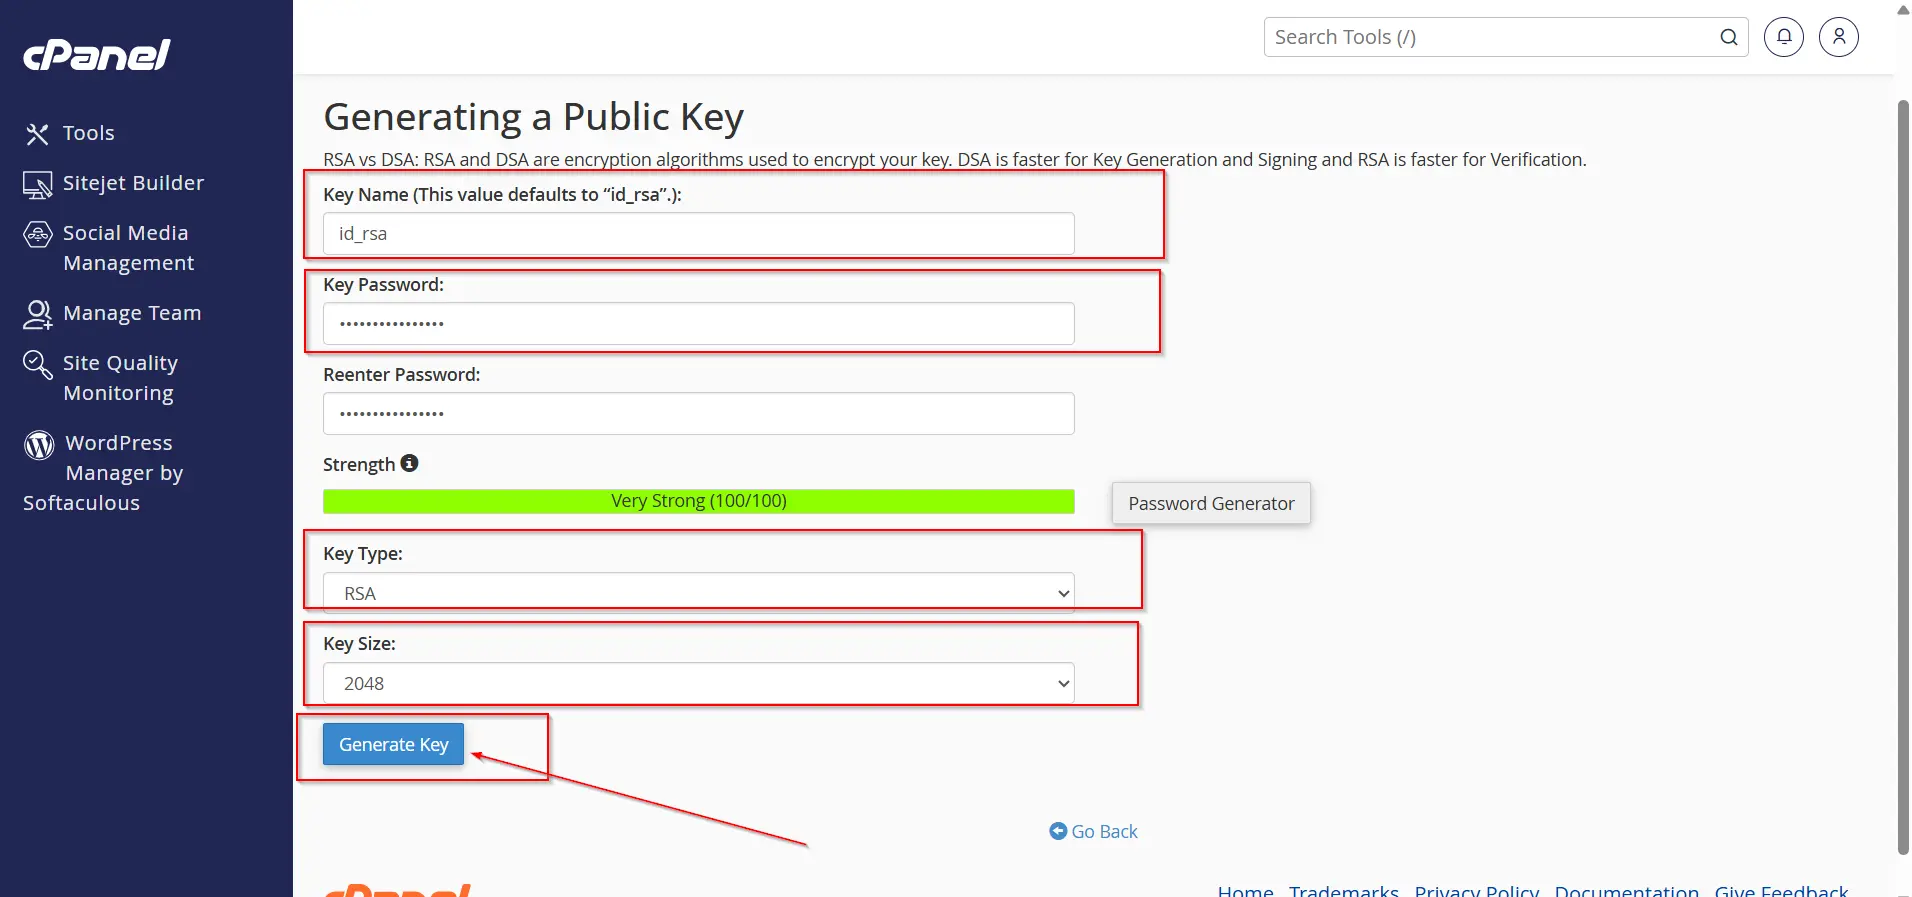
cPanel will create both:
- Public Key
- Private Key
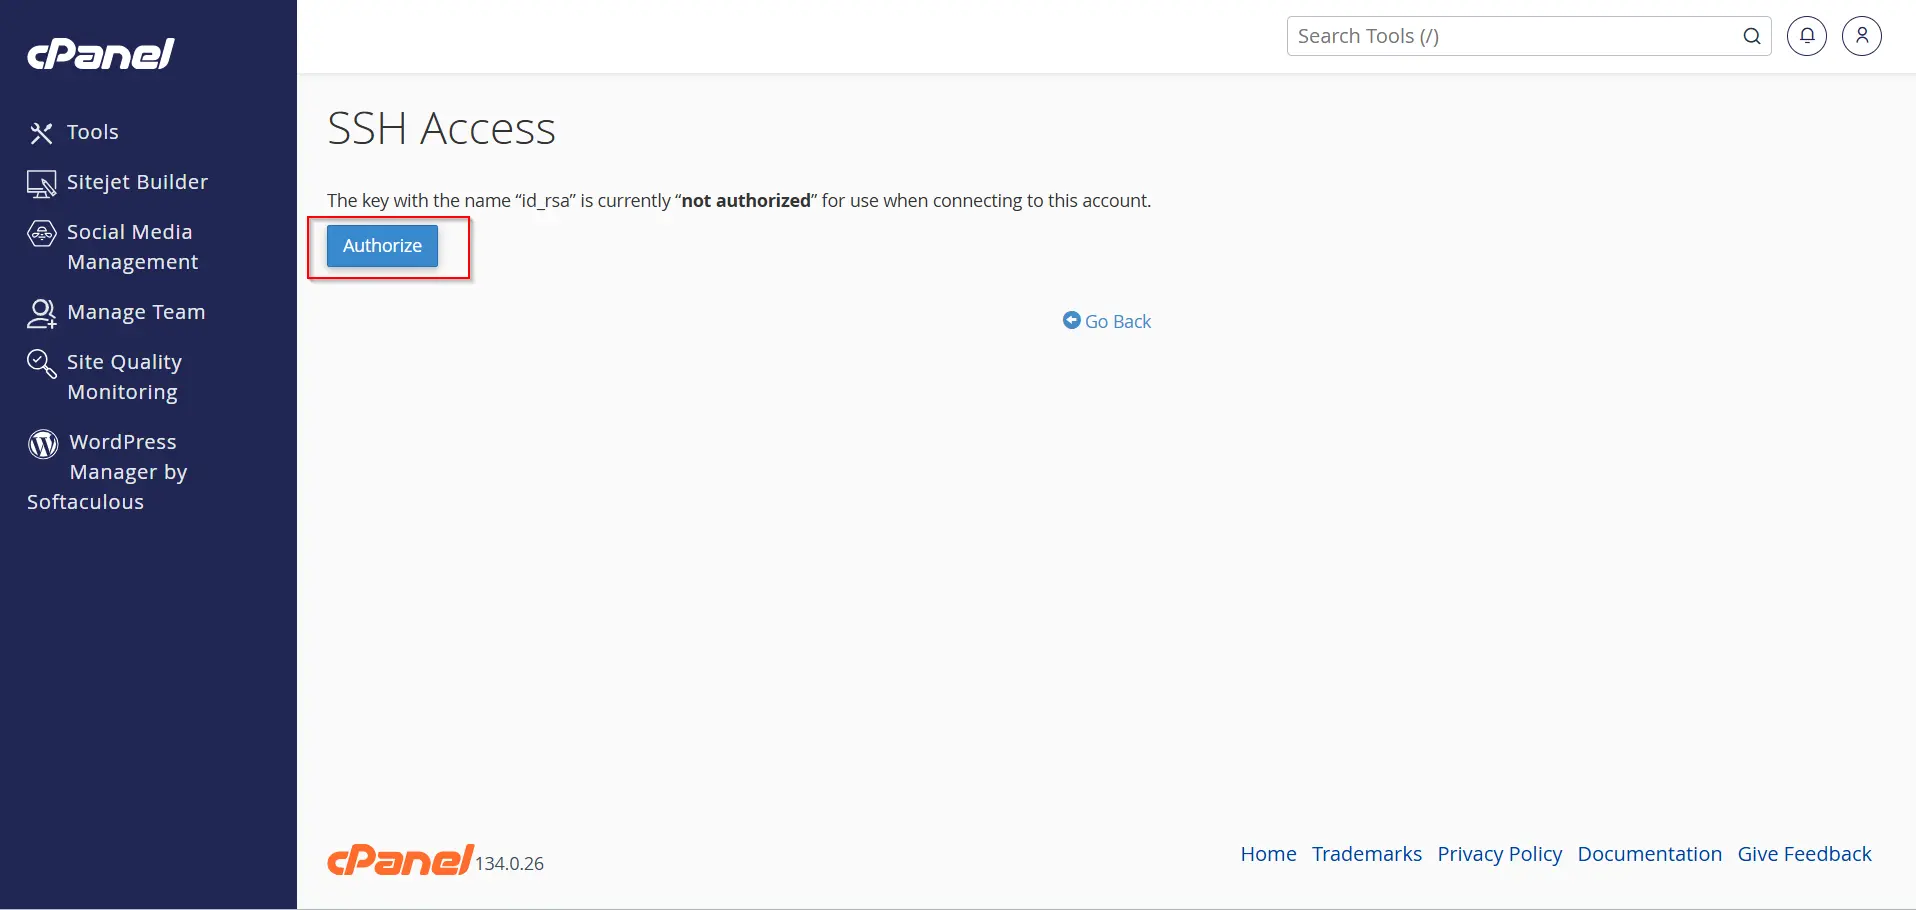
Step 4: Authorize the SSH Key
After generating the key:
- Return to the Manage SSH Keys page.
- Locate the newly created public key.
- Click Manage.
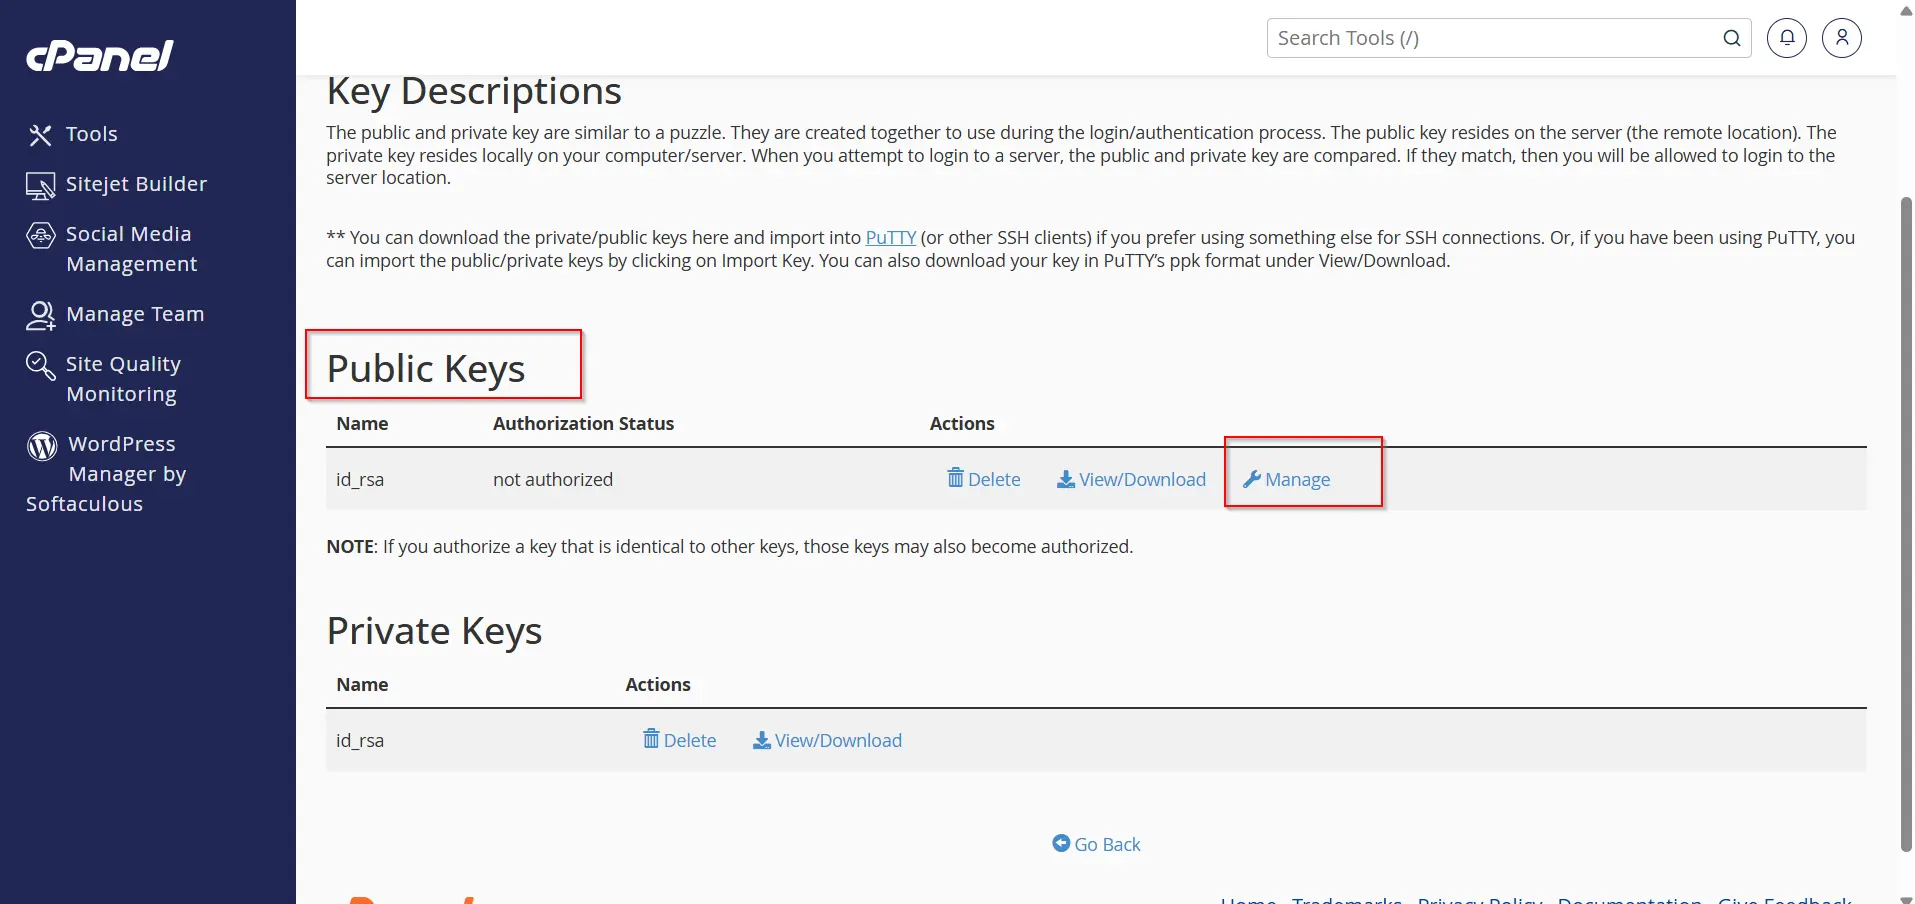
4. Select Authorize.
Once authorized, the key becomes valid for SSH authentication.
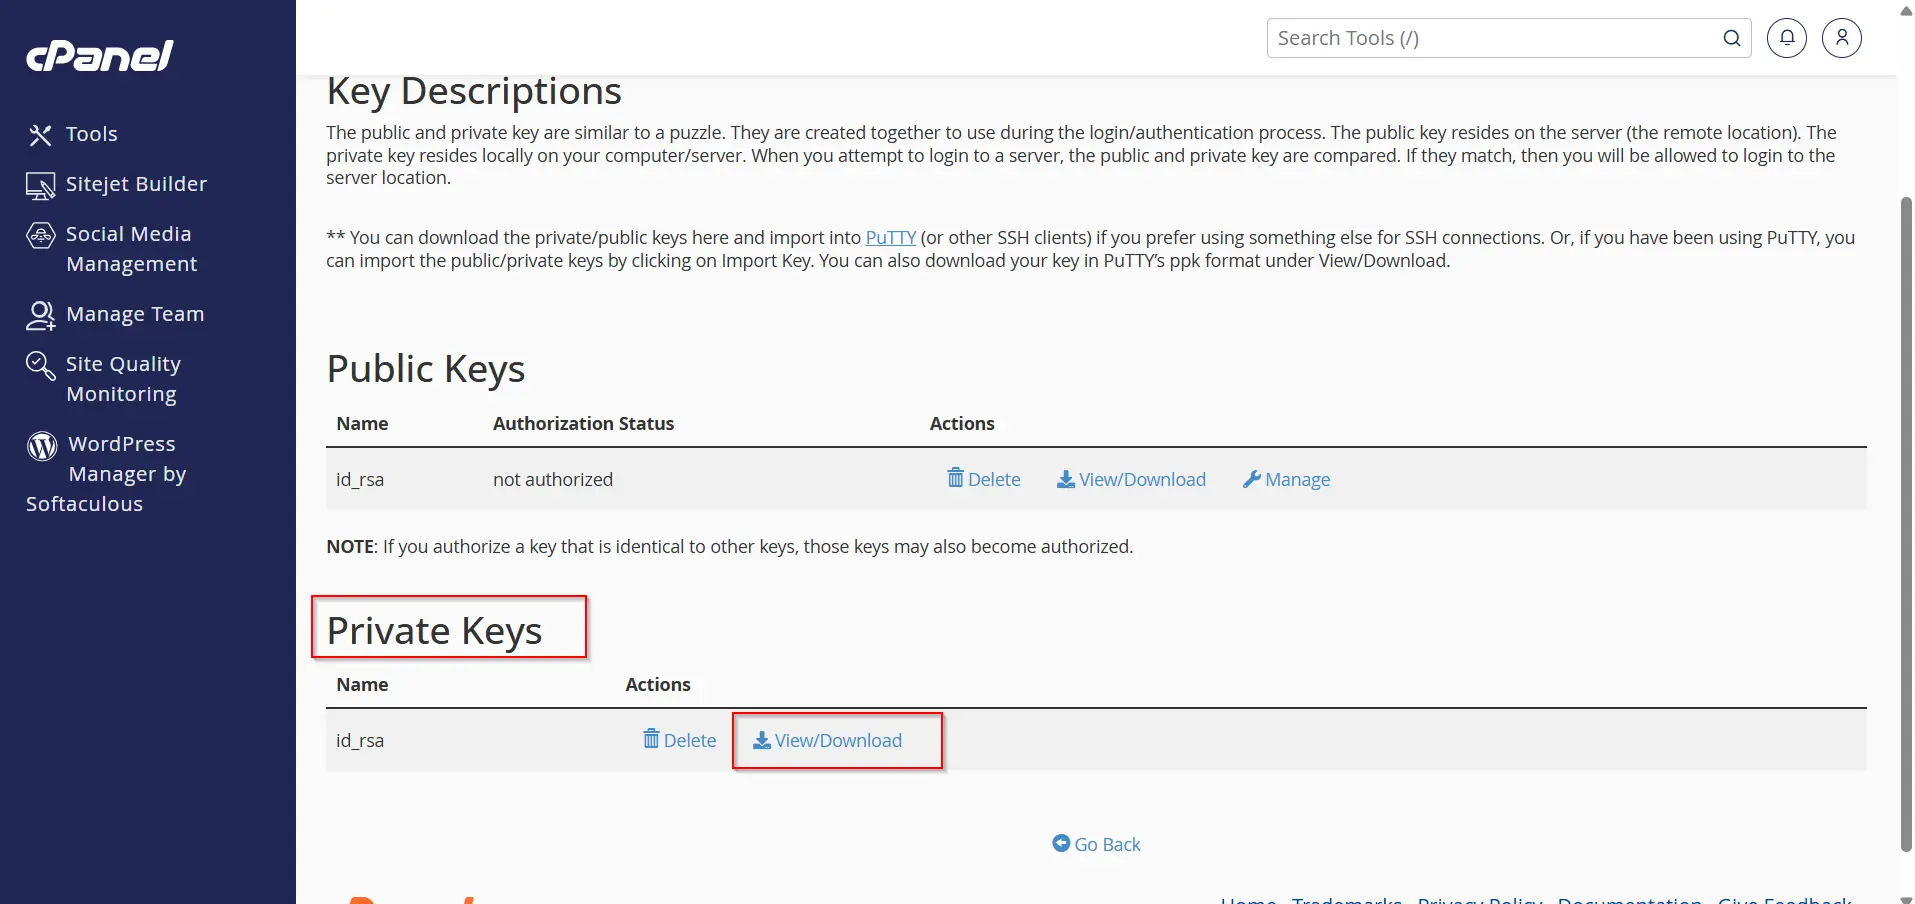
Step 5: Download the Private Key
To connect from your local computer:
- Locate the private key.
- Click View/Download.
- Save the private key securely on your device.
Never share your private key with anyone.
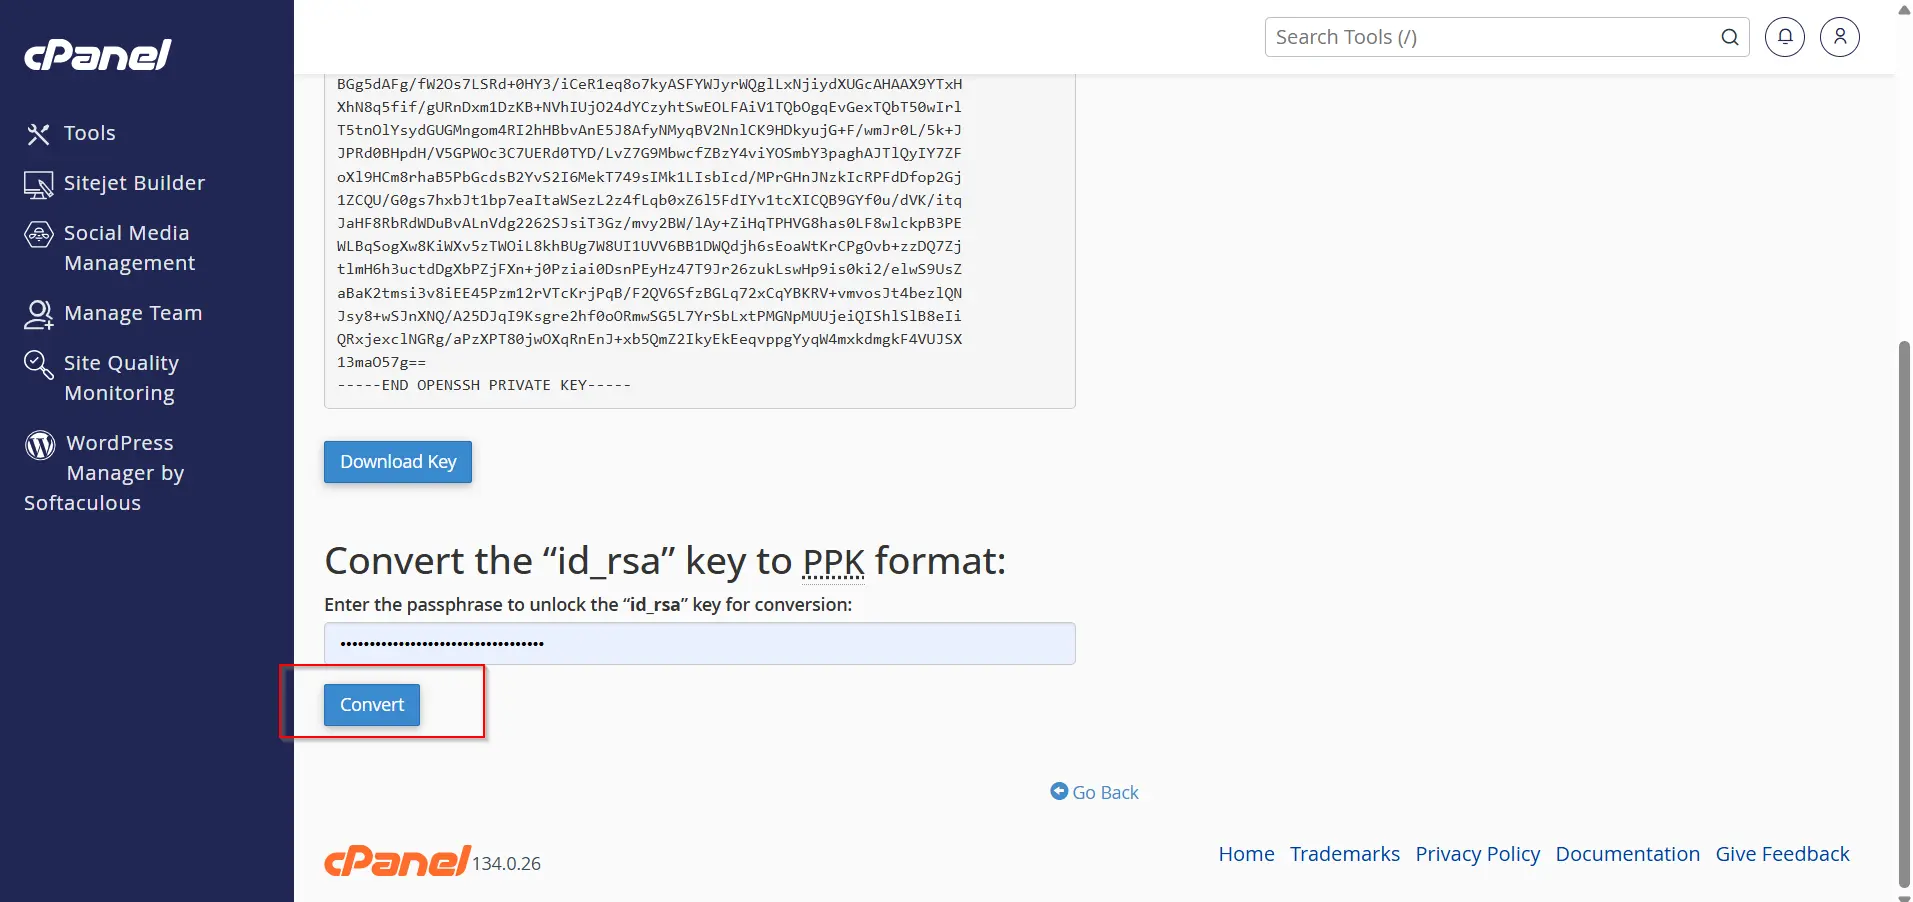
Step 6: Convert the Key for PuTTY (Windows Only)
If you use PuTTY:
- Open the private key in cPanel.
- Click Convert.
- Download the converted
.ppkfile. - Save it in a secure location.
PuTTY requires the .ppk format for authentication.
Step 7: Connect to the Server Using SSH
For Windows (PuTTY)
- Open PuTTY.
- Enter your server hostname or IP address.
- Set Port to 22.
- Navigate to:
Connection → SSH → Auth
- Browse and select your private key (.ppk file).
- Click Open.
Why Use SSH Instead of FTP?
While FTP remains a common method for transferring files, SSH offers several significant advantages.
- Enhanced Security
- Command-Line Access
- Faster Operations
- Automation Capabilities
- Secure Authentication
When Should You Use SSH?
SSH is especially useful for:
- Website migrations
- Application deployments
- Laravel projects
- WordPress management
- Database administration
- Backup creation
- Git integration
- Cron job management
- Security audits
- Server troubleshooting
For developers and advanced website owners, SSH is often an essential tool for daily operations.
Benefits of Configuring SSH in cPanel
Configuring SSH access through cPanel offers numerous advantages.
- Secure Remote Management
- Efficient File Management
- Improved Development Workflow
- Better Website Maintenance
- Greater Administrative Control
Conclusion
Learning how to configure SSH using cPanel is an important skill for anyone managing a website or hosting account. SSH provides a secure, encrypted connection that allows you to perform advanced administrative tasks, manage files efficiently, automate workflows, and improve overall server security.
By generating SSH keys, authorizing access, and following security best practices, you can safely connect to your hosting account and take full advantage of the powerful command-line tools available through SSH. Whether you are a developer, business owner, or system administrator, SSH access can significantly enhance your website management capabilities and streamline server operations.
Related Articles