Latest Updates
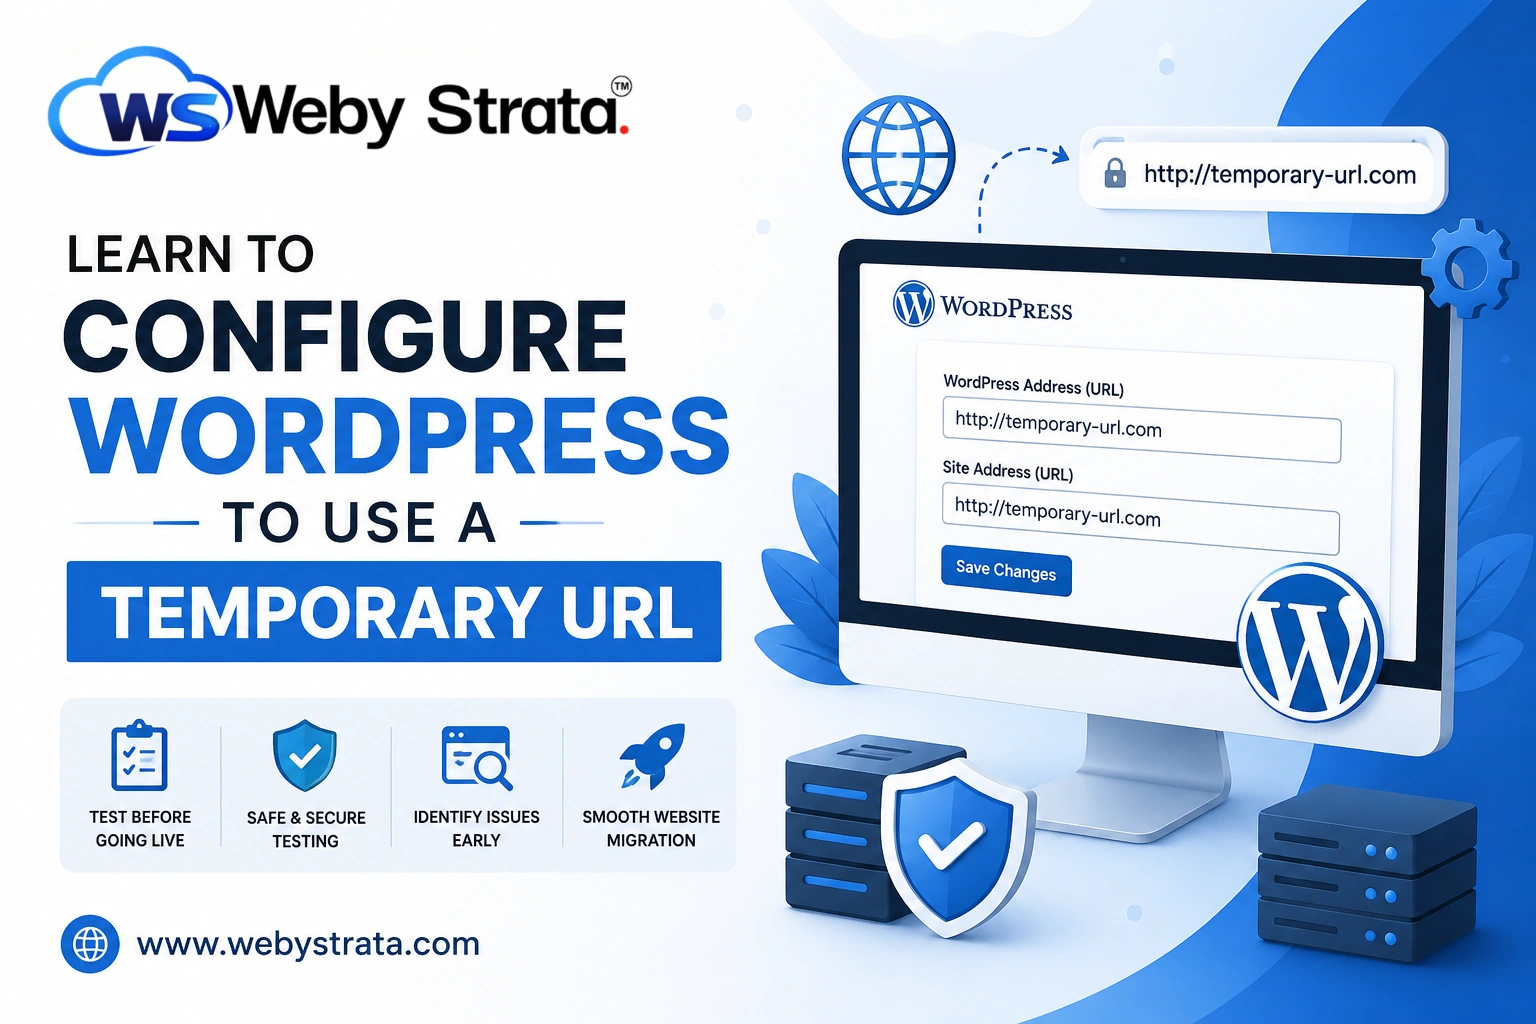
Learn to Configure WordPress to Use a Temporary URL
Learn to Configure WordPress to Use a Temporary URL When migrating a WordPress website to a new hosting provider, moving it to a different server, or creating a staging environment, it is important to…
Learn to Configure WordPress to Use a Temporary URL
When migrating a WordPress website to a new hosting provider, moving it to a different server, or creating a staging environment, it is important to test everything before making the website publicly available. One of the easiest ways to do this is by configuring WordPress to use a temporary URL.
A temporary URL allows you to access and review your website on the new hosting account before updating your domain’s DNS records. This ensures that your website is functioning correctly and helps you identify any issues before visitors access the new version of your site.
In this guide, you’ll learn what a temporary URL is, why it’s useful, and how to configure WordPress to use one through phpMyAdmin.
What Is a Temporary URL?
A temporary URL is a web address provided by your hosting provider that allows you to access your website without pointing your domain name to the server. Instead of using your domain (such as example.com), you can access the website using a server-generated URL.
Temporary URLs are commonly used during:
- Website migrations
- Hosting transfers
- Website development and testing
- Troubleshooting website issues
- Creating staging environments
This method allows you to verify that everything works correctly before making the website live.
Prerequisites
Before proceeding, make sure you have:
- Access to your hosting cPanel
- Access to phpMyAdmin
- Your WordPress database information
- A temporary URL provided by your hosting provider
- A recent database backup
Creating a backup before modifying your database is always recommended.
How to Configure WordPress to Use a Temporary URL
Follow the steps below to update your WordPress installation.
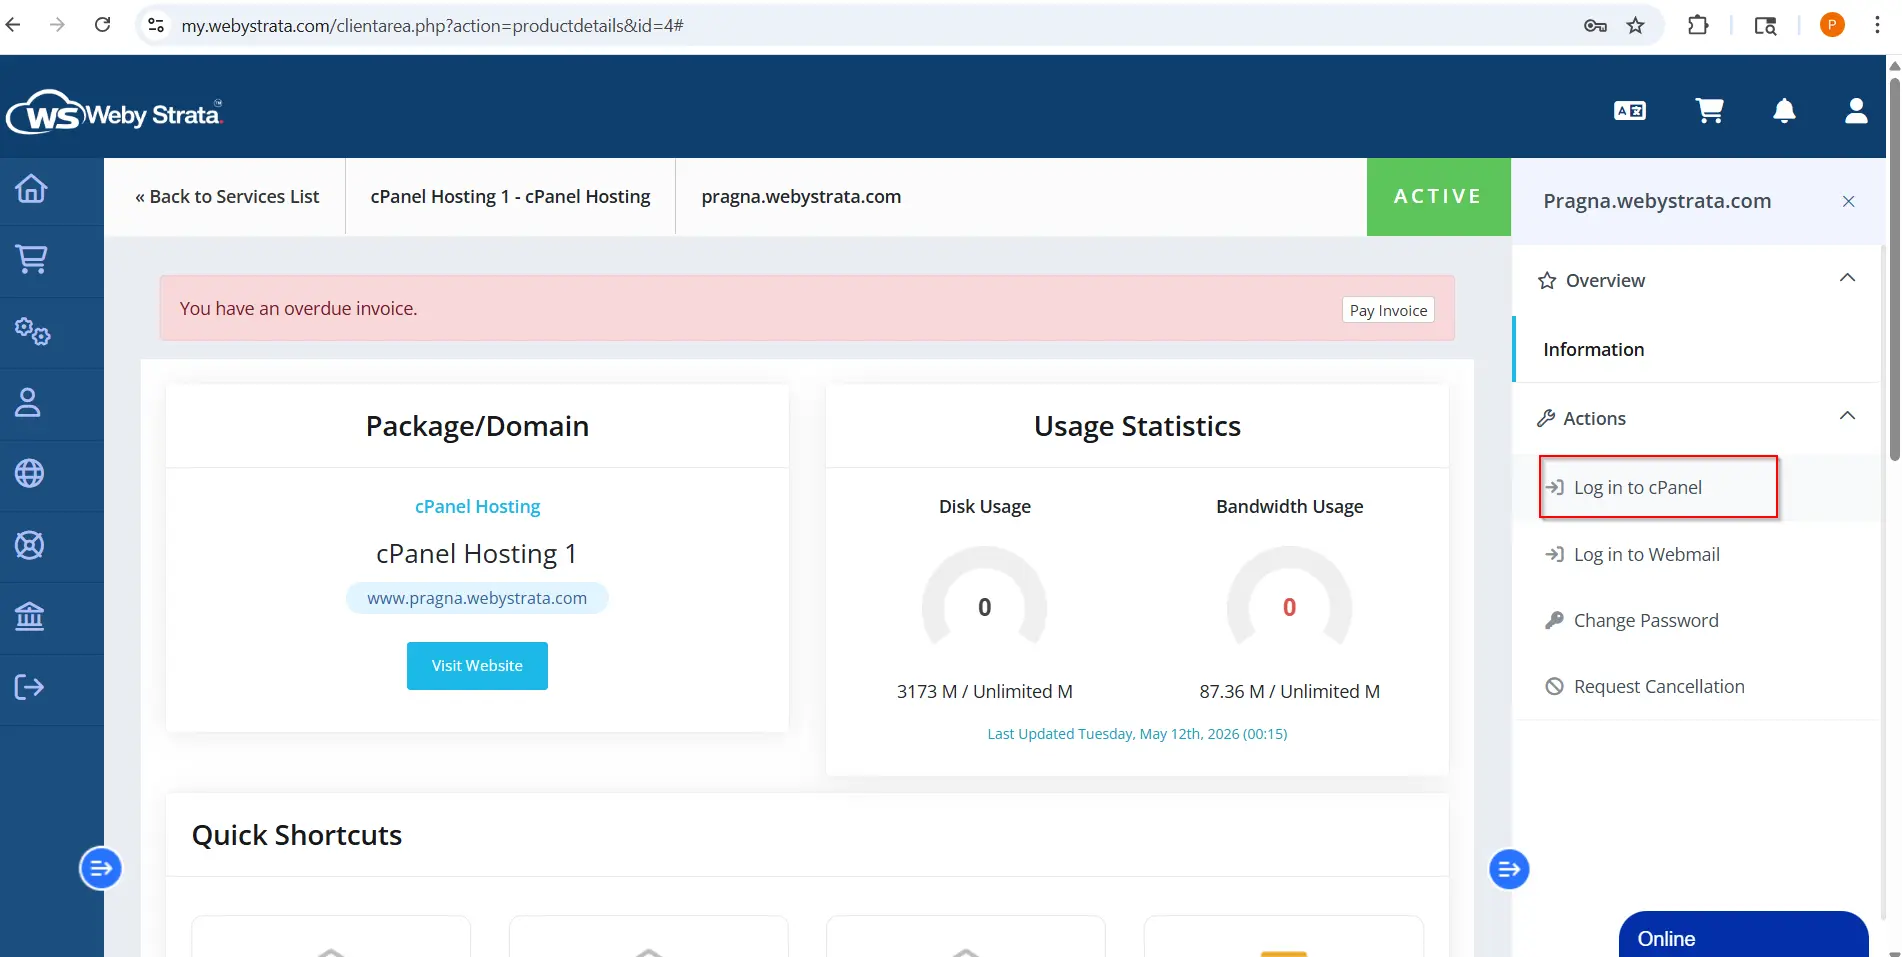
Step 1: Login to cPanel from WebyStrata Client Area
First, visit the WebyStrata website and log in to your client area account using your registered email address and password.
official Website www.webystrata.com
After logging in:
- Go to Services
- Click on My Services
- Select your active hosting service
- Click on Login to cPanel
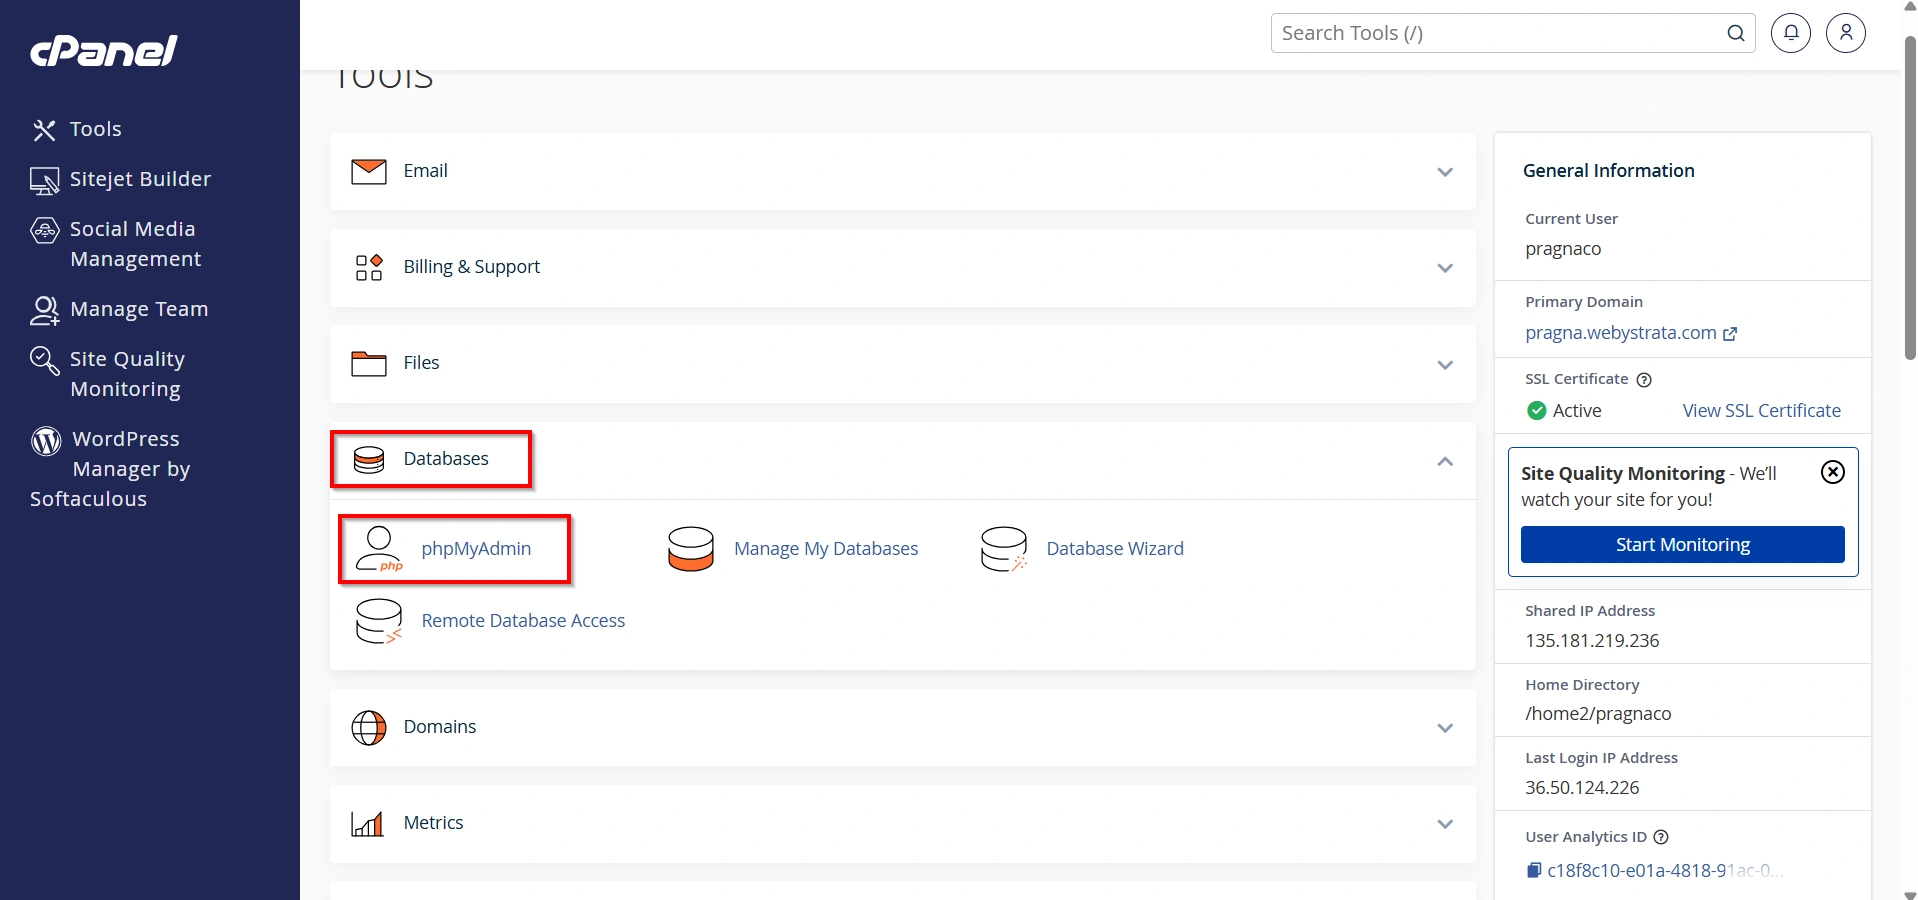
Step 2: Open phpMyAdmin
Under the Databases section, click phpMyAdmin.
phpMyAdmin allows you to manage and edit your WordPress database directly.
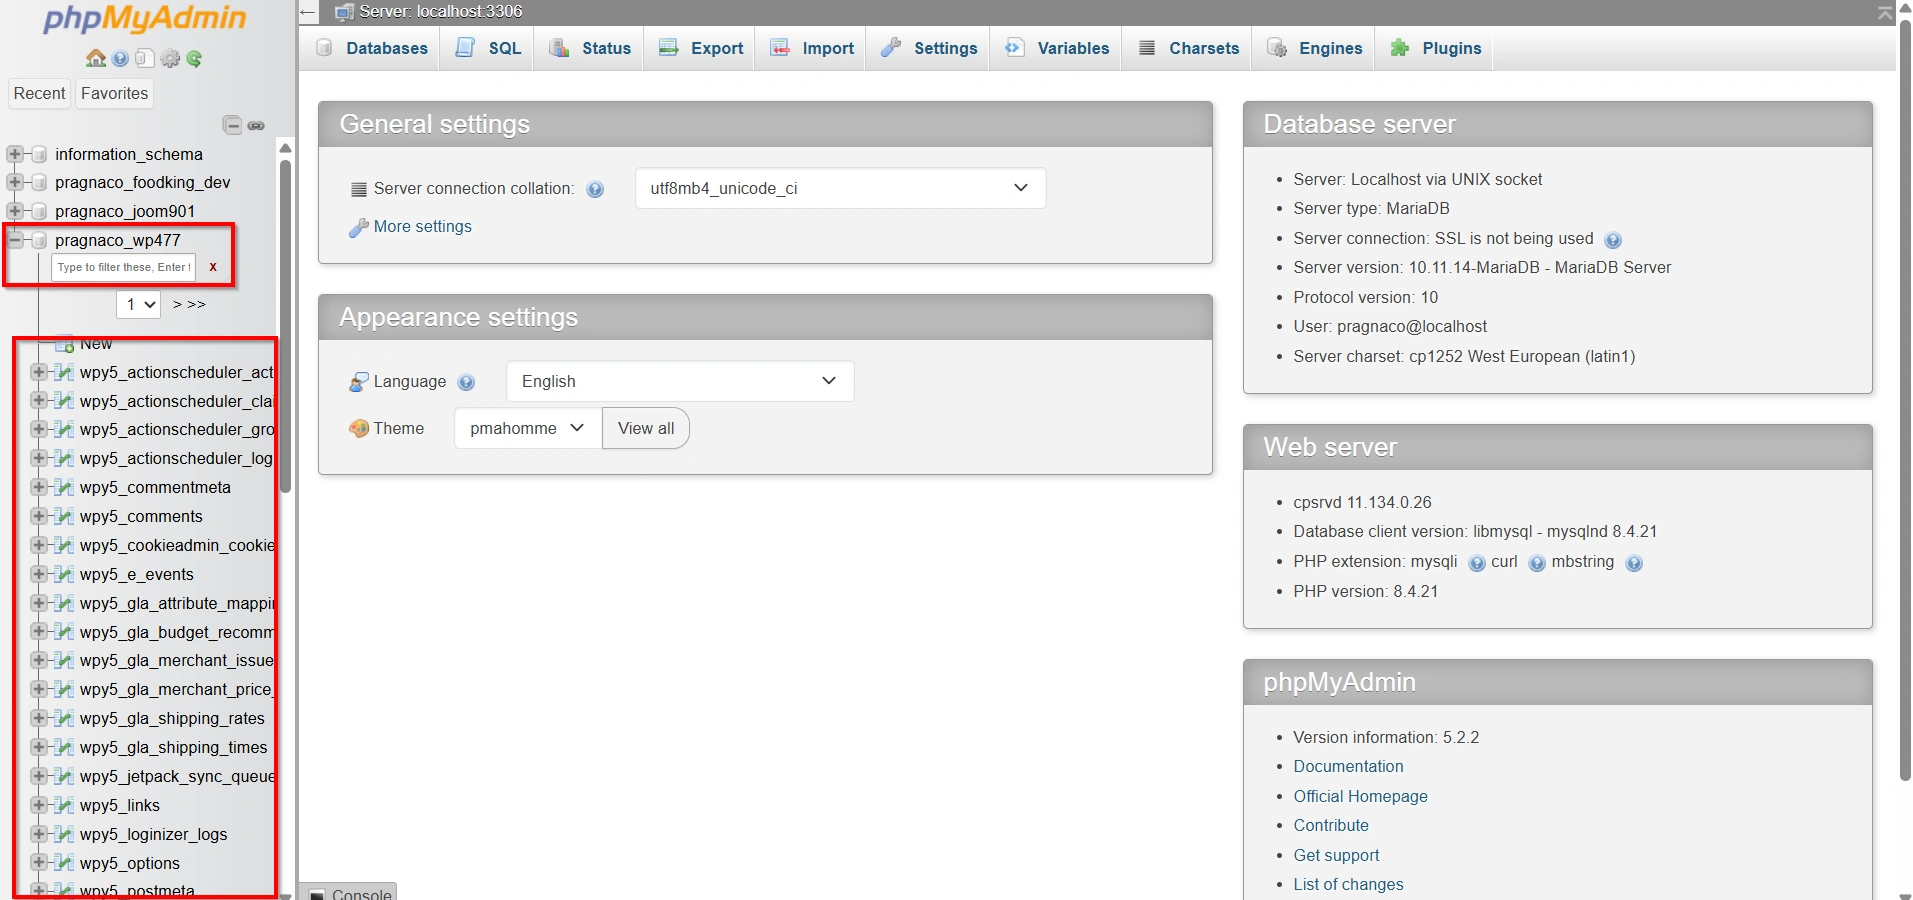
Step 3: Select Your WordPress Database
In the left-hand sidebar, locate your WordPress database and click on it.
If you’re unsure which database belongs to your website, check your wp-config.php file for the database name.
Most WordPress databases have names similar to:
- username_wp123
- username_wp001
- username_wordpress
After selecting the database, a list of tables will appear.
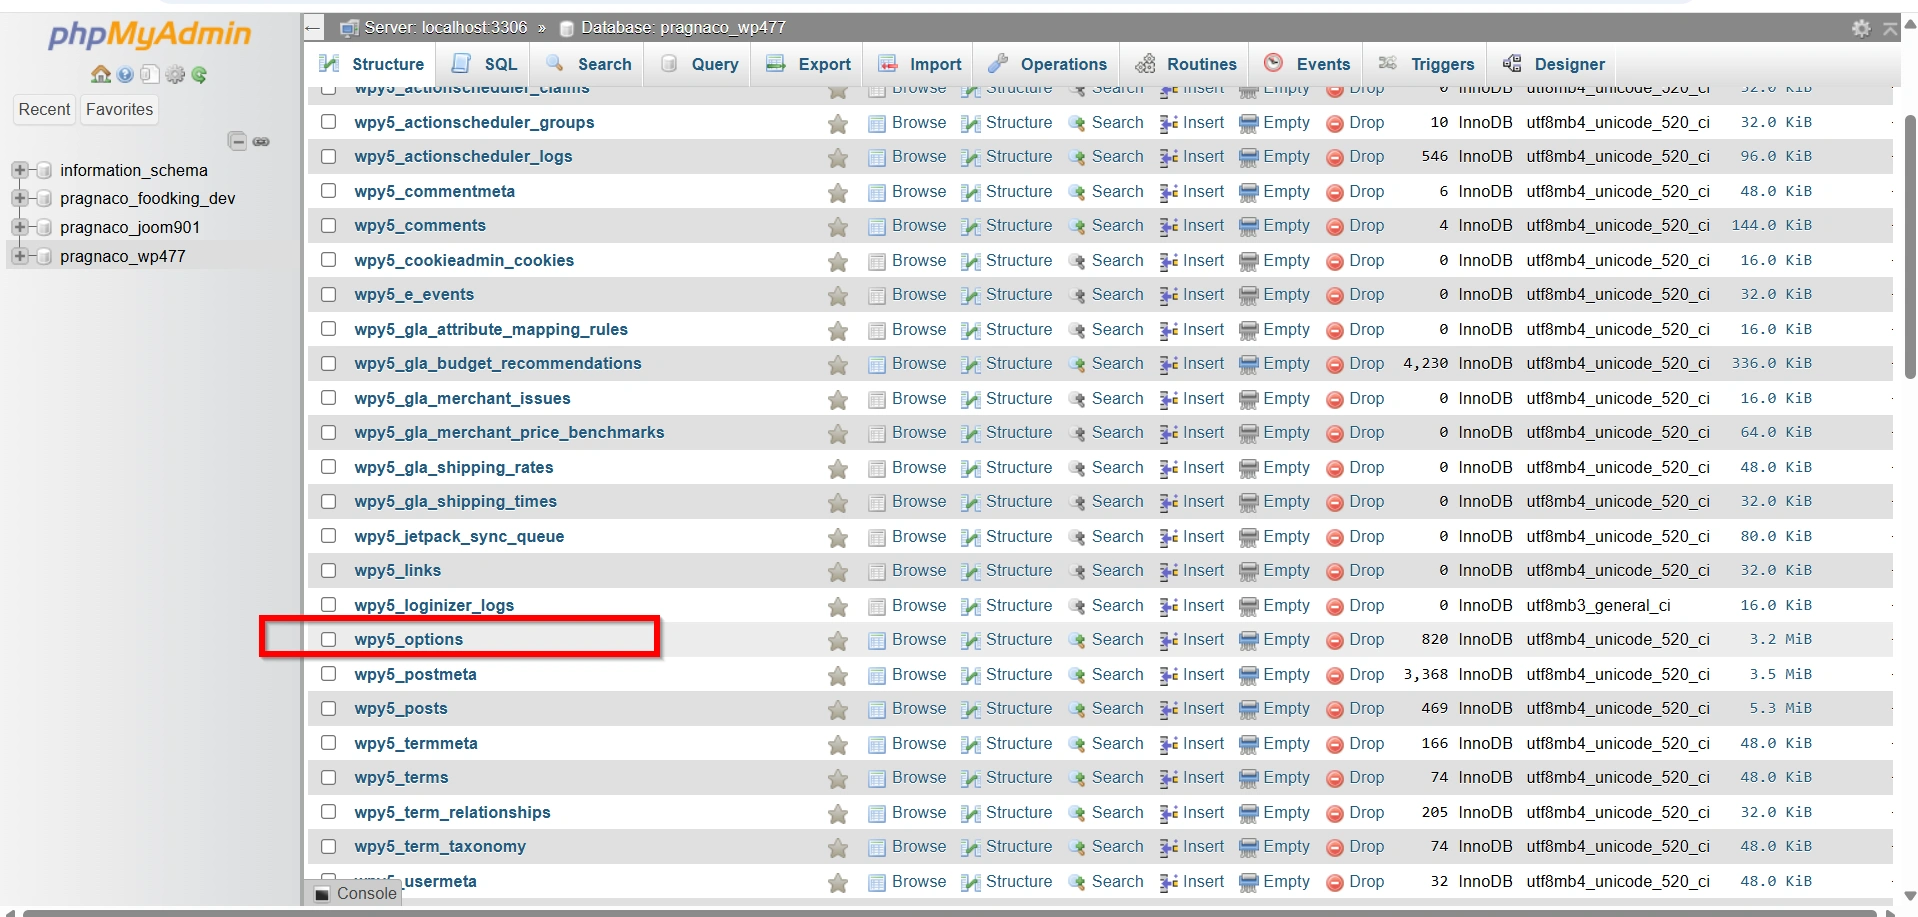
Step 4: Open the Options Table
Locate the WordPress options table.
The table name is typically:
- wp_options
However, if you use a custom database prefix, it may look different, such as:
- customprefix_options
Click the options table to view its contents.
Step 5: Modify the Site URL
Within the options table, locate the row labeled:
- siteurl
- Click Edit next to this row.
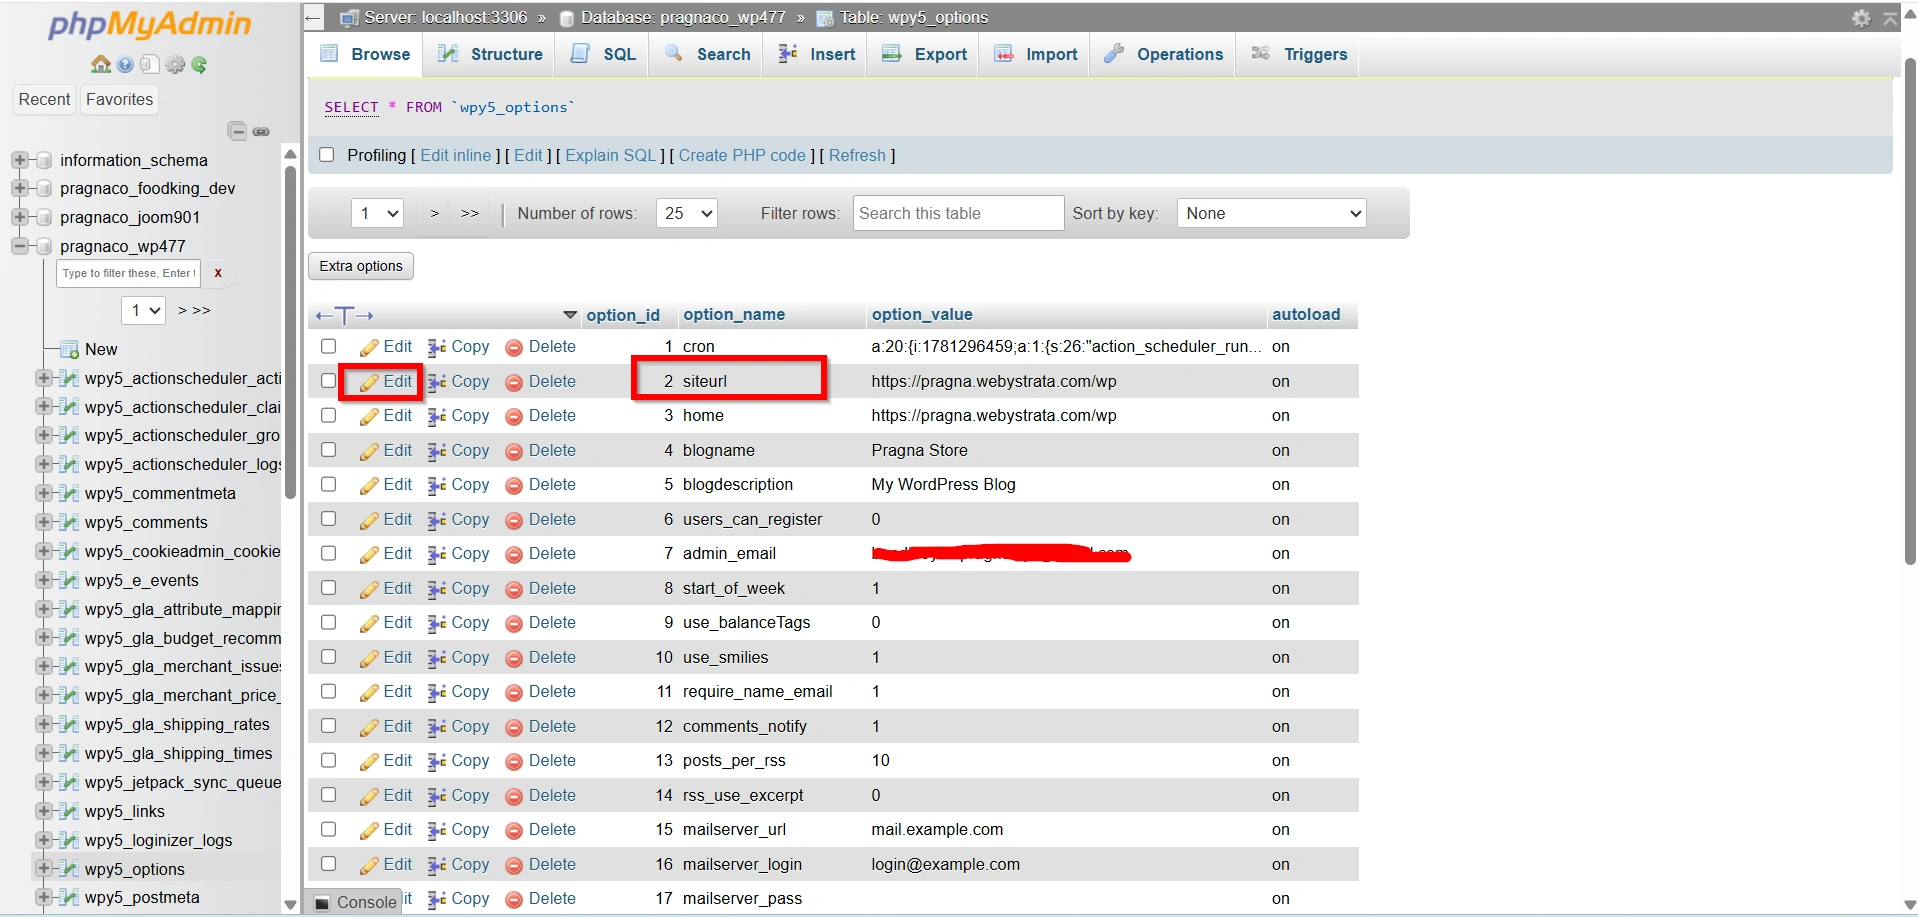
In the option_value field, replace the existing website URL with your temporary URL.
For example:
or
http://temporaryurl.hostprovider.com
Make sure:
- The URL begins with http://
- No trailing slash (/) is added
- The URL matches the temporary URL provided by your hosting provider
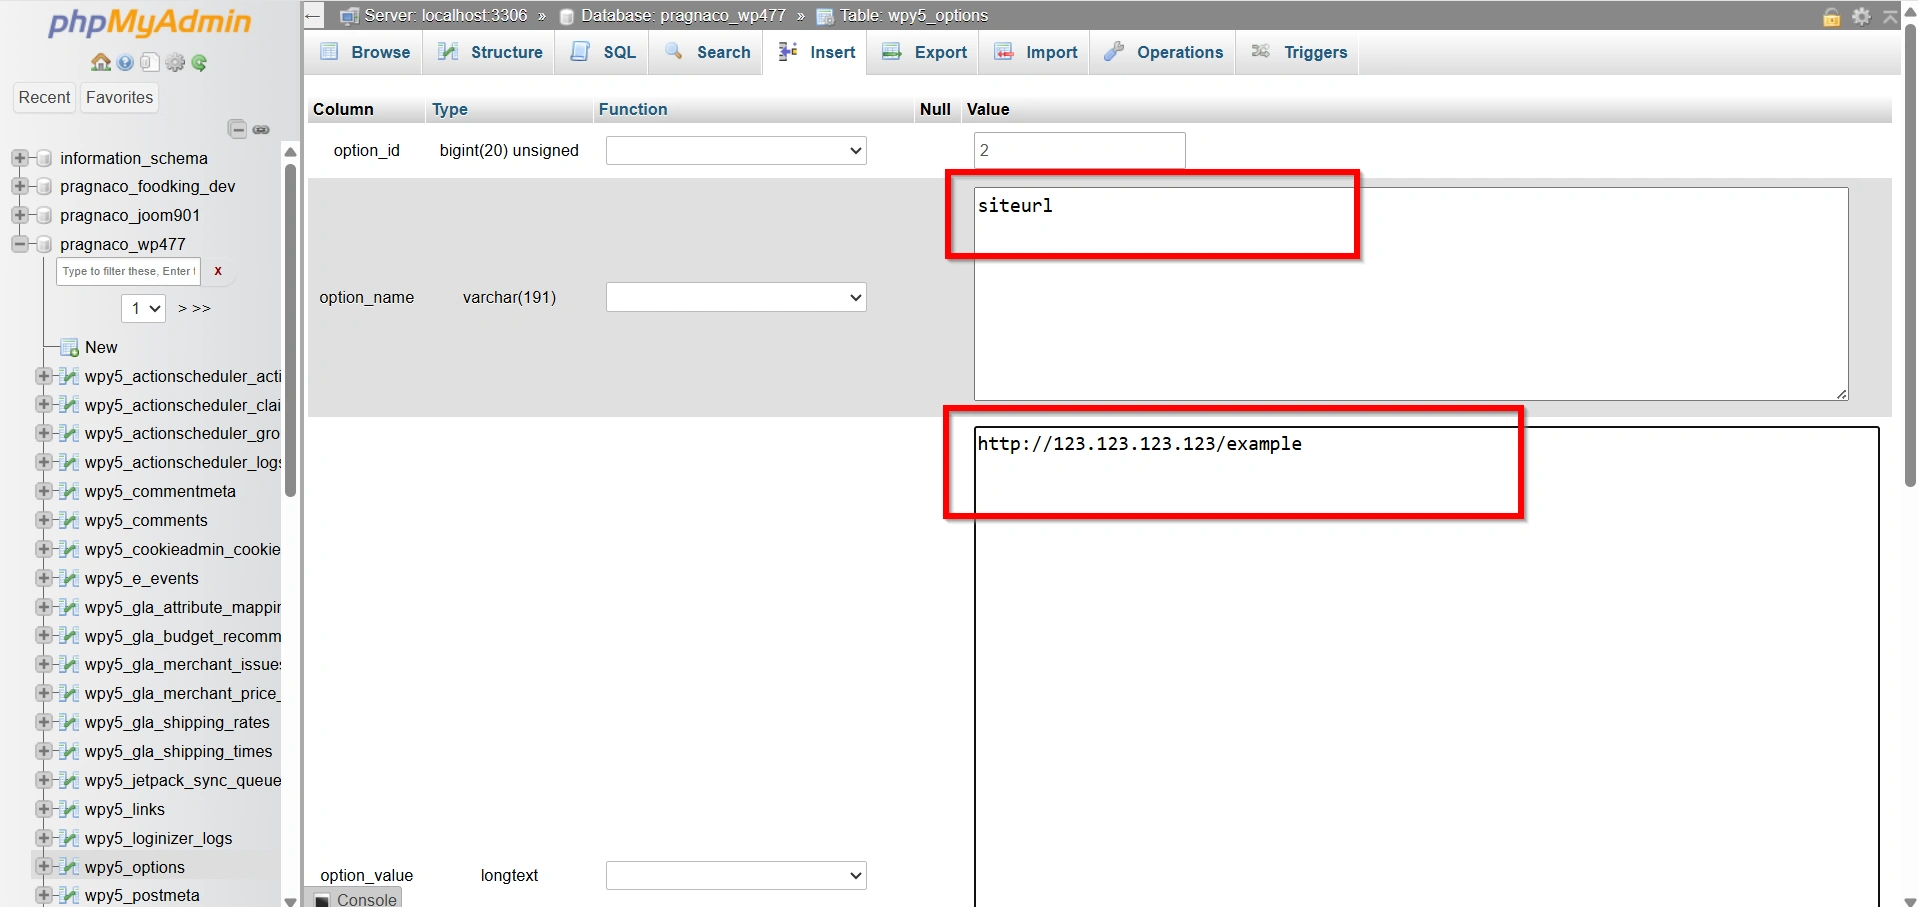
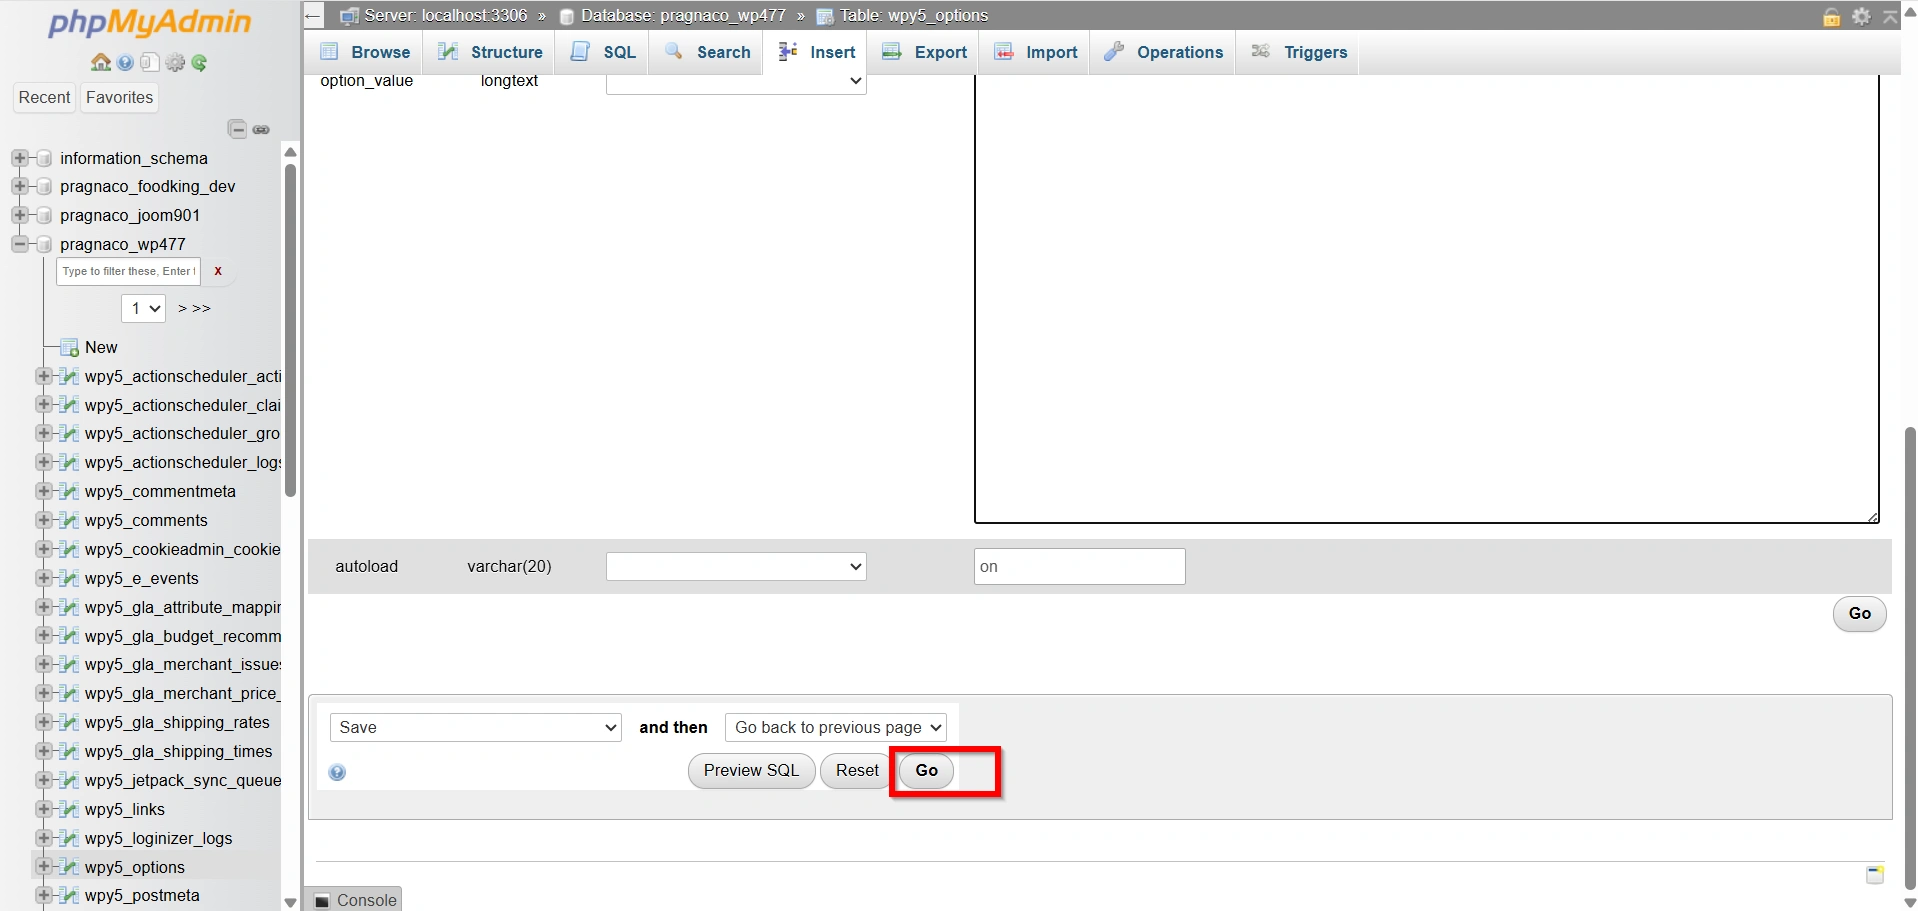
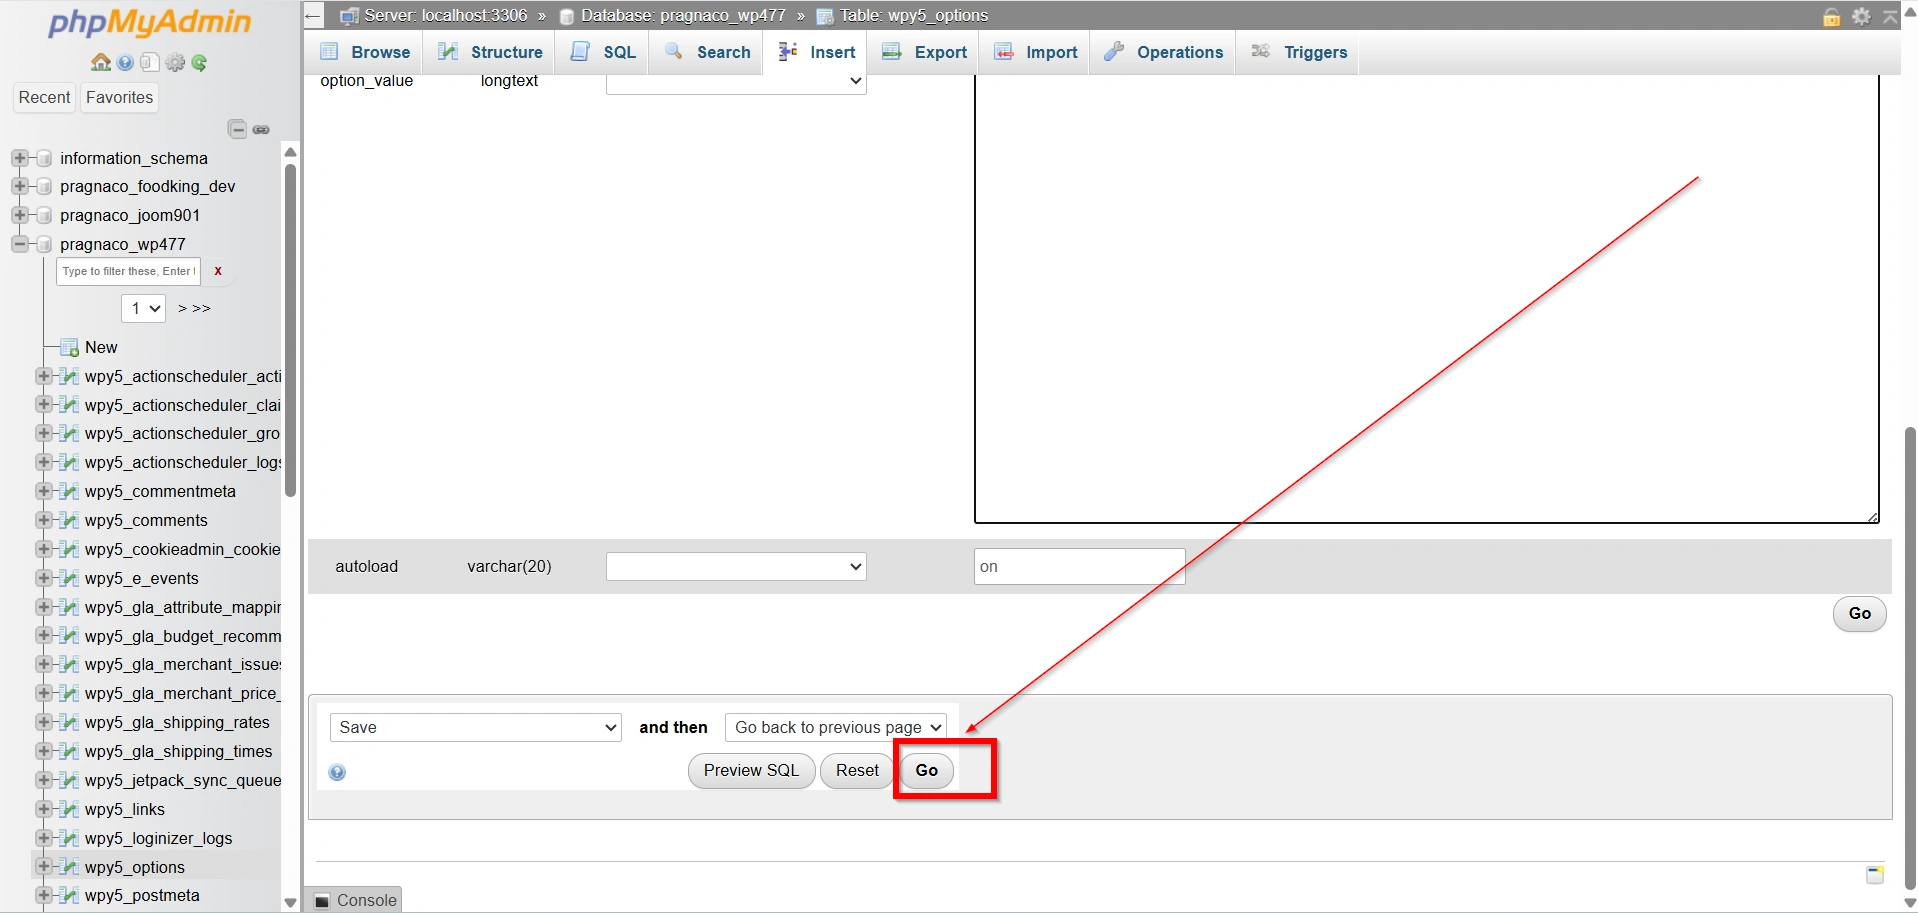
- Click Go to save the changes.
Step 6: Modify the Home URL
Next, locate the row labeled:
- home
- Click Edit.
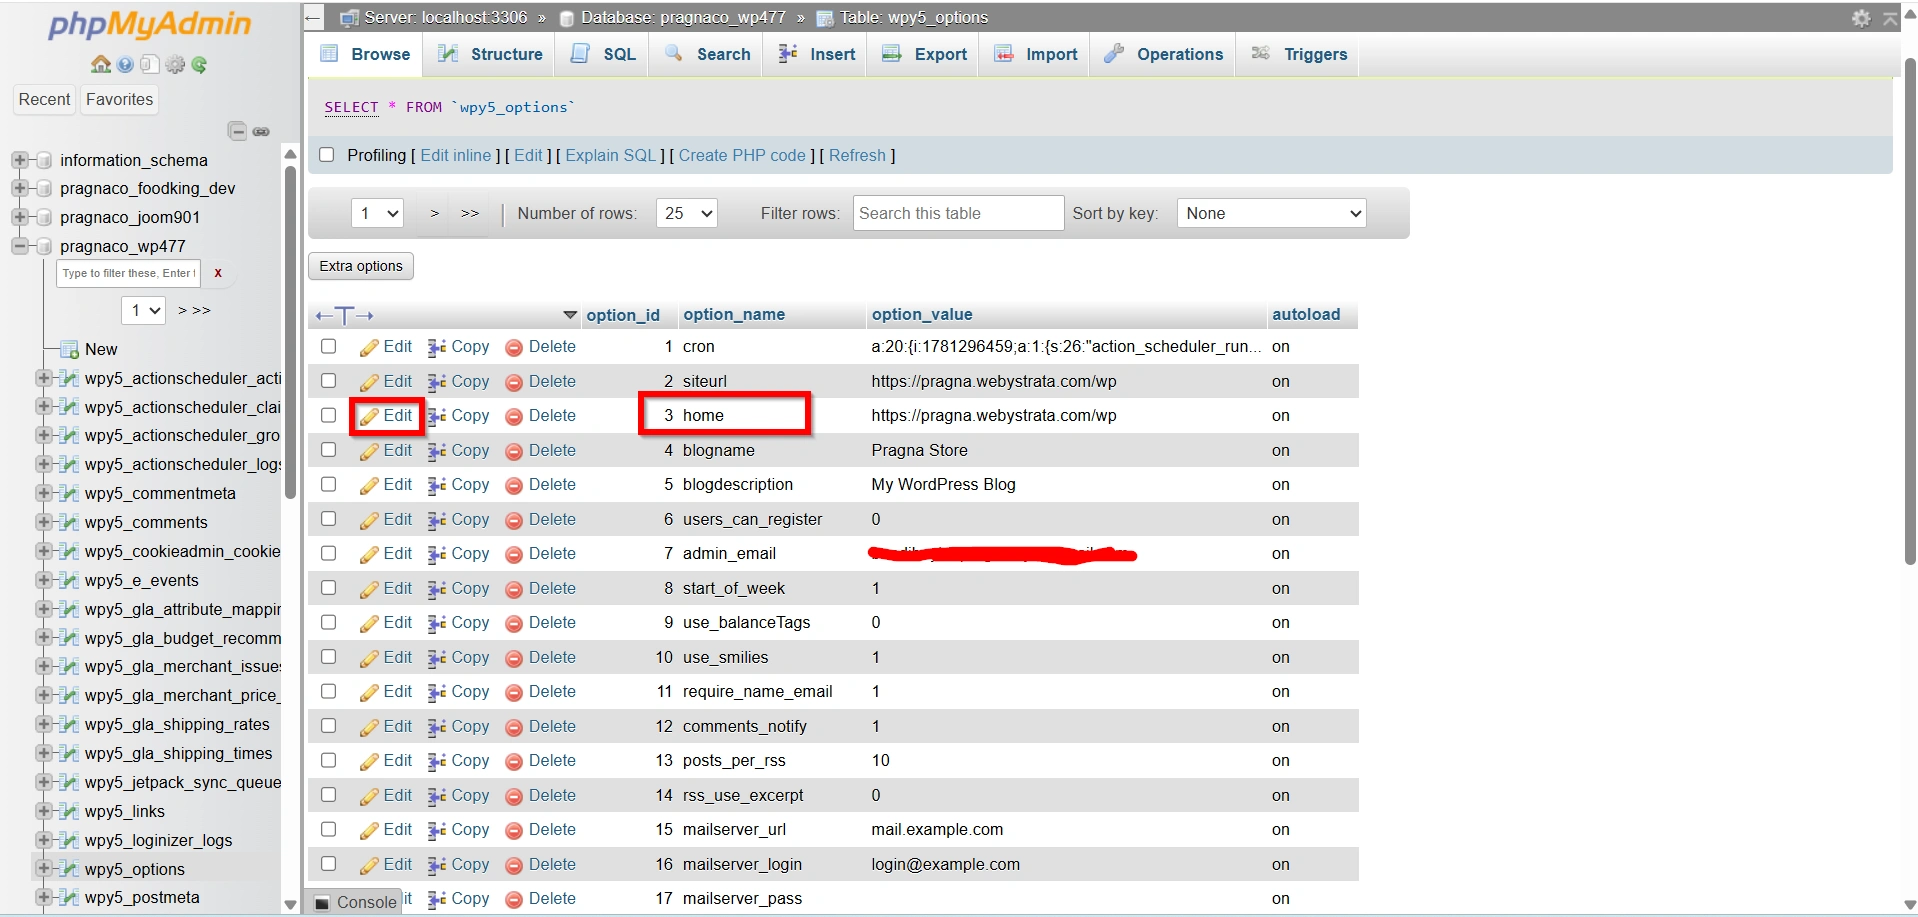
- Replace the current website URL with the same temporary URL you entered for the siteurl setting.
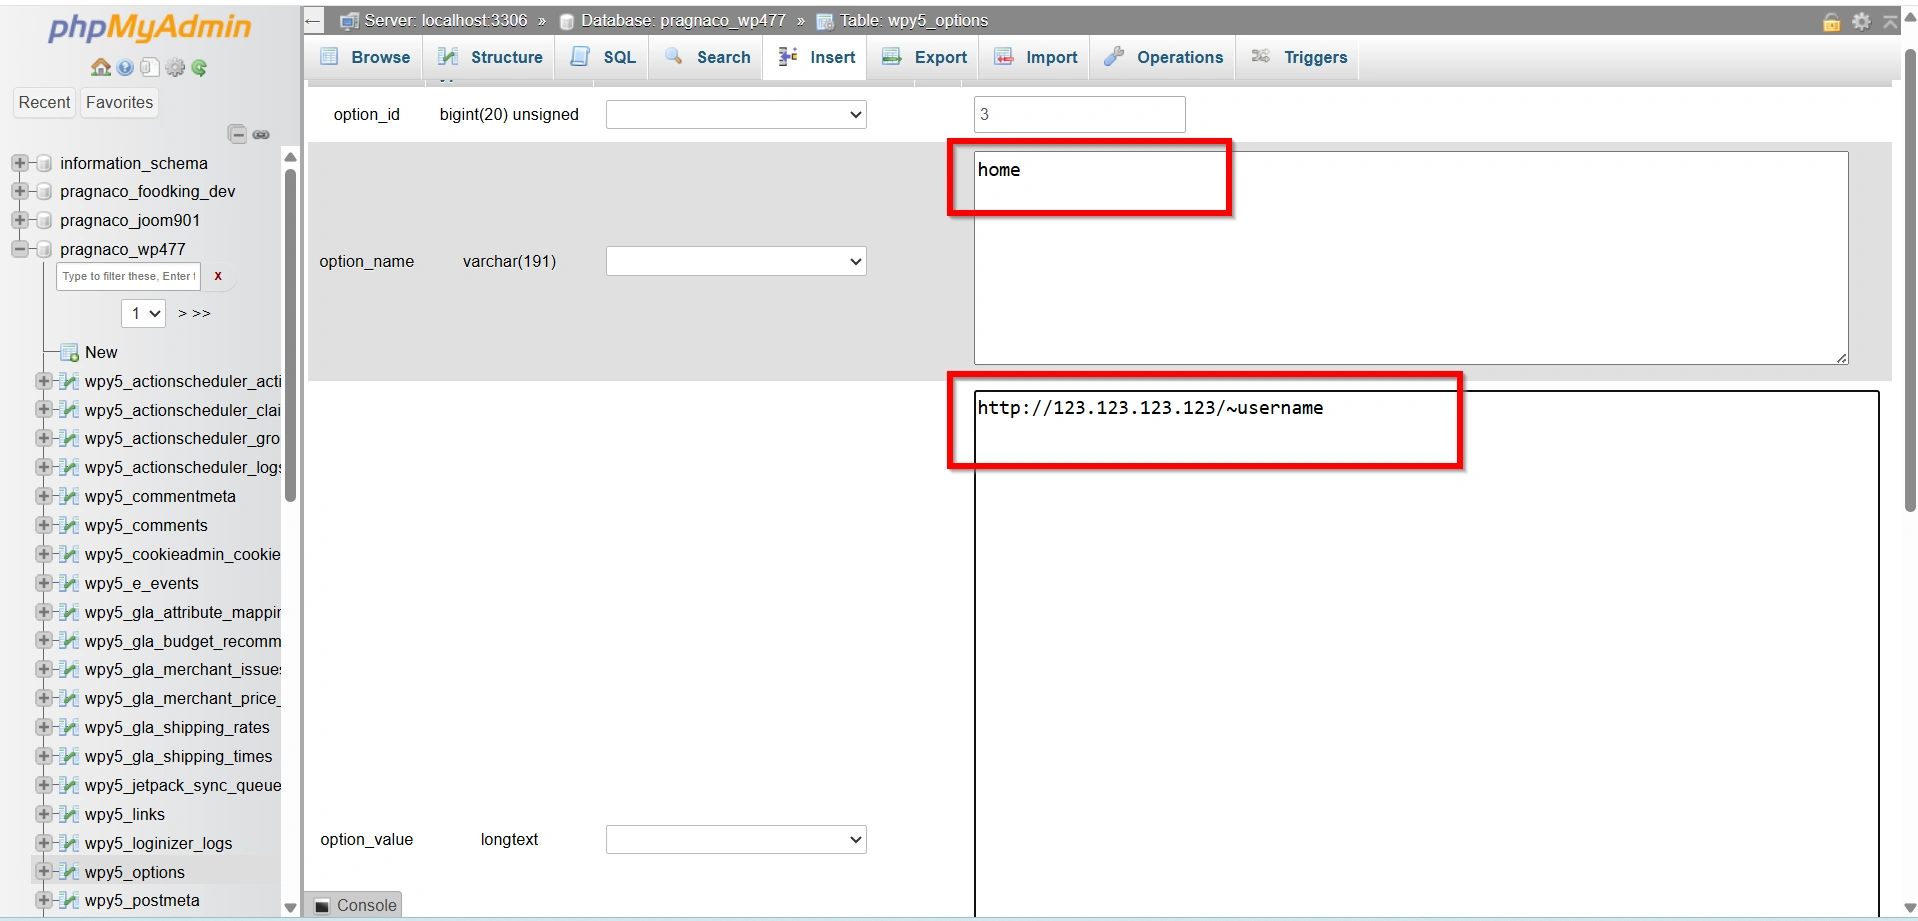
- Click Go to save the changes.
These two settings tell WordPress which URL should be used to load the website.
Step 7: Test the Website
Open a browser and enter the temporary URL.
Check the following:
- Homepage loads correctly
- Images display properly
- Menus function as expected
- Plugins work correctly
- Contact forms submit successfully
- Internal links are accessible
Browse through multiple pages to ensure everything is functioning normally.
Common Issues When Using a Temporary URL
Although temporary URLs are useful, you may encounter a few minor issues.
- Missing Images
- Mixed Content Warnings
- Plugin Conflicts
- Login Redirect Problems
Benefits of Using a Temporary URL
Using a temporary URL provides several advantages:
1. Test Before Going Live
2. Reduce Downtime
3. Verify Successful Migration
4. Troubleshoot Safely
5. Ensure a Smooth Launch
Conclusion
Configuring WordPress to use a temporary URL is a valuable technique for website migrations, server transfers, and pre-launch testing. By temporarily updating the WordPress URL settings in phpMyAdmin, you can safely review your website on a new hosting environment before updating DNS records.
This process minimizes downtime, helps identify issues early, and ensures a smooth transition when your website goes live. Once testing is complete, simply restore the original domain URL and your WordPress website will be ready for visitors.
Related Articles