Latest Updates
How to Create a cPanel Account in WHM
How to Create a cPanel Account in WHM Managing multiple websites on a server becomes much easier with WHM (Web Host Manager). WHM provides administrators and hosting resellers with powerful tools to create, manage,…
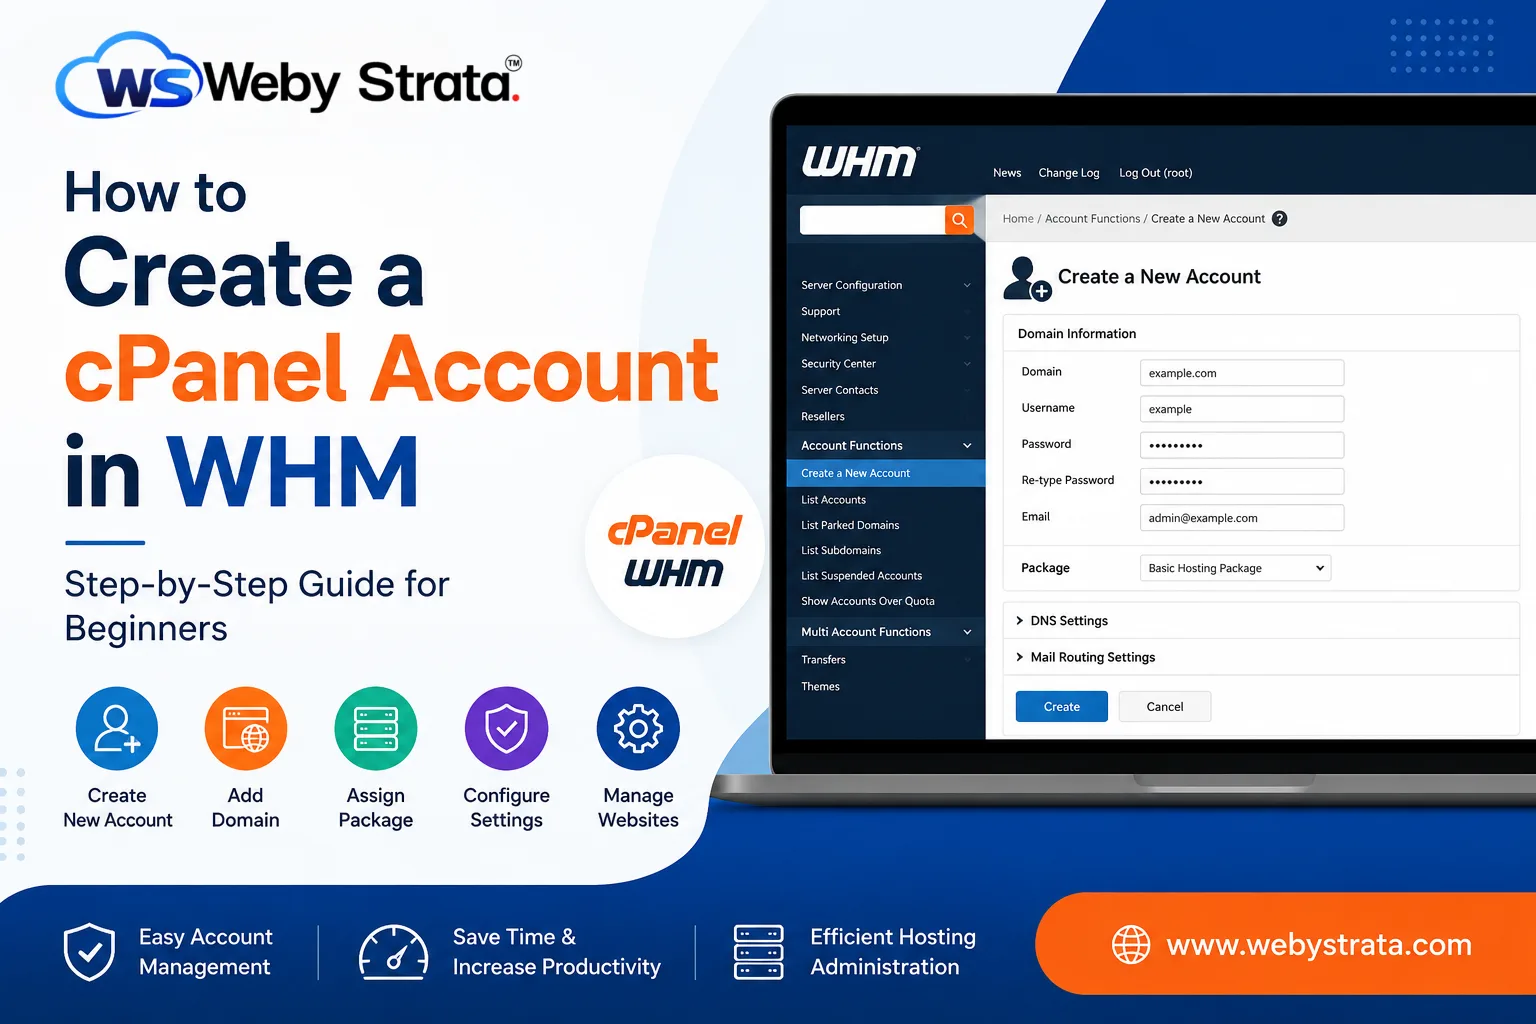
How to Create a cPanel Account in WHM
Managing multiple websites on a server becomes much easier with WHM (Web Host Manager). WHM provides administrators and hosting resellers with powerful tools to create, manage, and maintain cPanel accounts. Every website hosted on a cPanel server requires its own cPanel account, making account creation one of the most common tasks performed in WHM.
Whether you are a hosting provider, reseller, web developer, or server administrator, understanding how to create a cPanel account in WHM is essential for efficient server management. This guide will walk you through the entire process and explain the settings involved so you can confidently create and manage hosting accounts.
What Is a cPanel Account?
A cPanel account is an individual hosting account that provides users with access to website management tools. Through cPanel, website owners can:
- Manage website files
- Create email accounts
- Configure databases
- Manage DNS settings
- Install applications
- Create backups
- Monitor resource usage
WHM acts as the administrative interface that allows server owners and resellers to create and manage these cPanel accounts.
Why to Create a cPanel Accounts Through WHM?
Creating cPanel accounts through WHM offers several advantages:
- Centralized management of multiple websites
- Easy allocation of server resources
- Quick deployment of new hosting accounts
- Improved organization of domains and clients
- Enhanced security through account isolation
- Simplified hosting package management
By using WHM, administrators can efficiently manage dozens or even thousands of hosting accounts from a single dashboard.
Prerequisites Before Creating a cPanel Account
Before you begin, ensure that:
- You have access to WHM as root or reseller.
- A valid domain name is available.
- DNS settings are properly configured.
- Hosting packages have been created (recommended).
- The server has sufficient disk space and bandwidth resources.
Having these requirements in place will help ensure a smooth account creation process.
Step 1: Log in to WHM
Start by accessing your WHM dashboard.
Common WHM login URLs include:
Enter your WHM username and password to log in.
Once authenticated, you will be directed to the WHM home page where all server management tools are available.
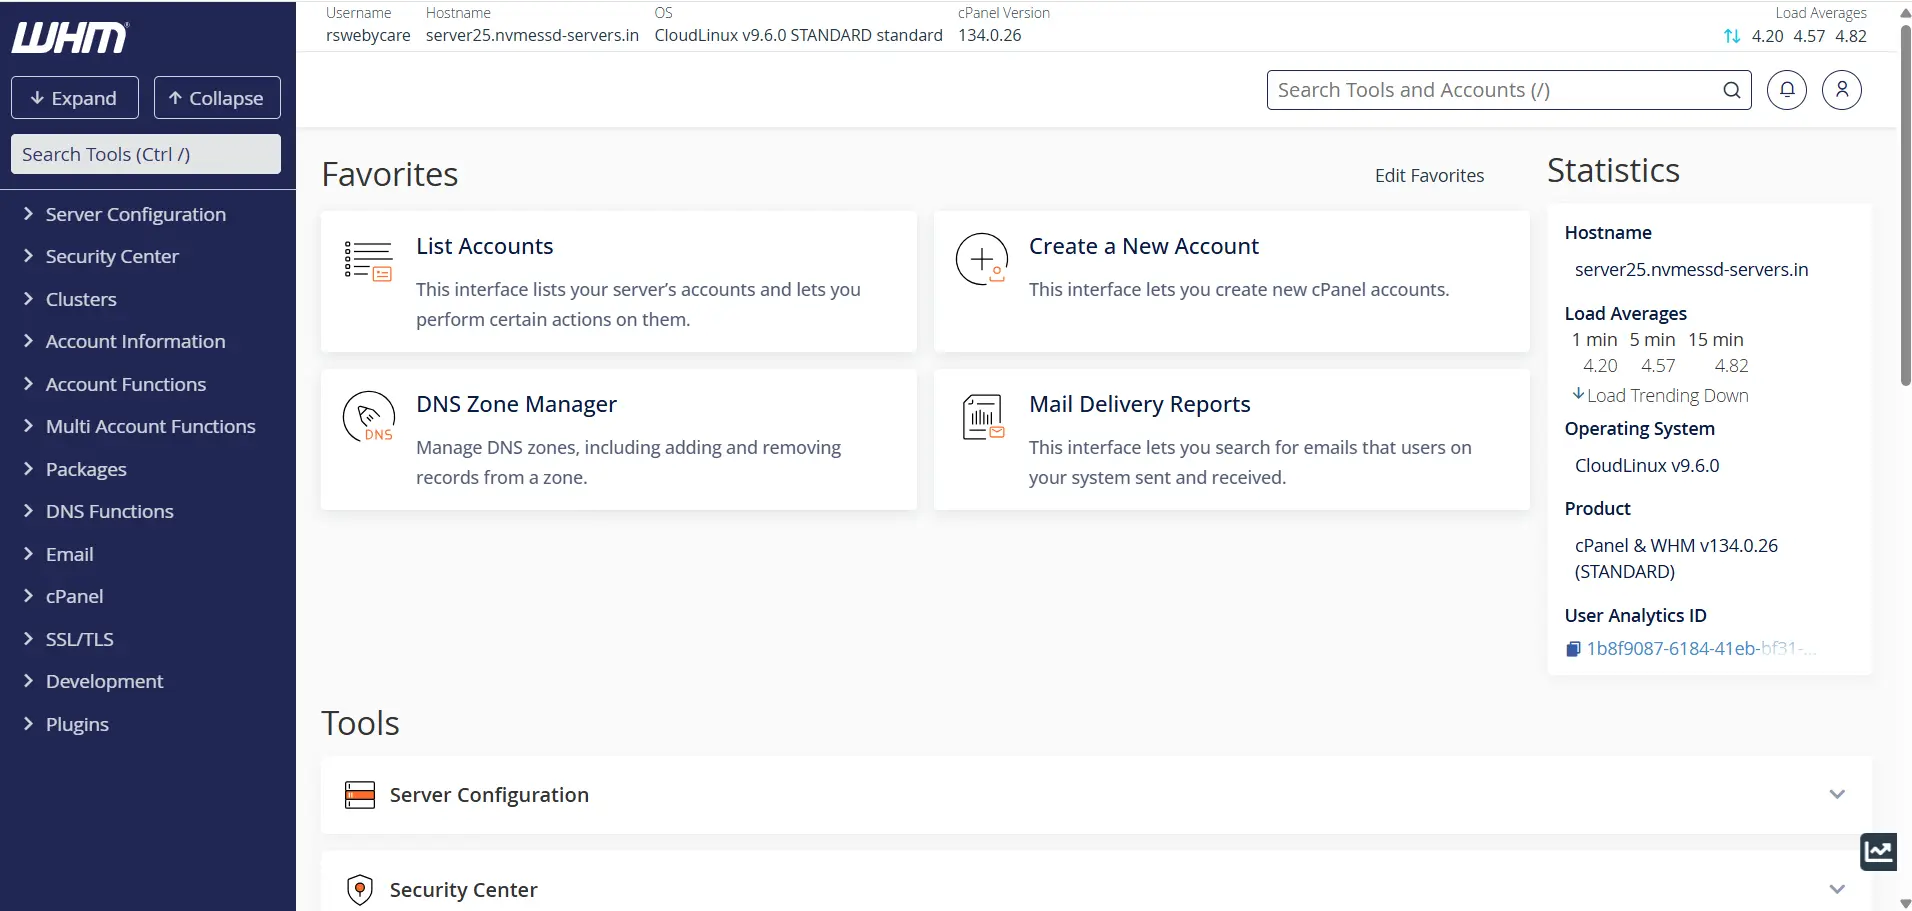
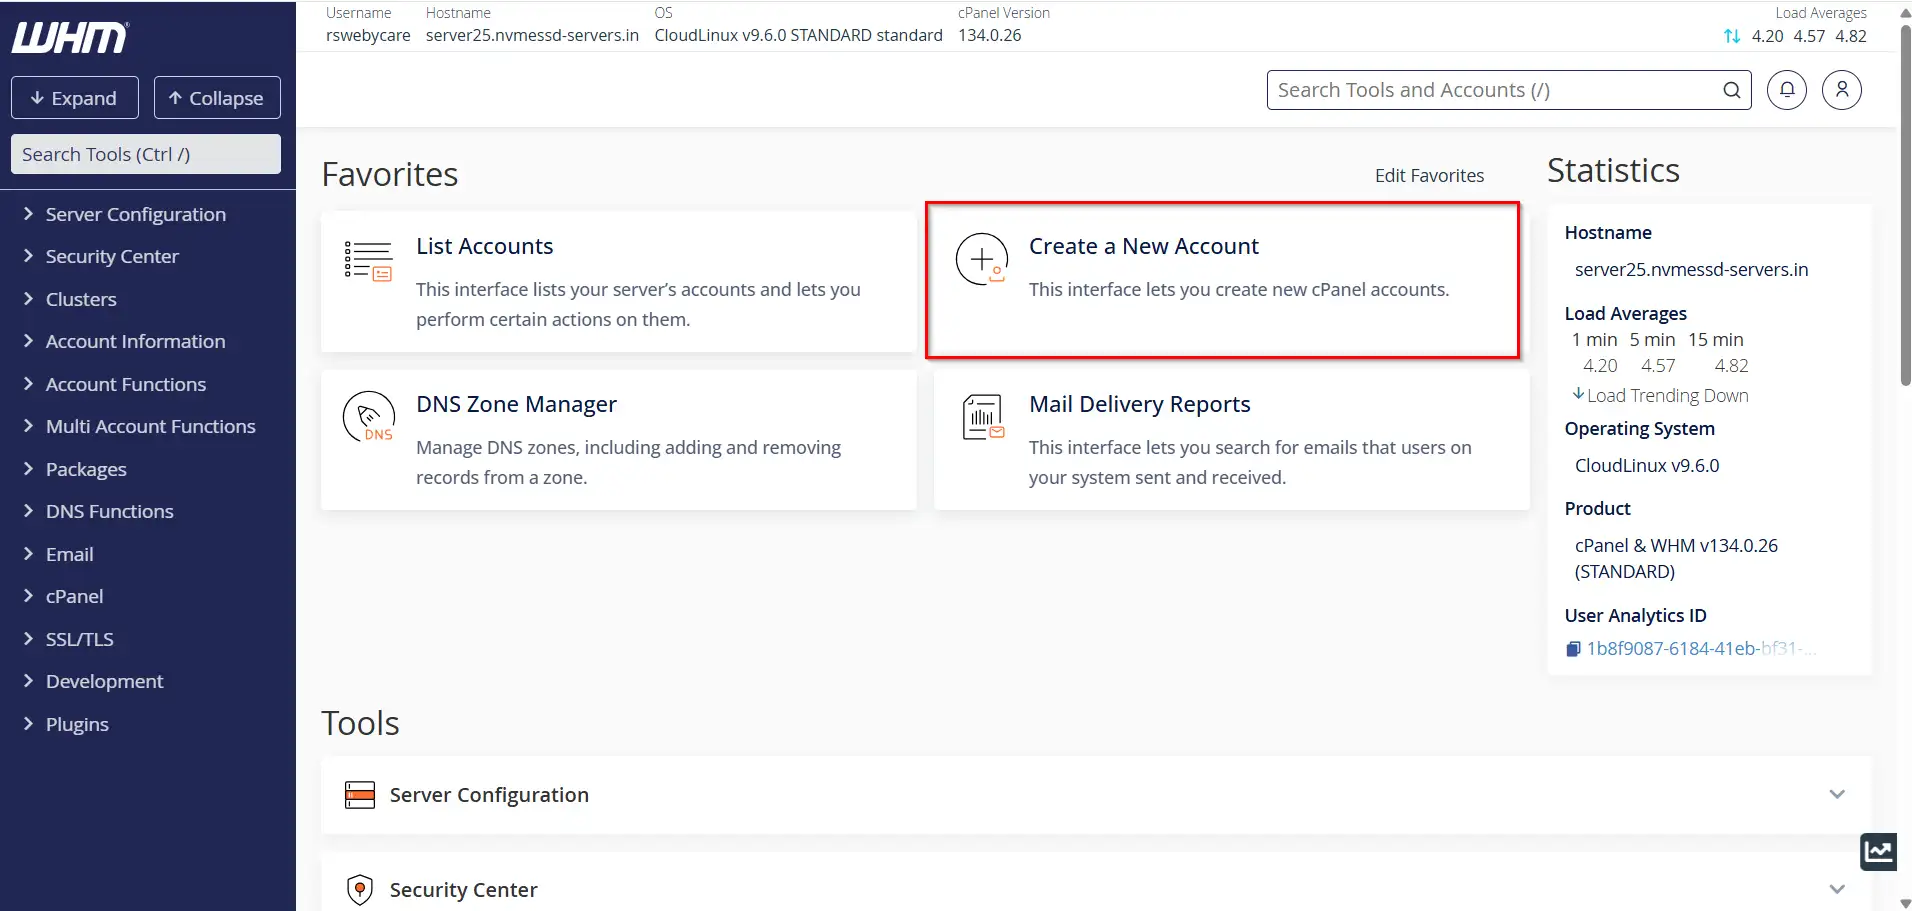
Step 2: Access the Create a New Account Feature
In the WHM dashboard:
- Locate the search box on the left sidebar.
- Type “Create a New Account.”
- Click on the option when it appears.
This opens the account creation interface where you can configure the new hosting account.
Step 3: Enter Domain Information
The Domain Information section contains the basic account details.
Domain
Enter the primary domain name for the hosting account.
Example:
example.com
Username
WHM automatically generates a username based on the domain name. You may modify it if necessary.
Example:
example
Password
Create a secure password for the account. WHM includes a password generator that can create strong passwords automatically.
Email Address
Provide a valid email address for the account owner. This email is used for notifications, password recovery, and account-related communication.

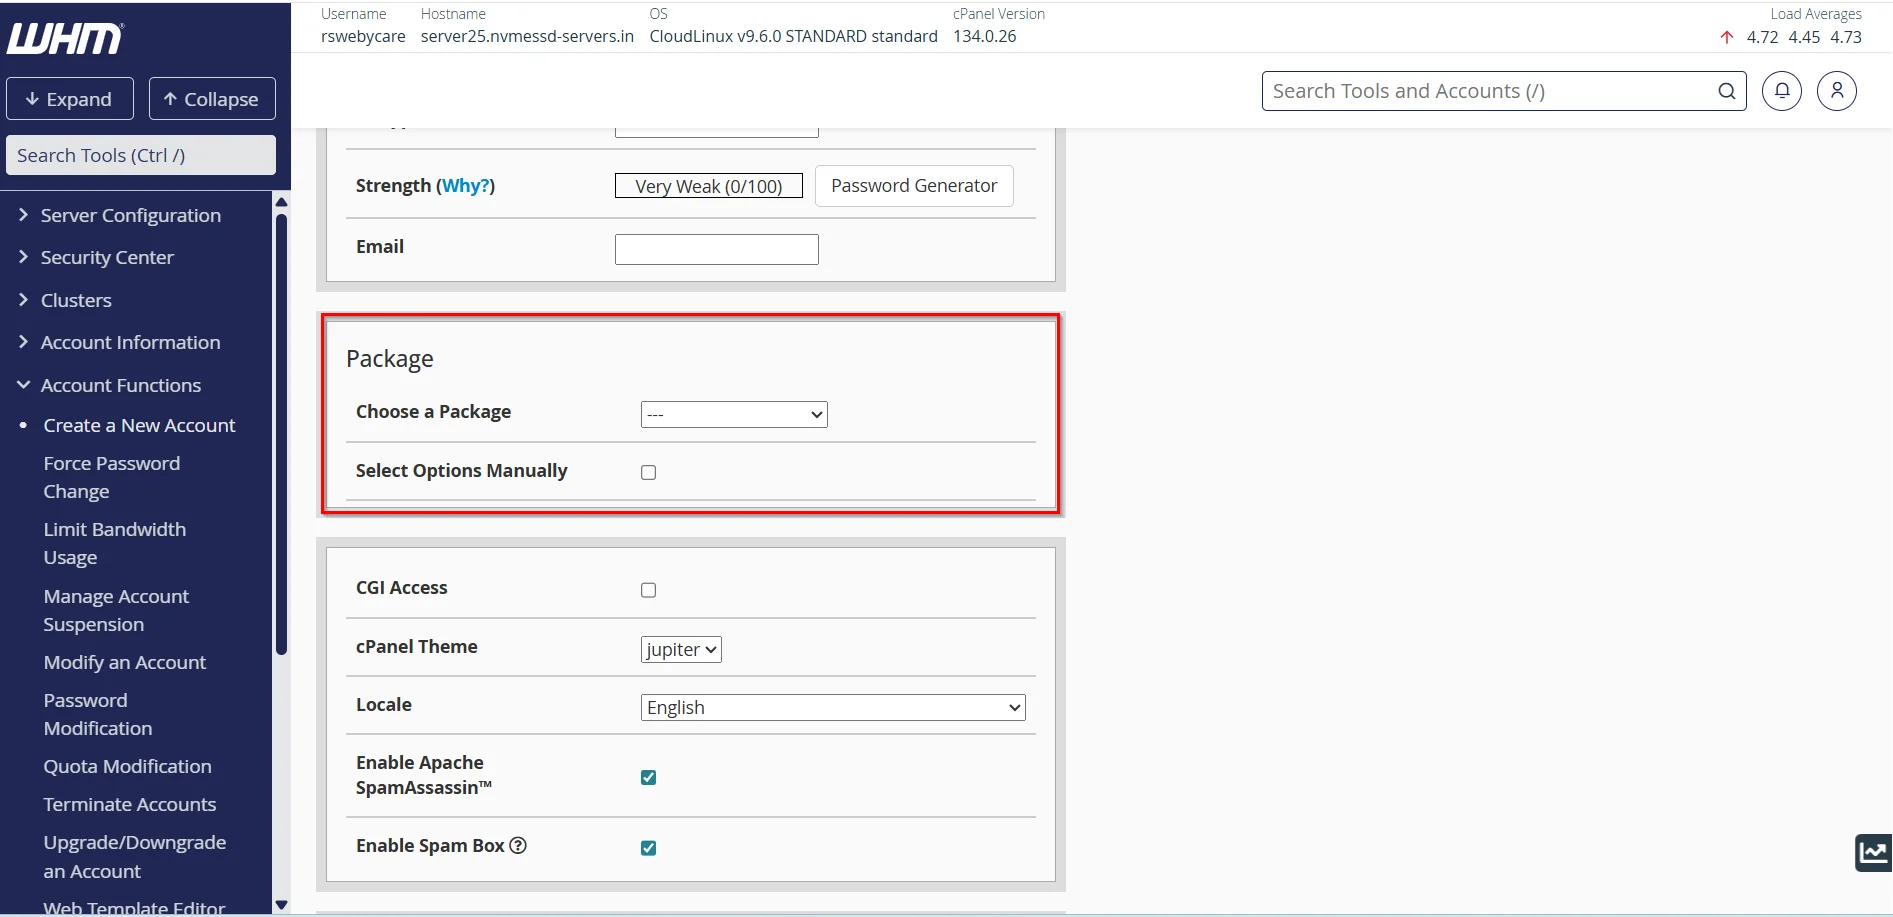
Step 4: Choose a Hosting Package
The Package section allows you to assign predefined hosting resources.
A hosting package typically includes:
- Disk space allocation
- Monthly bandwidth limits
- Maximum email accounts
- FTP account limits
- Database limits
- Addon domains
- Subdomains
Using hosting packages helps maintain consistency across accounts and reduces manual configuration.
If no package is selected, you may need to manually configure account limits later.
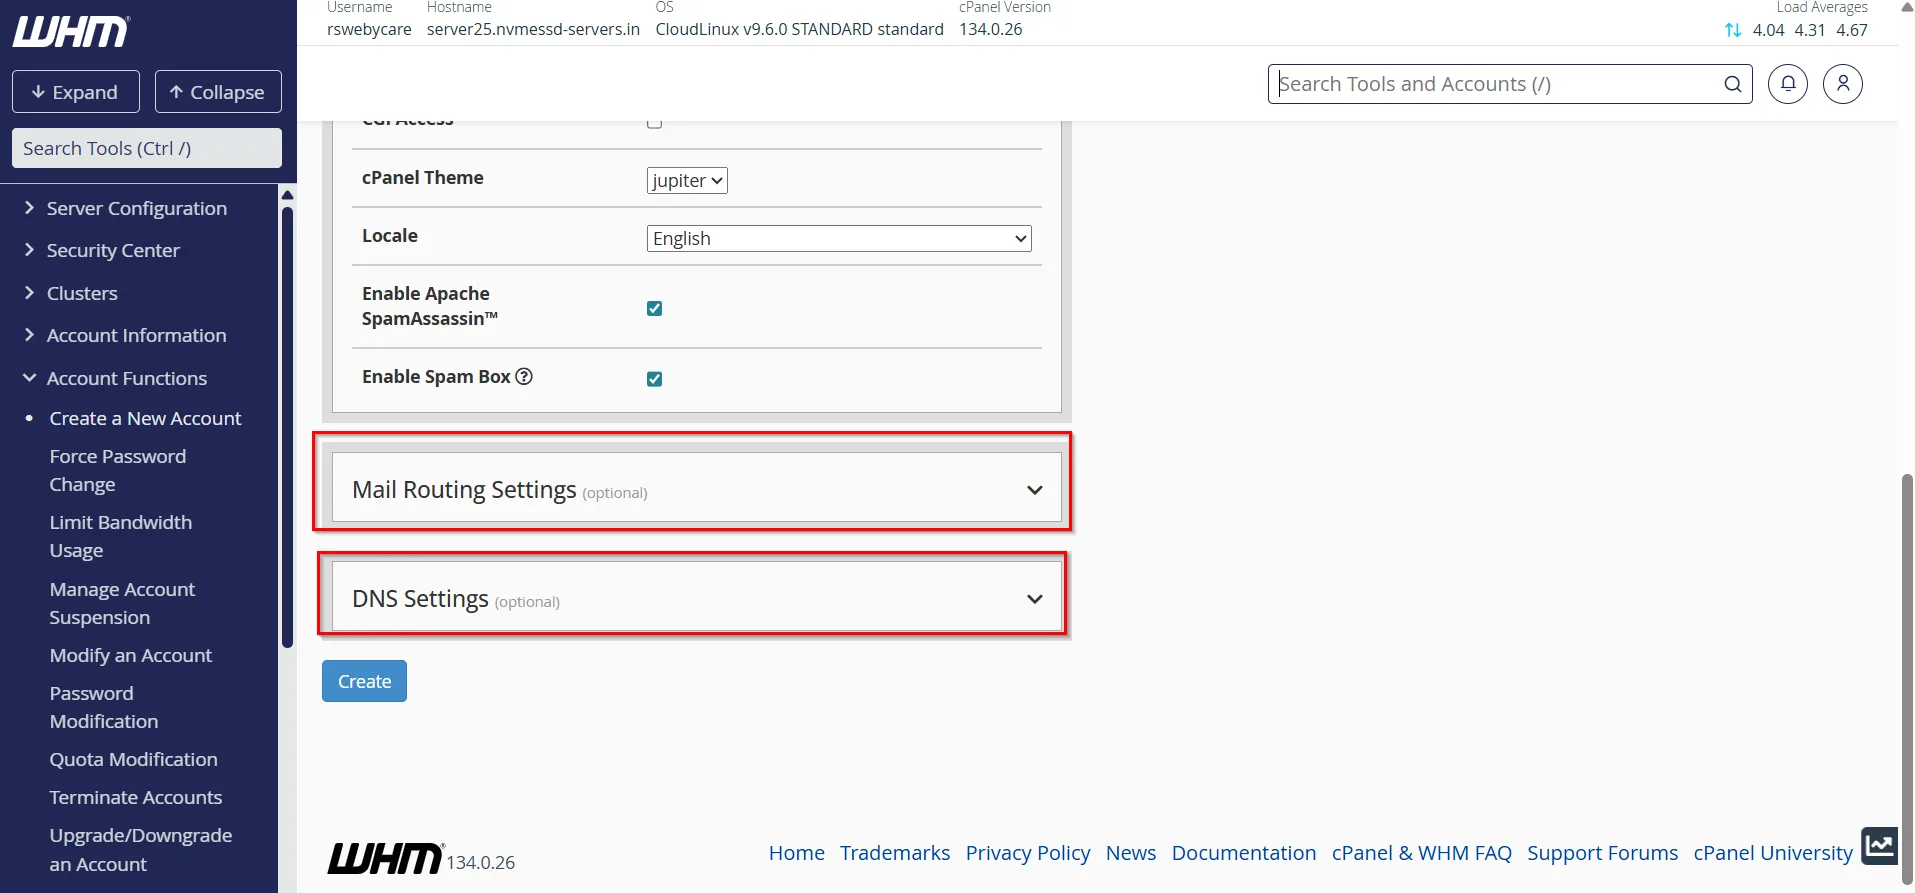
Step 5: Configure Settings (optional)
DNS Settings
WHM automatically creates DNS zones for new accounts.
In the DNS Settings section, you can choose options such as:
- Automatically create DNS zones
- Use custom nameservers
- Configure DNS clustering
For most hosting environments, the default DNS configuration is sufficient.
Proper DNS configuration ensures that the domain resolves correctly to your server.
Mail Routing
Mail Routing determines how email is handled for the domain.
Available options include:
Automatically Detect Configuration
WHM determines the appropriate configuration automatically.
Local Mail Exchanger
Choose this option if email services are hosted on the same server.
Remote Mail Exchanger
Select this option if email is handled by an external provider such as Google Workspace or Microsoft 365.
For most shared hosting accounts, Automatic Detection works perfectly.
Step 6: Review Account Information
Before proceeding, carefully verify all information entered:
- Domain name
- Username
- Password
- Contact email
- Hosting package
- DNS settings
- Mail routing configuration
Reviewing the settings helps avoid future issues and saves time.
Step 7: Create the cPanel Account
Once everything is configured:
- Scroll to the bottom of the page.
- Click the Create button.
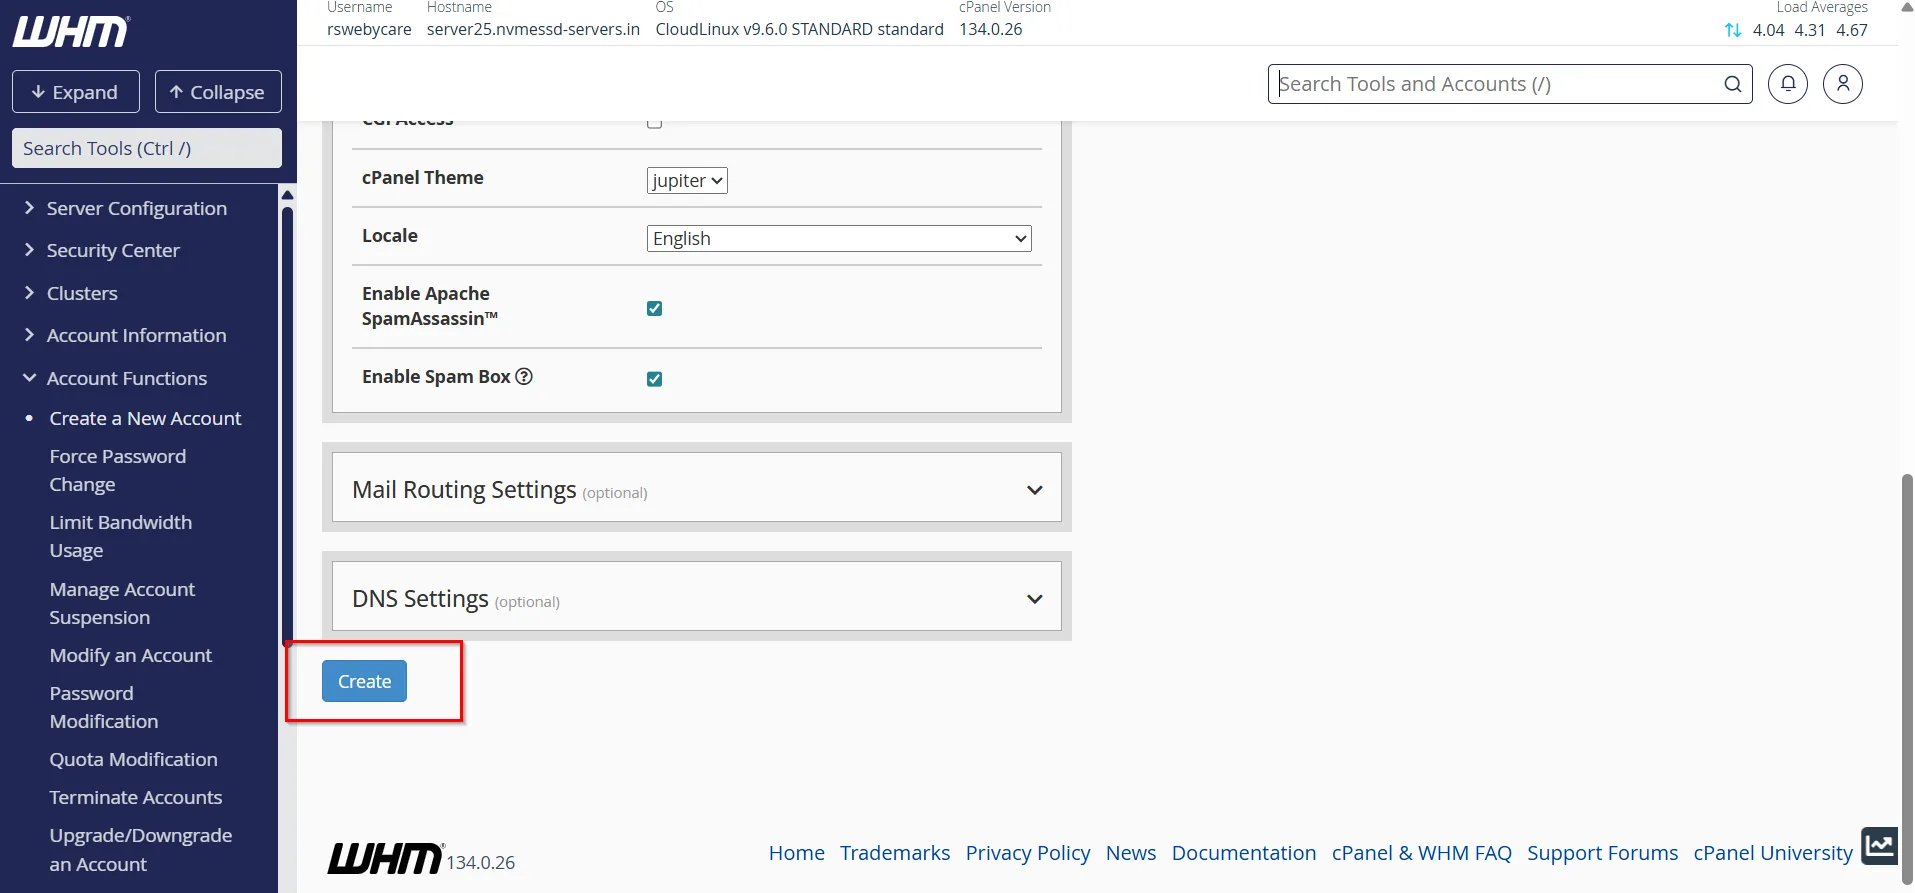
WHM will begin provisioning the account automatically.
During this process, the server creates:
- User account
- Home directory
- DNS zone
- Apache virtual host configuration
- Email configuration
- FTP access
- cPanel environment
The process usually takes only a few seconds.
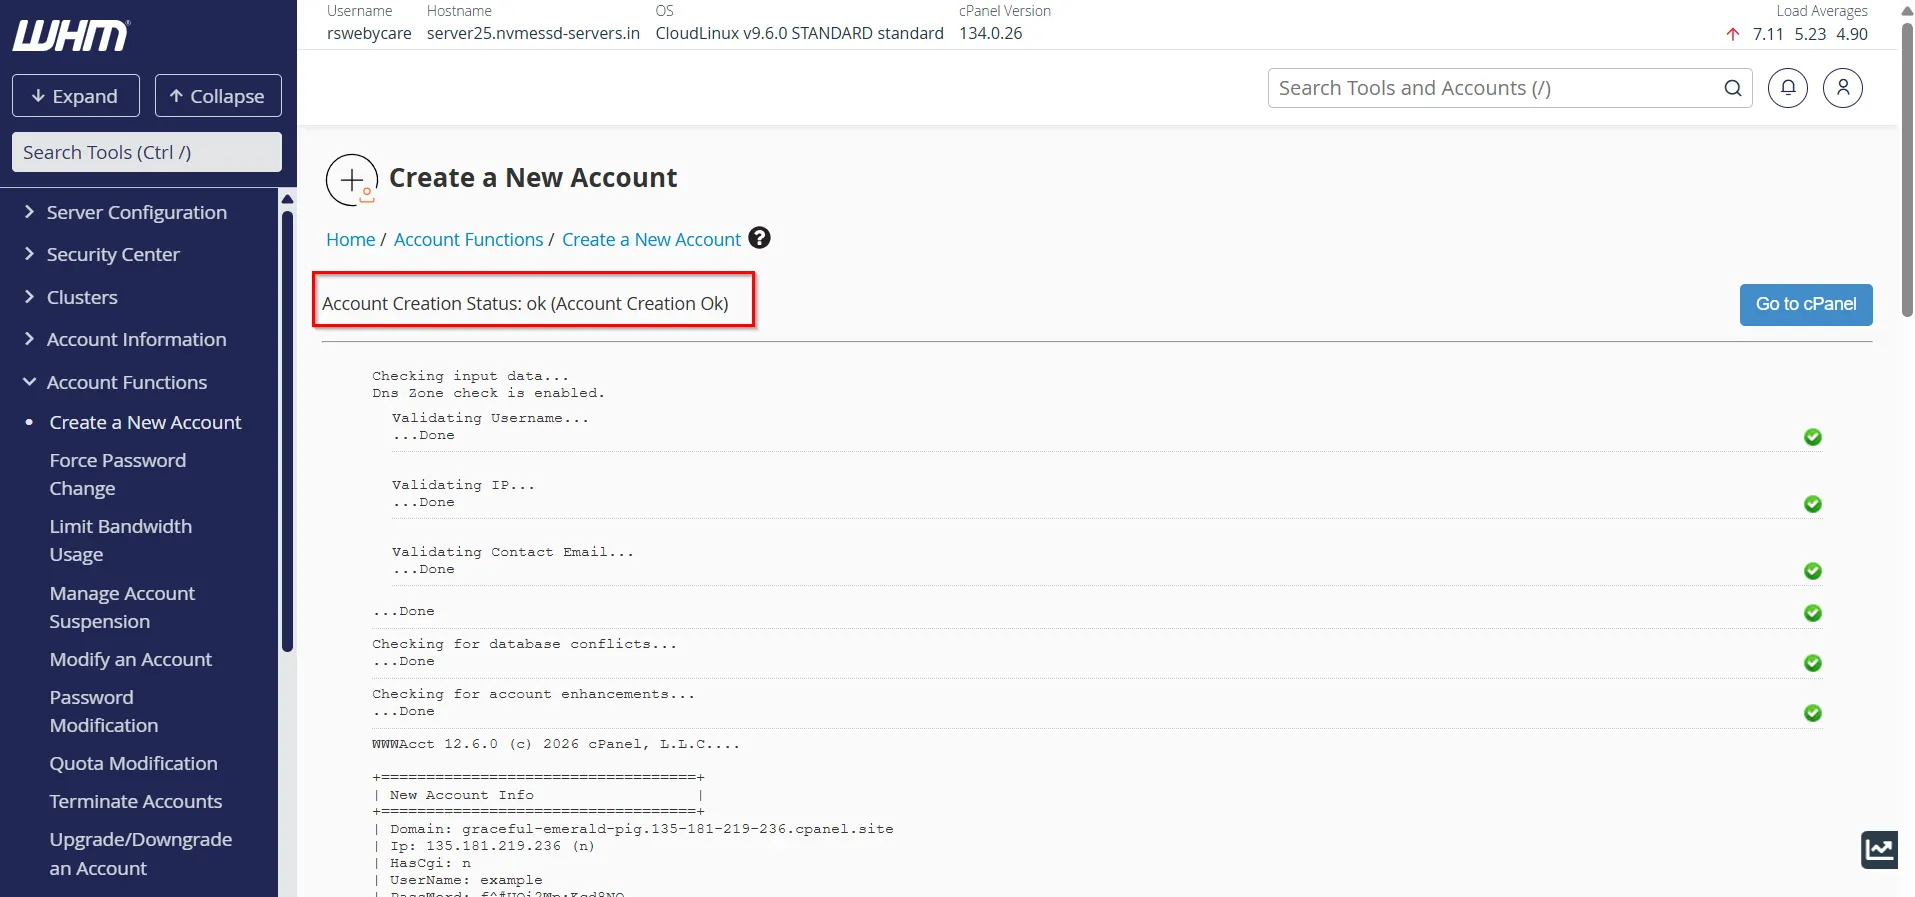
Step 8: Verify Successful Account Creation
After completion, WHM displays a success message.
You will see information such as:
- Domain name
- Username
- Server hostname
- cPanel login URL
- IP address assignment
At this stage, the hosting account is ready for use.
Accessing the New cPanel Account
Users can log in to cPanel using:
or
They can then begin managing their website, email accounts, databases, and hosting settings.
Managing Existing cPanel Accounts
After creating an account, WHM provides several management tools.
You can:
- Change account passwords
- Upgrade hosting packages
- Modify account limits
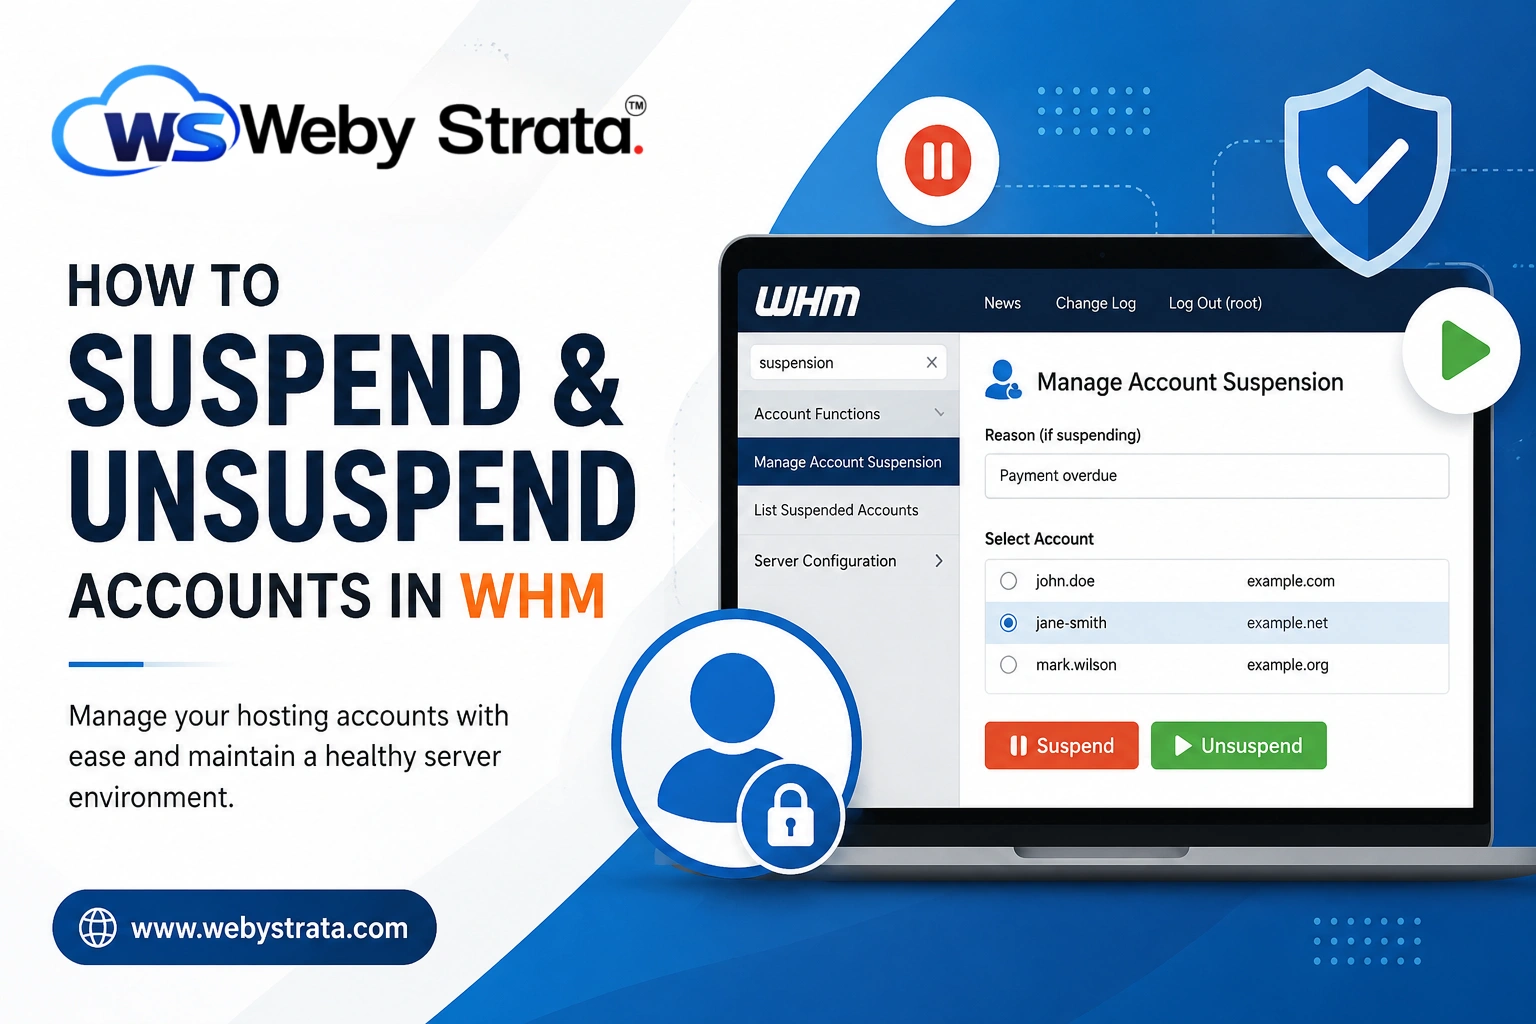
- Suspend or unsuspend accounts
- Access cPanel directly
- View bandwidth usage
- Manage backups
- Terminate accounts when necessary
These options are available under the Account Functions section in WHM.
Common Issues When Creating cPanel Accounts
Domain Already Exists
If WHM reports that the domain already exists:
- Check existing accounts.
- Remove duplicate entries.
- Verify DNS records.
Username Conflict
Usernames must be unique across the server. Choose an alternative username if one is already in use.
Insufficient Server Resources
Ensure adequate disk space, memory, and bandwidth are available before creating new accounts.
Package Not Found
Create hosting packages under WHM’s Package Functions before assigning them to new accounts.
Best Practices for Creating cPanel Accounts
To maintain a secure and organized hosting environment:
- Use strong passwords for every account.
- Assign hosting packages instead of manual resource limits.
- Enable automated backups.
- Keep WHM and cPanel updated.
- Monitor server resource utilization regularly.
- Configure proper DNS records.
- Use secure email addresses for account notifications.
Following these practices improves security, performance, and account management efficiency.
Conclusion
Creating a cPanel account in WHM is a straightforward process that allows administrators and resellers to quickly provision hosting accounts for websites and clients. By entering domain information, assigning hosting packages, configuring DNS settings, and reviewing account details, you can have a fully functional hosting account ready within minutes.
WHM’s account management features make it easy to scale your hosting environment while maintaining organization, security, and resource control. Whether you manage a few websites or hundreds of client accounts, mastering the process of creating cPanel accounts in WHM is a valuable skill for efficient server administration.
Related Articles