Latest Updates
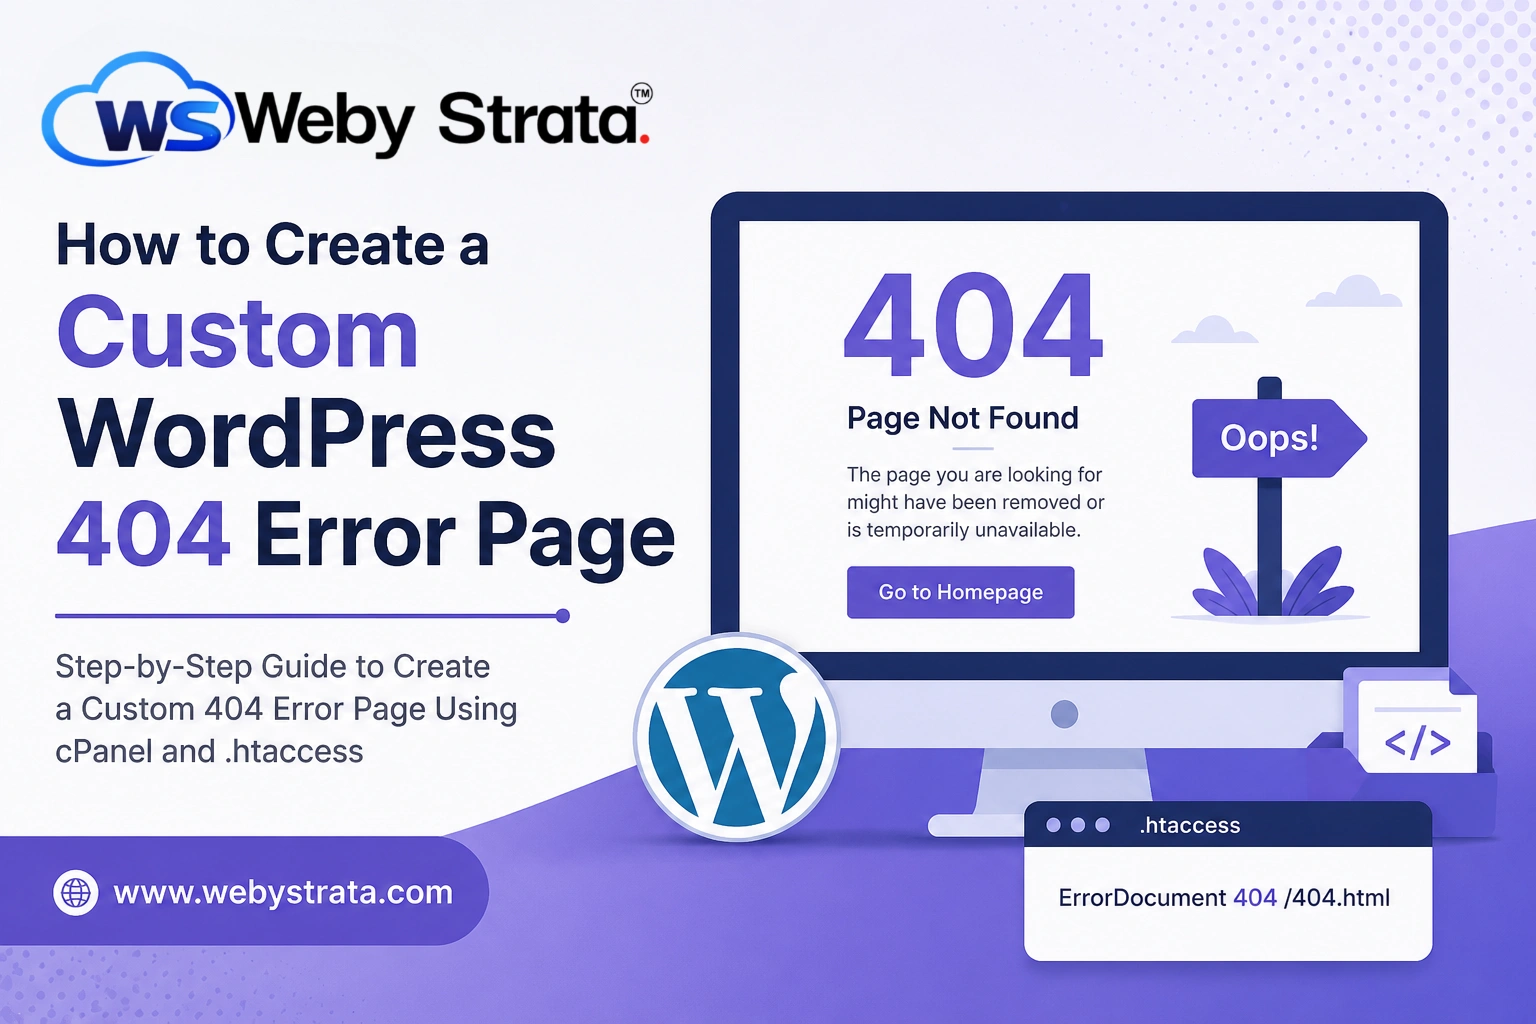
How to Create a Custom WordPress 404 Error Page
How to Create a Custom WordPress 404 Error Page Every website visitor expects to find the information they are looking for quickly and easily. However, there are times when a page may no longer…
How to Create a Custom WordPress 404 Error Page
Every website visitor expects to find the information they are looking for quickly and easily. However, there are times when a page may no longer exist, a URL is entered incorrectly, or content has been moved without updating links. In such cases, visitors encounter a 404 Error Page.
By default, many web servers display a plain and unhelpful “404 Page Not Found” message. While functional, this generic page often creates a poor user experience and may cause visitors to leave your website. Creating a custom WordPress 404 error page allows you to provide helpful information, maintain your branding, and guide users toward other useful content on your site.
In this guide, you’ll learn what a 404 error is, why a custom error page is important, and how to create one using cPanel and the .htaccess file.
What Is a 404 Error?
A 404 error is an HTTP status code that indicates the server could not find the page requested by the visitor. The website itself is working correctly, but the specific page or resource being requested does not exist.
Common reasons for a 404 error include:
- The page has been deleted.
- The URL was typed incorrectly.
- Links point to outdated content.
- Website pages have been moved or renamed.
- Broken internal or external links.
Although 404 errors are common, displaying a custom page instead of a generic error message can significantly improve the visitor experience.
Steps to Create Custom WordPress 404 Error Page
This method displays a basic custom message whenever a visitor lands on a missing page.
Step 1: Login to cPanel from WebyStrata Client Area
First, visit the WebyStrata website and log in to your client area account using your registered email address and password.
official Website www.webystrata.com
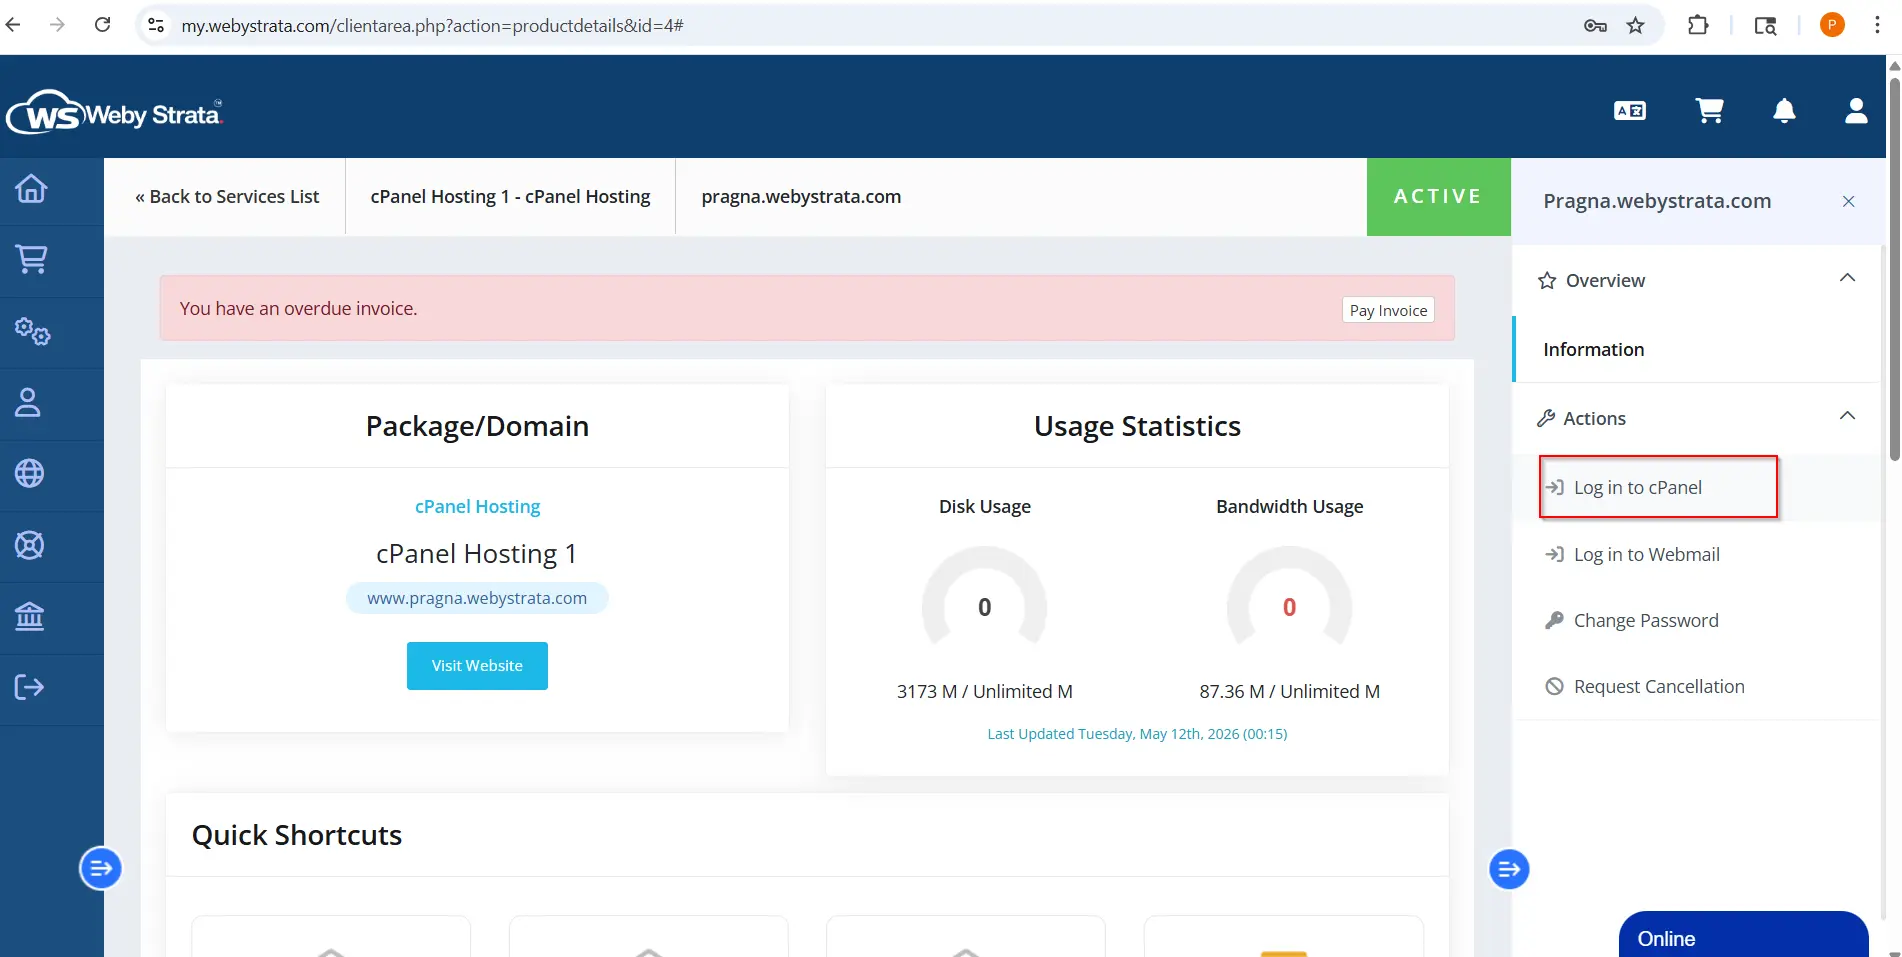
After logging in:
- Go to Services
- Click on My Services
- Select your active hosting service
- Click on Login to cPanel
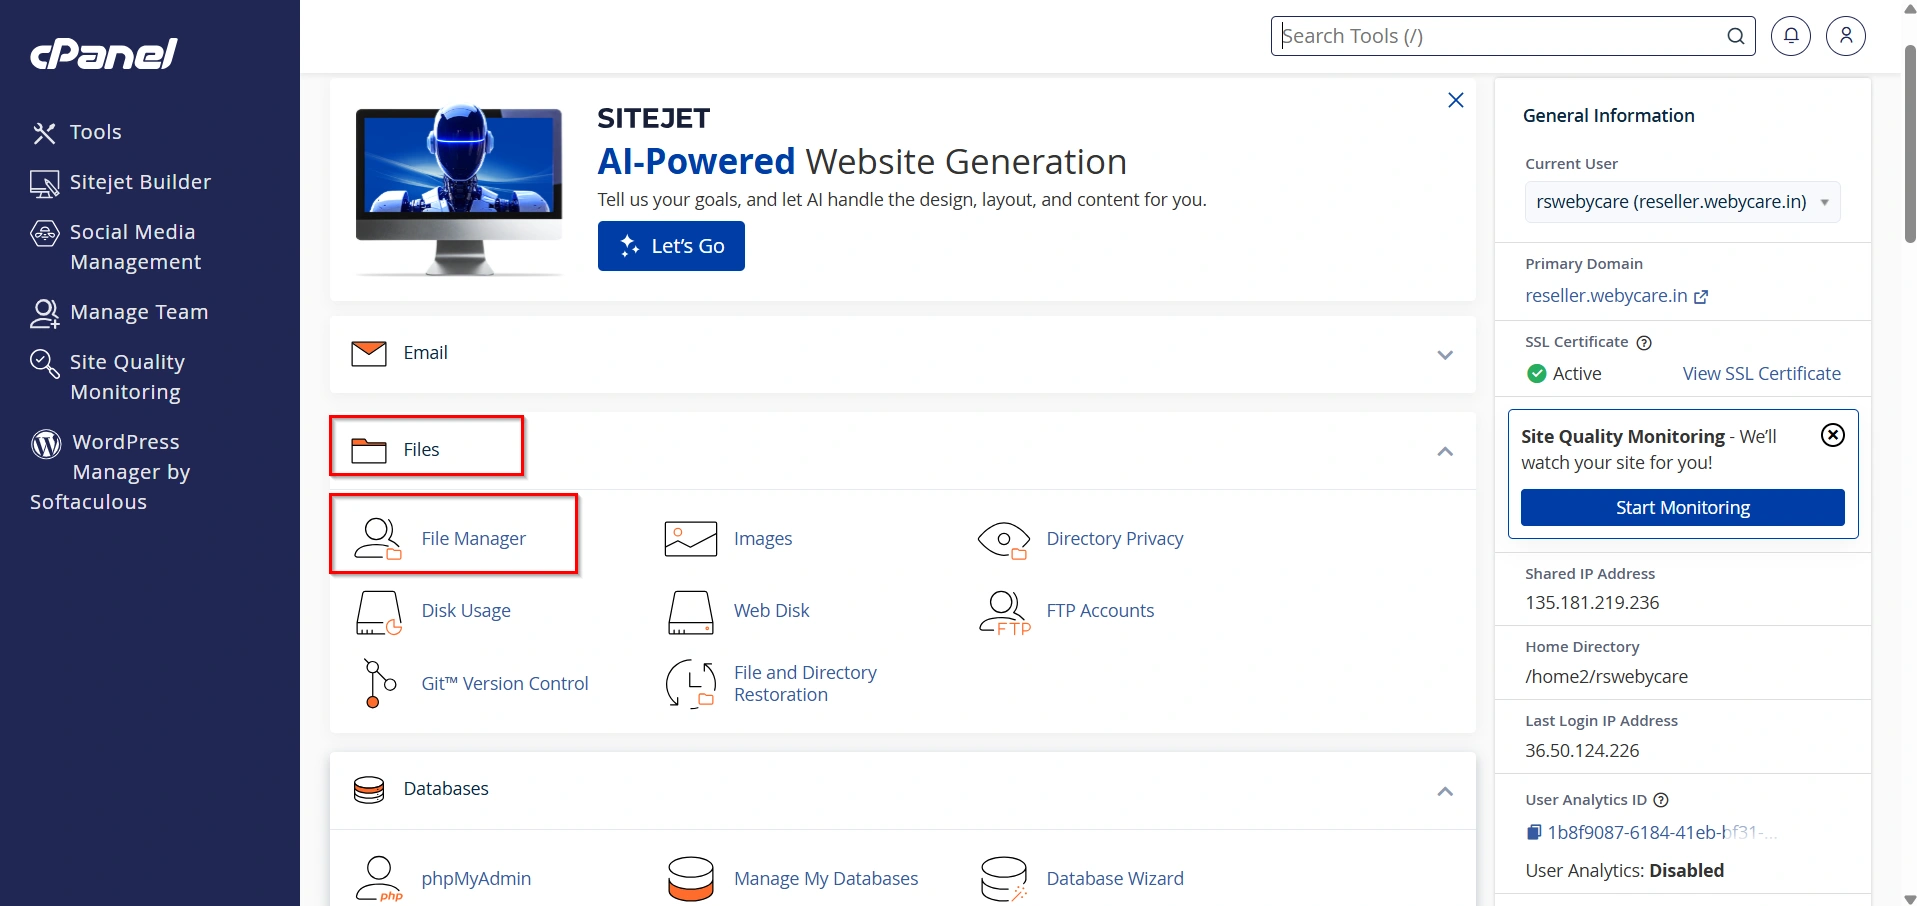
Step 2: Open File Manager
Under the Files section, click File Manager.
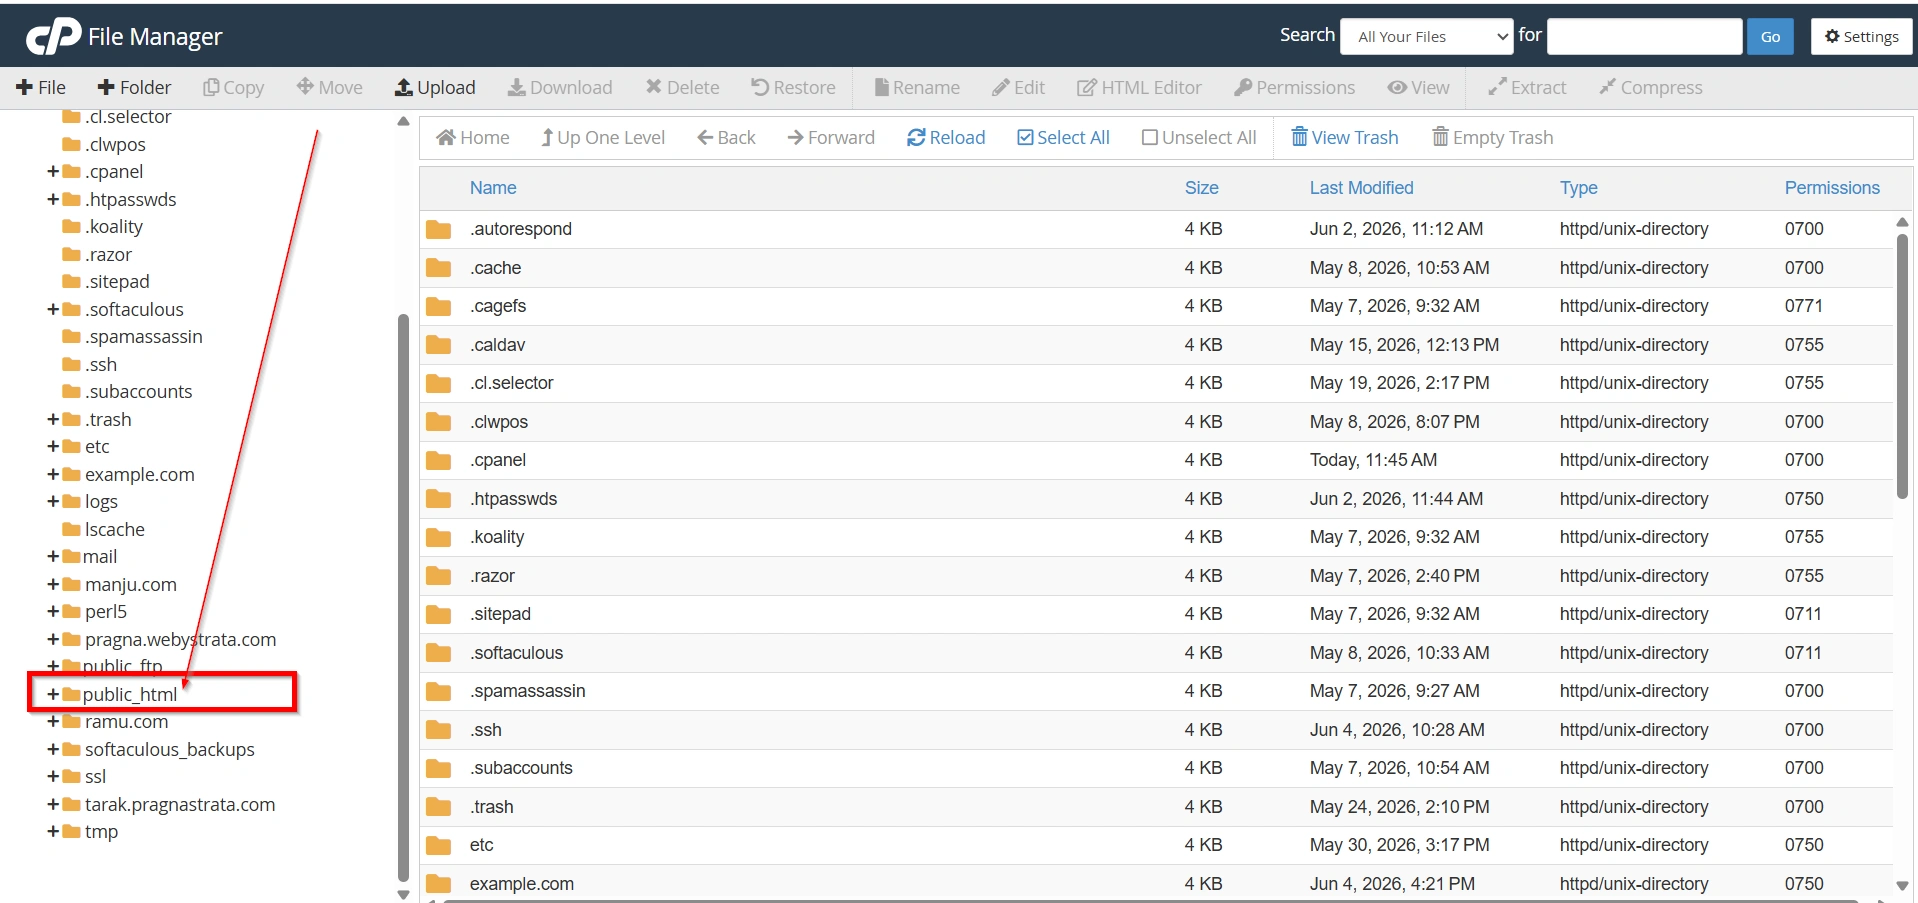
Step 3: Navigate to public_html
Open the public_html directory, which contains your website files.
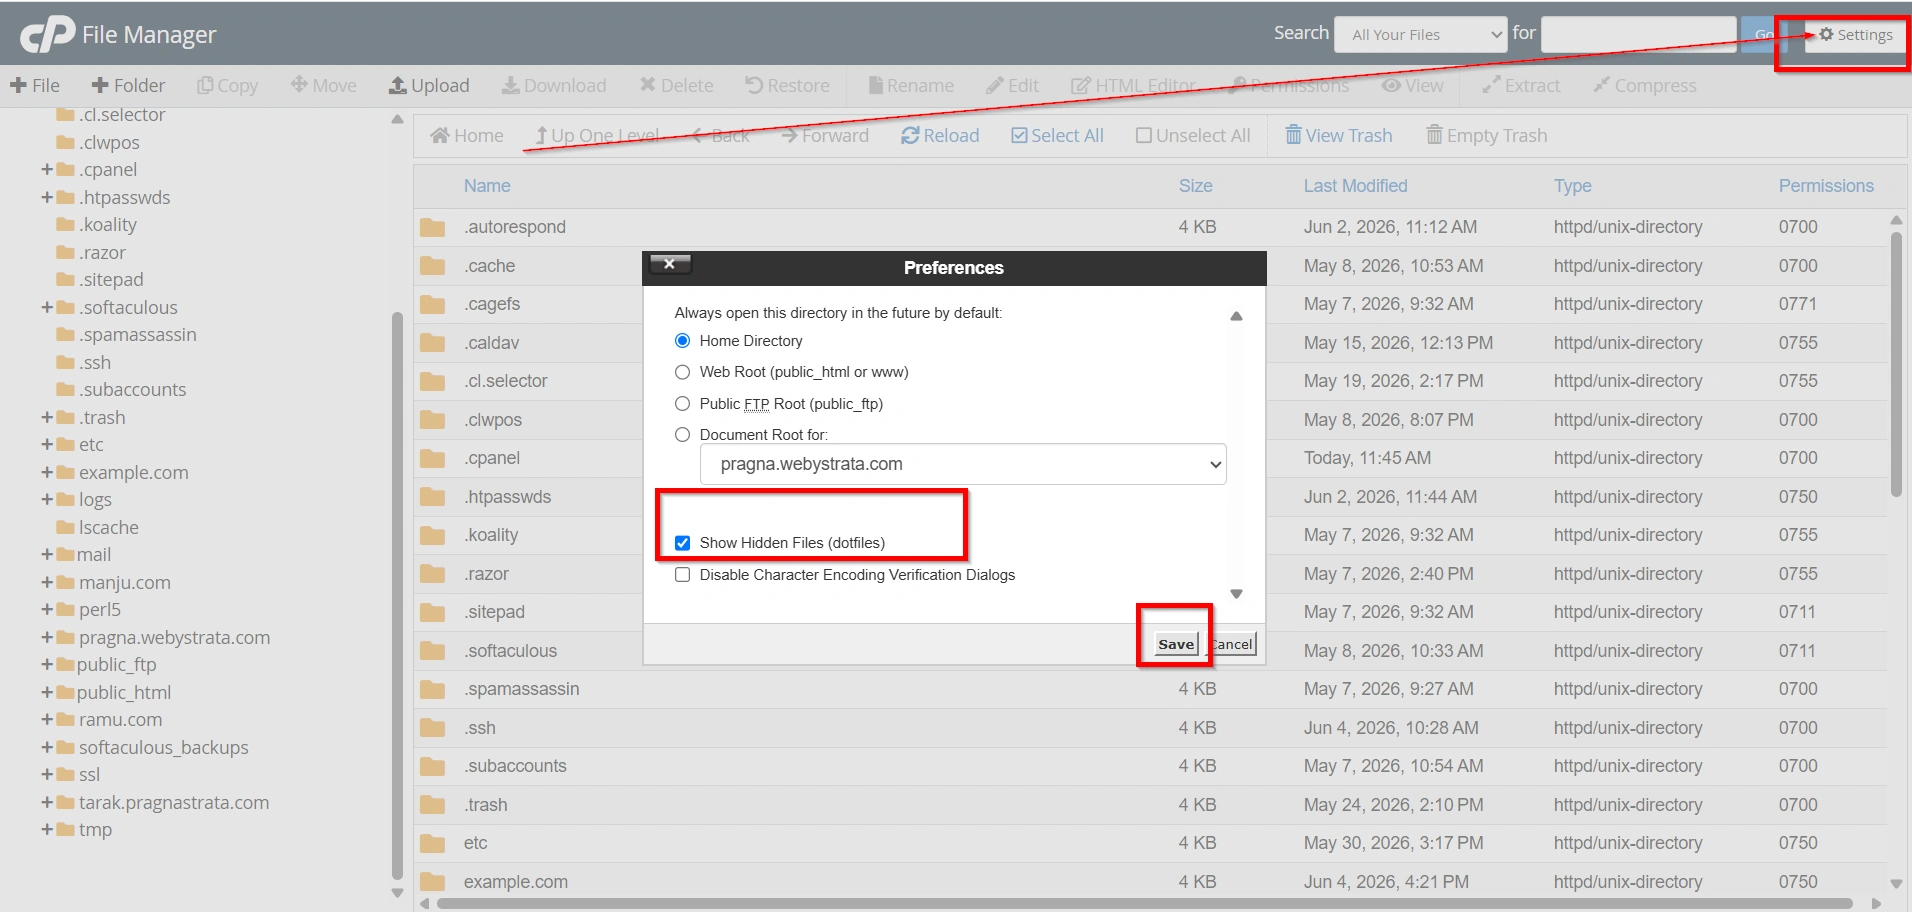
Step 4: Enable Hidden Files
Since the .htaccess file is hidden by default:
- Click the Settings button in the upper-right corner.
- Check Show Hidden Files (dotfiles).
- Click Save.
Step 5: Edit the .htaccess File
Locate the .htaccess file.
- Right-click the file.
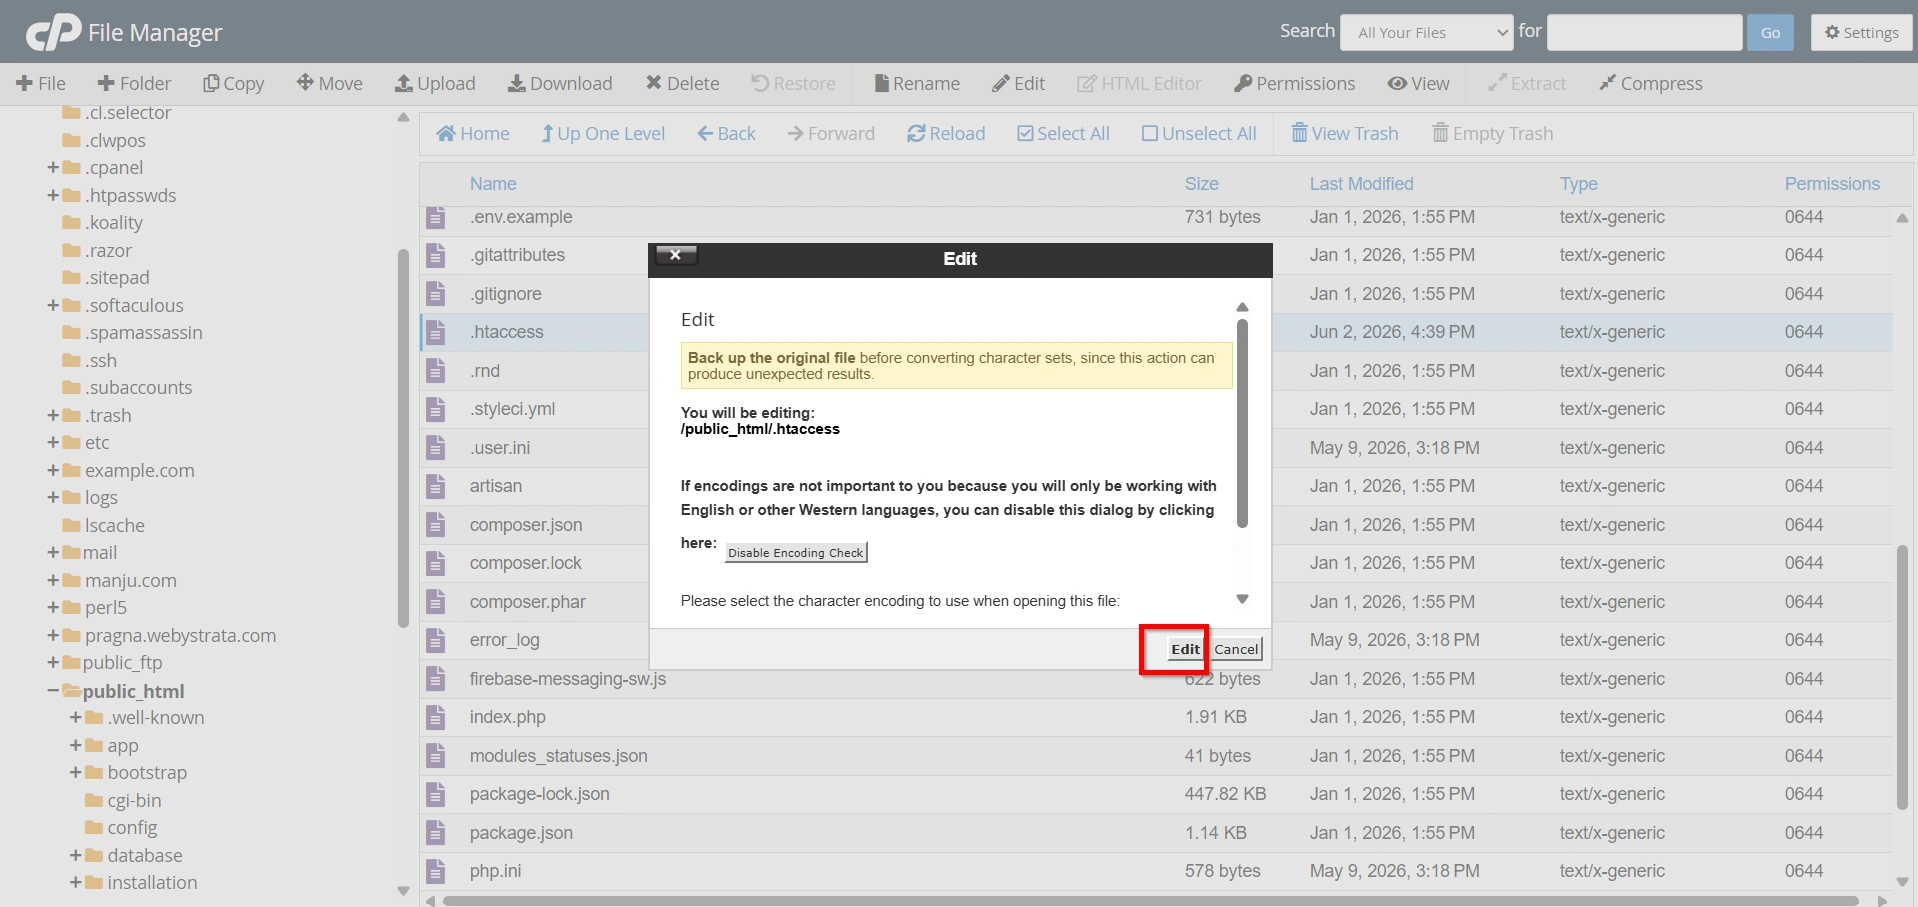
- Select Edit.
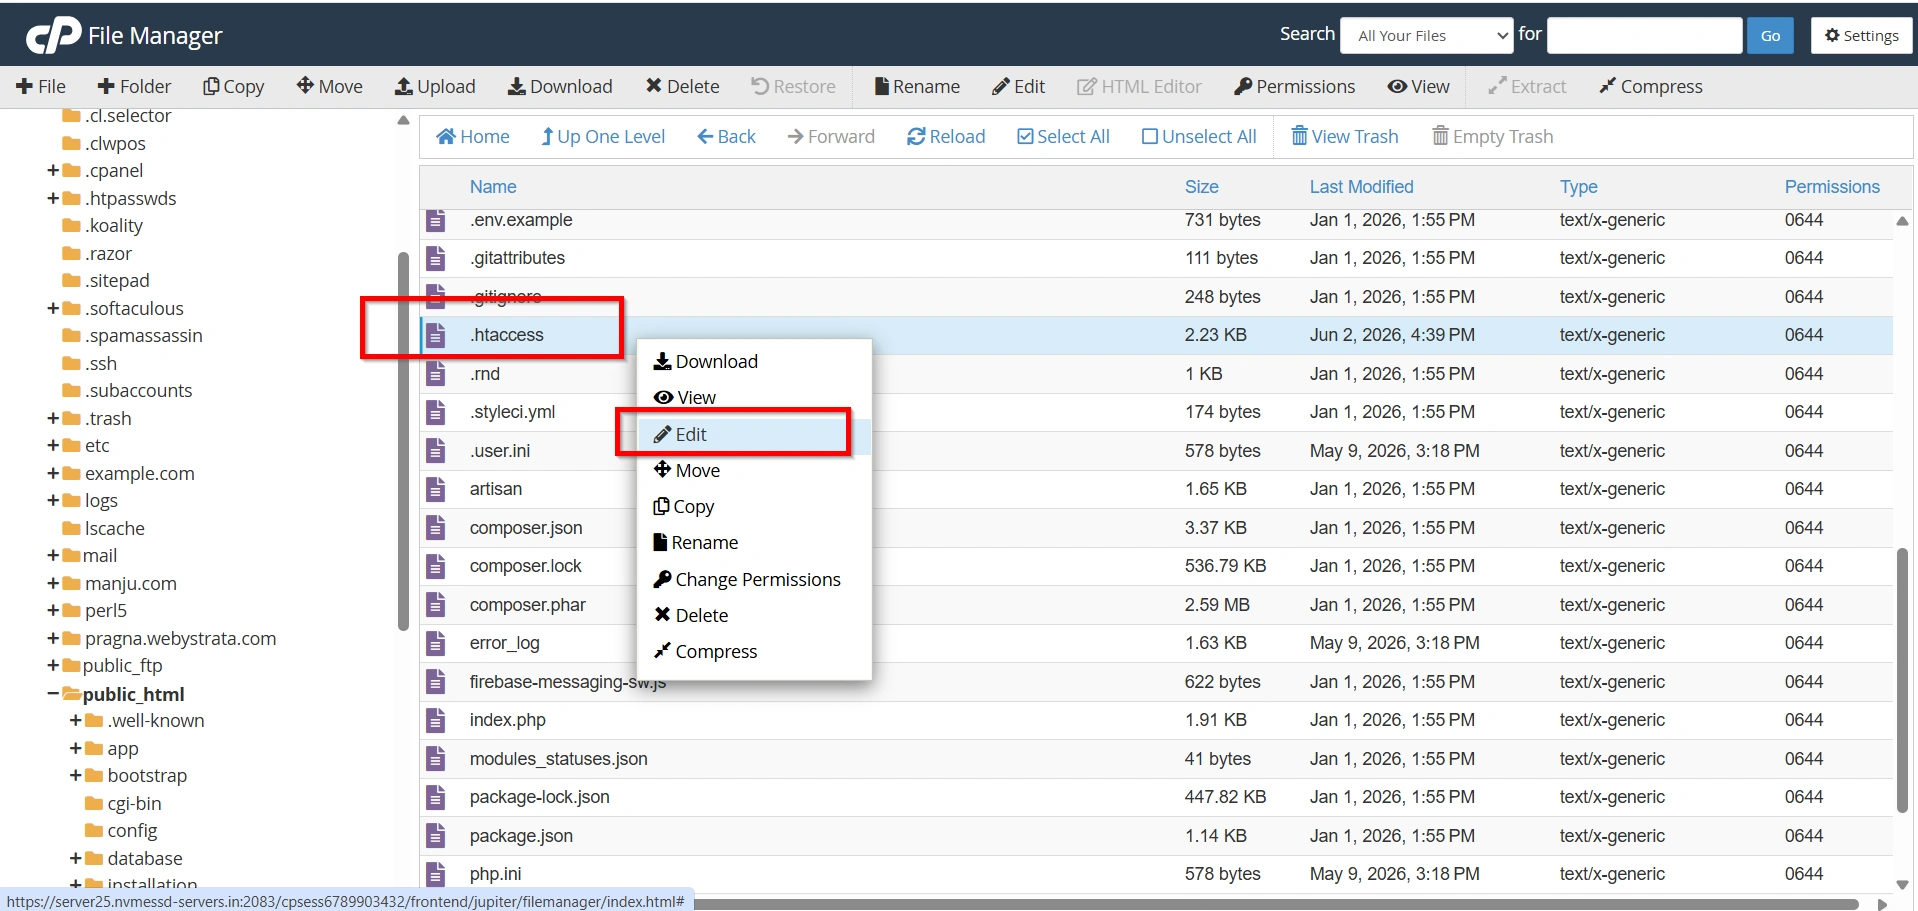
- Again Click Edit.
If you do not have a .htaccess file, create one by clicking + File and naming it .htaccess.
Step 6: Add the ErrorDocument Directive
Add the following line:
ErrorDocument 404 "Page not found"
You can customize the message to suit your website.
For example:
ErrorDocument 404 "Sorry, the page you are looking for cannot be found."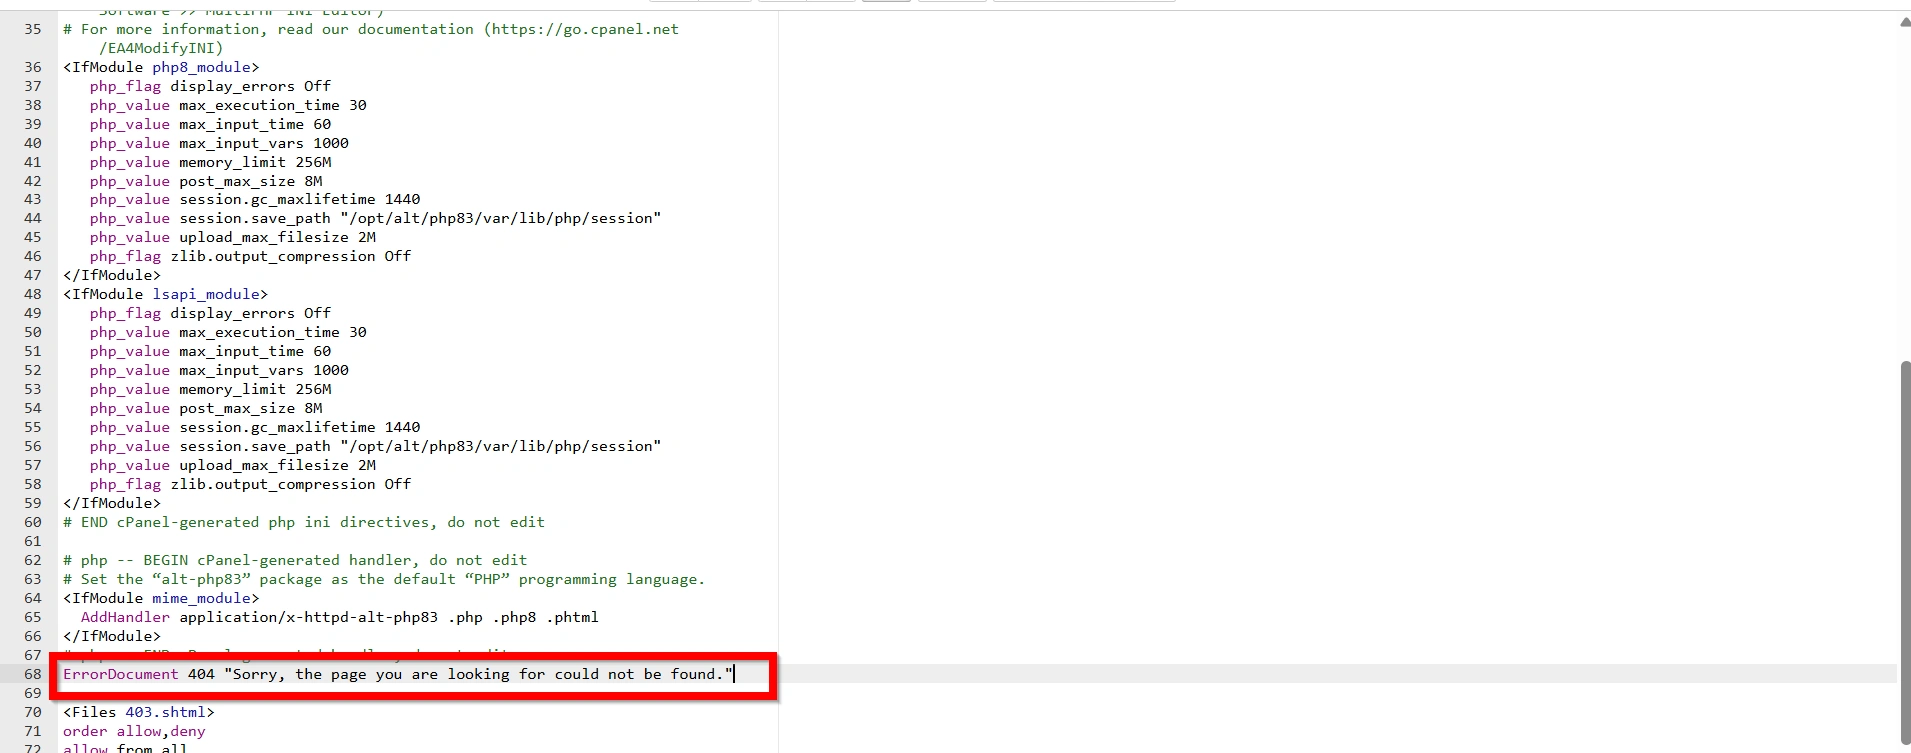
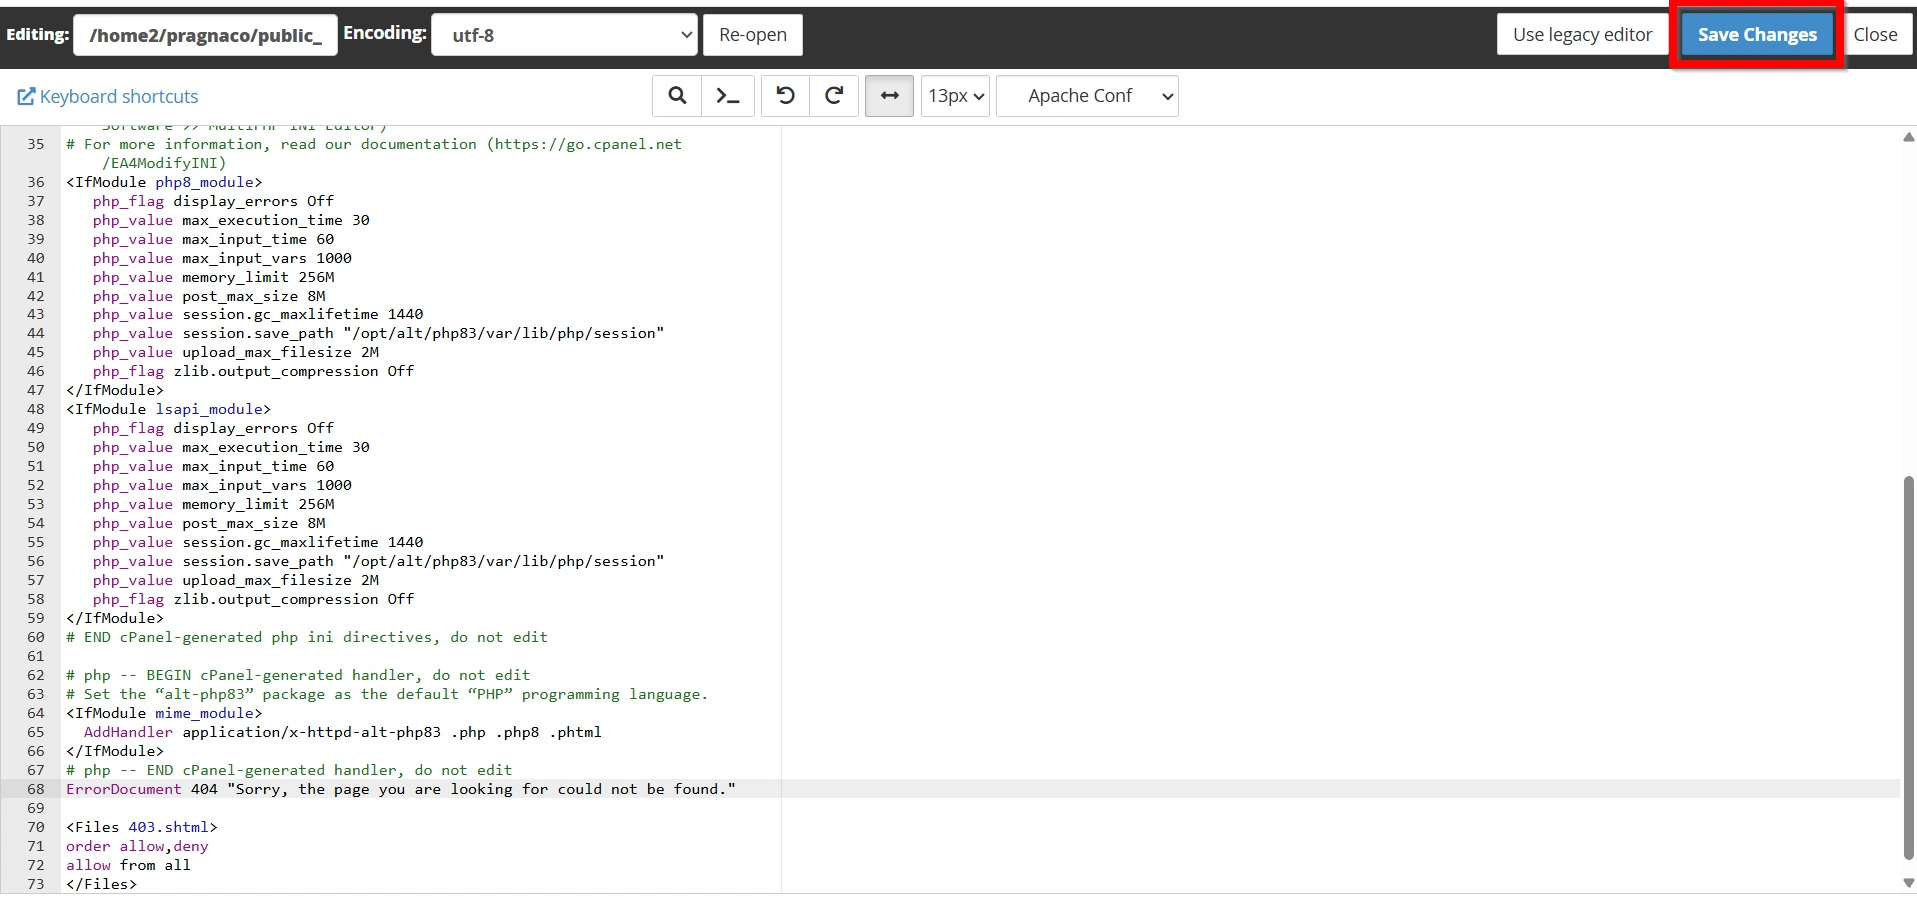
Step 7: Save Changes
Click Save Changes.
Your website will now display the custom message whenever a 404 error occurs.
Testing Your Custom 404 Page
After creating your custom page, verify that it works properly.
Test Procedure
- Open your website in a browser.
- Enter a URL that does not exist.
For example:
https://yourdomain.com/nonexistent-page
- Press Enter.
If configured correctly, your custom 404 page should appear instead of the default server error.
Why Create a Custom 404 Error Page?
A custom 404 page does much more than simply tell visitors that a page is missing. It helps maintain engagement and encourages users to continue exploring your website.
Benefits of a Custom 404 Page
- Improved User Experience
- Reduced Bounce Rate
- Better Branding
- Easier Navigation
- Increased Engagement
Conclusion
Creating a custom WordPress 404 error page is a simple yet effective way to improve your website’s user experience. Rather than displaying a generic error message, a custom page can guide visitors back to useful content, reinforce your brand identity, and reduce the chances of users leaving your site.
Whether you choose a simple text-based message or a fully customized HTML page, implementing a custom 404 page is considered a best practice for every WordPress website. By following the steps outlined above, you can create a professional error-handling page that keeps visitors engaged and helps them find the information they need.
Related Articles