Latest Updates
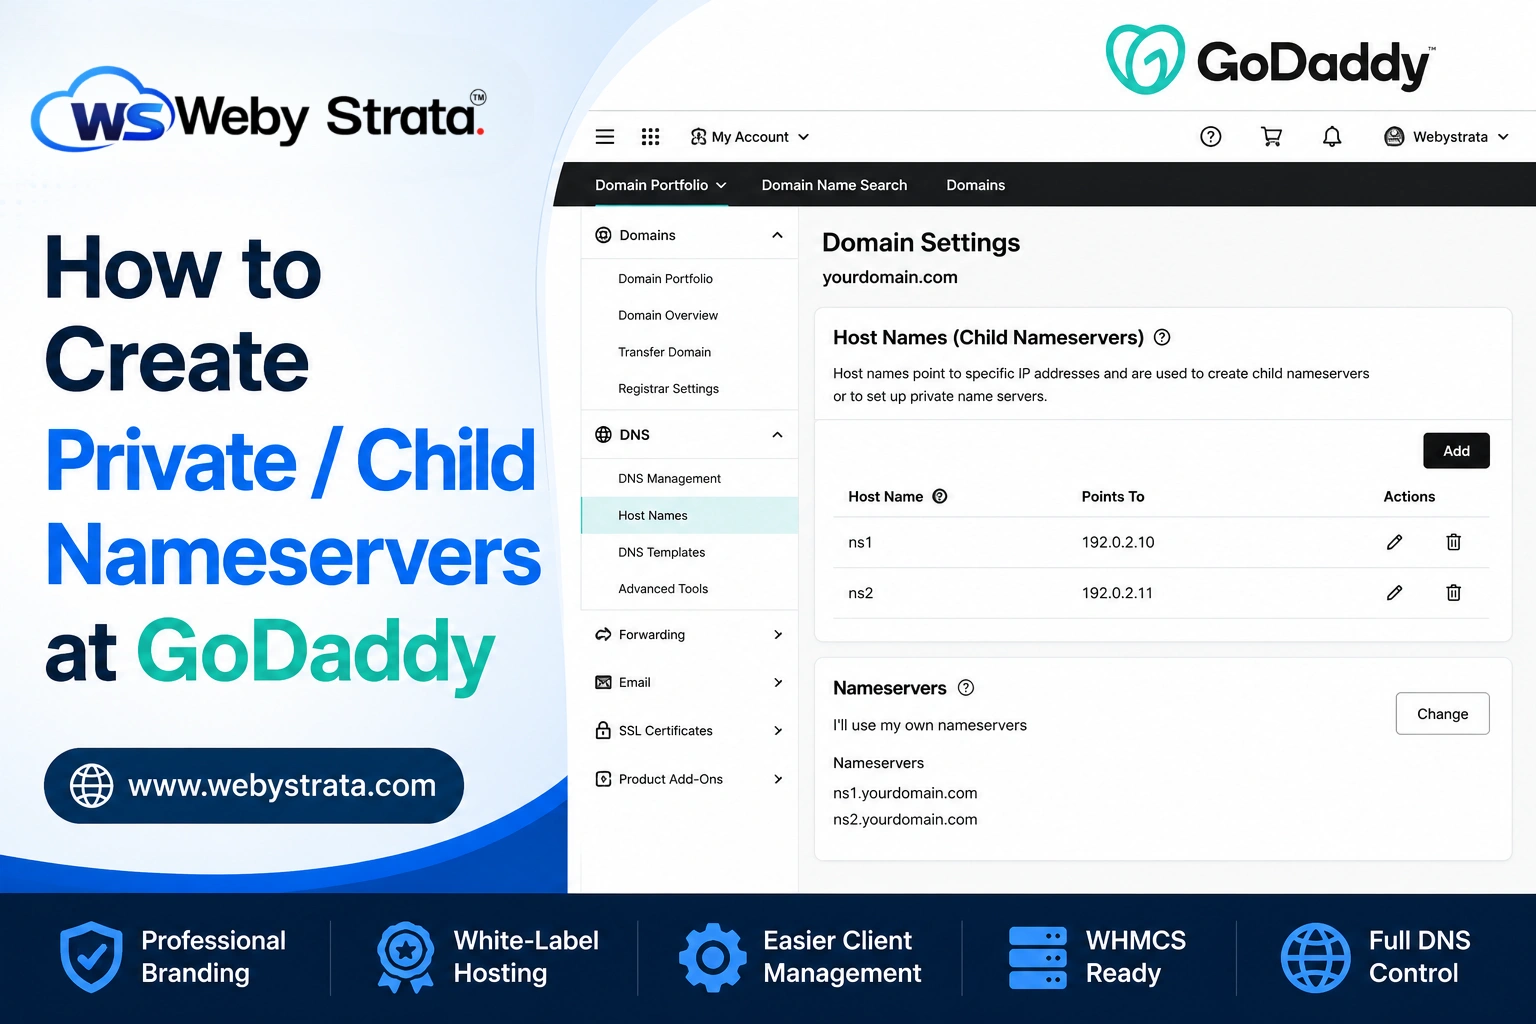
How to Create Private / Child Nameservers at GoDaddy
How to Create Private / Child Nameservers at GoDaddy If you're planning to launch a hosting business, it's important to Create Private / Child Nameservers at GoDaddy before offering hosting services to customers. Using…
How to Create Private / Child Nameservers at GoDaddy
If you’re planning to launch a hosting business, it’s important to Create Private / Child Nameservers at GoDaddy before offering hosting services to customers. Using branded nameservers helps establish a professional identity and ensures your clients see your business name instead of your hosting provider’s default nameservers.
Private nameservers improve your company’s professional appearance and help strengthen your brand identity. They also provide your customers with a consistent experience when managing their domains and hosting services.
In this guide, you’ll learn how to Create Private / Child Nameservers at GoDaddy and configure them for your hosting server.
What Are Private / Child Nameservers?
Private nameservers, also called child nameservers or glue records, are DNS records that connect your domain name to your hosting server’s IP addresses.
For example:
- ns1.example.com → 192.168.1.10
- ns2.example.com → 192.168.1.11
Once created, these nameservers can be assigned to your hosting accounts, allowing clients to point their domains to your branded DNS servers.
Why Create Private Nameservers?
Choosing to Create Private / Child Nameservers at GoDaddy gives you complete control over your DNS branding and improves the overall customer experience. It also makes it easier to integrate your hosting environment with WHMCS and automate account provisioning.
- Professional branding
- White-label hosting experience
- Easier client management
- Better business credibility
- Consistent DNS management
- Suitable for WHMCS hosting automation
Prerequisites
Before you begin, make sure you have:
- A domain registered with GoDaddy
- A VPS or Dedicated Server
- Two dedicated IP addresses (recommended)
- Root or administrator access to your server
- DNS service configured (WHM/cPanel, DirectAdmin, Plesk, etc.)
- WHMCS installed (optional but recommended for hosting automation)
Step 1: Obtain Your Server IP Addresses
Log in to your hosting control panel or VPS provider.
Locate your server IP addresses.
Example:
- Primary IP: 192.168.10.10
- Secondary IP: 192.168.10.11
You’ll need these while creating the child nameservers.
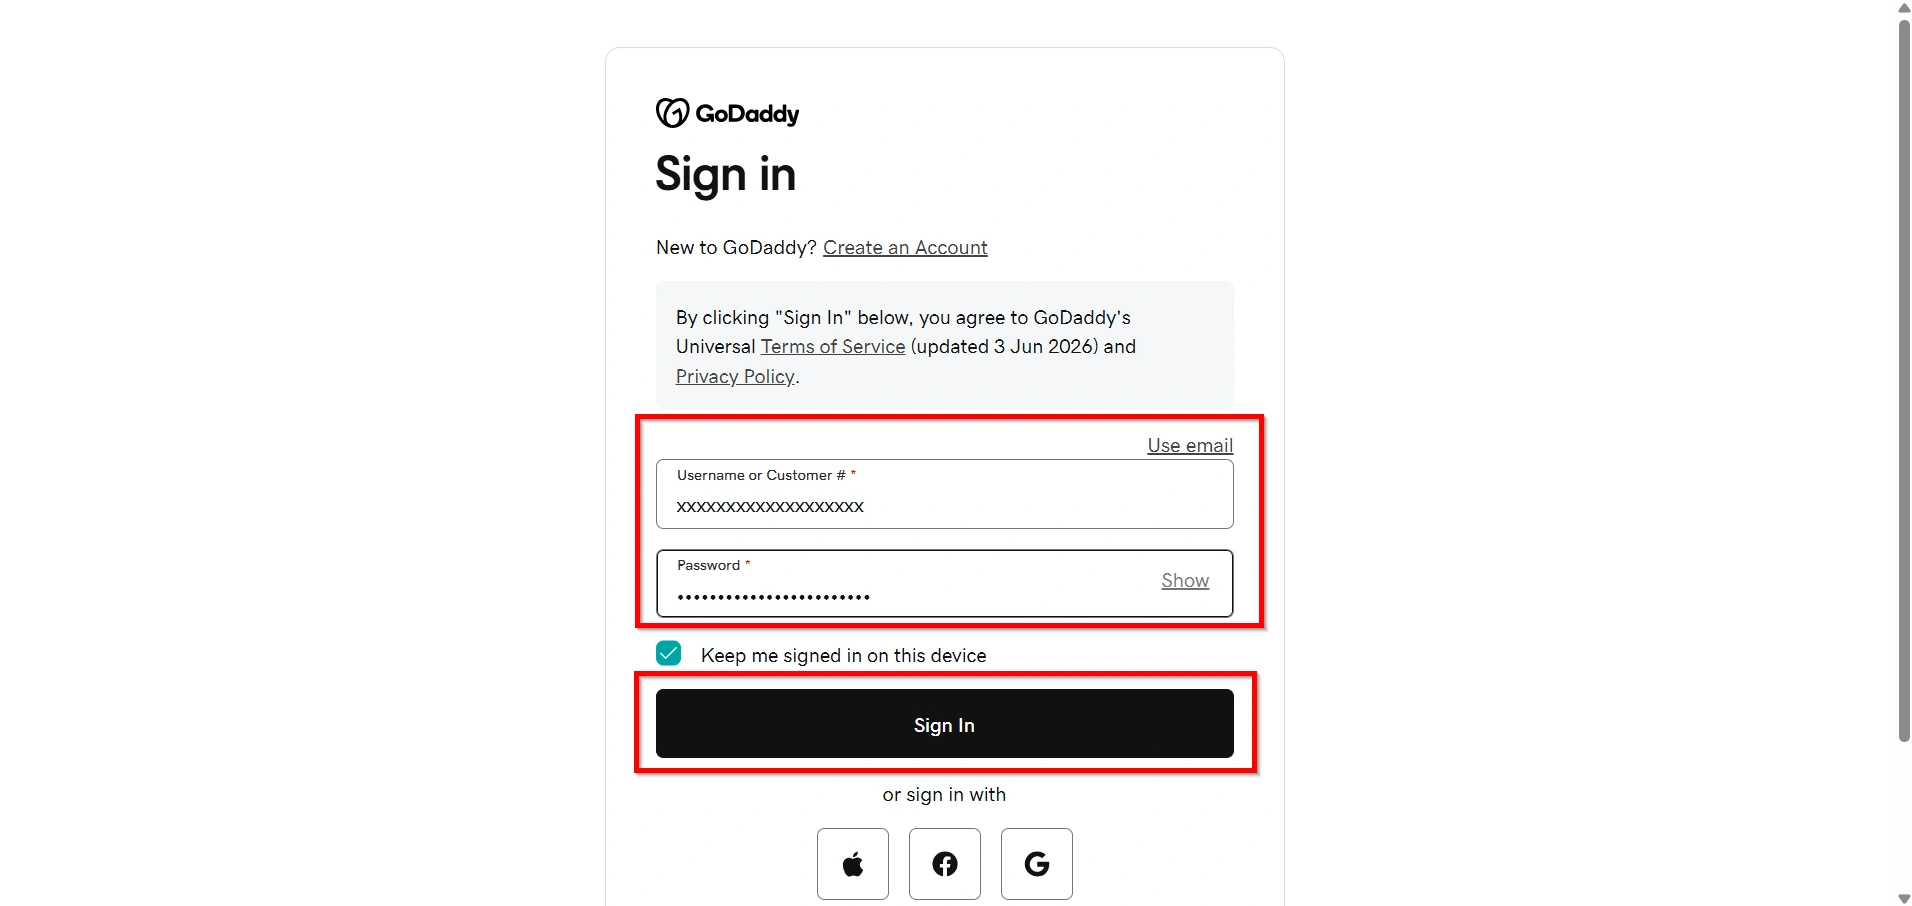
Step 2: Log in to GoDaddy
- Visit the GoDaddy website.
- Sign in to your account.
3. Click My Products.
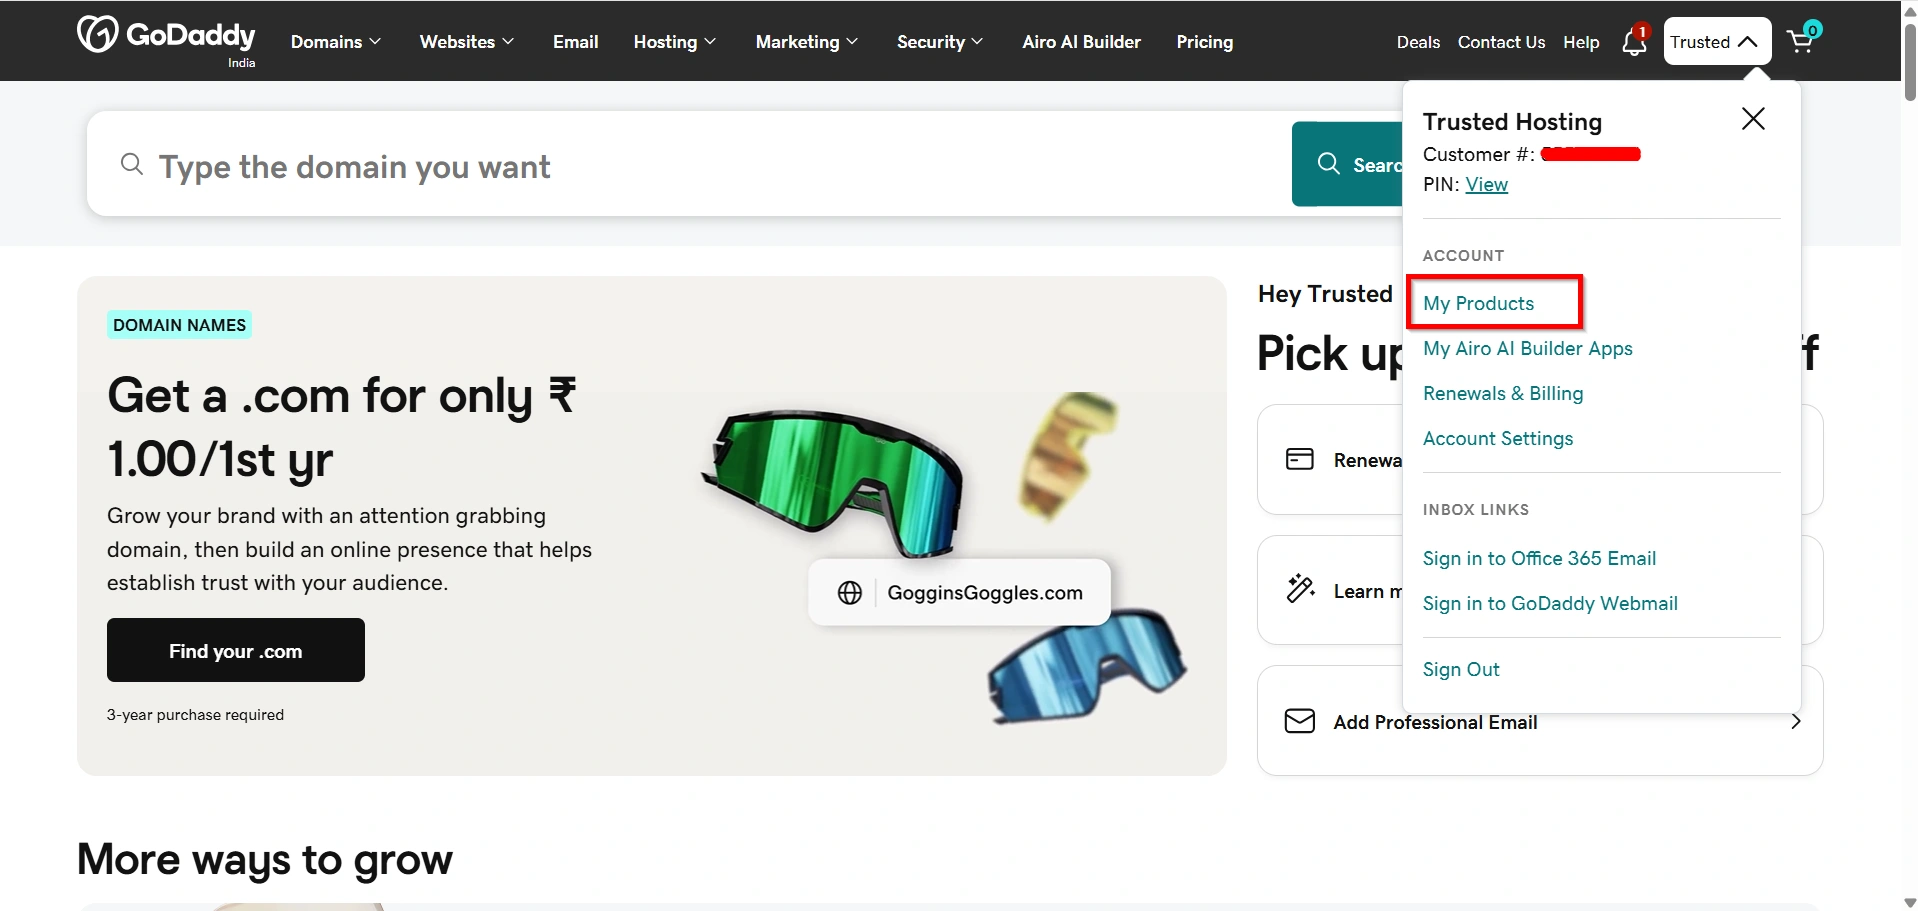
4. Locate the domain you want to use.
5. Click Manage DNS.
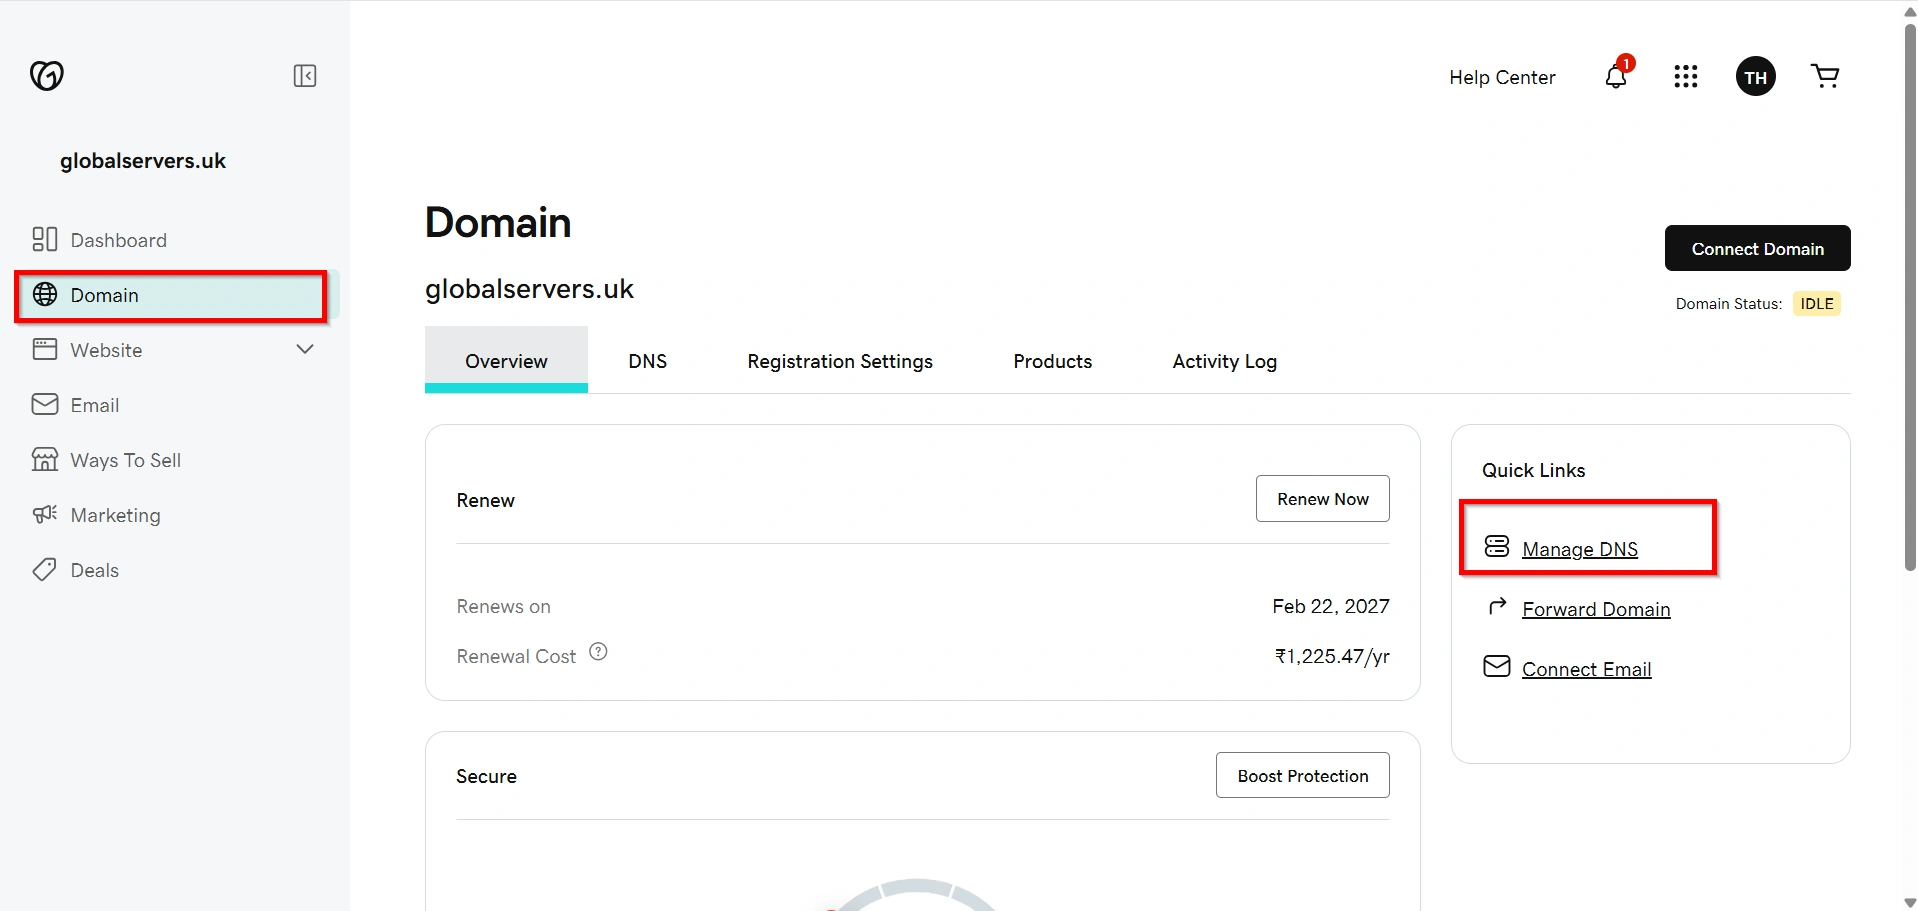
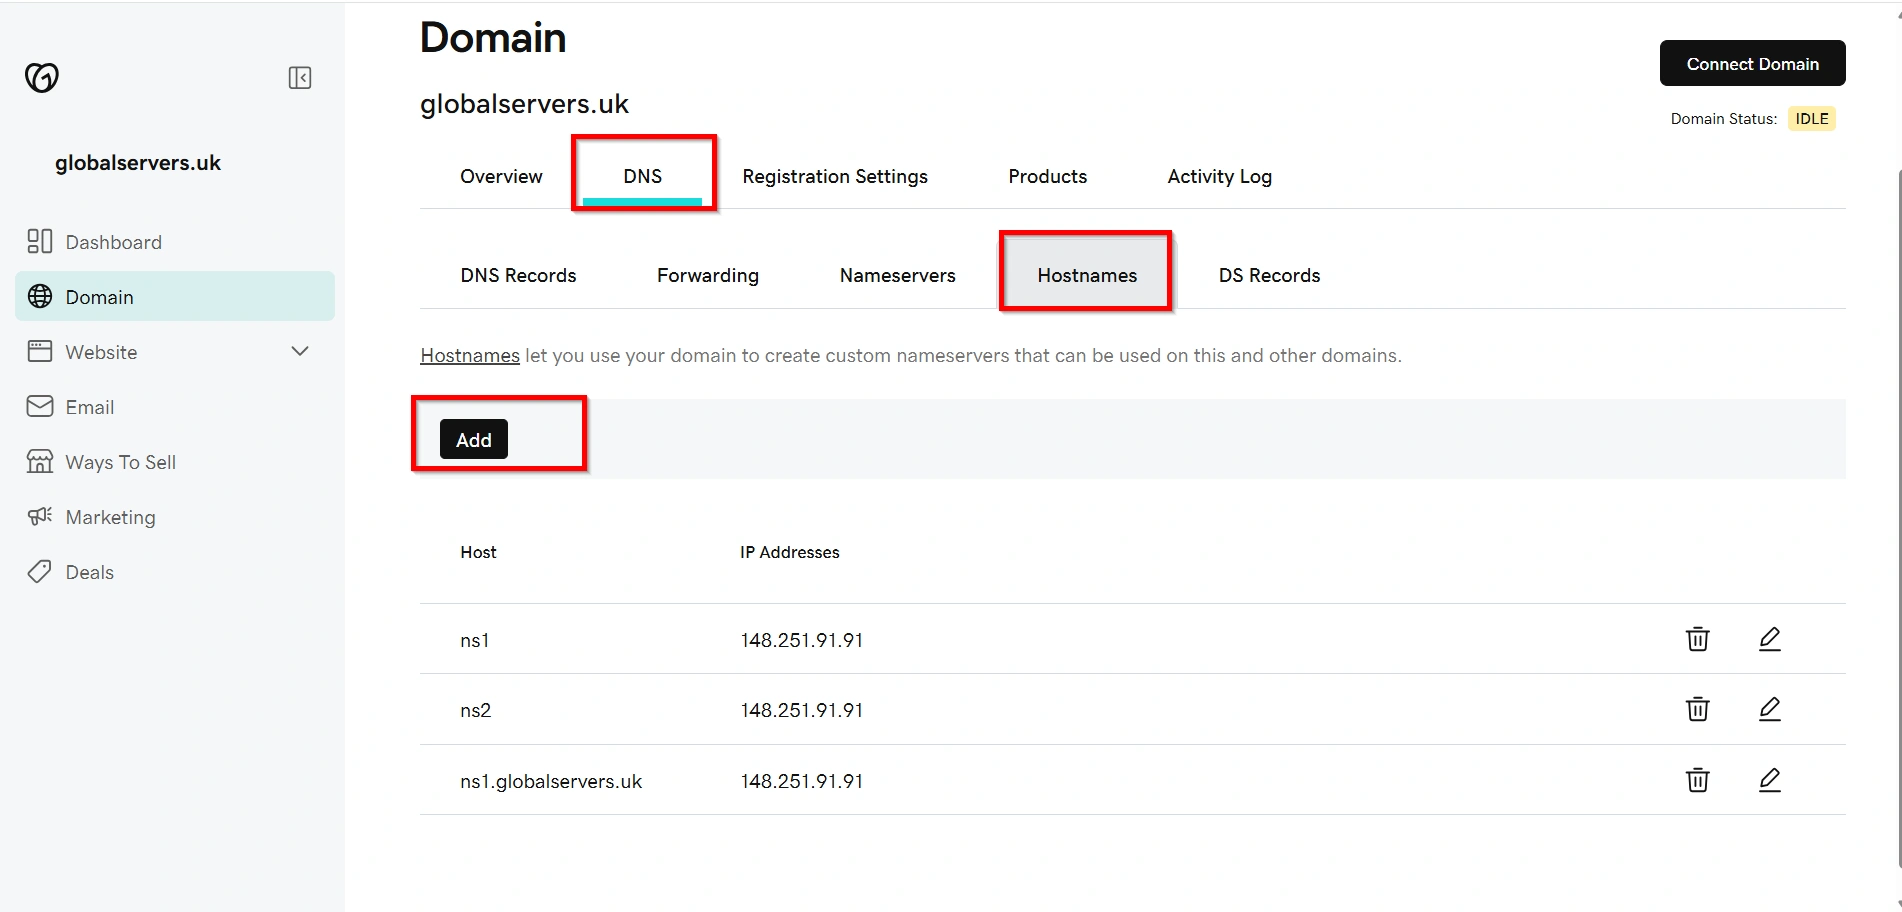
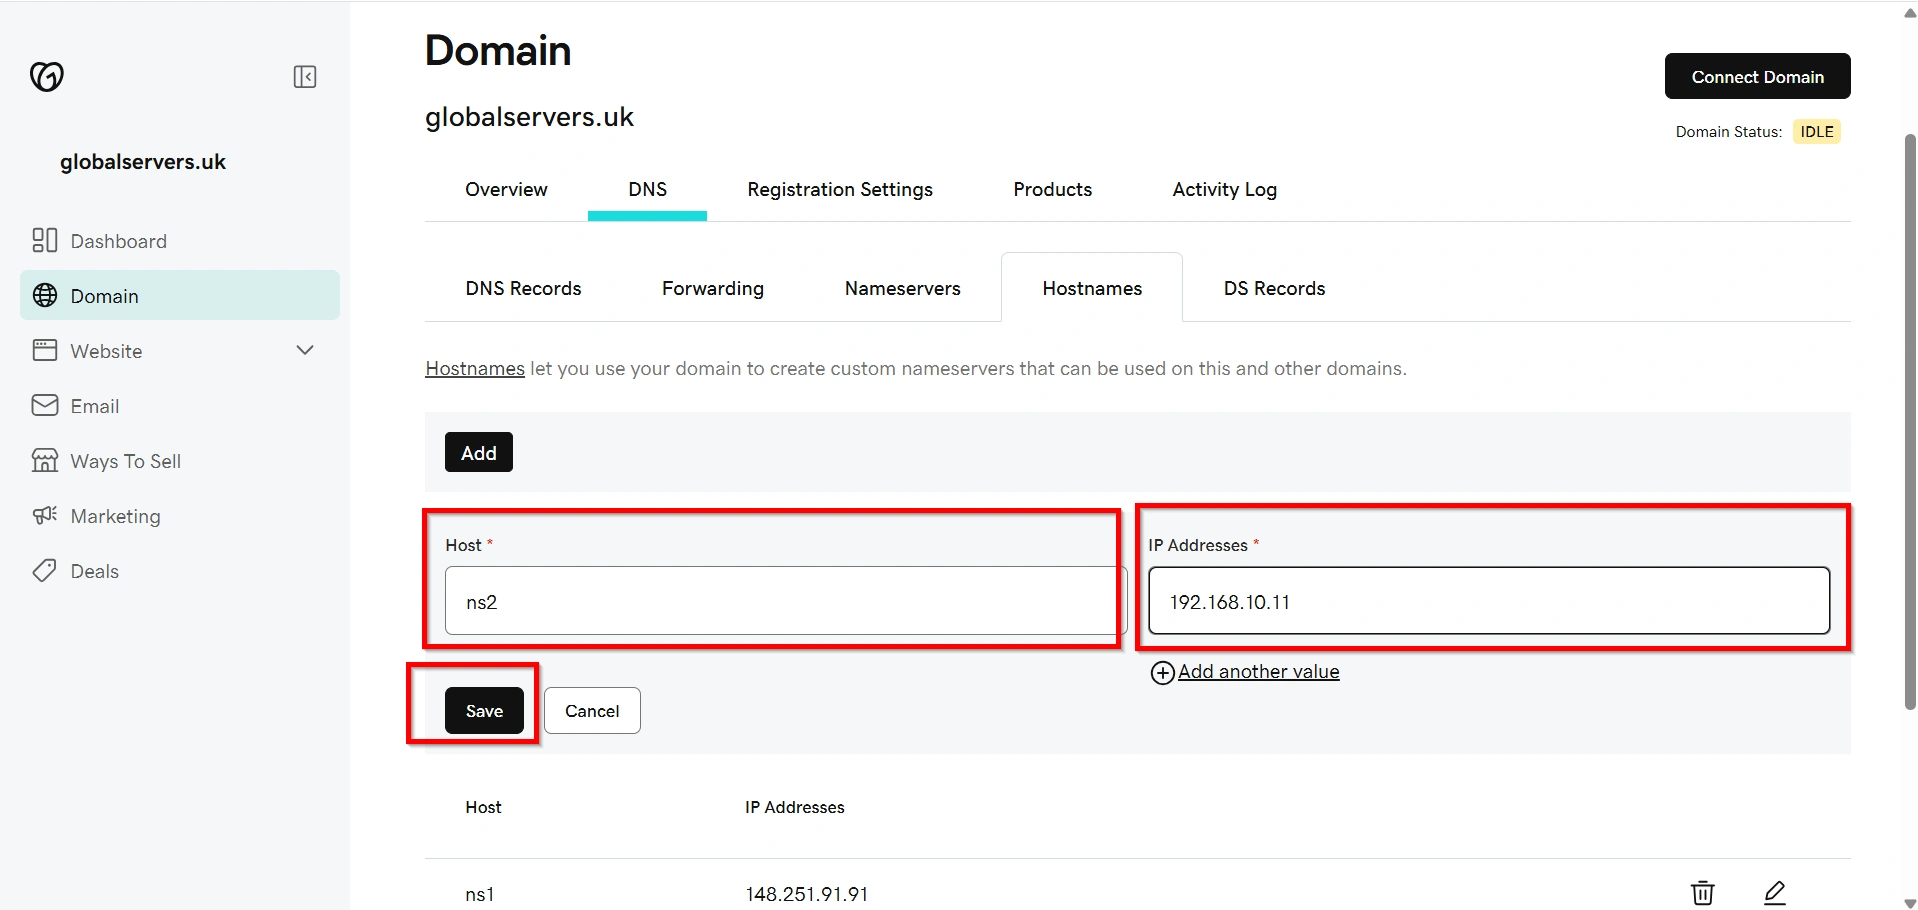
Step 3: Open Host Names (Child Nameservers)
Inside your domain settings:
- Under DNS Section.
- Click Host Names.
- Select Add.
This section is where GoDaddy allows you to create glue records.
Step 4: Create the First Child Nameserver
Enter the following details:
Hostname
ns2IP Address
Your Primary Server IPExample
192.168.10.11
Click Save.
Step 5: Create the Second Child Nameserver
Again click Add.
Enter:
Hostname
ns3IP Address
192.168.10.10Click Save.
You have now successfully completed the process to Create Private / Child Nameservers at GoDaddy.
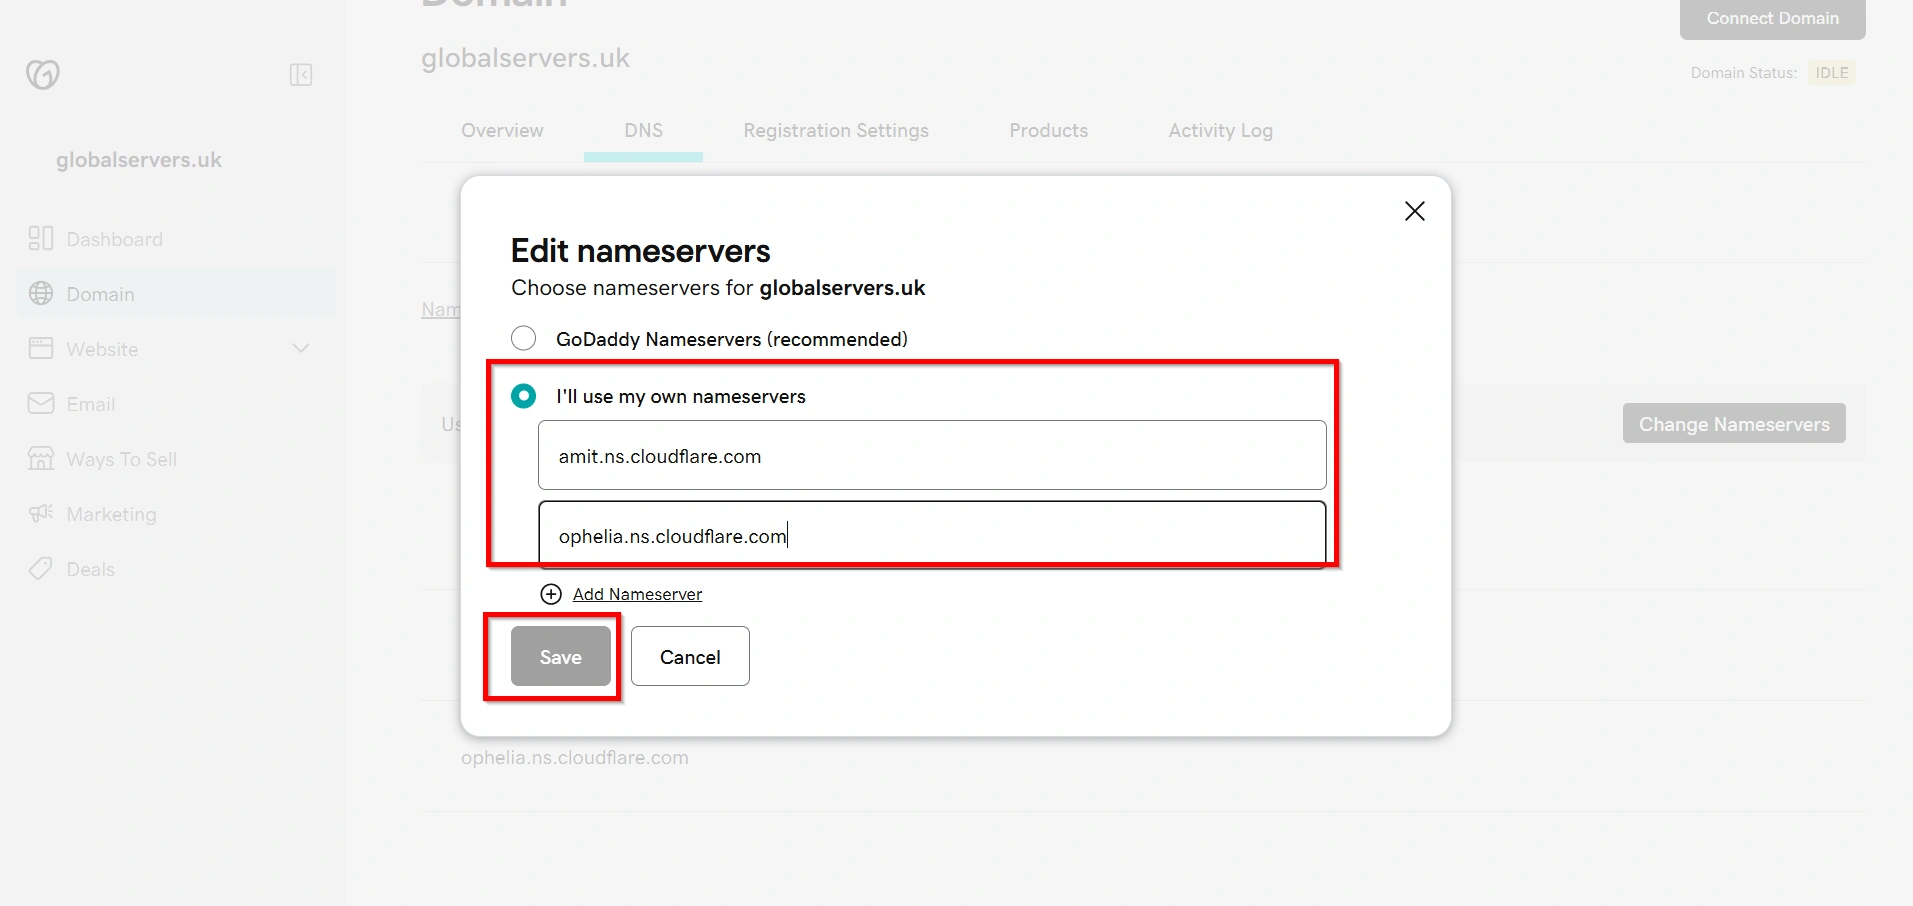
Step 6: Update Your Domain to Use the New Nameservers
Return to your domain settings.
Choose Change Nameservers.
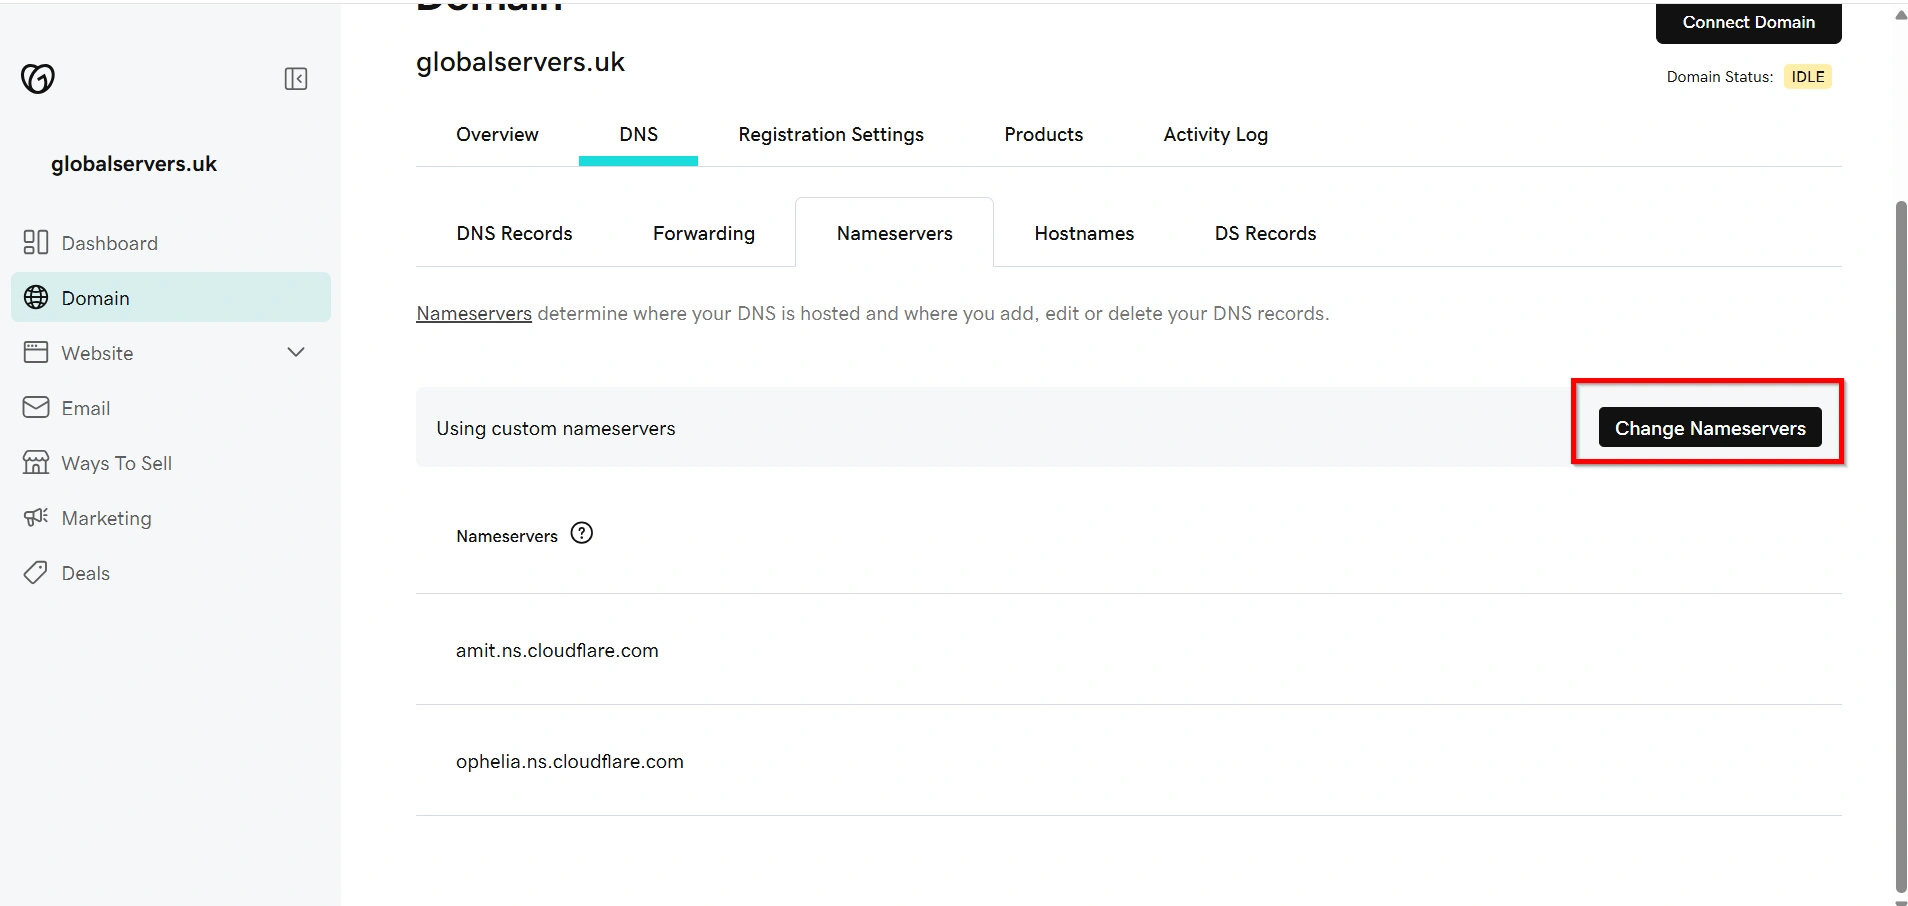
Select:
I’ll use my own nameservers
Enter:
ns1.yourdomain.com
ns2.yourdomain.com
Save the changes.
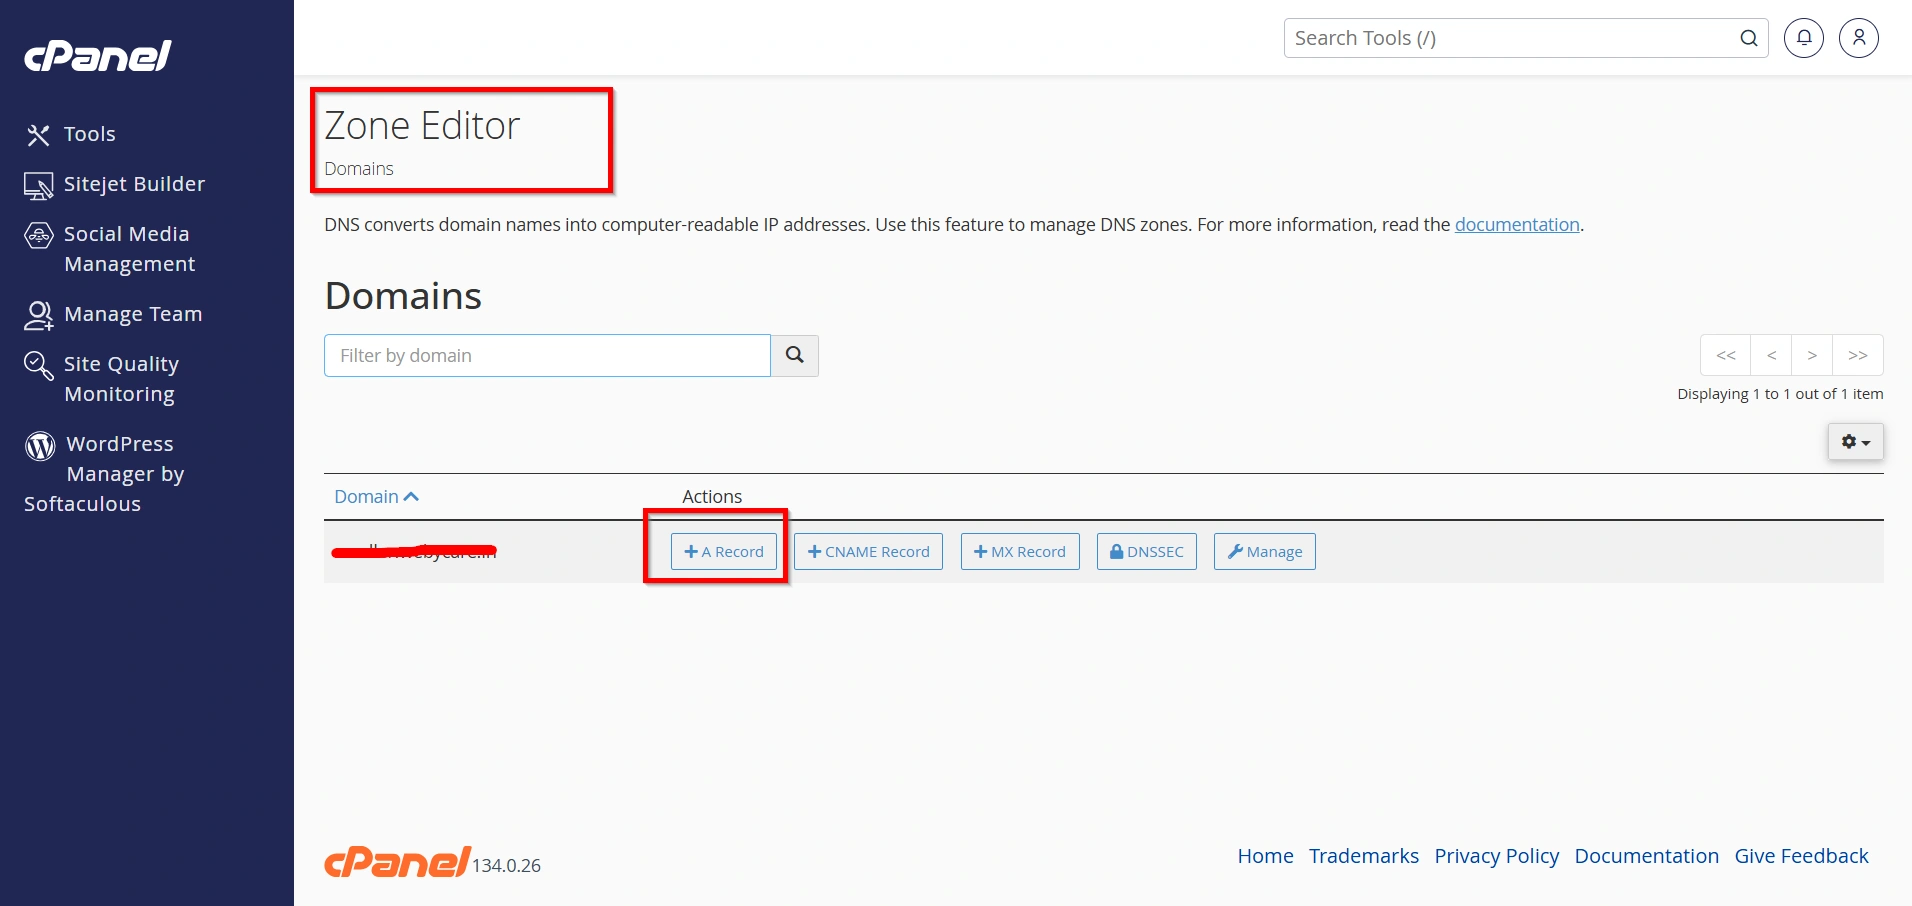
Step 7: Configure DNS Records on Your Server
Inside your hosting control panel (WHM/cPanel):
Create the following A records.
| Host | Type | IP Address |
|---|---|---|
| ns1 | A | Your Primary IP |
| ns2 | A | Your Secondary IP |
These records ensure the nameservers resolve correctly.
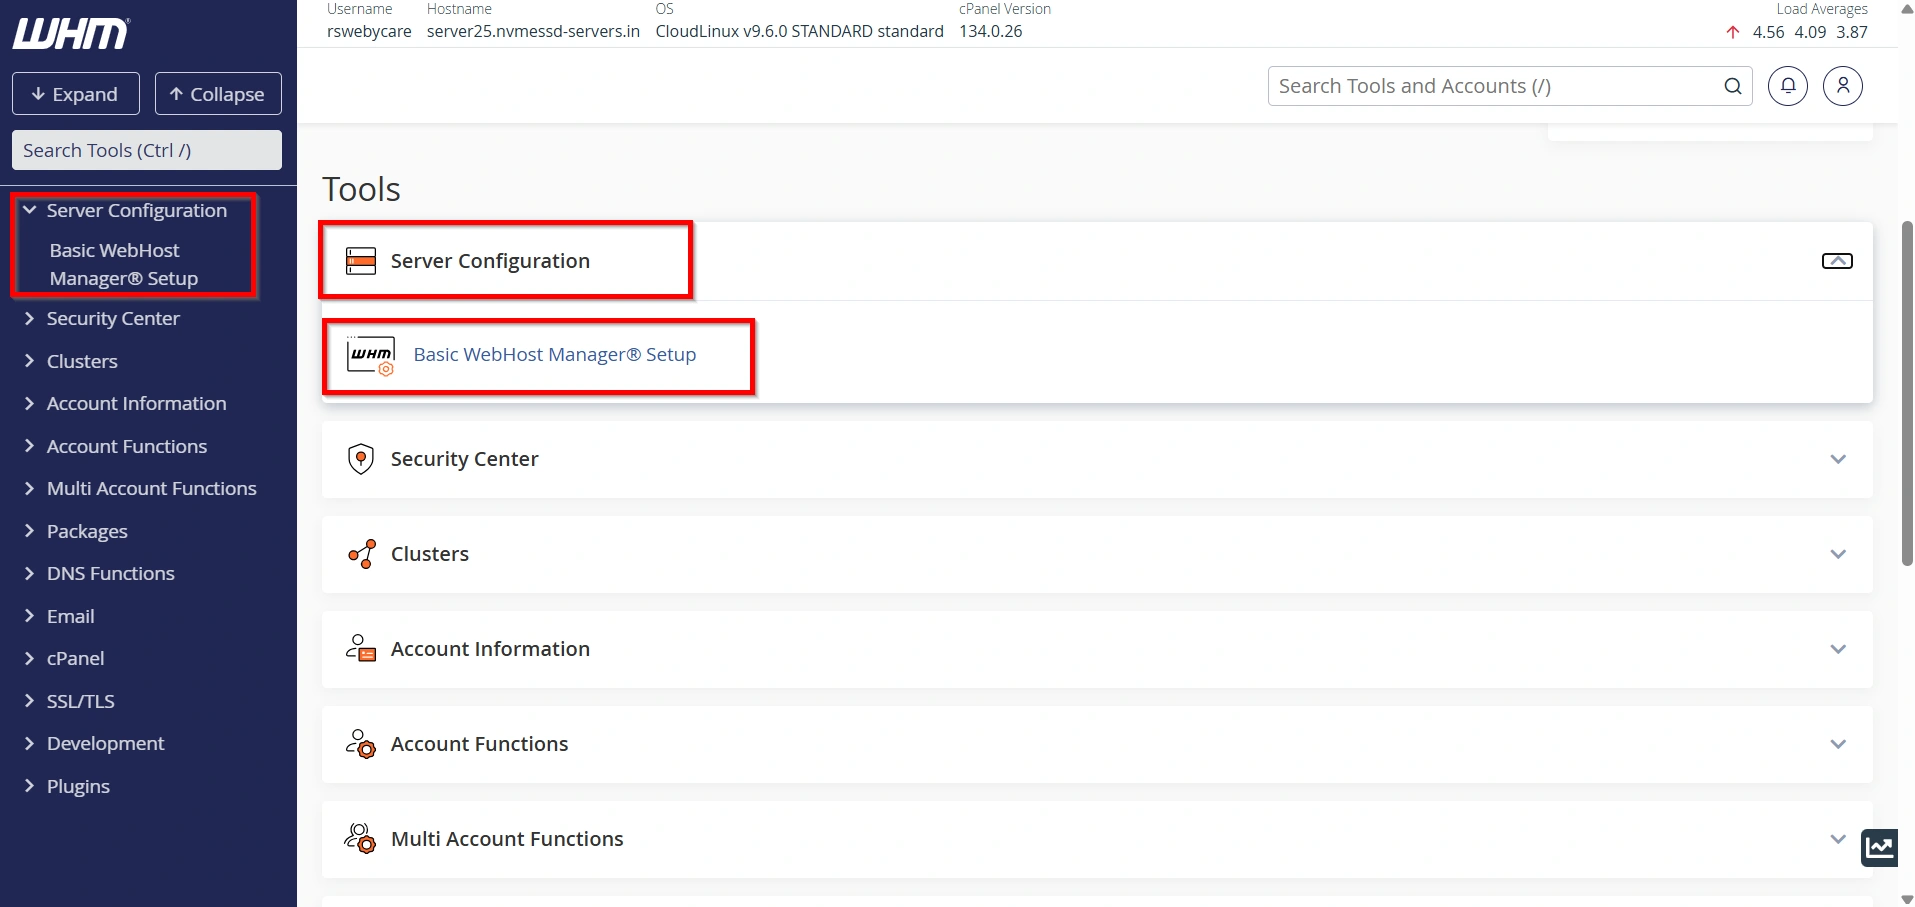
Step 8: Configure WHM (If Using cPanel)
If you’re running cPanel/WHM:
- Log in to WHM.
- Navigate to Basic WebHost Manager Setup.
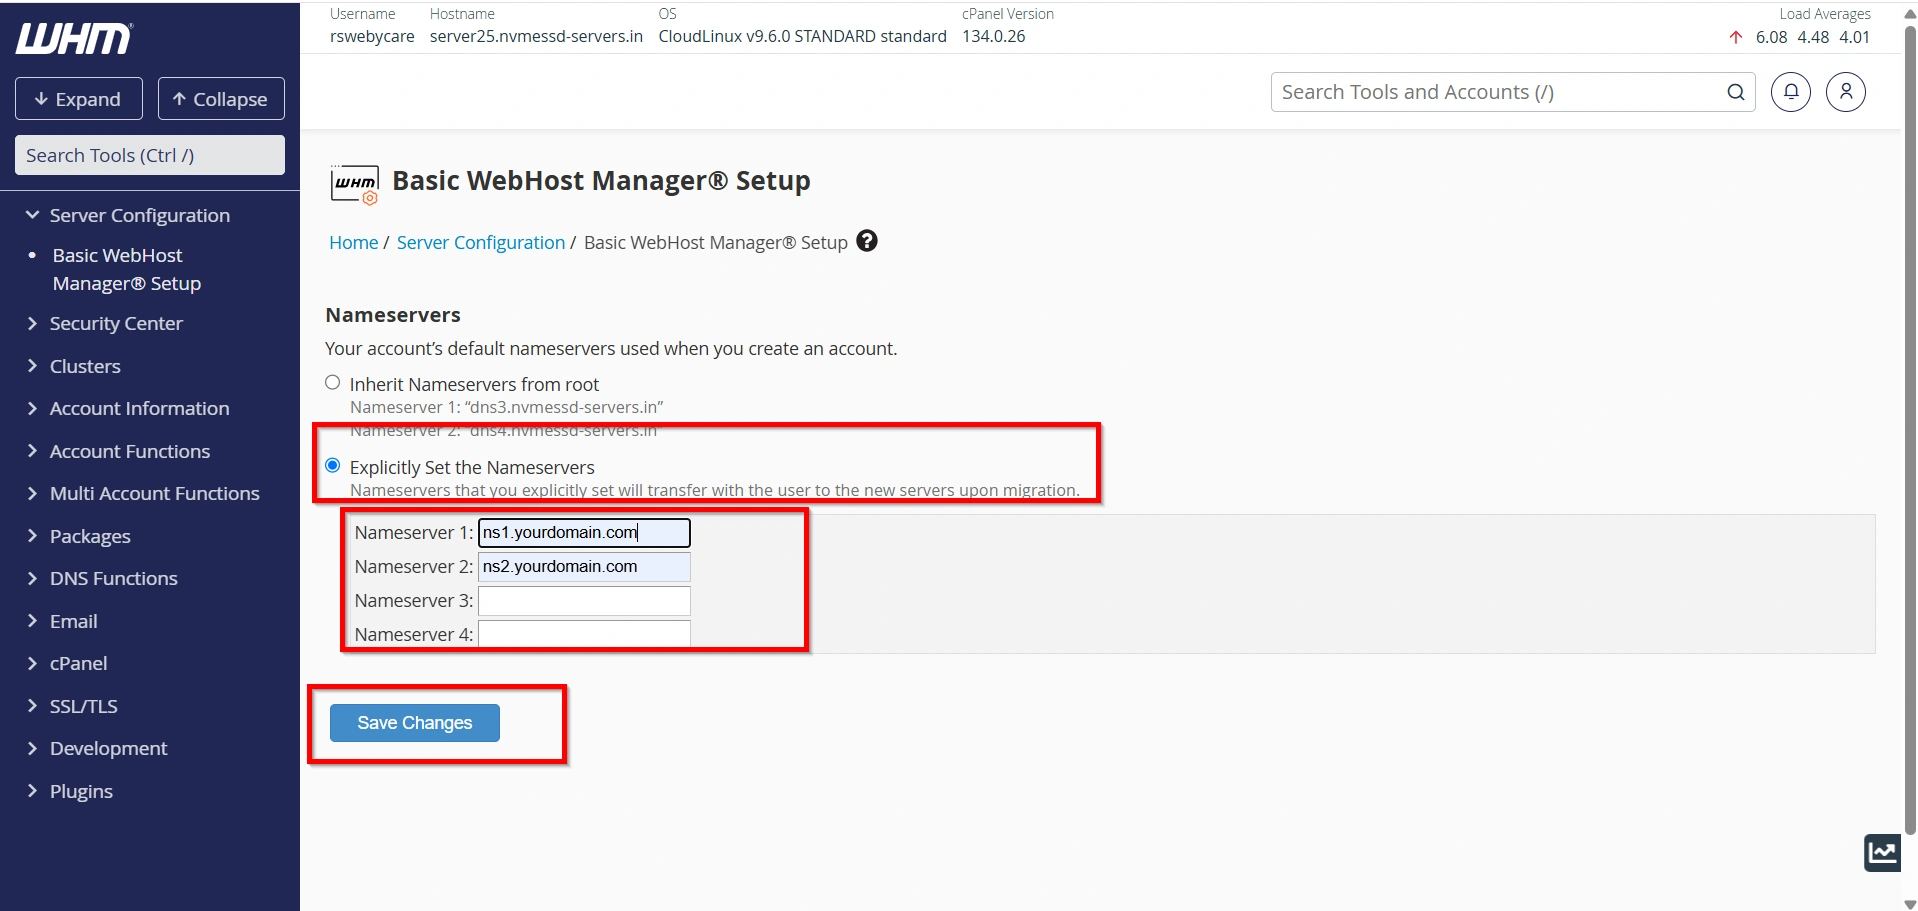
3. Set Explicitly:
Primary Nameserver
ns1.yourdomain.comSecondary Nameserver
ns2.yourdomain.comAssign the correct IP addresses.
Click Save Changes.
Step 9: Configure WHMCS
Inside WHMCS:
- Go to System Settings → Servers.
- Edit your hosting server.
- Ensure the server uses:
ns1.yourdomain.com
ns2.yourdomain.com
Now, every new hosting account created through WHMCS will automatically display your branded nameservers to clients.
Verify Your Nameservers
DNS propagation may take several hours.
You can verify by checking whether:
- ns1.yourdomain.com resolves correctly
- ns2.yourdomain.com resolves correctly
- Domains using your nameservers load successfully
Common Issues
- Nameserver Not Resolving
- Glue Records Not Created
- Wrong IP Address
Best Practices
- Use two separate IP addresses whenever possible.
- Keep your DNS records updated.
- Match the IP addresses in GoDaddy and your server.
- Use branded nameservers for all hosting accounts.
- Regularly verify DNS resolution after server migrations.
Benefits for WHMCS Users
When you Create Private / Child Nameservers at GoDaddy, your WHMCS installation becomes more professional and easier to manage. Customers receive branded DNS information during account creation, strengthening your company’s identity while providing a seamless hosting experience.
- Professional Branding
Use custom nameservers likens1.yourdomain.comandns2.yourdomain.comto promote your brand instead of your hosting provider’s default nameservers. - White-Label Hosting Experience
Hide your hosting provider’s identity and provide customers with a fully branded hosting experience. - Simplified Client Management
Manage DNS settings more efficiently and provide clients with consistent nameserver information across all hosting accounts. - Seamless WHMCS Integration
Configure your branded nameservers in WHMCS so new hosting accounts automatically use your custom DNS settings. - Increased Trust and Credibility
Branded nameservers give your hosting business a more professional appearance, helping build customer confidence and strengthen your brand identity.
Conclusion
Learning how to Create Private / Child Nameservers at GoDaddy is an essential step for any hosting provider using WHMCS. By configuring glue records, assigning the correct IP addresses, and updating your server settings, you can offer fully branded nameservers that enhance trust and professionalism. Once the setup is complete and DNS propagation finishes, your clients can use your custom nameservers for all their hosting services.
Related Articles