Latest Updates
How to Create Private / Child Nameservers at Hostinger for WHMCS
How to Create Private / Child Nameservers at Hostinger If you're running a hosting business with WHMCS, using branded nameservers helps create a more professional experience for your customers. Instead of using your registrar's…
How to Create Private / Child Nameservers at Hostinger
If you’re running a hosting business with WHMCS, using branded nameservers helps create a more professional experience for your customers. Instead of using your registrar’s default nameservers, you can configure private (child) nameservers such as ns1.yourdomain.com and ns2.yourdomain.com.
In this guide, we will explain how to Create Private / Child Nameservers at Hostinger and connect your domain with your hosting server. Setting up custom nameservers helps you manage DNS records professionally and allows your customers to use branded nameservers.
What Are Private / Child Nameservers?
Create Private / Child Nameservers at Hostinger means creating your own custom nameservers connected to your hosting server’s IP address instead of using Hostinger’s default nameservers. These custom nameservers usually look like:
- ns1.yourdomain.com
- ns2.yourdomain.com
When you Create Private / Child Nameservers at Hostinger, you are basically creating branded DNS addresses that point visitors’ domains to your hosting infrastructure.
Prerequisites
Before you begin, make sure you have:
- A domain registered with Hostinger.
- A VPS or Dedicated Server with at least one public IPv4 address.
- Root access to your hosting server.
- WHM/cPanel installed (if applicable).
- WHMCS installed and configured.
Steps to Create Private / Child Nameservers at Hostinger
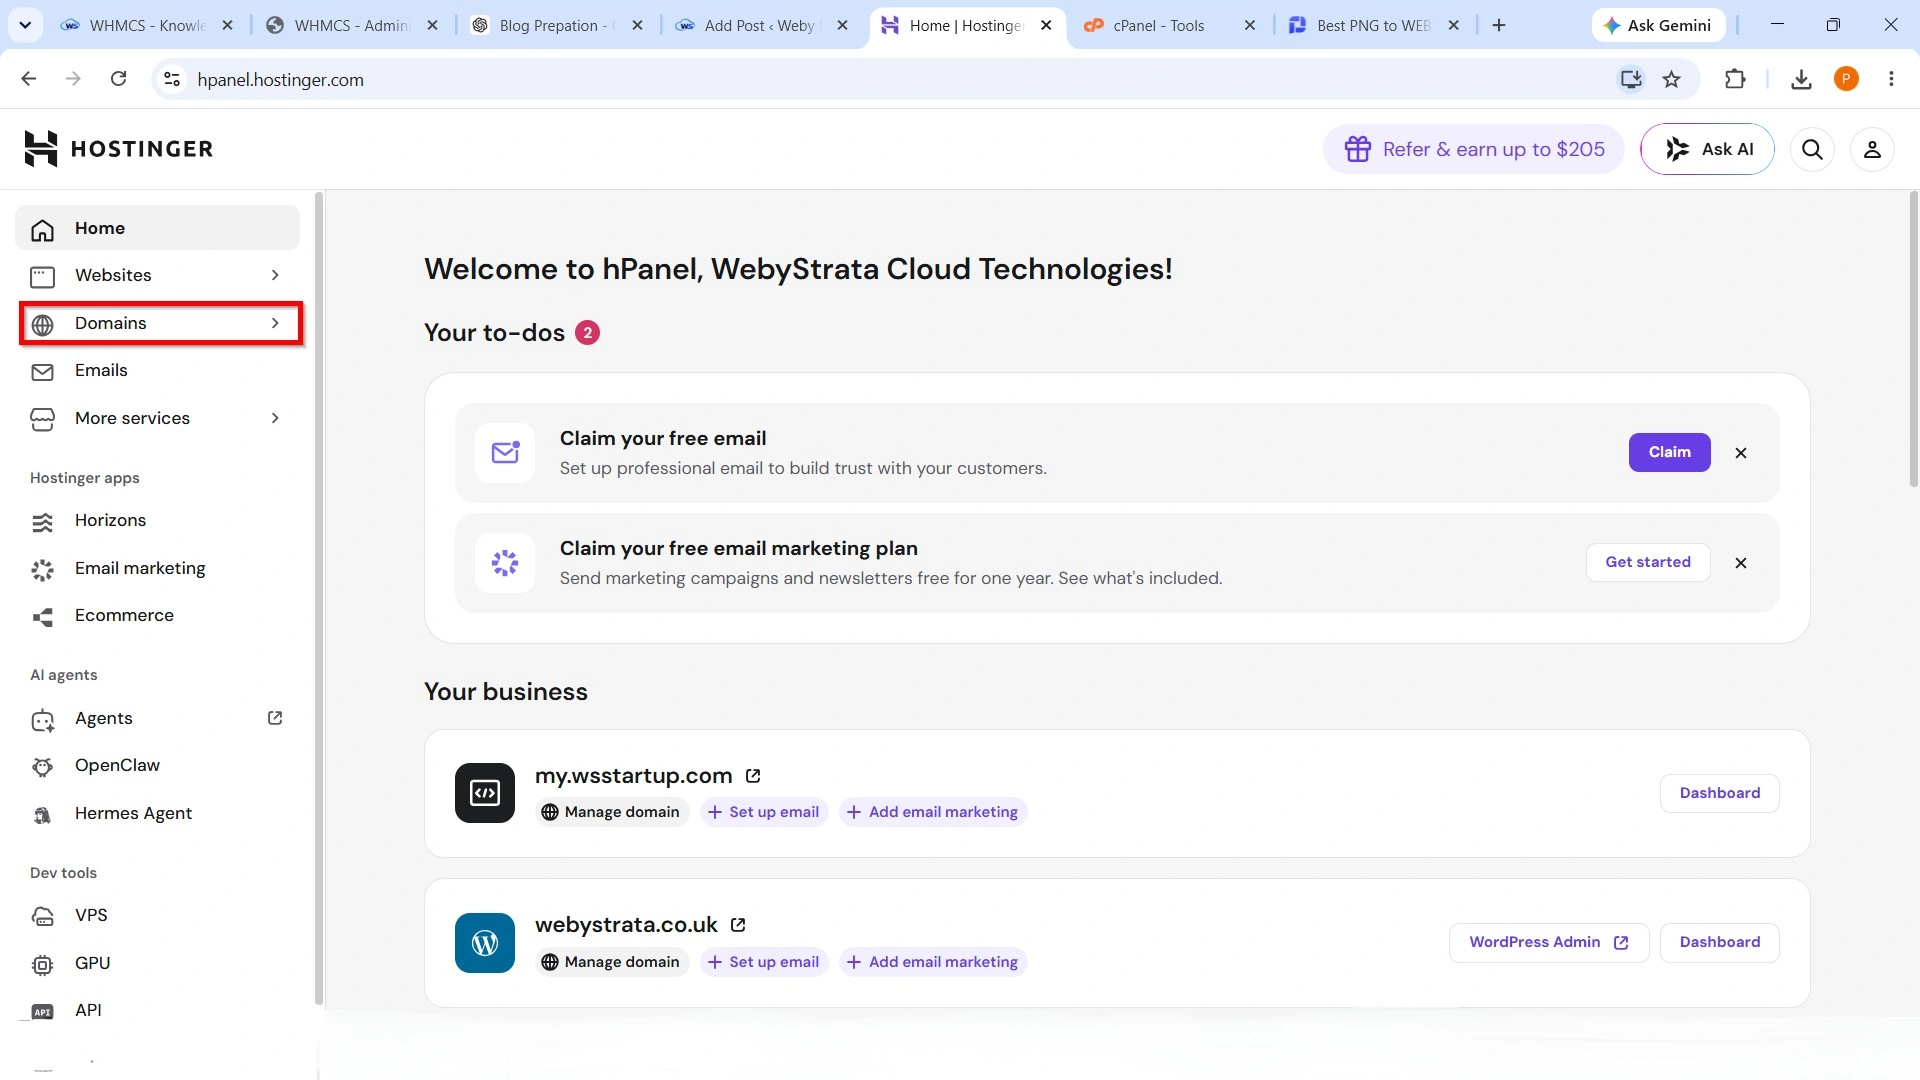
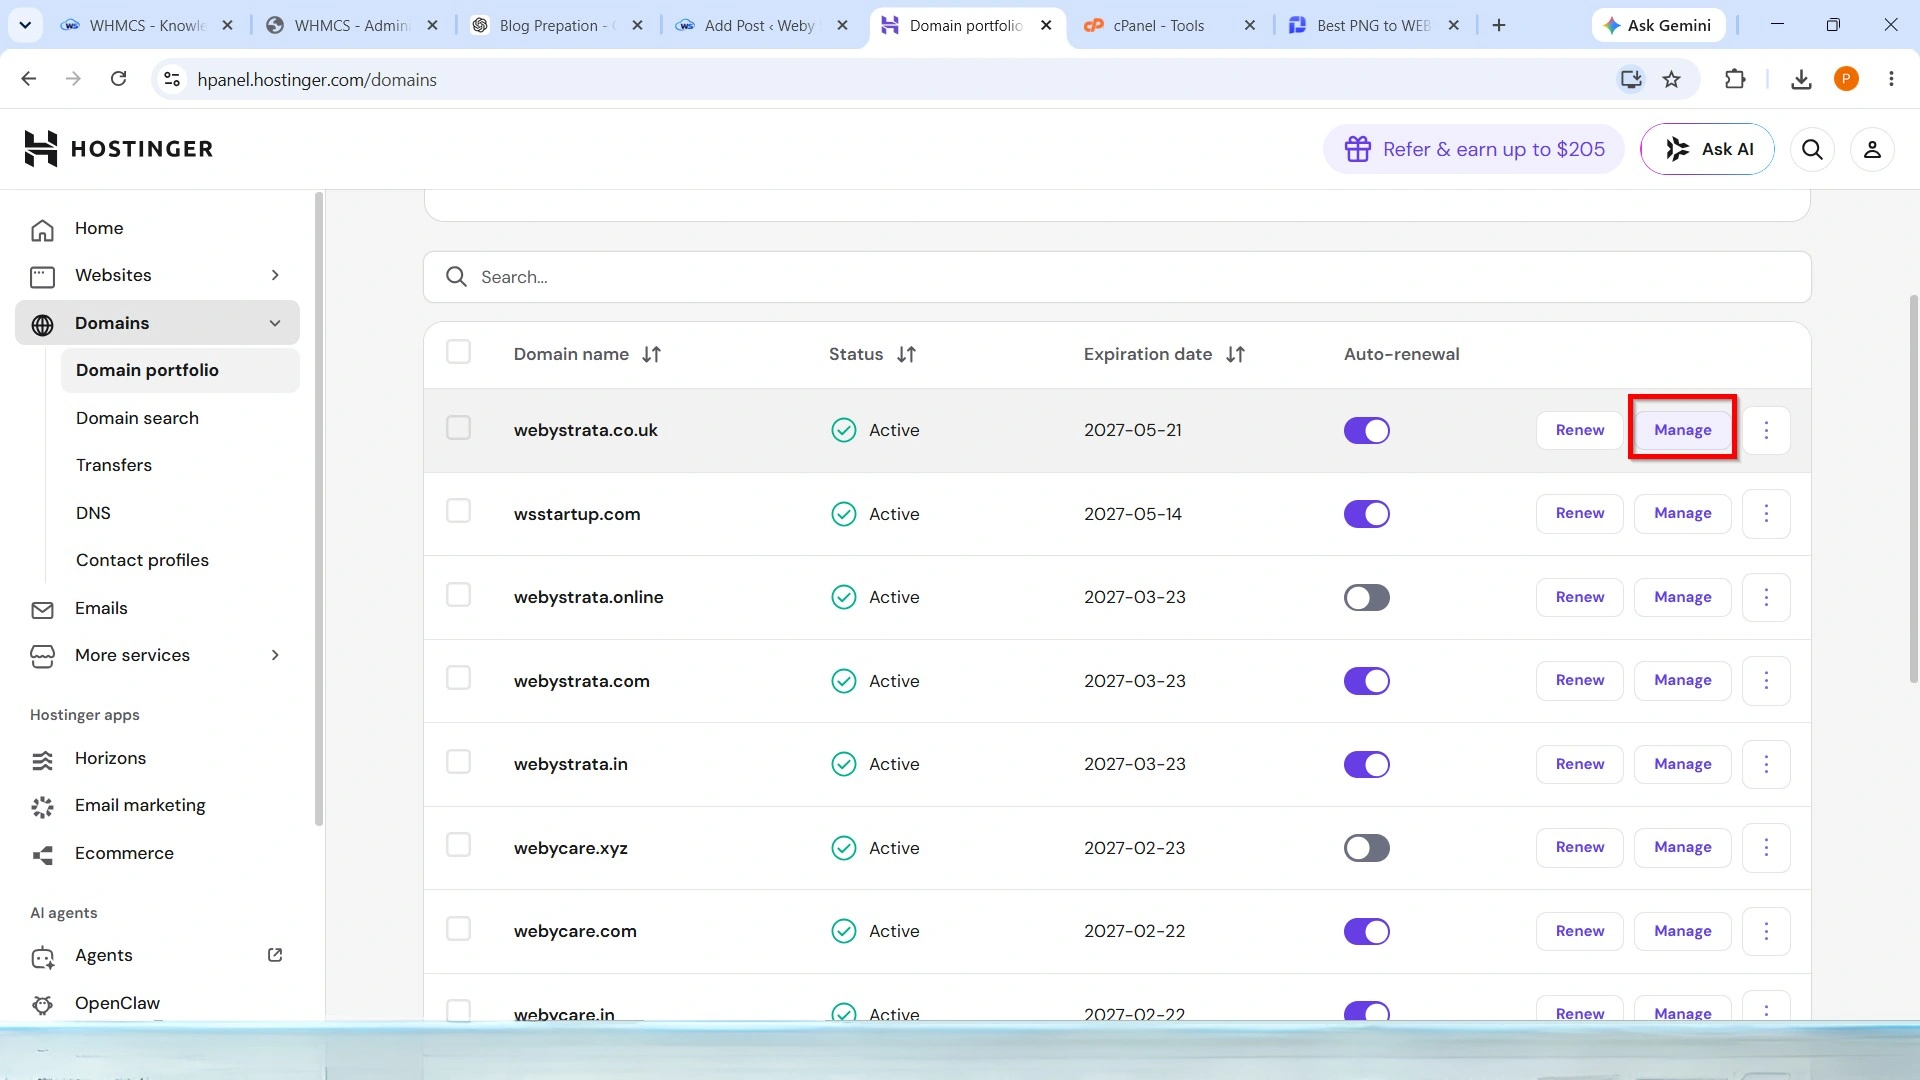
Step 1: Open Your Domain Portfolio
- Log in to your Hostinger account.
- From the left navigation menu, click Domains.
3. Locate the domain you want to use for your private nameservers.
4. Click Manage beside the selected domain.
This opens the domain management page where you can manage DNS settings, nameservers, and domain security.
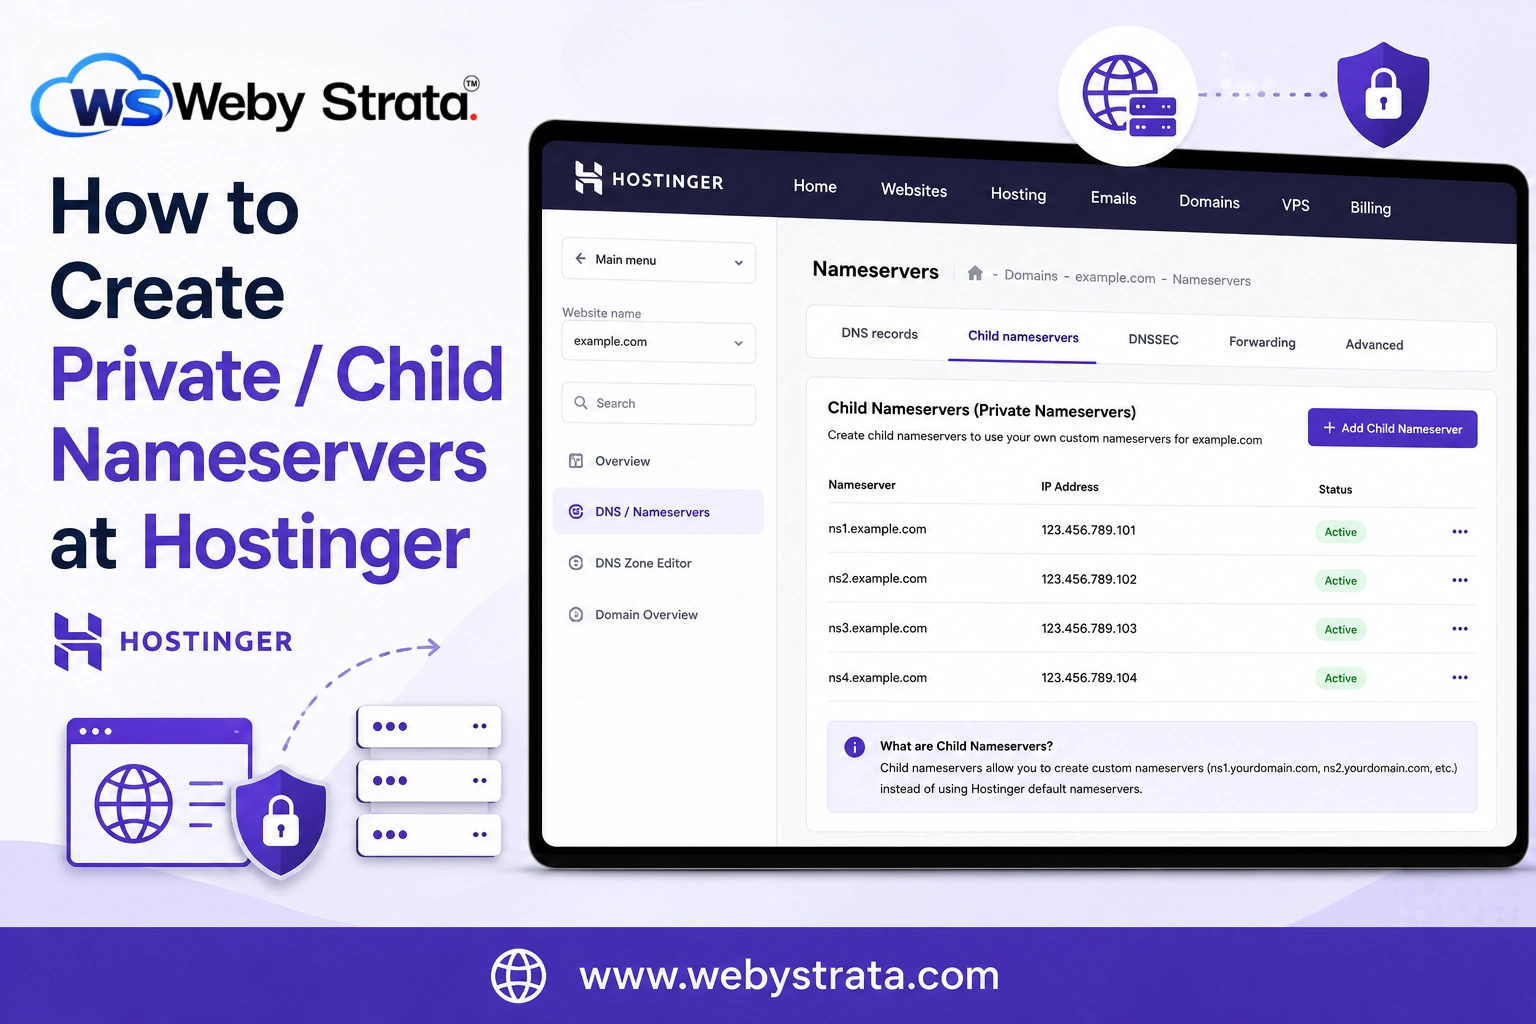
Step 2: Open the DNS / Nameservers Page
- Scroll down to the DNS/Nameservers section.
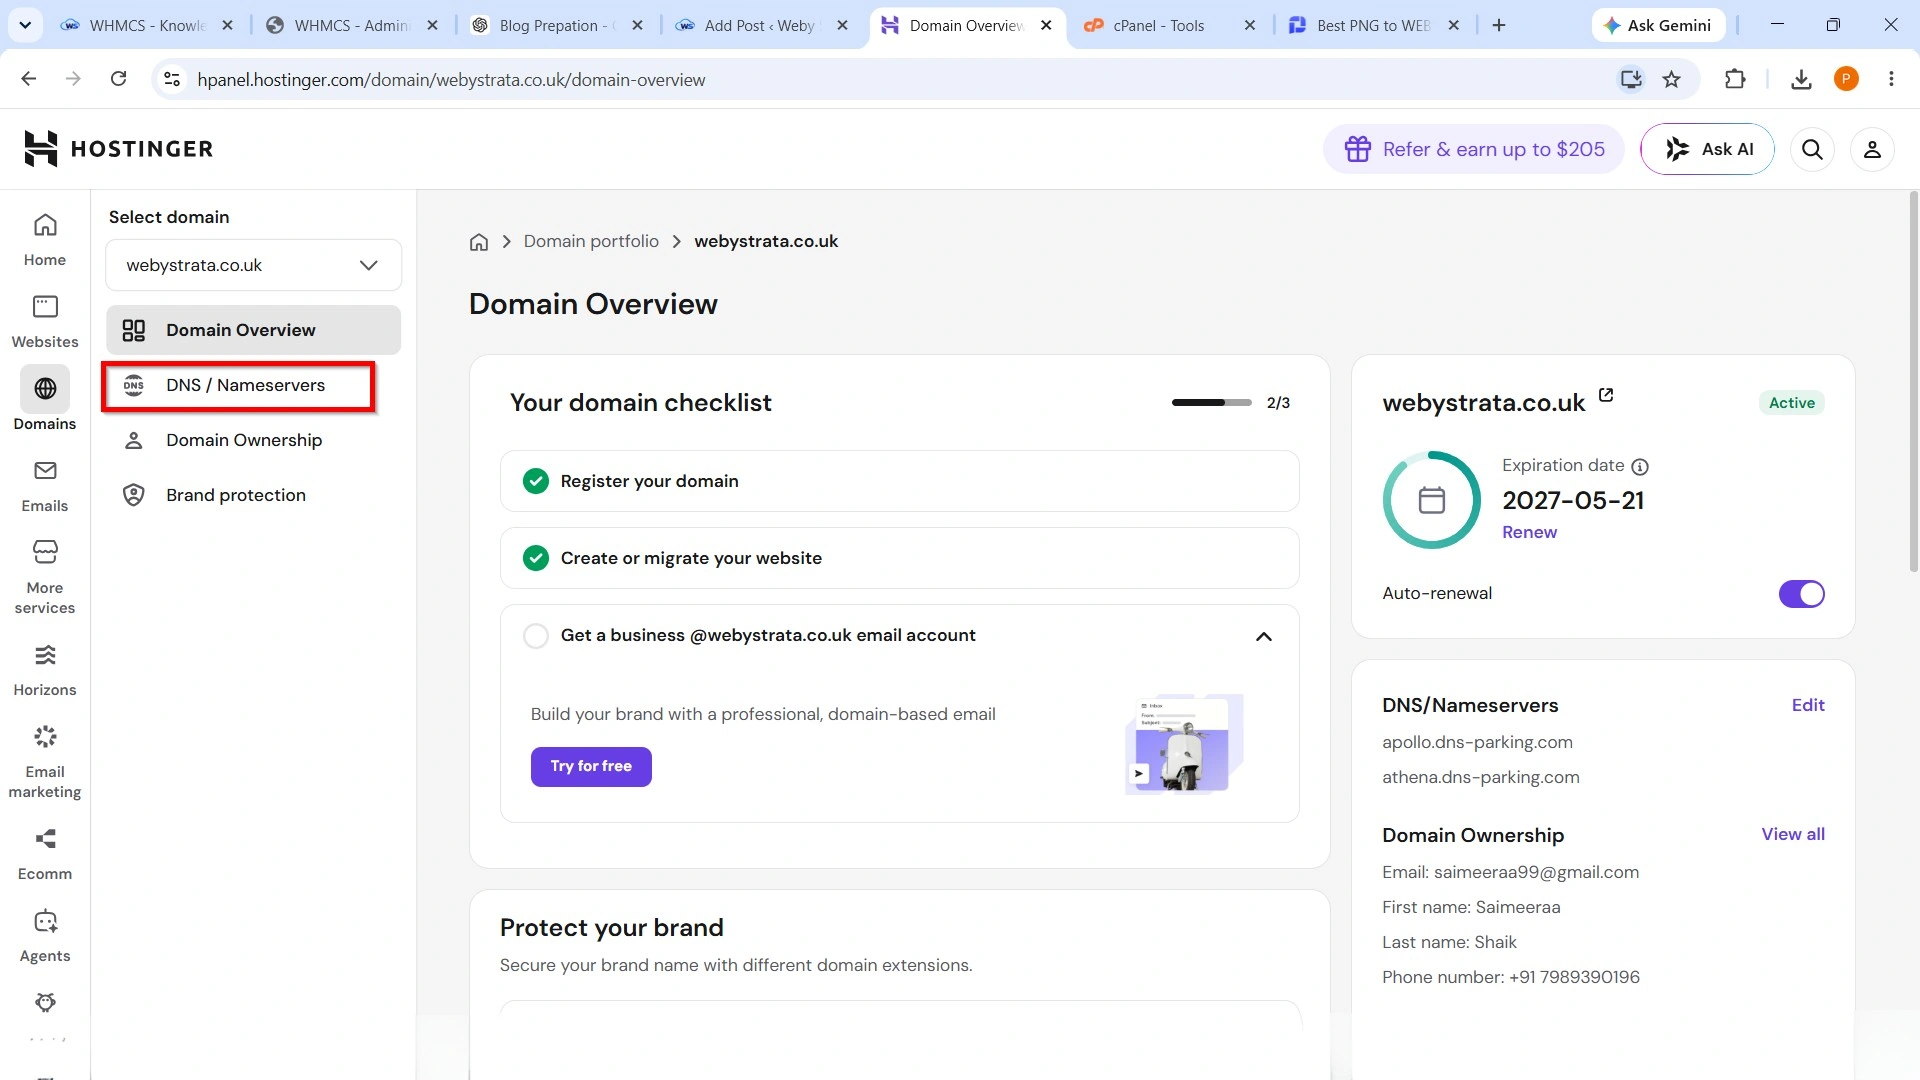
2. On the DNS management page, select the Child Nameservers tab.
This section allows you to register custom child nameservers (also known as glue records) for your domain.
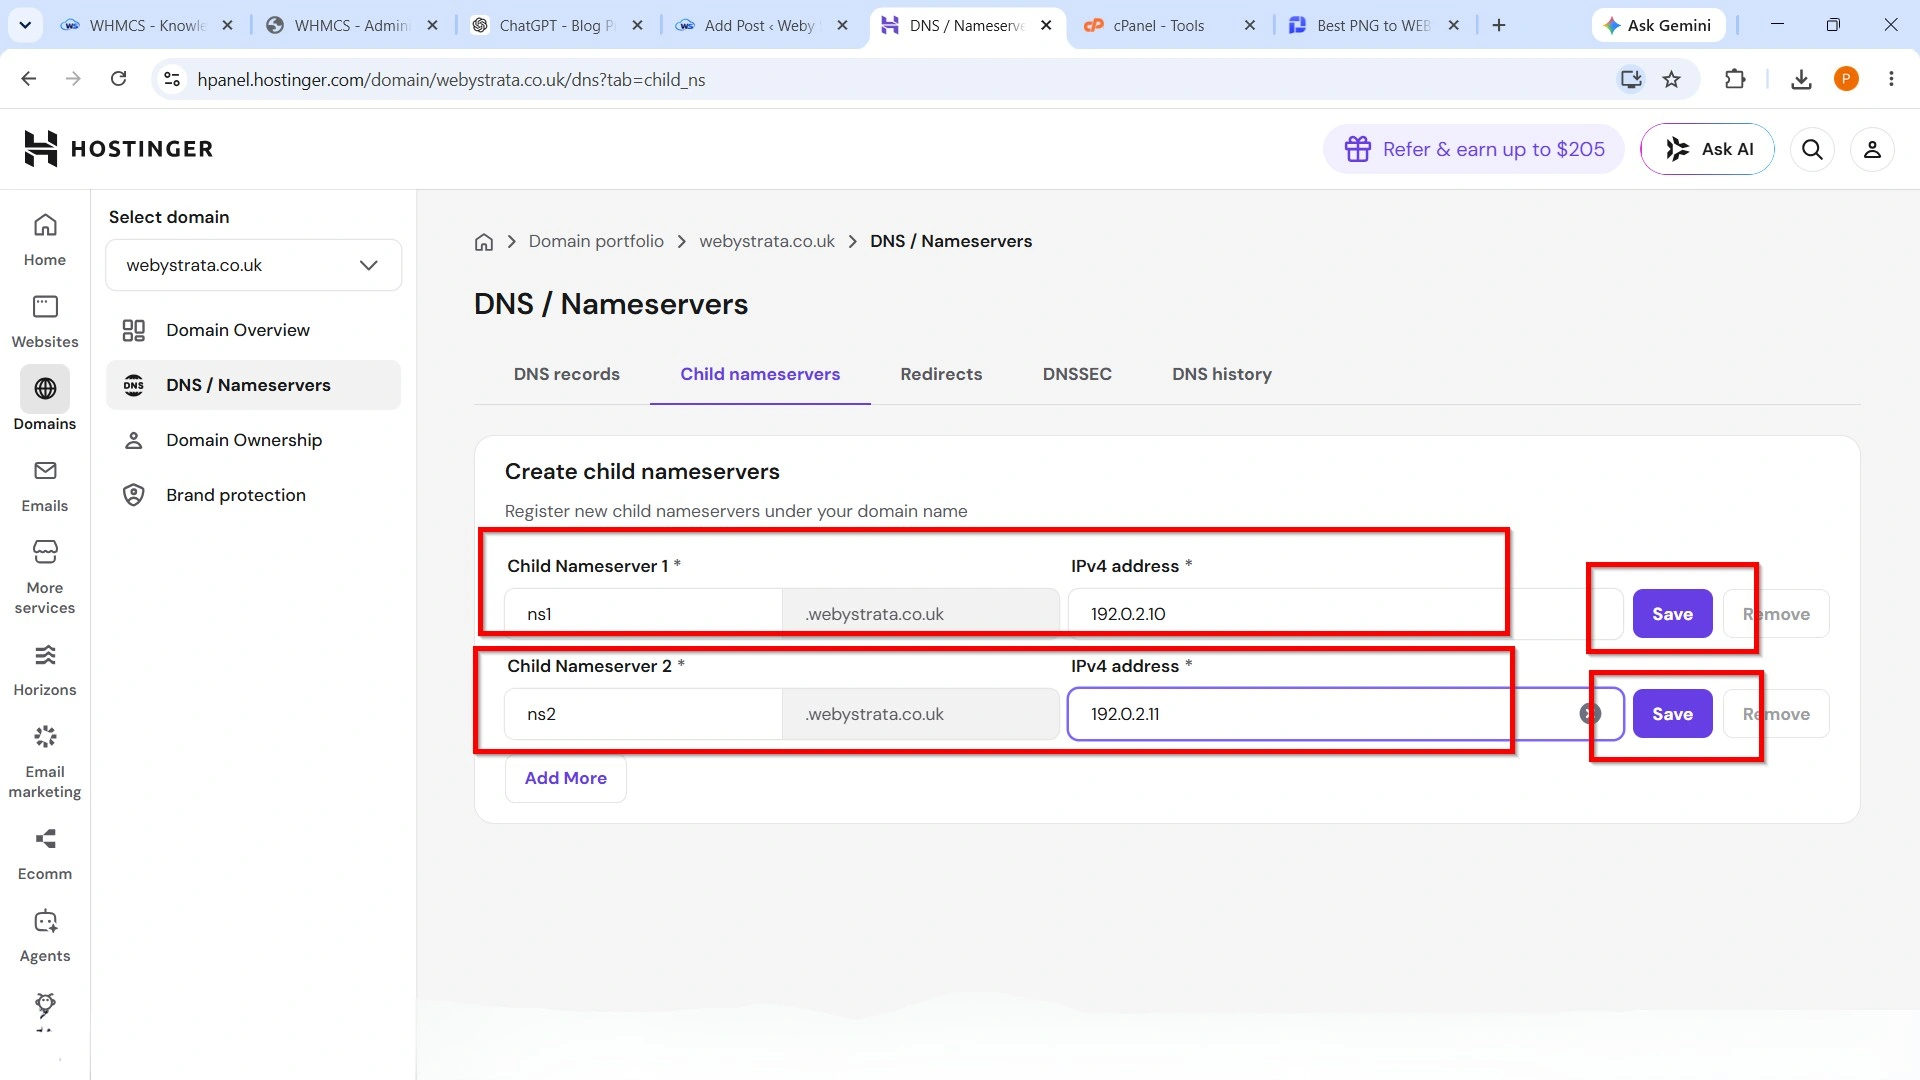
Step 3: Create Your Child Nameservers
Under the Create Child Nameservers section:
- In Child Nameserver 1, enter:
ns1
- Enter your server’s Primary IPv4 Address.
- In Child Nameserver 2, enter:
ns2
- Enter your Secondary IPv4 Address.
If your server has only one public IP address, you can use the same IP address for both nameservers.
- Click Save to register each child nameserver.
Hostinger automatically creates:
- ns1.yourdomain.com
- ns2.yourdomain.com
These nameservers are now registered with your domain.
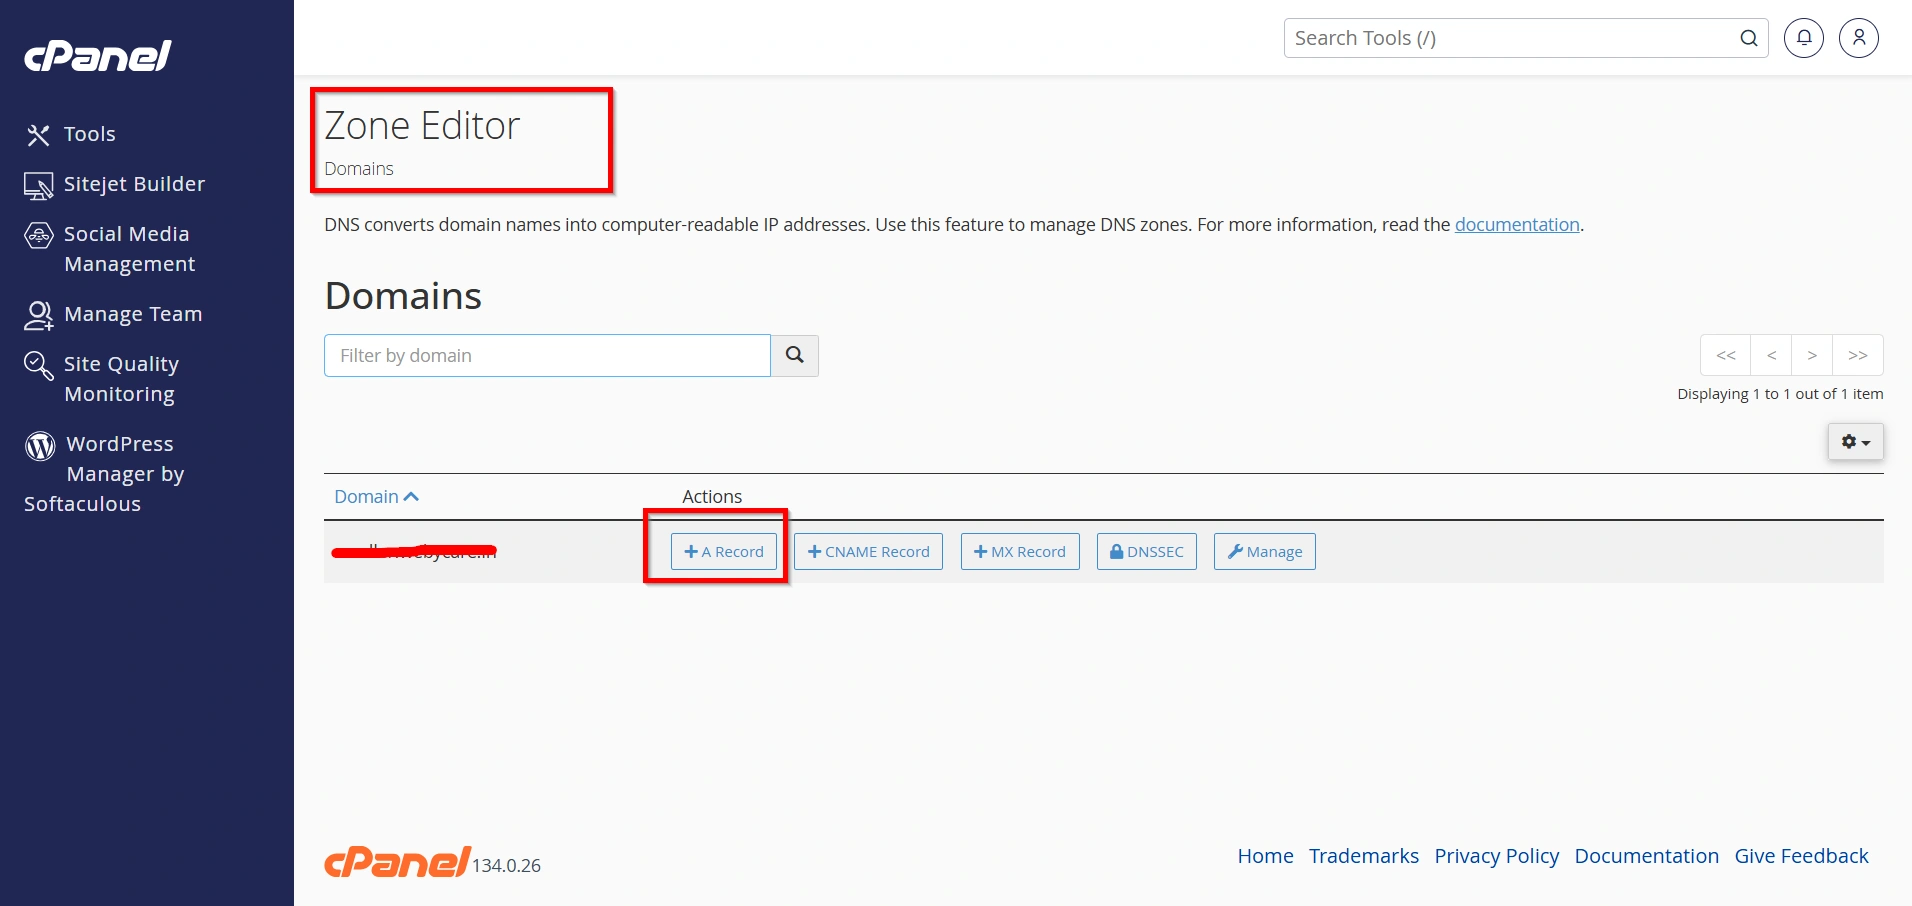
Step 4: Configure DNS Records on Your Server
Inside your hosting control panel (WHM/cPanel):
Create the following A records.
| Host | Type | IP Address |
|---|---|---|
| ns1 | A | Your Primary IP |
| ns2 | A | Your Secondary IP |
These records ensure the nameservers resolve correctly.
Step 5: Configure WHM (If Using cPanel)
If you’re running cPanel/WHM:
- Log in to WHM.
- Navigate to Basic WebHost Manager Setup.
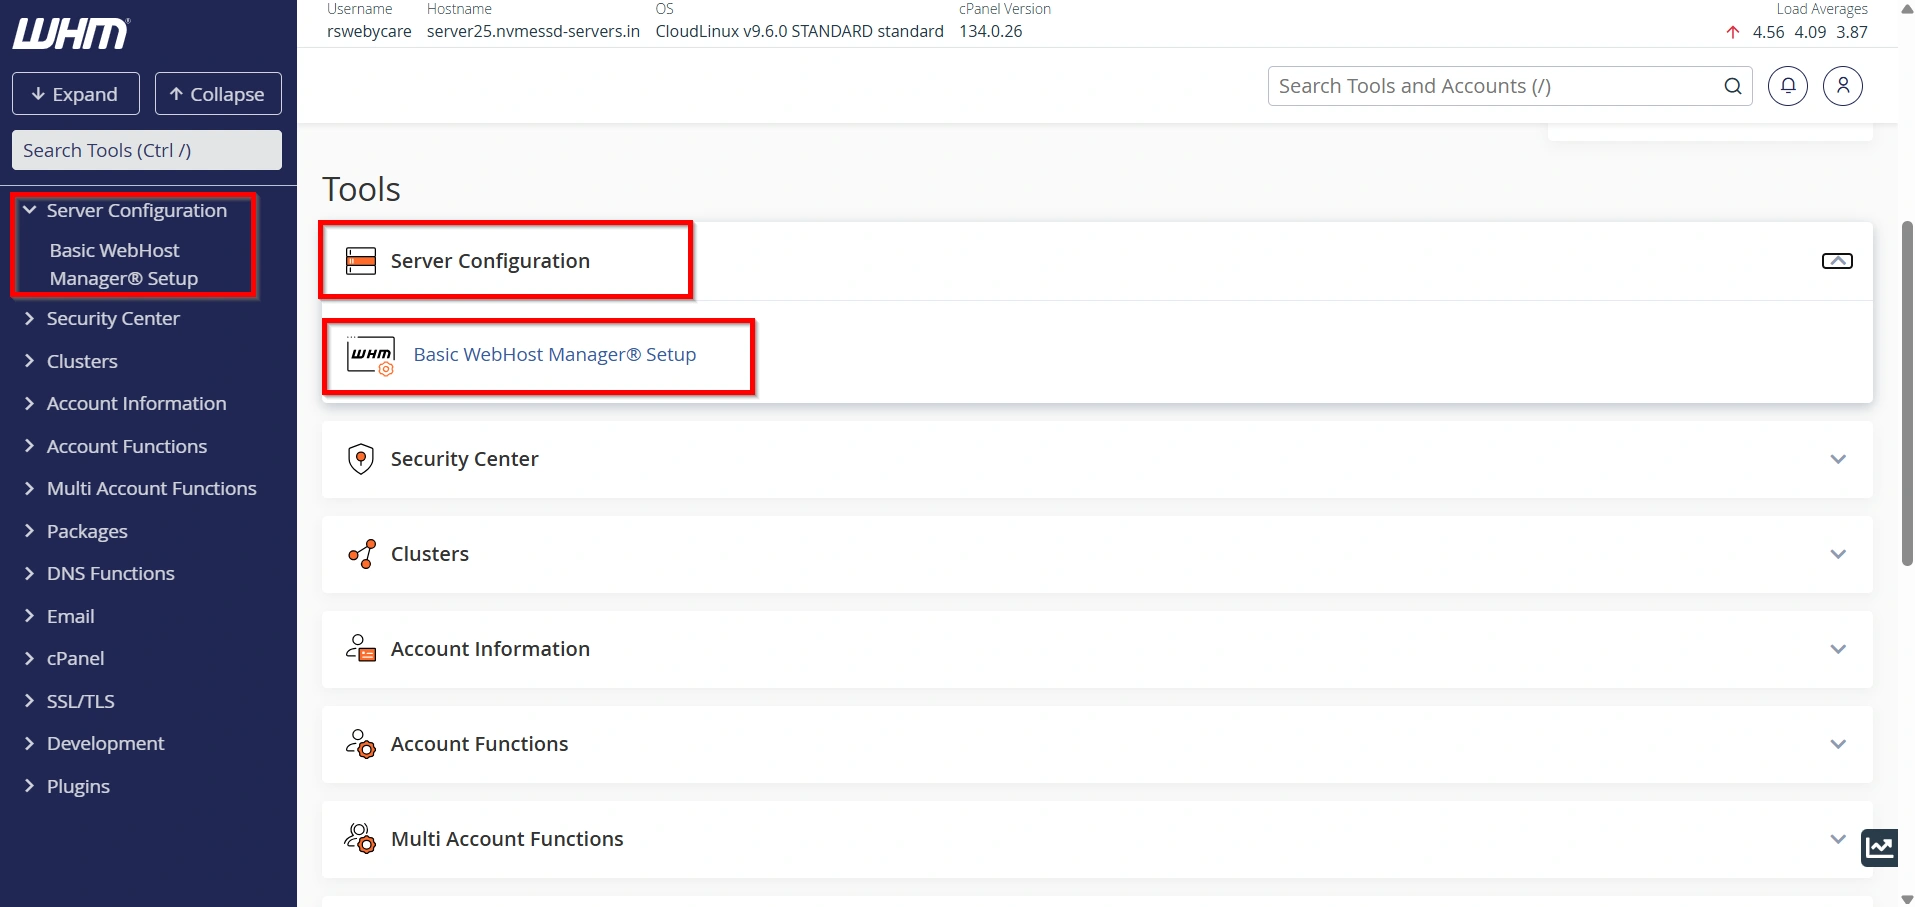
3. Set Explicitly:
Primary Nameserver
ns1.yourdomain.comSecondary Nameserver
ns2.yourdomain.comAssign the correct IP addresses.
Click Save Changes.

Step 6: Configure Default Nameservers in WHMCS
Now configure WHMCS to use your branded nameservers for all new hosting accounts.
- Log in to the WHMCS Admin Area.
- Navigate to:
Configuration → System Settings → General Settings → Domains
- Under Default Nameservers, enter:
- ns1.yourdomain.com
- ns2.yourdomain.com
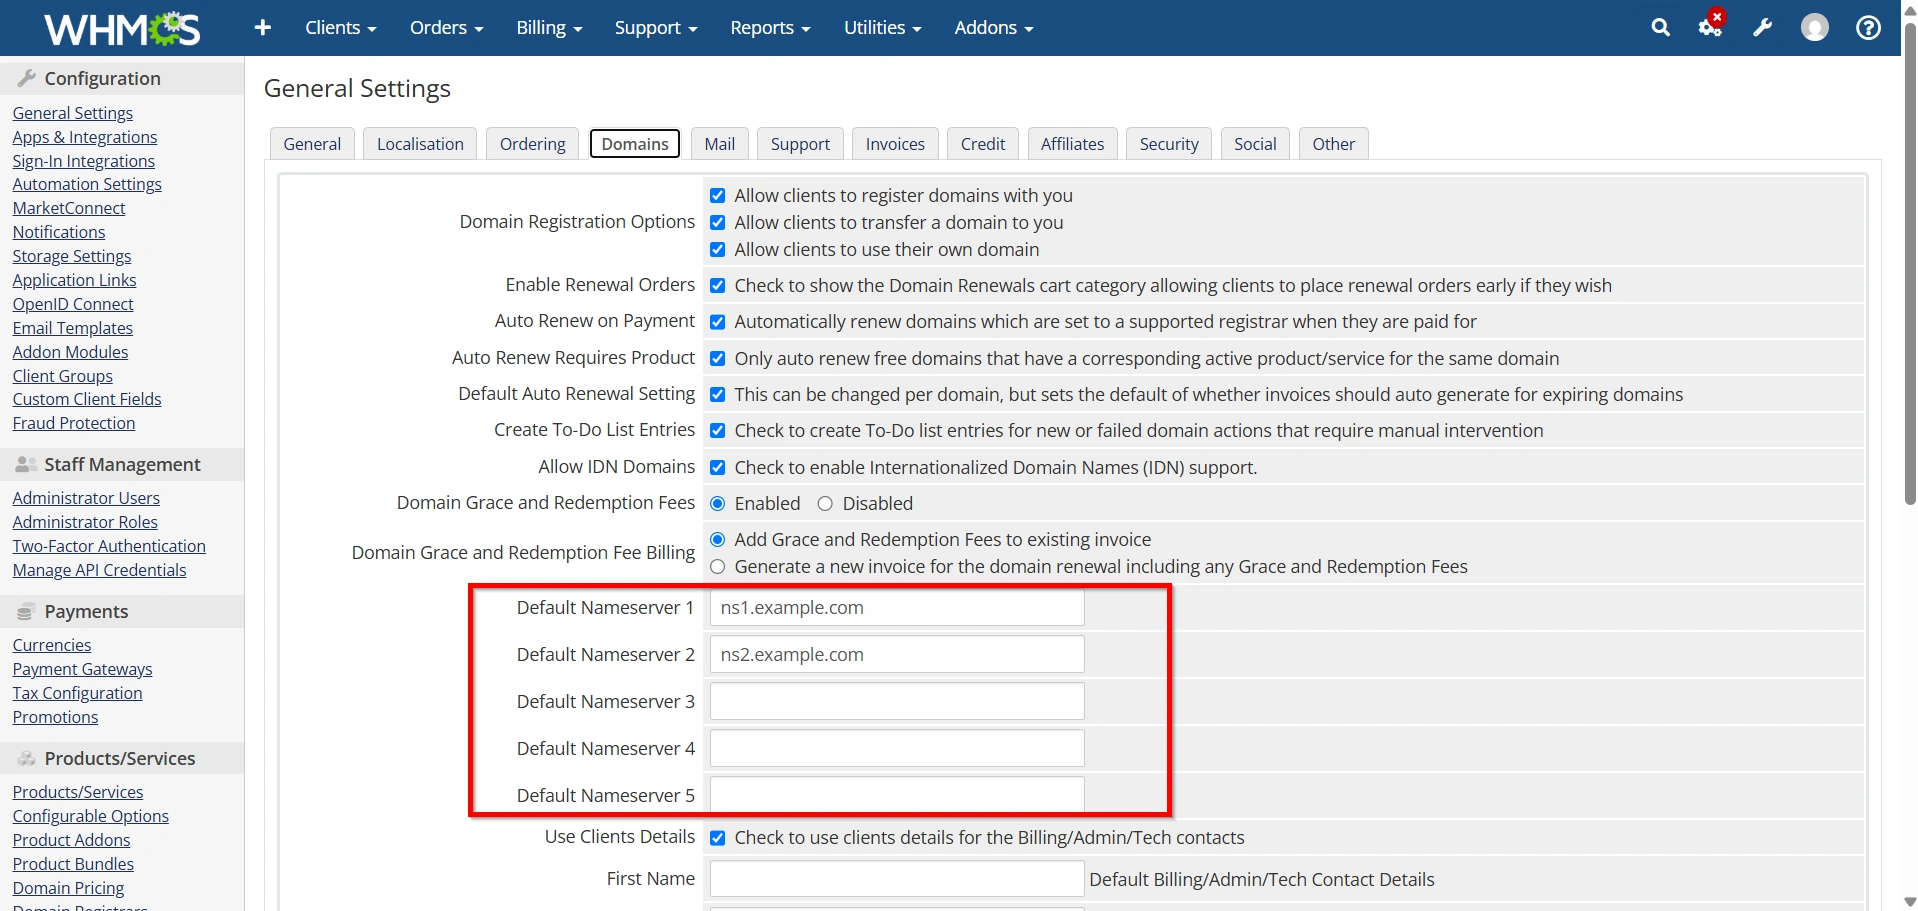
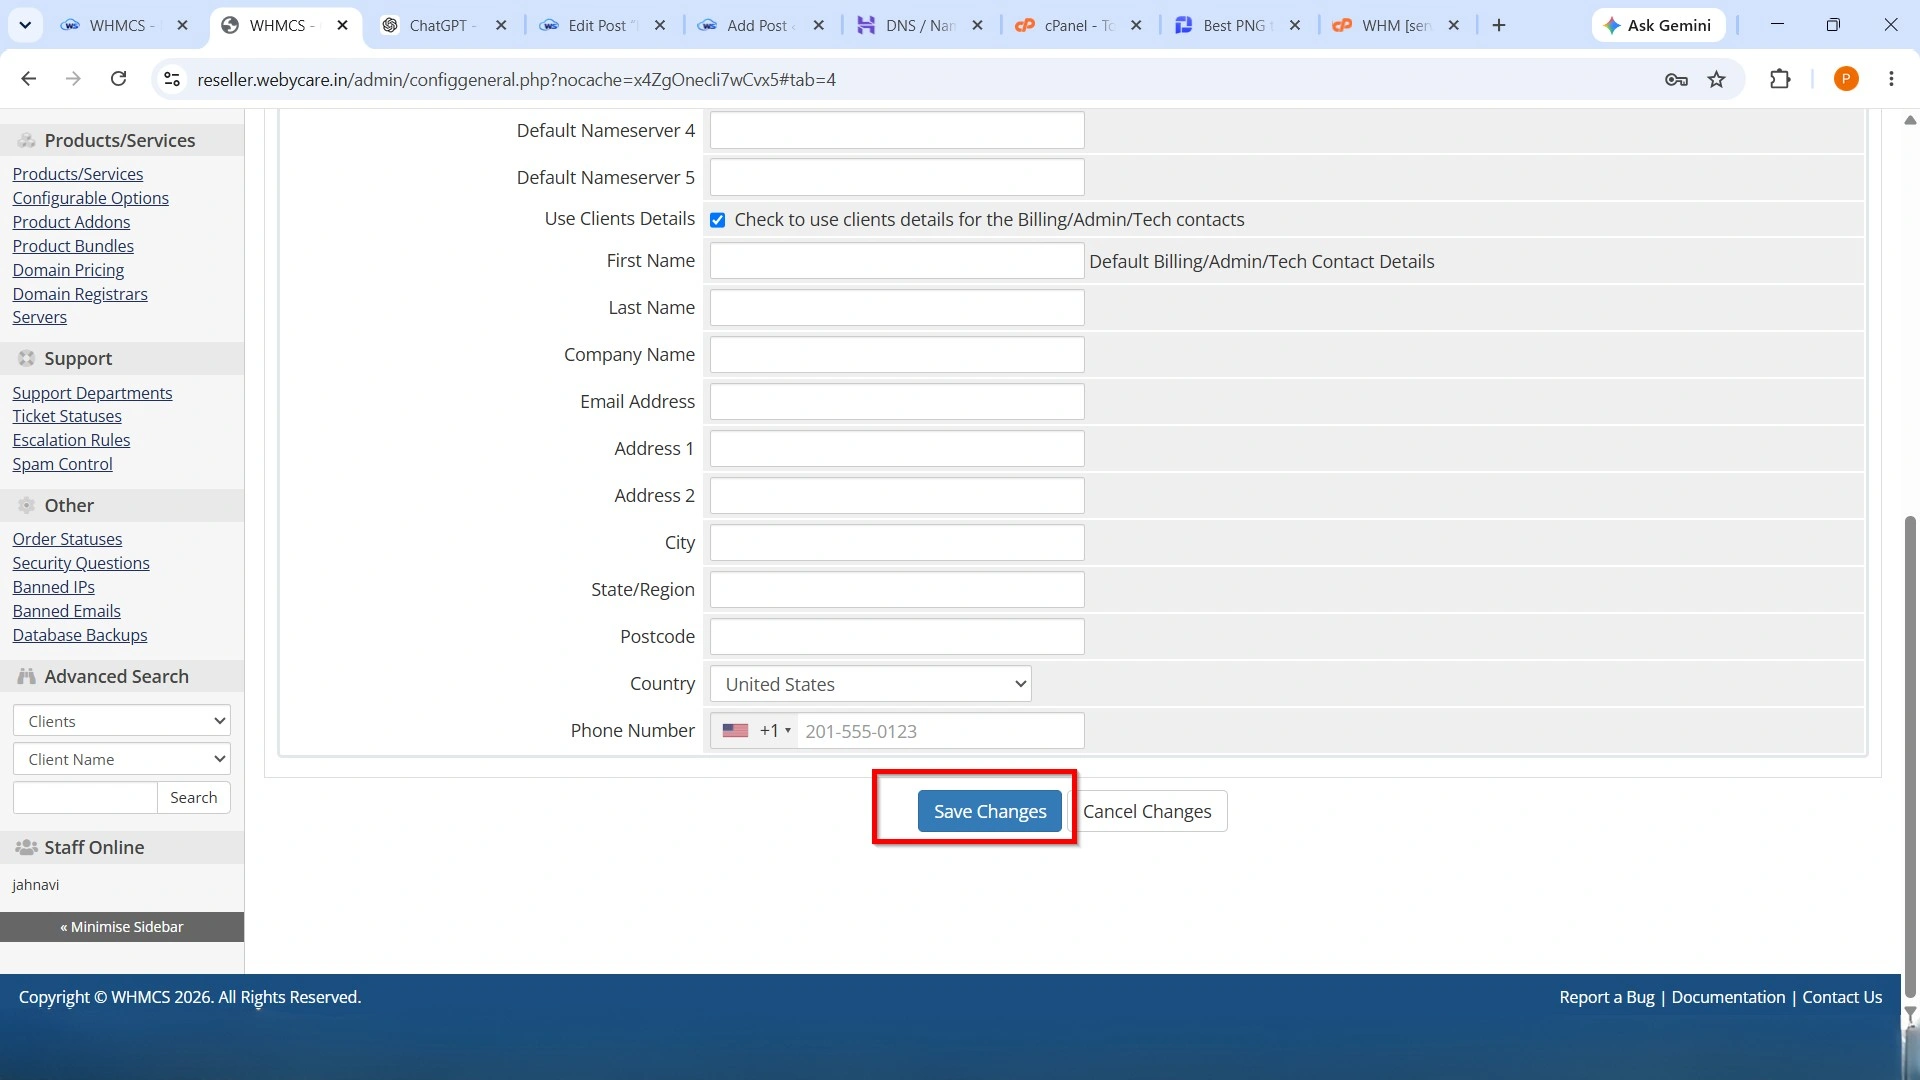
- Click Save Changes.
From now on, WHMCS will automatically display these nameservers whenever customers purchase hosting services.
Step 7: Wait for DNS Propagation
After saving your configuration, allow time for DNS propagation.
Propagation usually takes between 30 minutes and 24 hours, depending on DNS caching and your registrar.
During this period, the new nameservers become available across DNS servers worldwide.
Step 8: Test Your Private Nameservers
Once propagation has completed:
- Verify that ns1.yourdomain.com and ns2.yourdomain.com resolve correctly.
- Create a test hosting account in WHMCS.
- Assign your custom nameservers to a test domain.
- Confirm that the domain resolves successfully using your branded nameservers.
If everything works as expected, your private nameservers are ready for production use.
Best Practices
To ensure reliable DNS service:
- Use two public IP addresses whenever possible.
- Keep DNS records updated after server migrations.
- Verify DNS records before assigning nameservers to customers.
- Configure the same nameservers in both WHM and WHMCS.
- Allow sufficient time for DNS propagation before testing.
Why Use Private Nameservers?
There are several reasons to Create Private / Child Nameservers at Hostinger:
- Professional Branding: Custom nameservers allow you to use your own domain name instead of third-party DNS names.
- Better Client Experience: Hosting companies and resellers can provide branded services to customers.
- Easy DNS Management: Managing domains becomes easier when all DNS services are connected to your own nameservers.
- Build Trust: Custom nameservers make your hosting business look more professional and reliable.
Benefits of Creating Private / Child Nameservers at Hostinger
By choosing to Create Private / Child Nameservers at Hostinger, you get more control over your DNS settings and can create a more professional hosting environment. This setup is especially useful for web hosting providers, agencies, and businesses managing multiple websites.
- Creates a professional brand identity.
- Allows customers to use your custom nameservers.
- Improves trust in your hosting business.
- Works seamlessly with WHMCS hosting automation.
- Makes future server migrations easier.
- Provides consistent DNS management.
Conclusion
Learning how to Create Private / Child Nameservers at Hostinger is useful for hosting providers and businesses that want a professional DNS setup. By following these steps, you can successfully create custom nameservers and manage your hosting services efficiently.
Related Articles