Latest Updates
How to Create Welcome Emails in WHMCS
How to Create Welcome Emails in WHMCS Welcome emails are one of the first interactions your customers have with your hosting business. A well-designed welcome email helps create a positive first impression, provides important…
How to Create Welcome Emails in WHMCS
Welcome emails are one of the first interactions your customers have with your hosting business. A well-designed welcome email helps create a positive first impression, provides important account information, and strengthens your brand identity. WHMCS includes a powerful email template system that allows administrators to customize welcome emails according to their business requirements.
In this guide, you will learn how to Create Welcome Emails in WHMCS, why it is important, and the steps required to create professional and personalized welcome messages for your clients.
What Are Welcome Emails in WHMCS?
Welcome emails are automated messages sent to customers after purchasing a product or service. These emails typically contain:
- Account login details
- Product information
- Hosting server information
- Control panel access details
- Support contact information
- Useful links and resources
WHMCS automatically sends these emails based on the product or service purchased. By creating them, you can ensure that customers receive clear, branded, and relevant information.
Before You Begin
Before you start creating welcome emails, ensure that:
- WHMCS is installed and configured.
- You have administrator access.
- Products and services are already created.
- Email sending functionality is properly configured.
How to Create Welcome Emails in WHMCS
Step 1: Log in to the WHMCS Admin Area
Access your WHMCS administration panel using your administrator credentials.
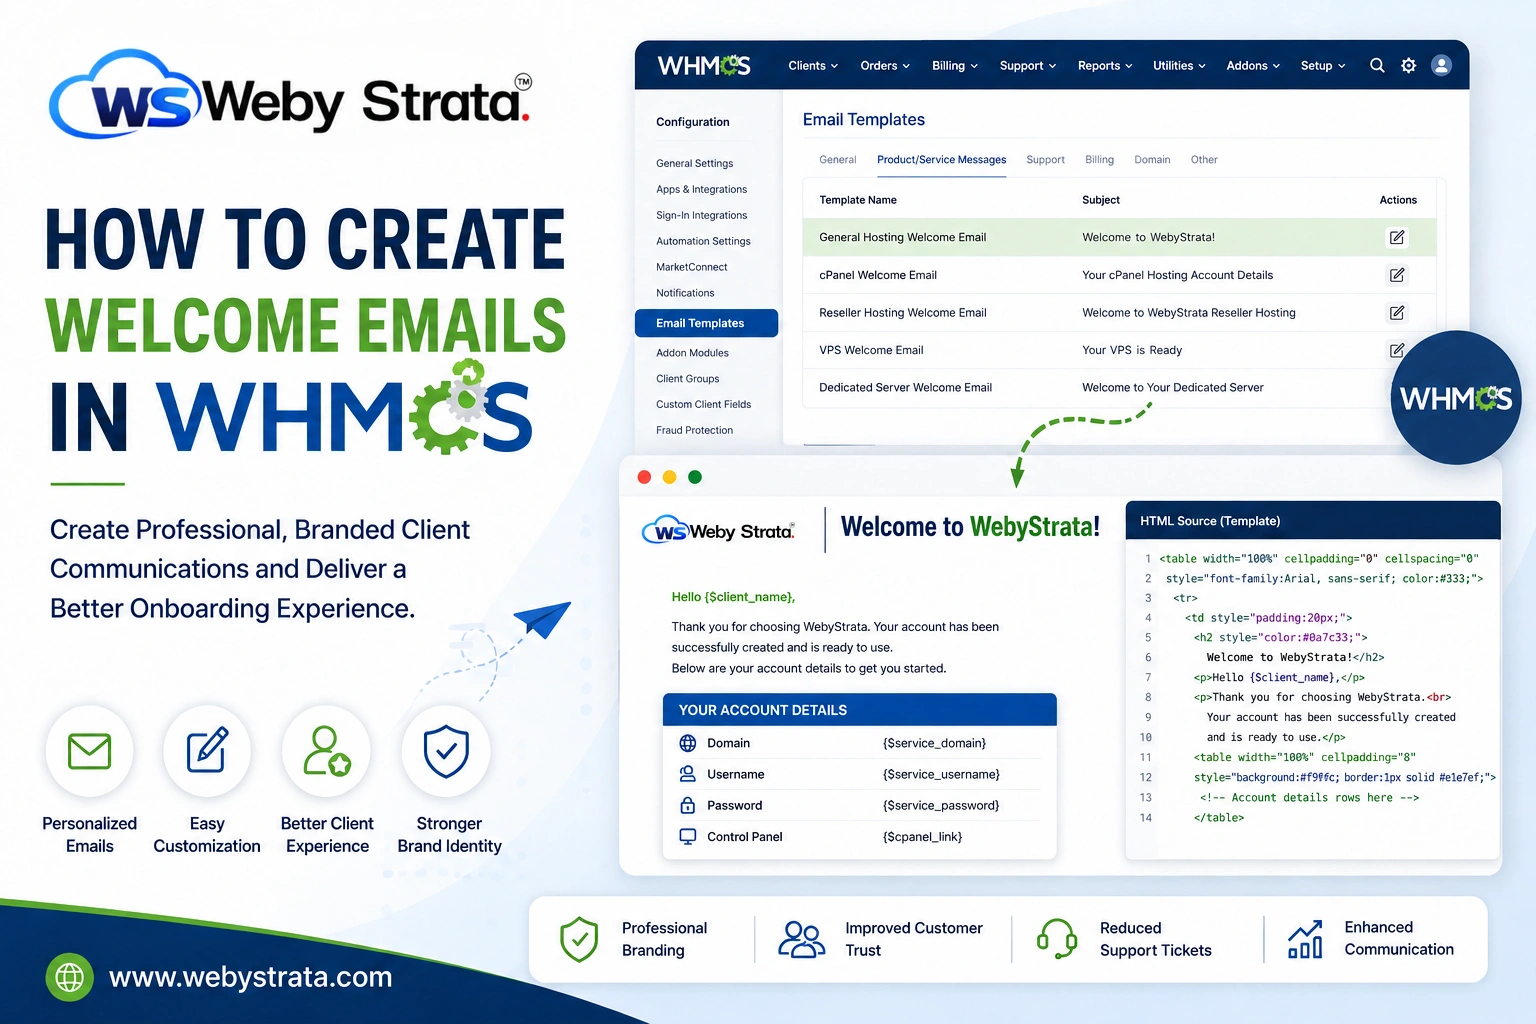
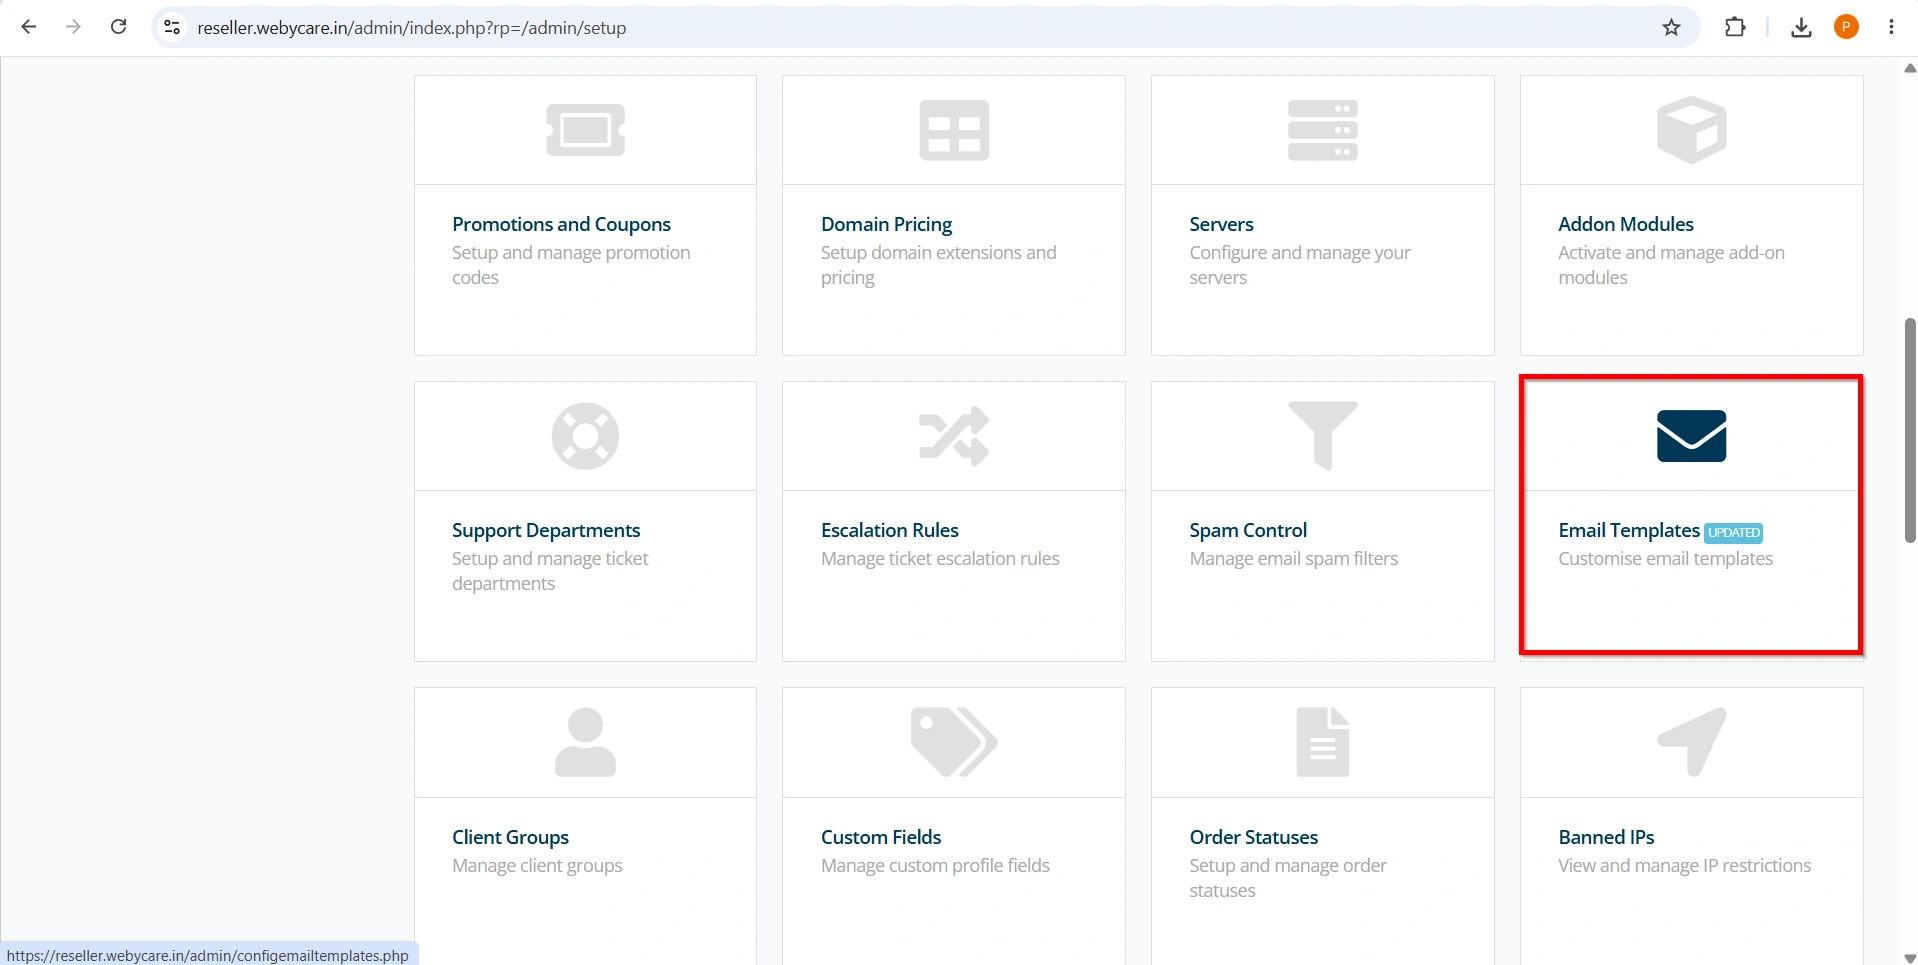
Step 2: Navigate to Email Templates
From the admin dashboard:
- Navigate to Configuration Icon → System Settings
![]()
- Select Email Templates
This section contains all email templates used throughout WHMCS.
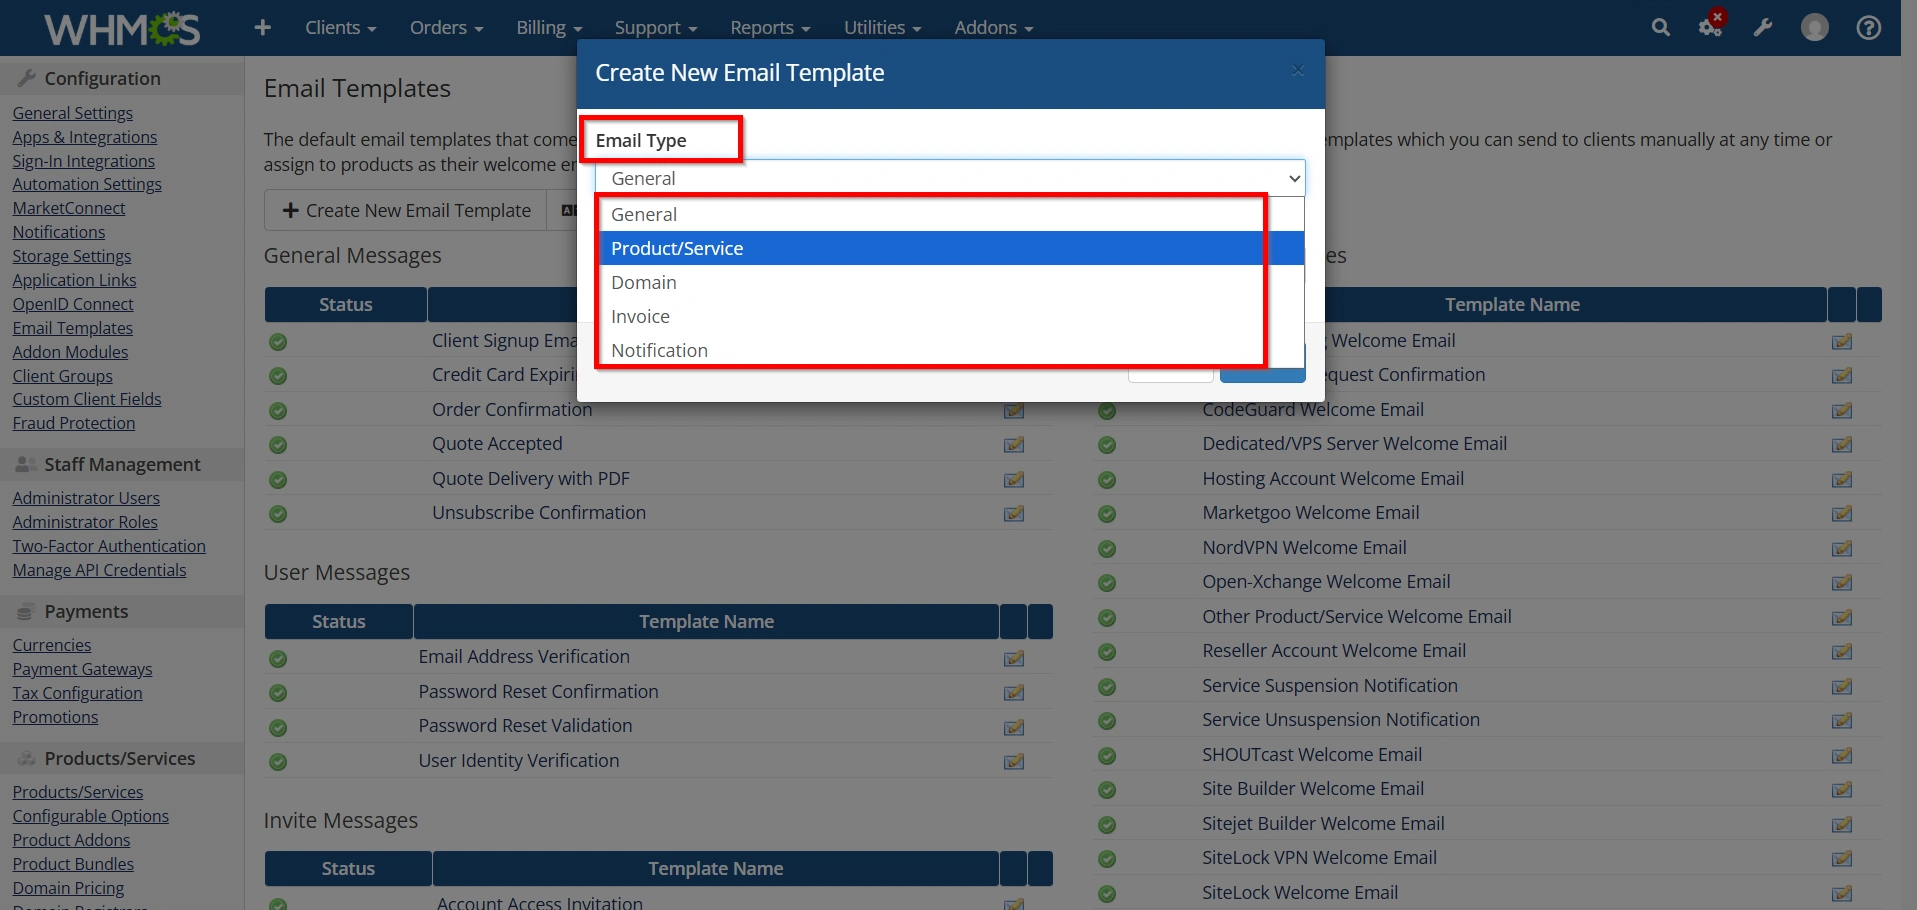
Step 3: Locate Product Welcome Emails
Under the Email Templates page, find the category called:
Product Type
Product/Service Messages
You will see various welcome email templates, such as:
- General Hosting Welcome Email
- cPanel Welcome Email
- Reseller Hosting Welcome Email
- VPS Welcome Email
- Dedicated Server Welcome Email
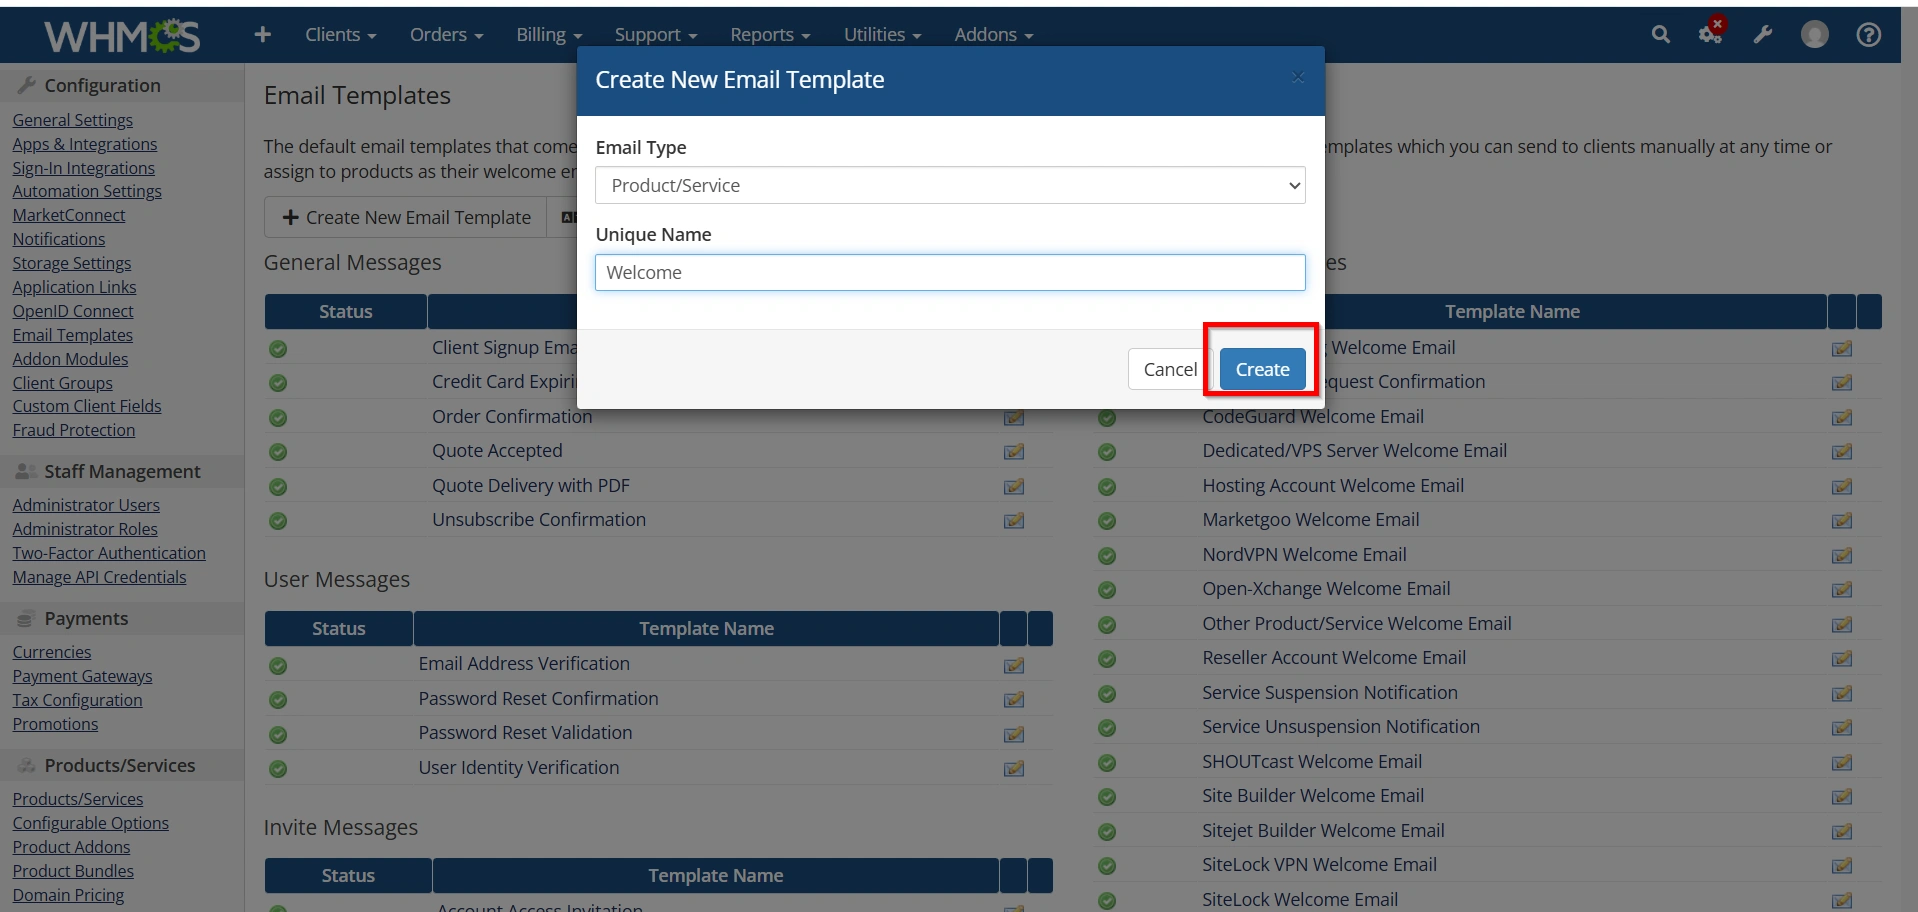
Select the template you want to create.
Template Name
Provide a descriptive name.
Examples:
- Welcome Email Custom
- Hosting Upgrade Notification
- Maintenance Announcement
- Service Activation Guide
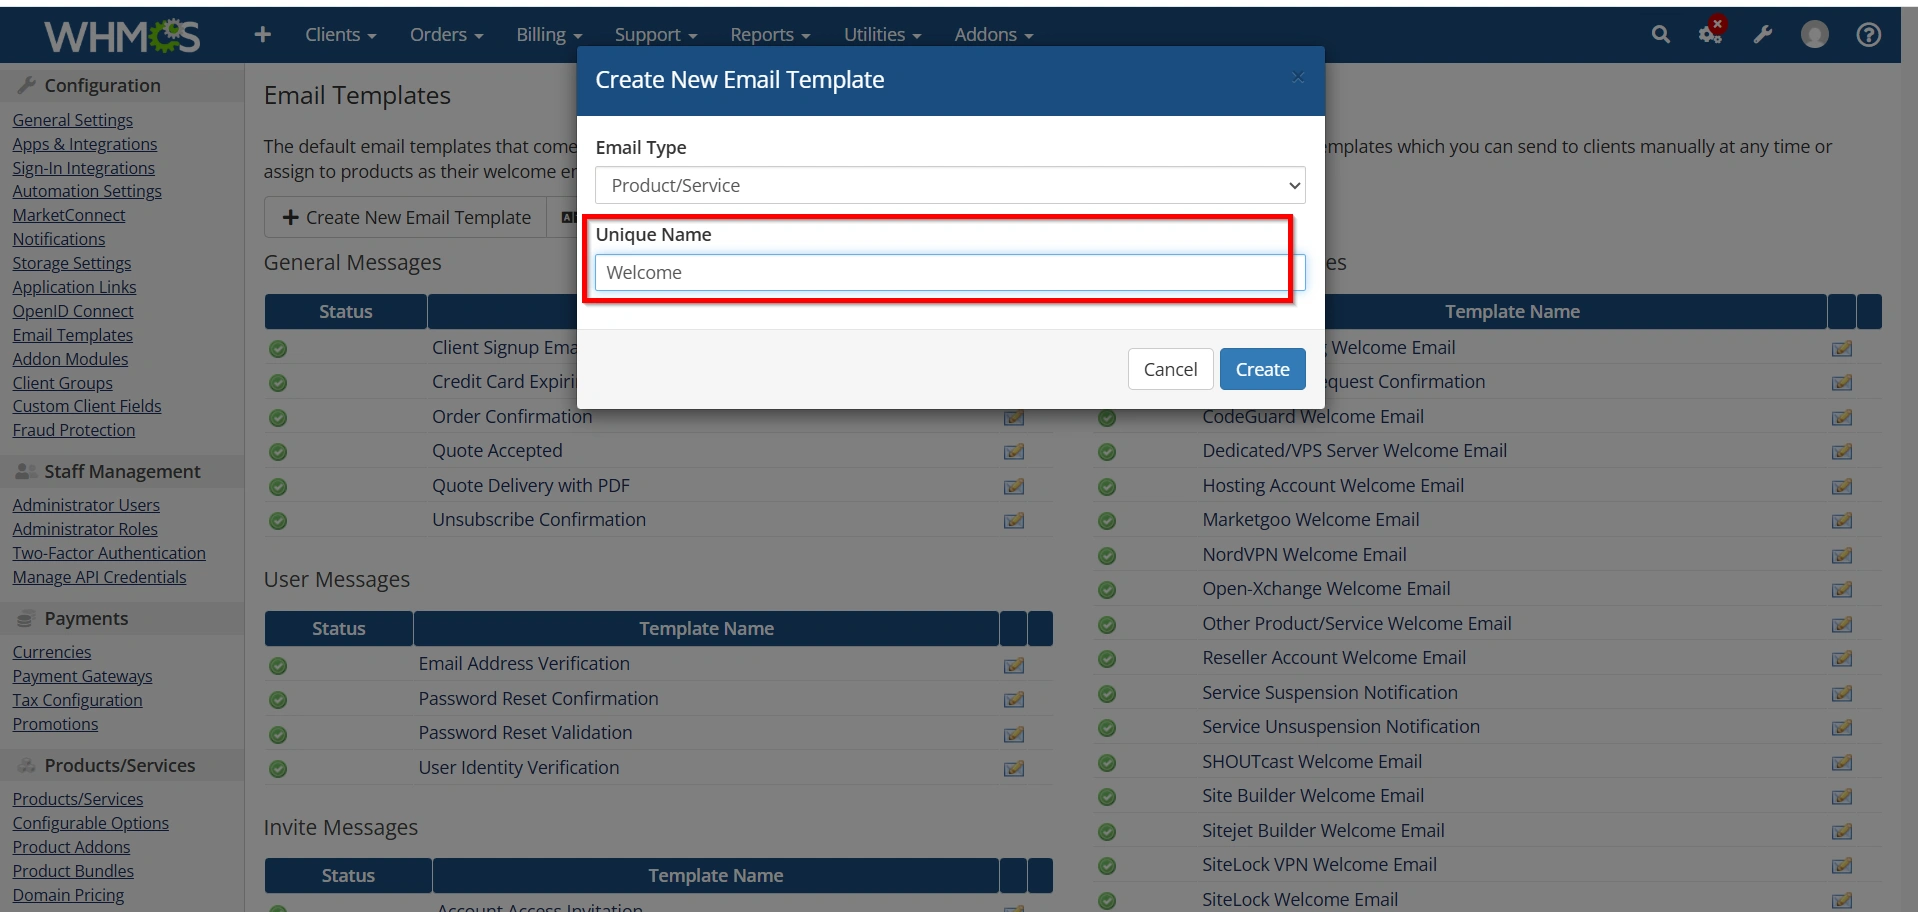
- Click Create.
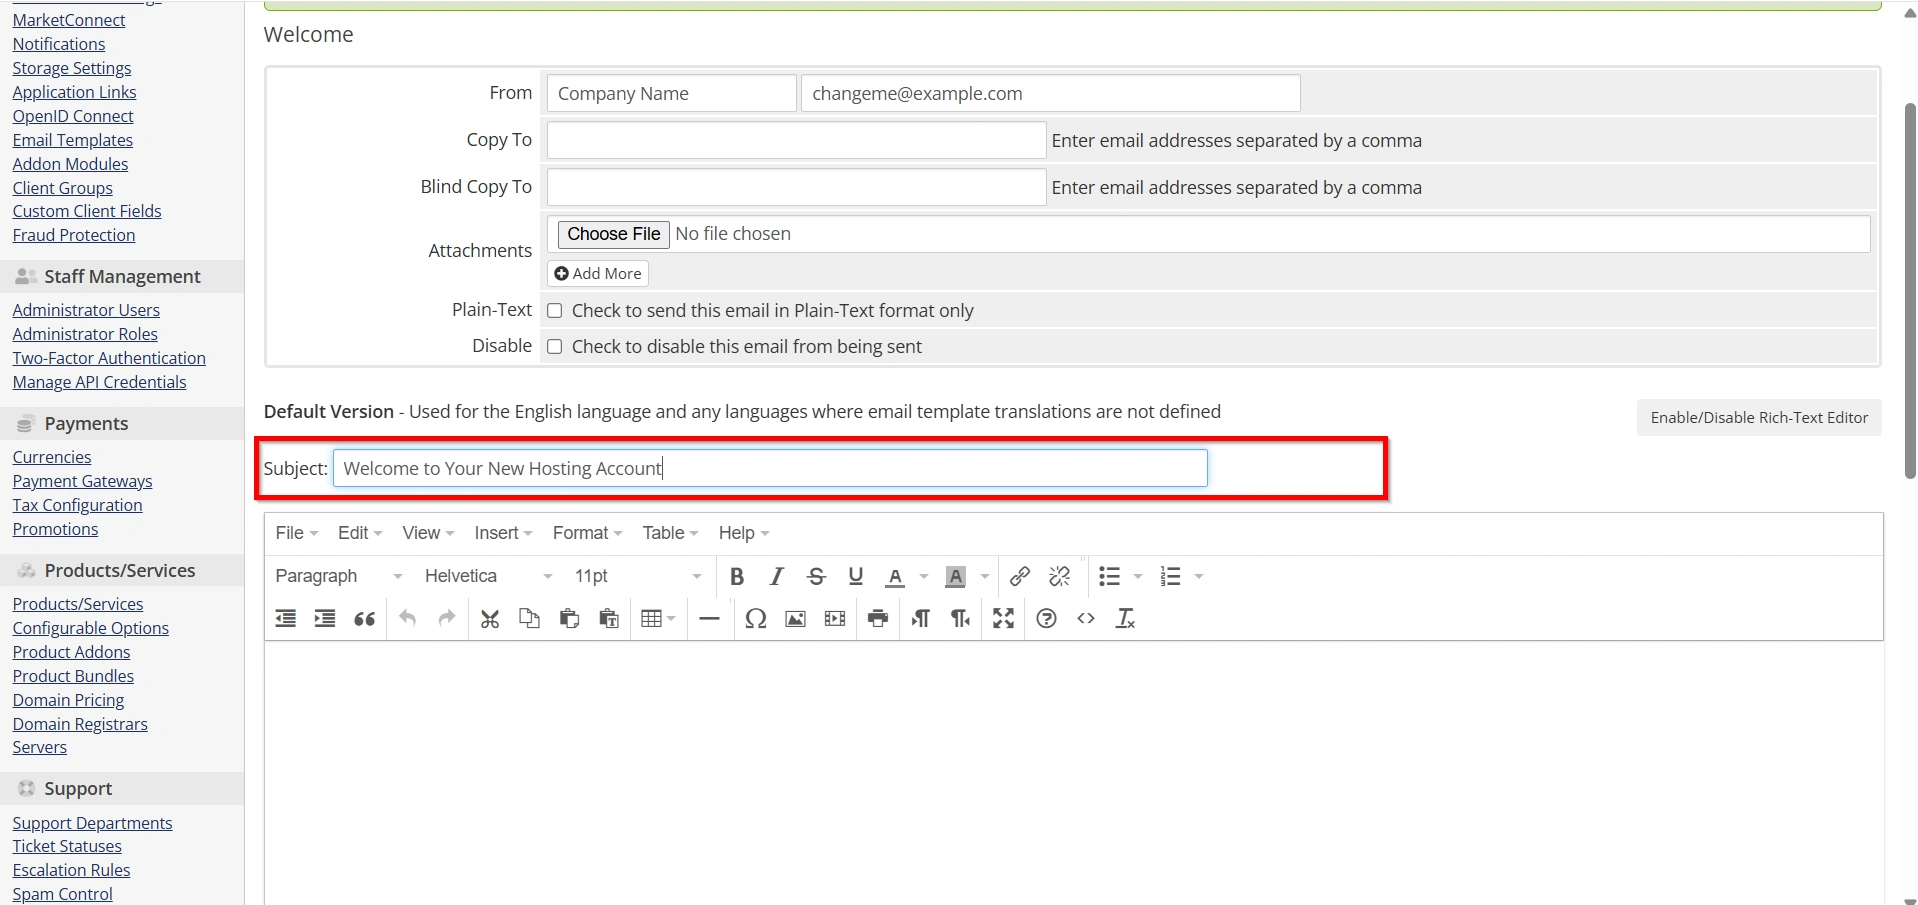
Step 4: Add the Email Subject
The email subject is the first thing customers see.
Example:
Default Subject:
Welcome to Your New Hosting Account
Customized Subject:
Welcome to WebyStrata – Your Hosting Account Is Ready
A clear and branded subject line can improve email engagement and professionalism.
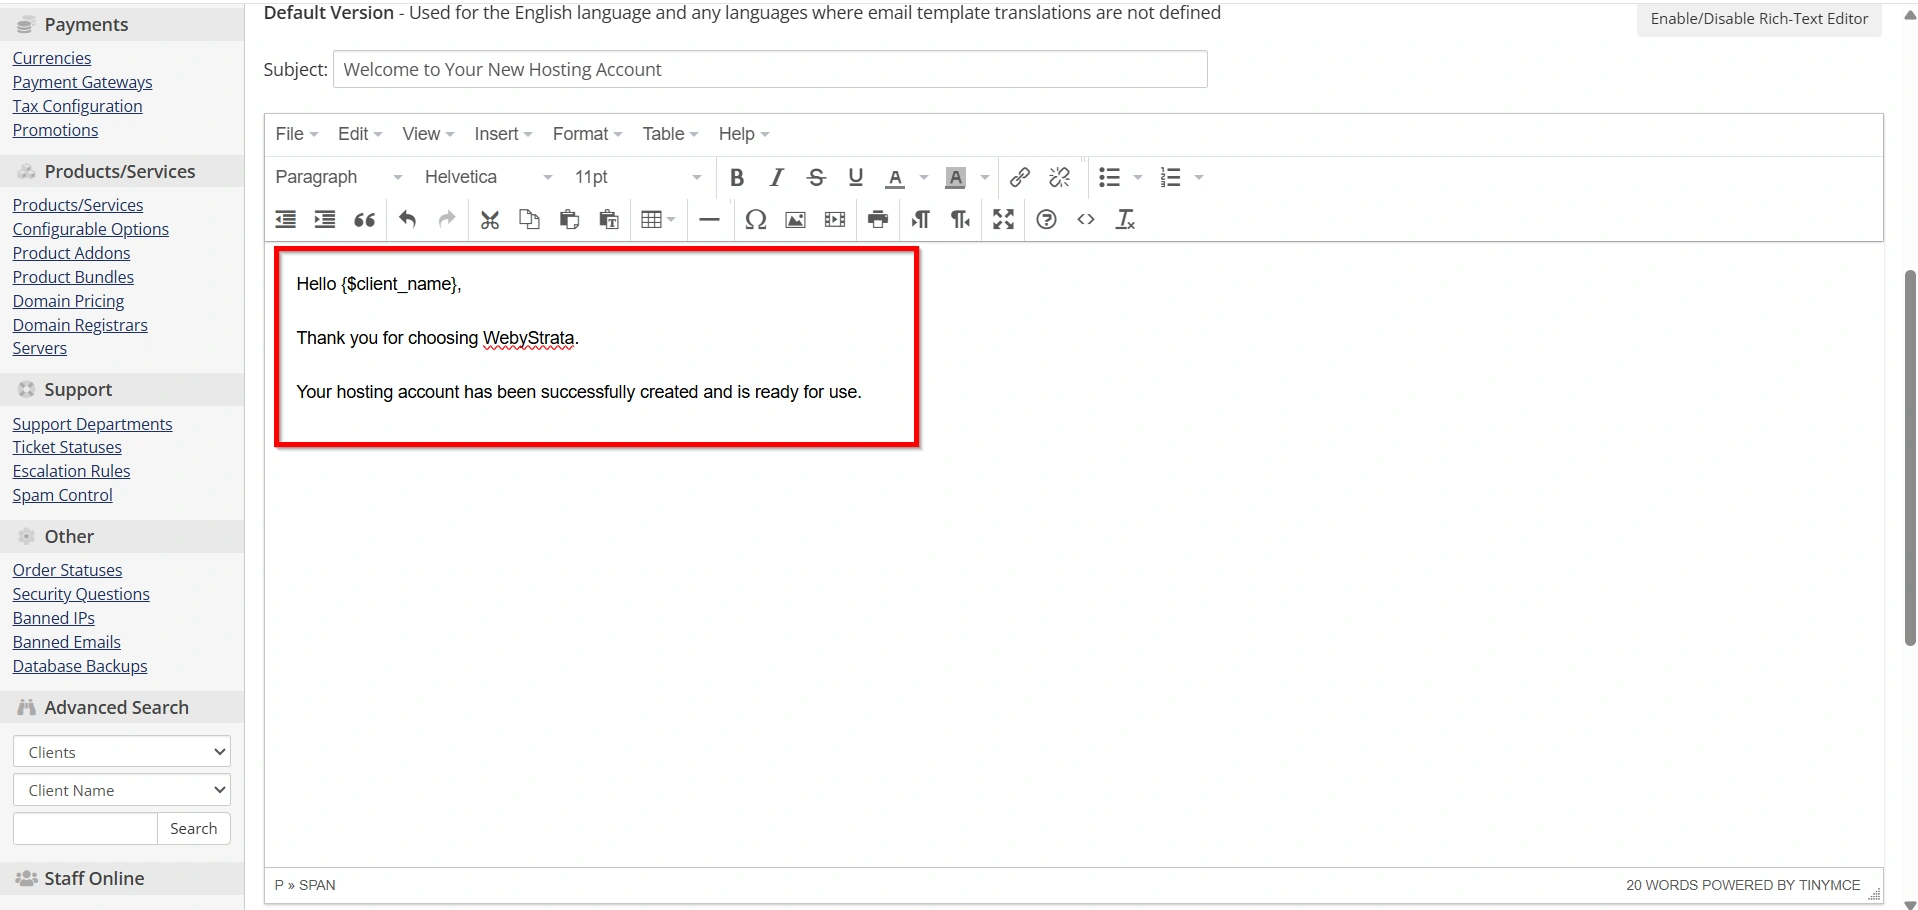
Step 5: Add the Email Content
The template editor allows you to create the email body.
You can include:
- Personalized greetings
- Hosting account details
- Login information
- Knowledge base links
- Support information
- Social media links
Example introduction:
Hello {$client_name},
Thank you for choosing WebyStrata. Your hosting account has been successfully created and is ready for use.
Below you will find your account details and important information to get started.
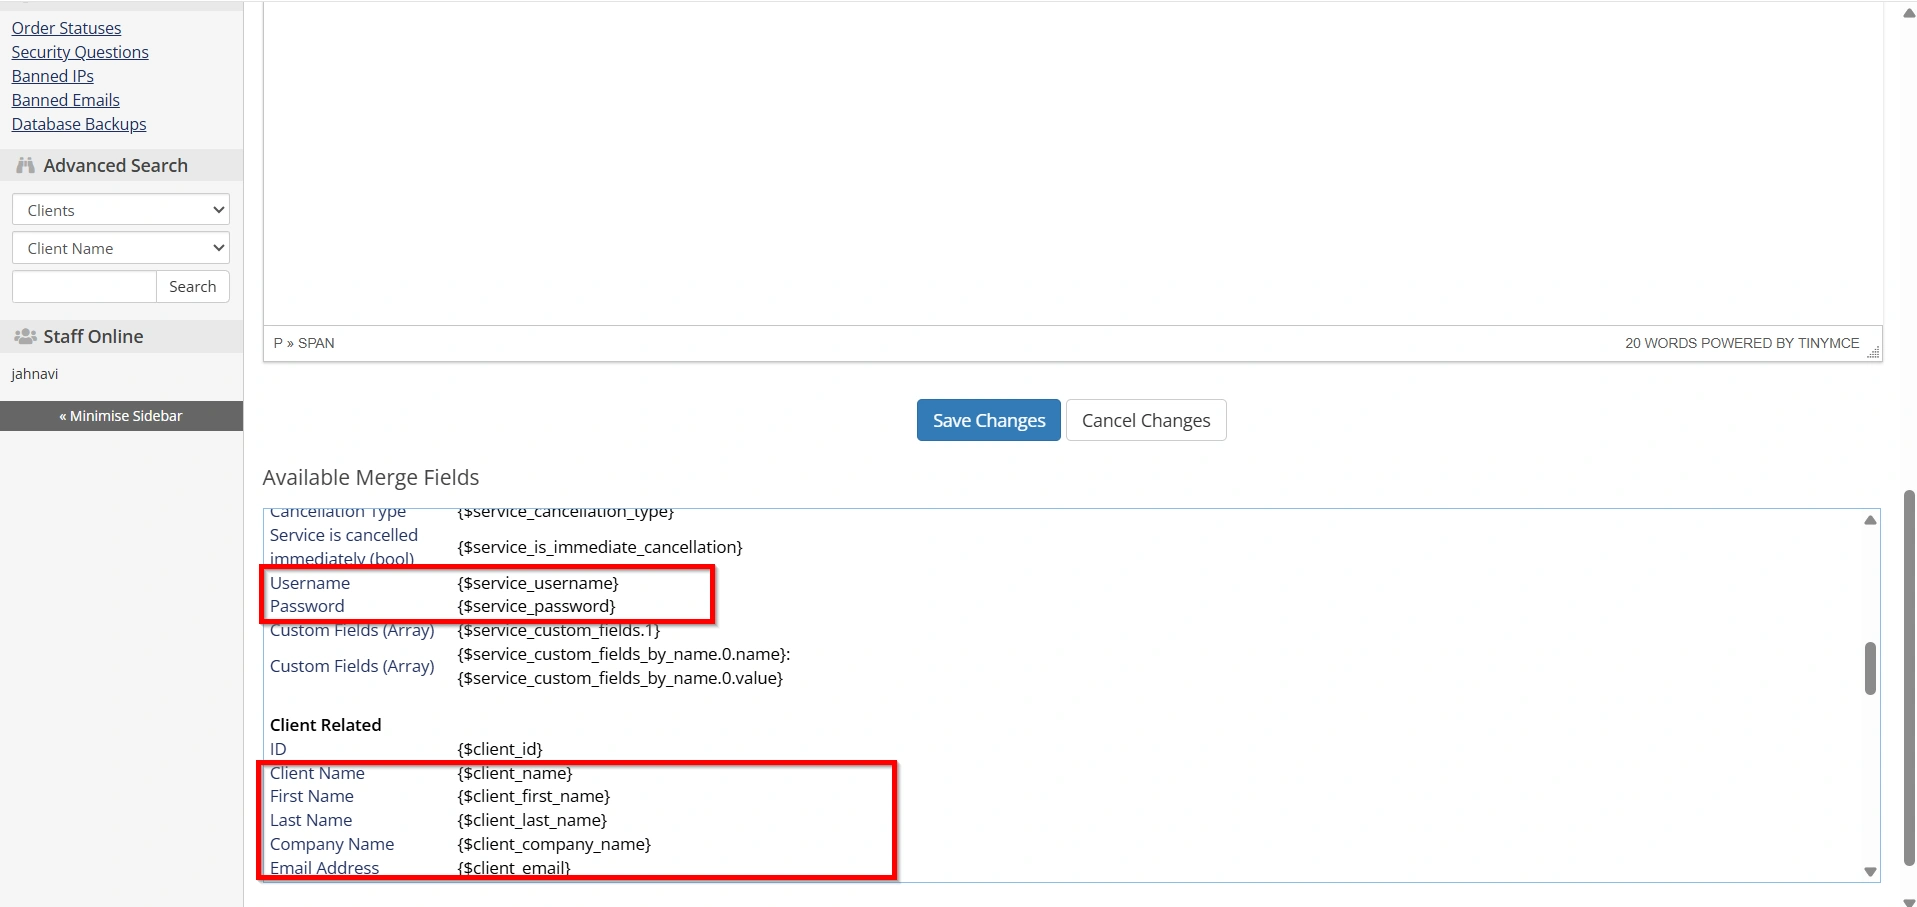
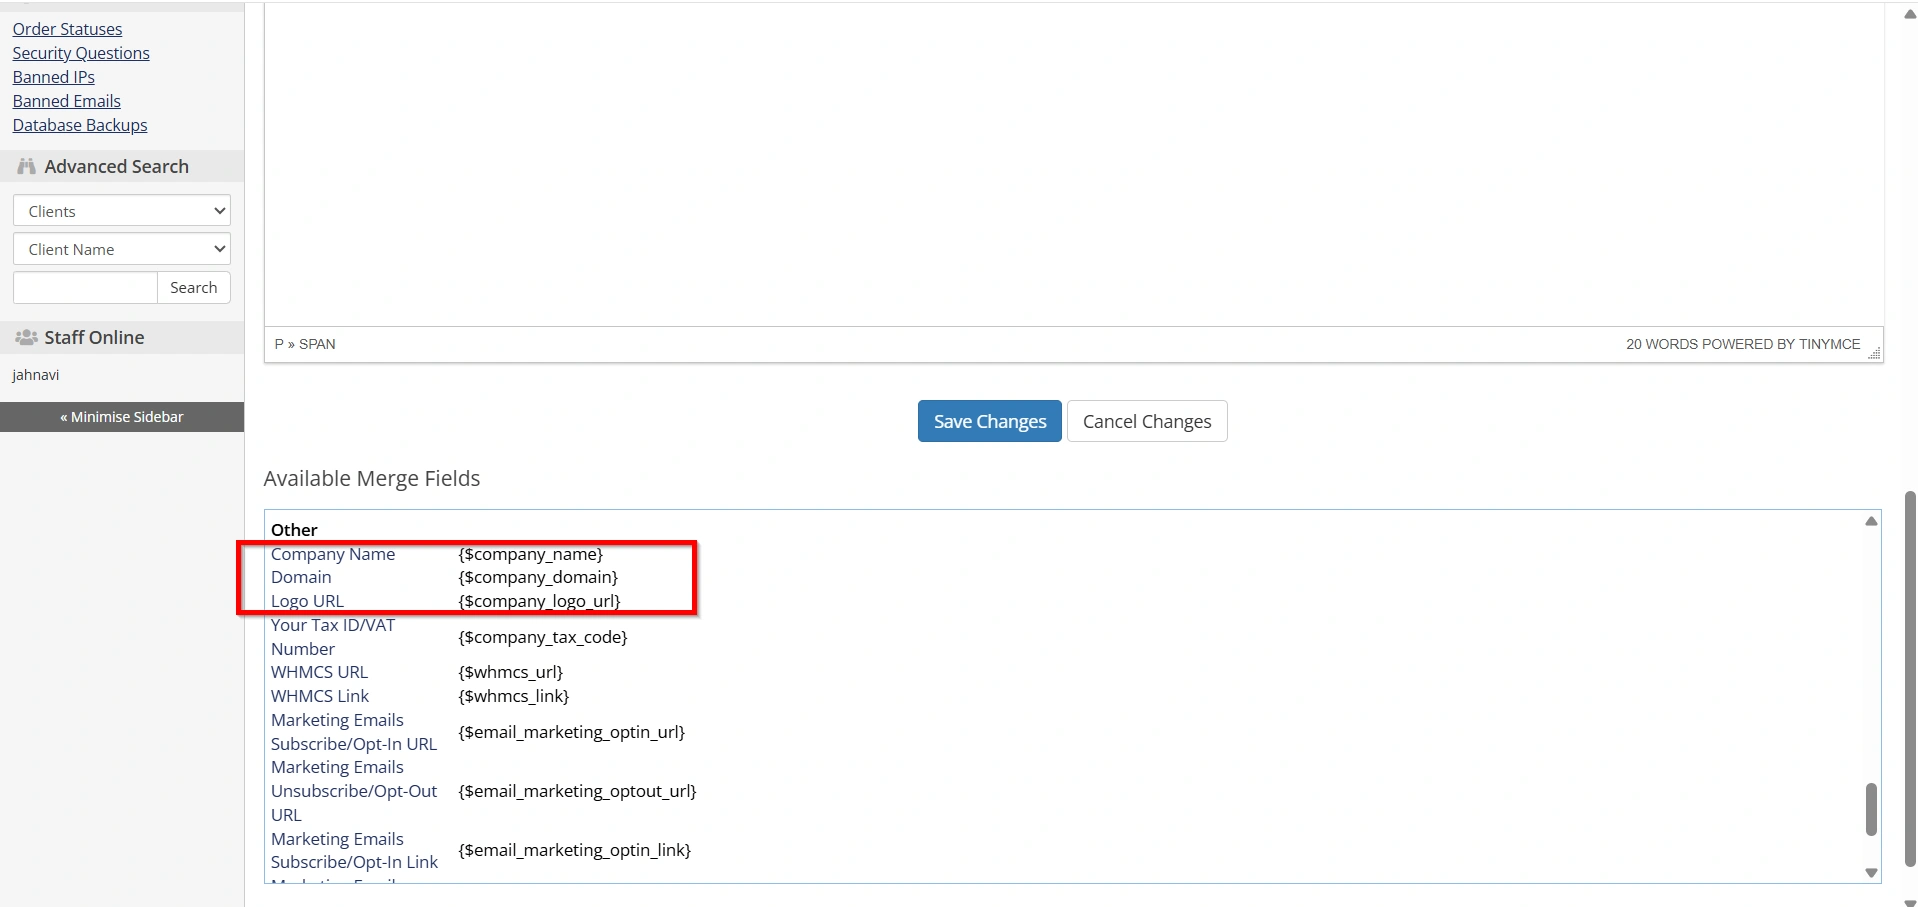
Step 6: Use WHMCS Merge Fields
WHMCS supports merge fields that automatically insert customer-specific information.
Common merge fields include:
- {$client_name}
- {$service_domain}
- {$service_username}
- {$service_password}
- {$company_name}
These variables ensure each email contains personalized information for the recipient.
Step 7: Add Branding Elements
To make your welcome emails more professional:
- Add your company logo
- Include brand colors
- Use consistent fonts
- Add your website URL
- Include social media profiles
Branding helps customers immediately recognize your company.
Step 8: Include Helpful Resources
Welcome emails should guide customers toward success.
Consider including links to:
- Knowledge Base
- Tutorials
- Support Center
- Billing Portal
- Contact Information
This allows customers to find answers quickly without contacting support.
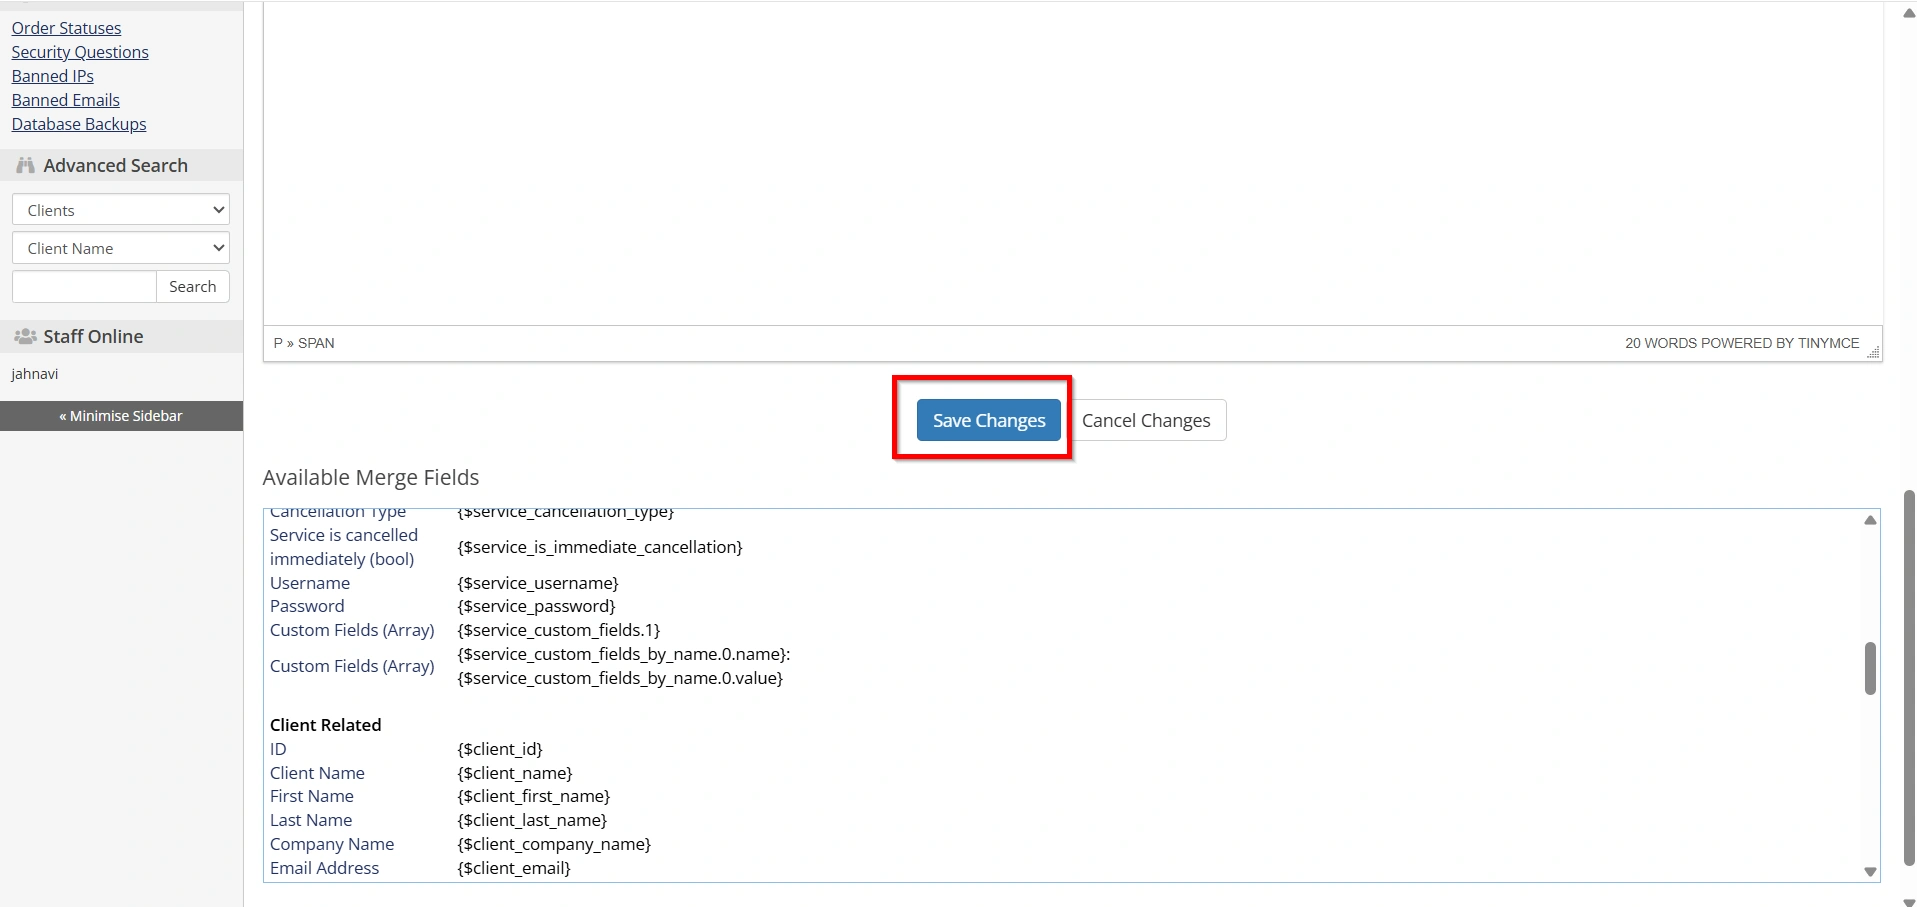
Step 9: Save the Template
After making your changes, click:
Save Changes
WHMCS will immediately begin using the updated template for future welcome emails.
Step 10: Test the Welcome Email
Always test your created email before using it in production.
You can:
- Create a test account
- Place a test order
- Verify email formatting
- Check merge fields
- Confirm links are working correctly
Testing helps identify any issues before customers receive the email.
Best Practices for Welcome Email Creation
- Keep the Message Clear
- Use Professional Language
- Optimize for Mobile Devices
- Highlight Important Information
- Include Support Information
- Update Templates Regularly
Common Mistakes to Avoid
- Using Generic Content
- Forgetting to Test
- Overloading the Email
- Missing Branding Elements
- Ignoring Mobile Users
Benefits of Creating Welcome Emails
Businesses that Create Welcome Emails in WHMCS often experience:
- Better customer engagement
- Stronger brand recognition
- Higher customer satisfaction
- Reduced support workload
- Improved communication
- More professional onboarding experience
A thoughtfully designed welcome email can significantly improve the first impression customers have of your business.
Conclusion
Learning how to Create Welcome Emails in WHMCS is an important step toward creating a professional customer onboarding process. Customized welcome emails help reinforce your brand, deliver essential account information, and improve customer satisfaction from the moment a service is activated.
By editing WHMCS email templates, using merge fields, adding branding elements, and providing useful resources, you can create effective welcome emails that enhance communication and strengthen customer relationships. Taking the time to Create Welcome Emails in WHMCS ensures that every new client receives a polished, informative, and professional introduction to your services.
Related Articles