Latest Updates
Learn to Downgrade Your WordPress Version
Learn to Downgrade Your WordPress Version WordPress regularly releases updates that include security patches, performance improvements, bug fixes, and new features. Keeping your website updated is generally recommended because it helps protect your site…
Learn to Downgrade Your WordPress Version
WordPress regularly releases updates that include security patches, performance improvements, bug fixes, and new features. Keeping your website updated is generally recommended because it helps protect your site from vulnerabilities and ensures compatibility with modern plugins and themes.
WordPress updates are important for maintaining website security, performance, and compatibility. However, there are times when an update may cause unexpected issues with plugins, themes, or custom code. In such situations, website owners may need to Downgrade Your WordPress Version temporarily until the compatibility issue is resolved. Learning how to Downgrade Your WordPress Version safely can help restore website functionality without affecting your content or settings.
In this guide, you will learn how to safely Downgrade Your WordPress Version using the WP Downgrade Specific Core Version plugin. This method is simple, beginner-friendly, and does not require manual file uploads or FTP access.
Prerequisites
Before you begin the downgrade process, it is important to take a few precautions.
- Create a Complete Website Backup
- Verify the Target Version
- Disable Caching Plugins
- Test on a Staging Website
Downgrade WordPress Version Using WP Downgrade Plugin
The WP Downgrade plugin provides one of the easiest ways to install a specific WordPress core version. Instead of manually replacing WordPress files, the plugin handles the process directly from the WordPress dashboard.
Step 1: Log in to Your WordPress Dashboard
Begin by accessing your WordPress administration area.
Open your web browser and visit:
https://yourdomain.com/wp-admin
Enter your administrator username and password, then click Log In.
Once logged in, you will be redirected to the WordPress Dashboard.
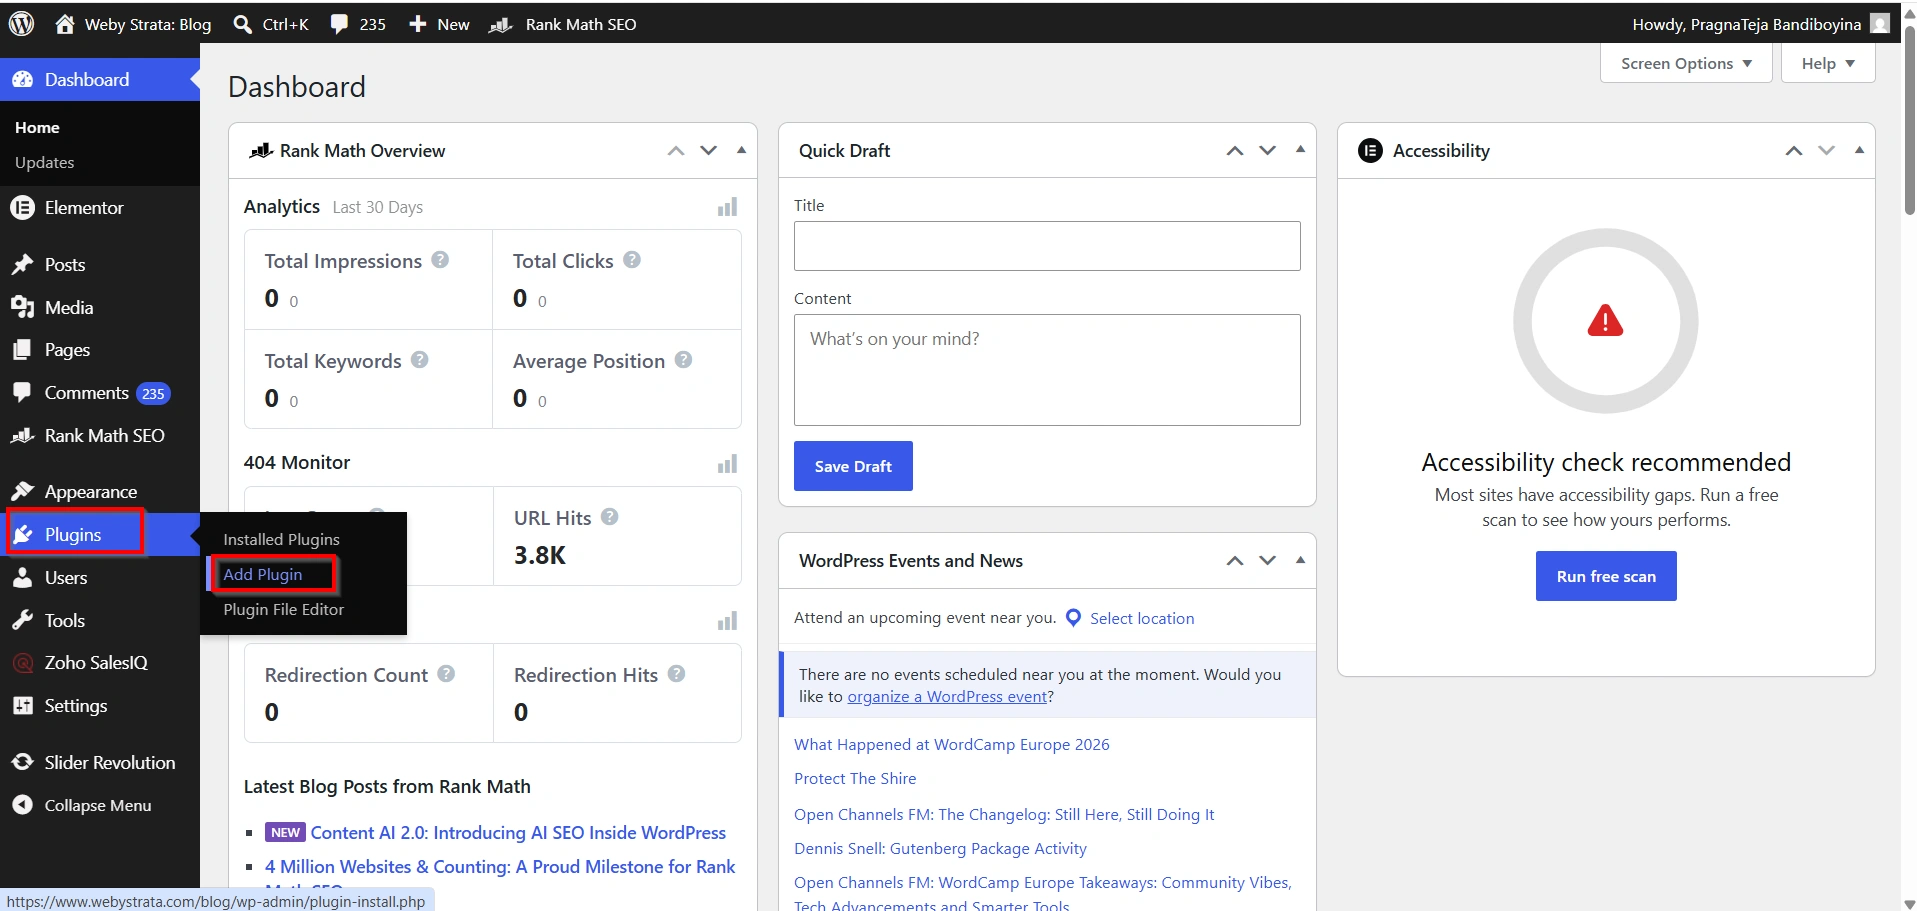
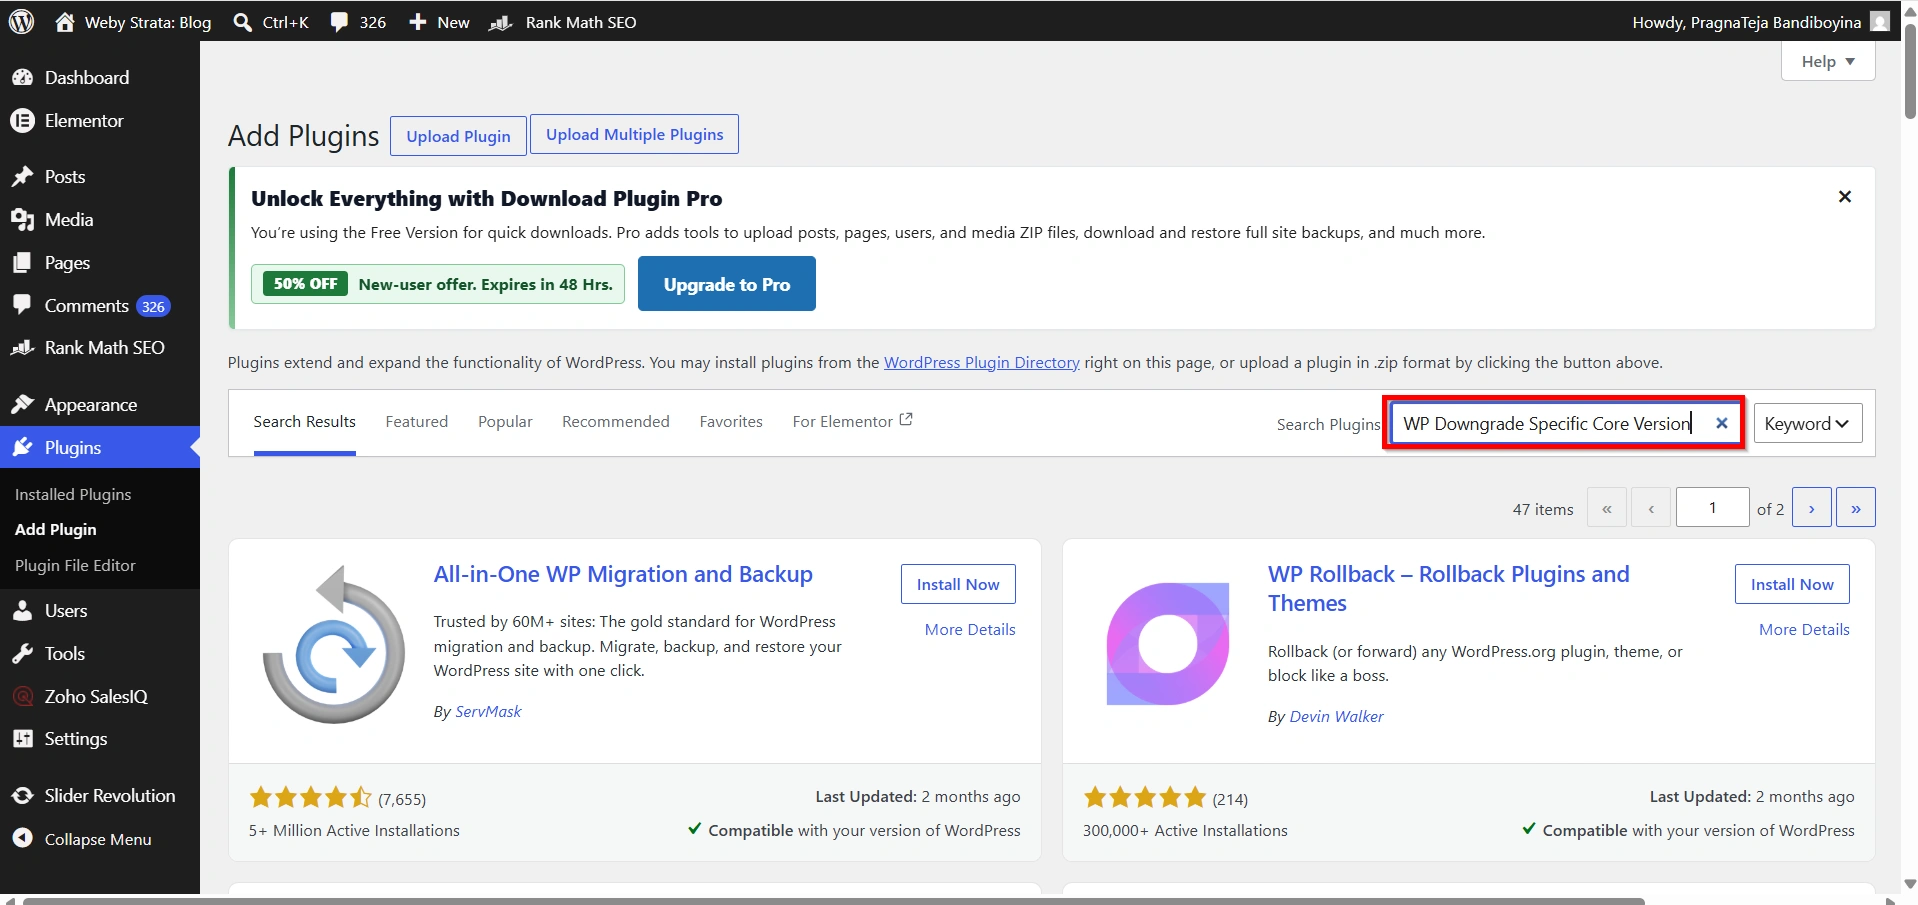
Step 2: Install the WP Downgrade Plugin
To install the plugin:
- Navigate to Plugins > Add Plugin.
2. Search for WP Downgrade | Specific Core Version.
3. Click Install Now.
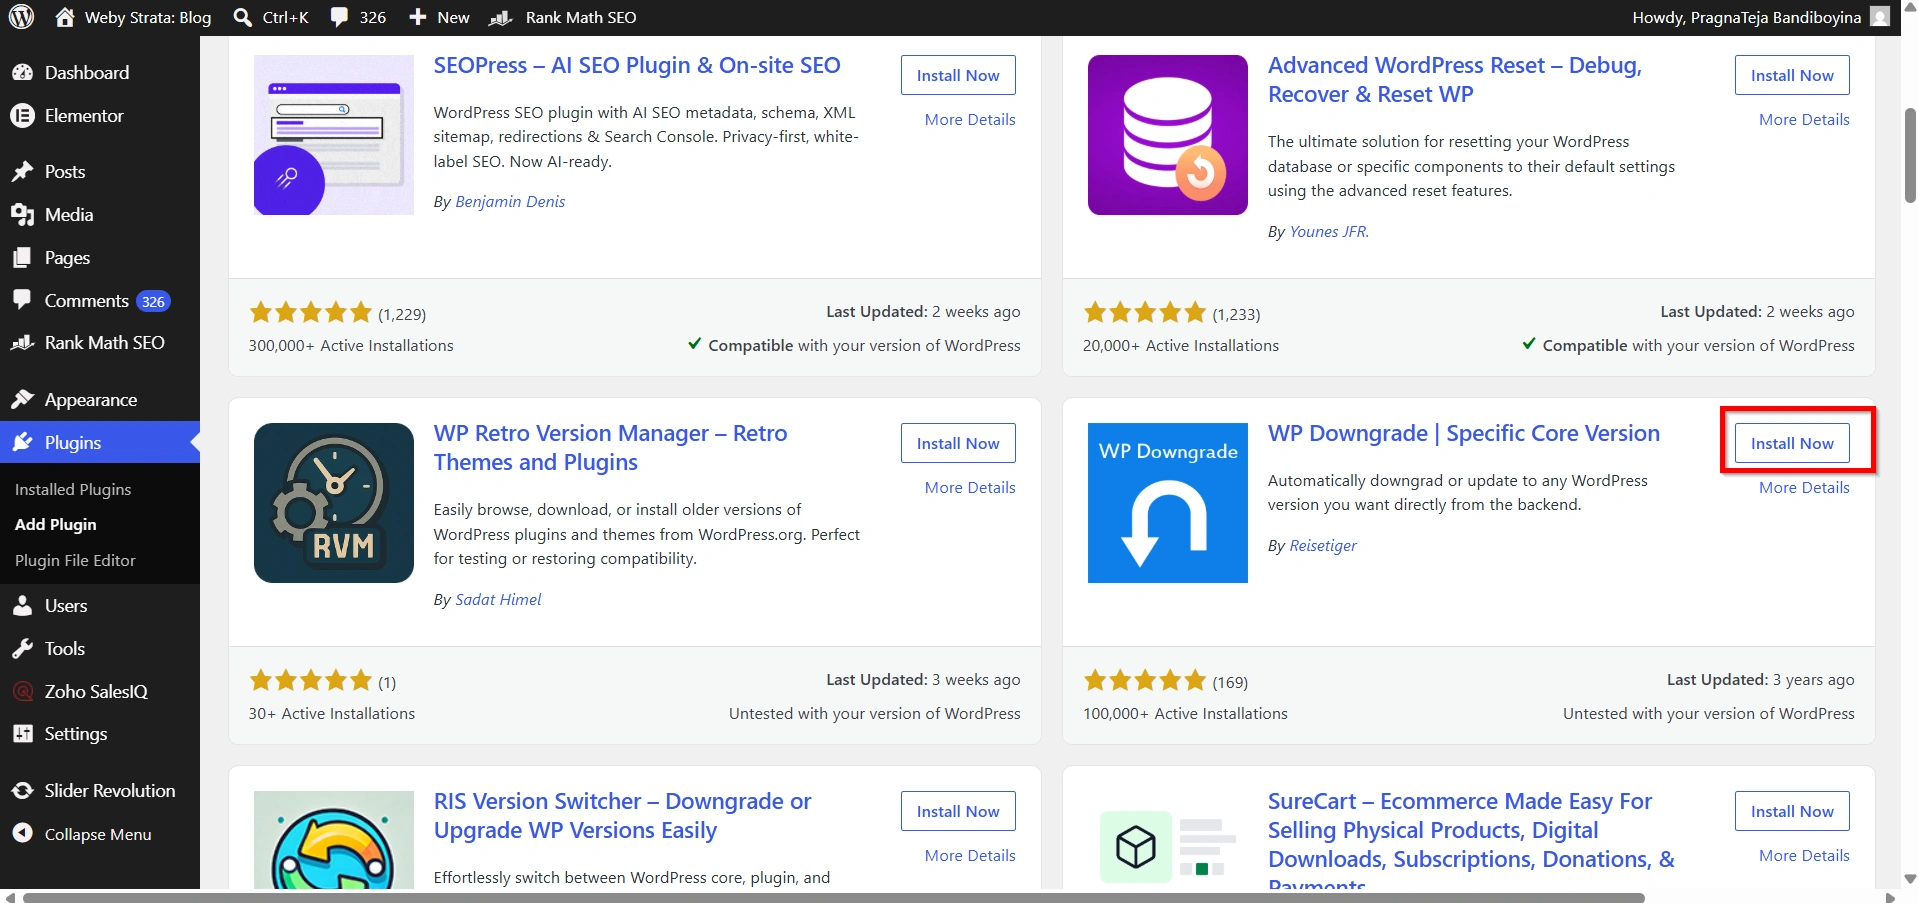
4. Click Activate.
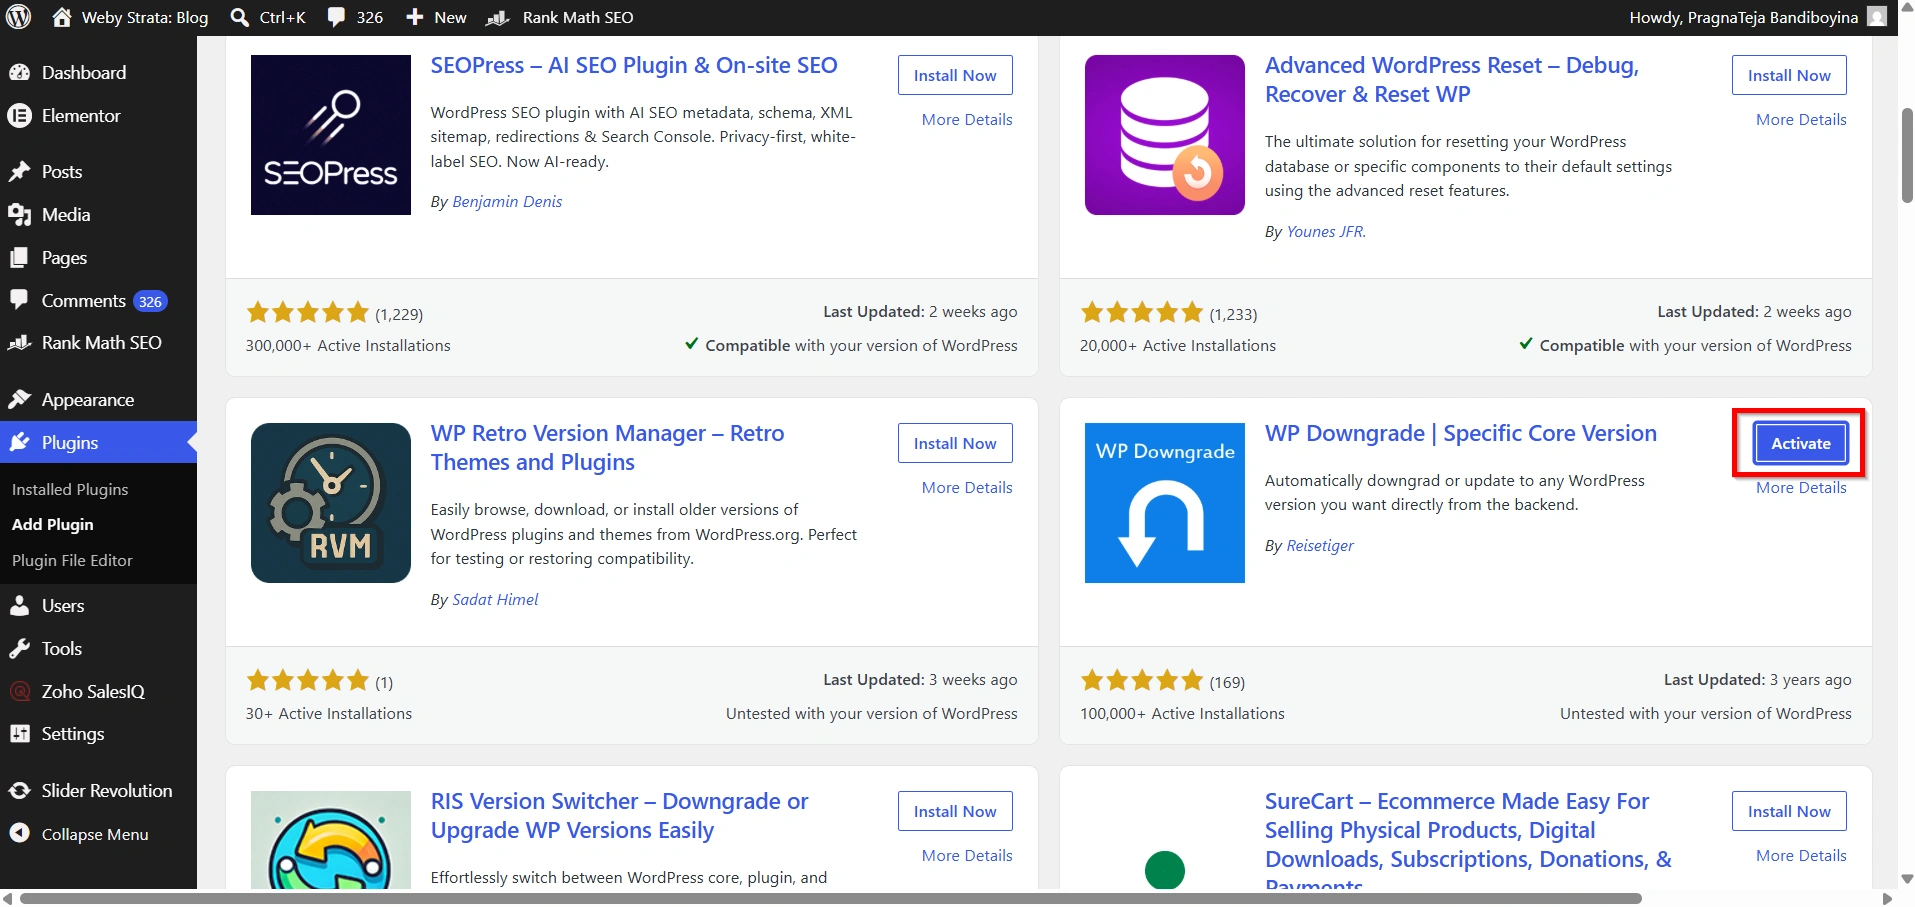
After activation, the plugin adds a new settings page where you can choose the WordPress version you wish to install.
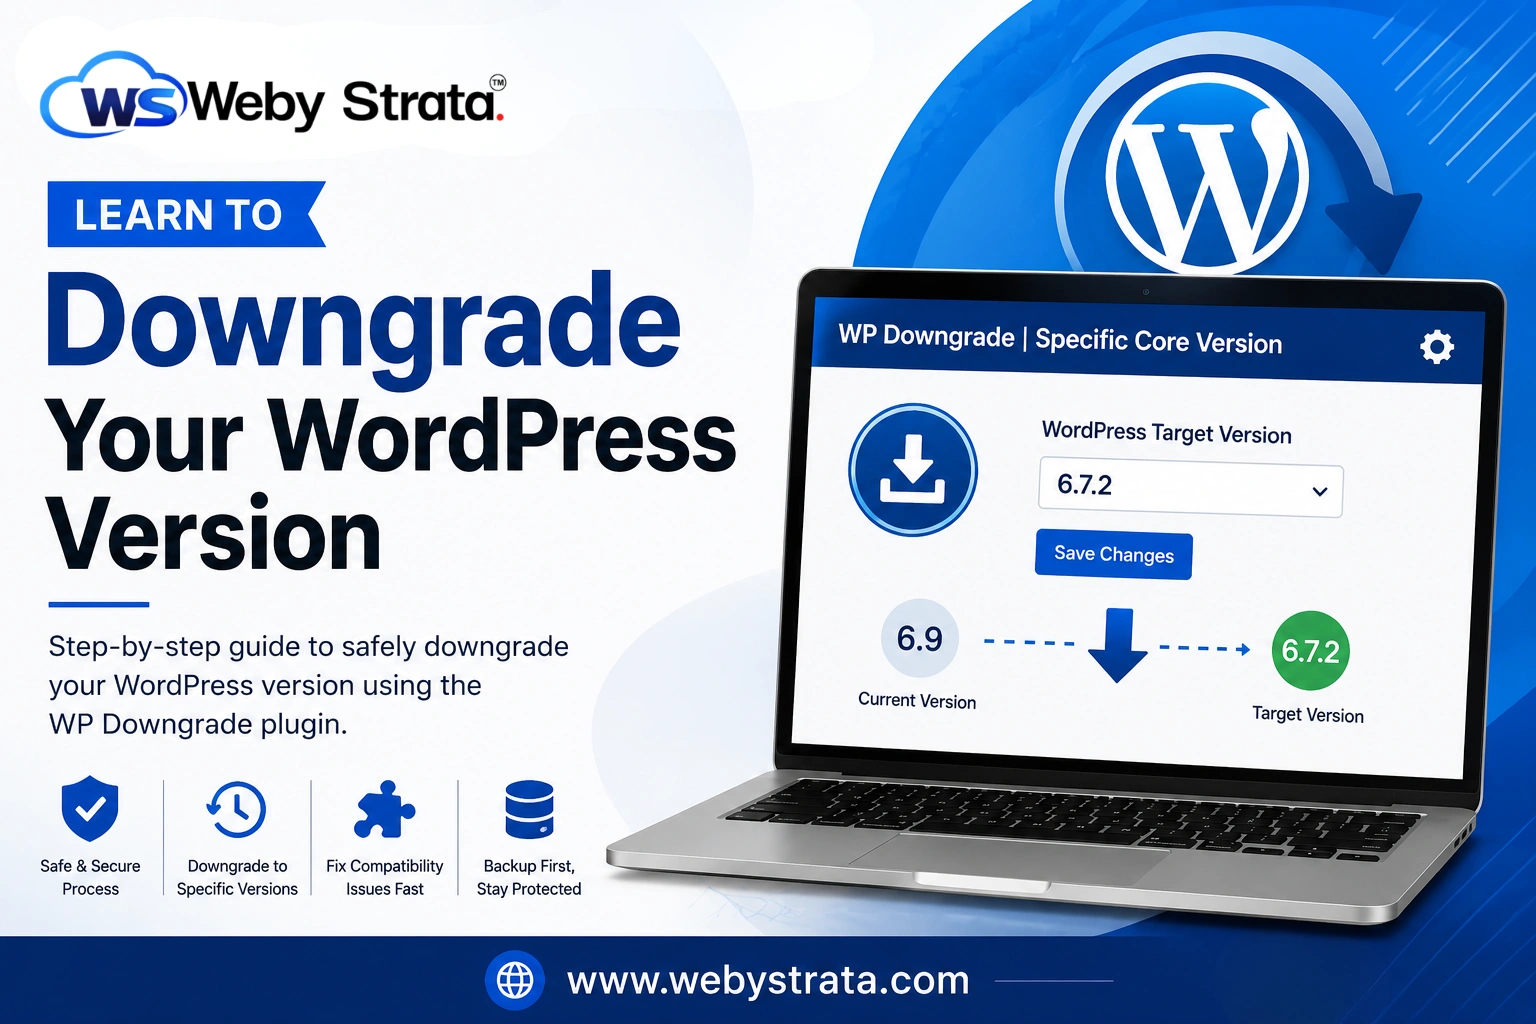
Step 3: Specify the Target WordPress Version
After installing the plugin:
- Go to Settings > WP Downgrade.
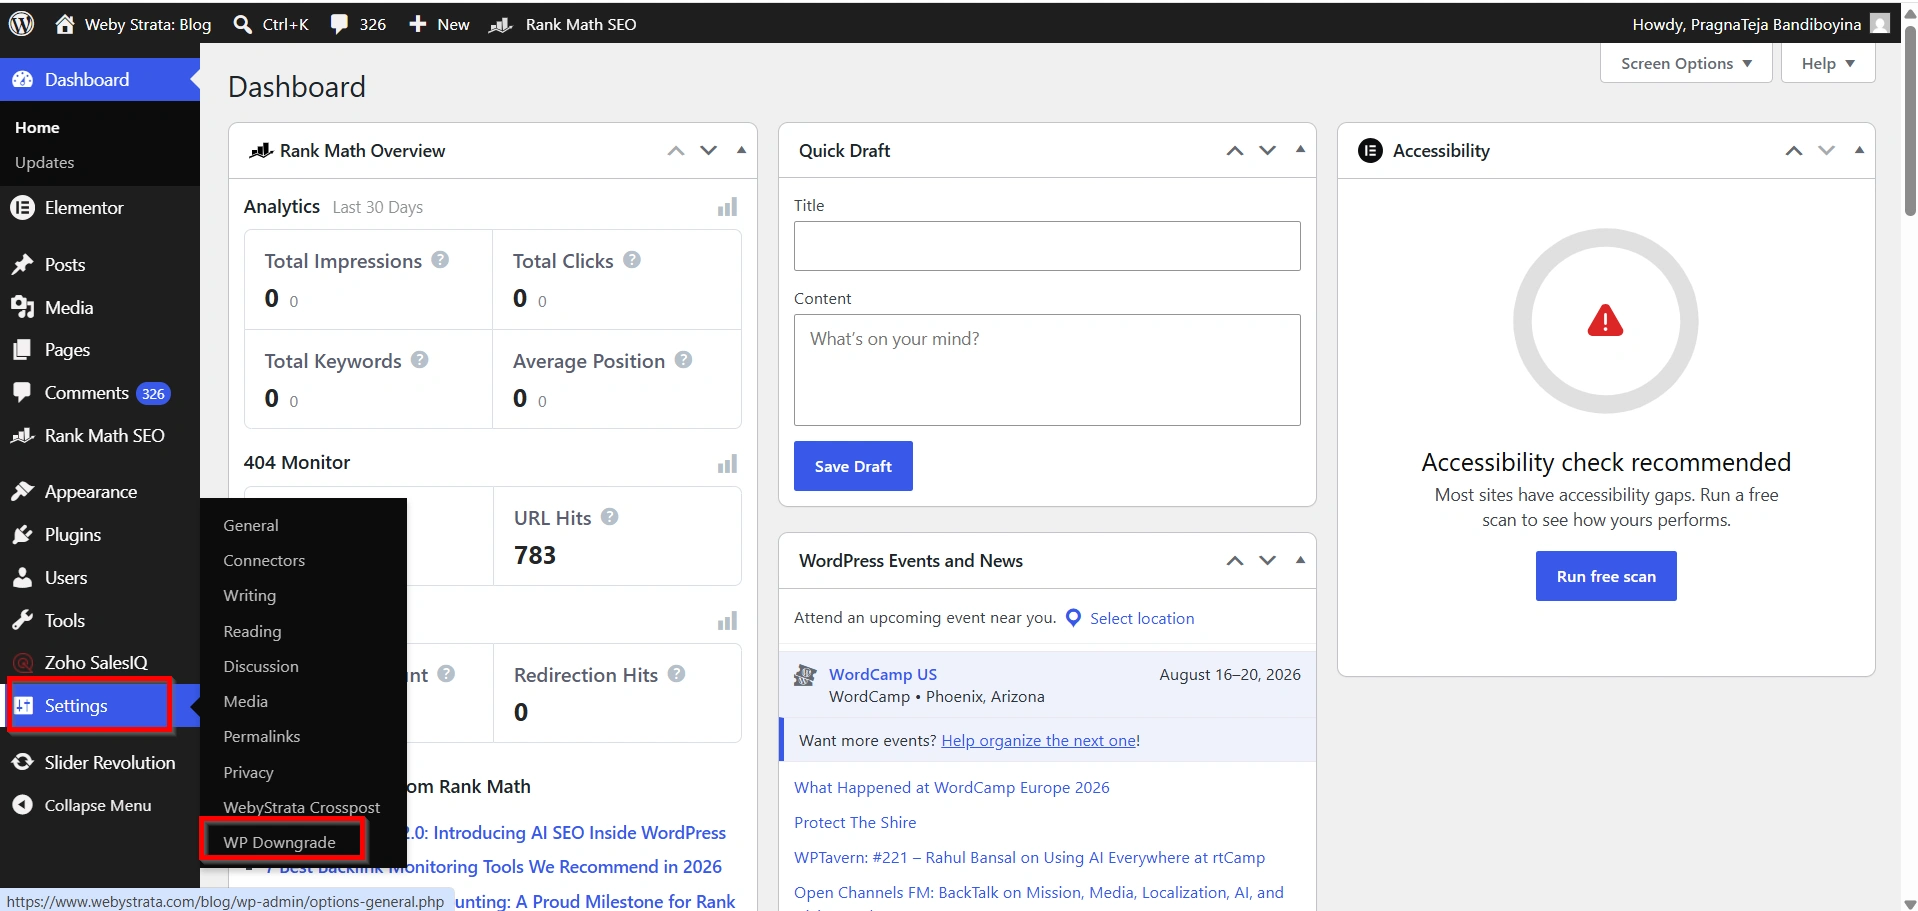
2. Locate the WordPress Target Version field.
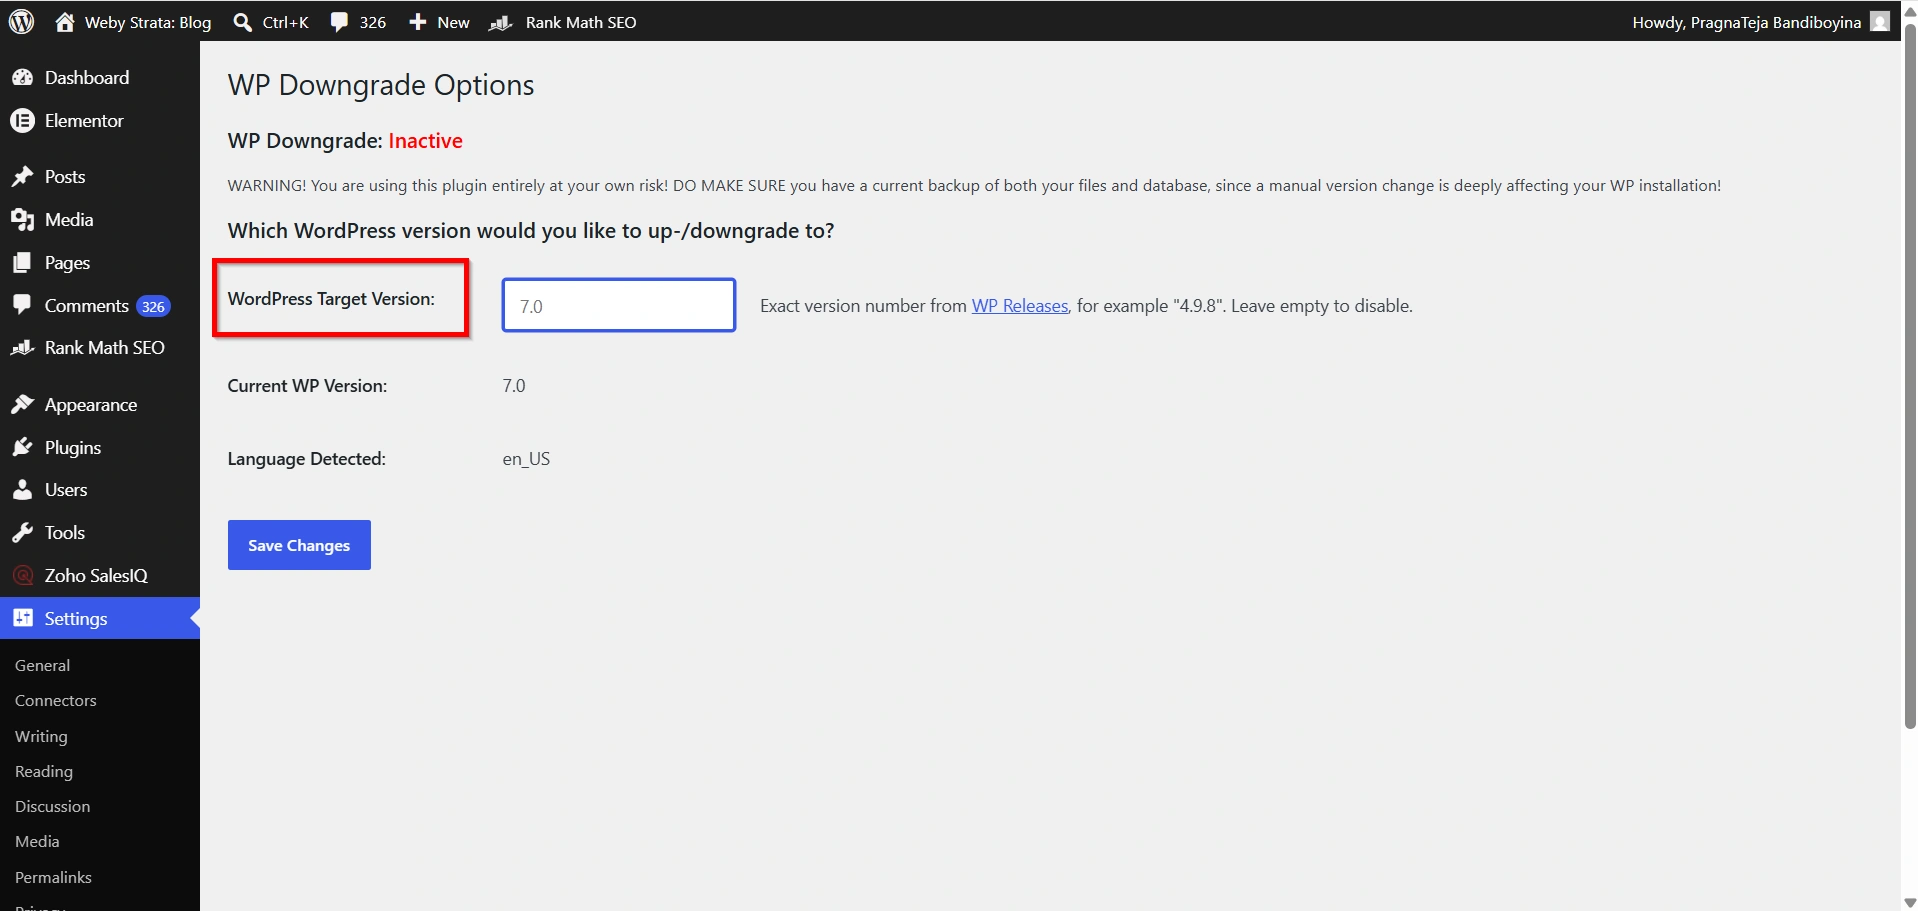
3. Enter the exact version number you want to install.
Examples include:
- 6.8
- 6.7.2
- 6.6.1
Be sure to enter the version number correctly. An incorrect version number may prevent WordPress from downloading the requested release.
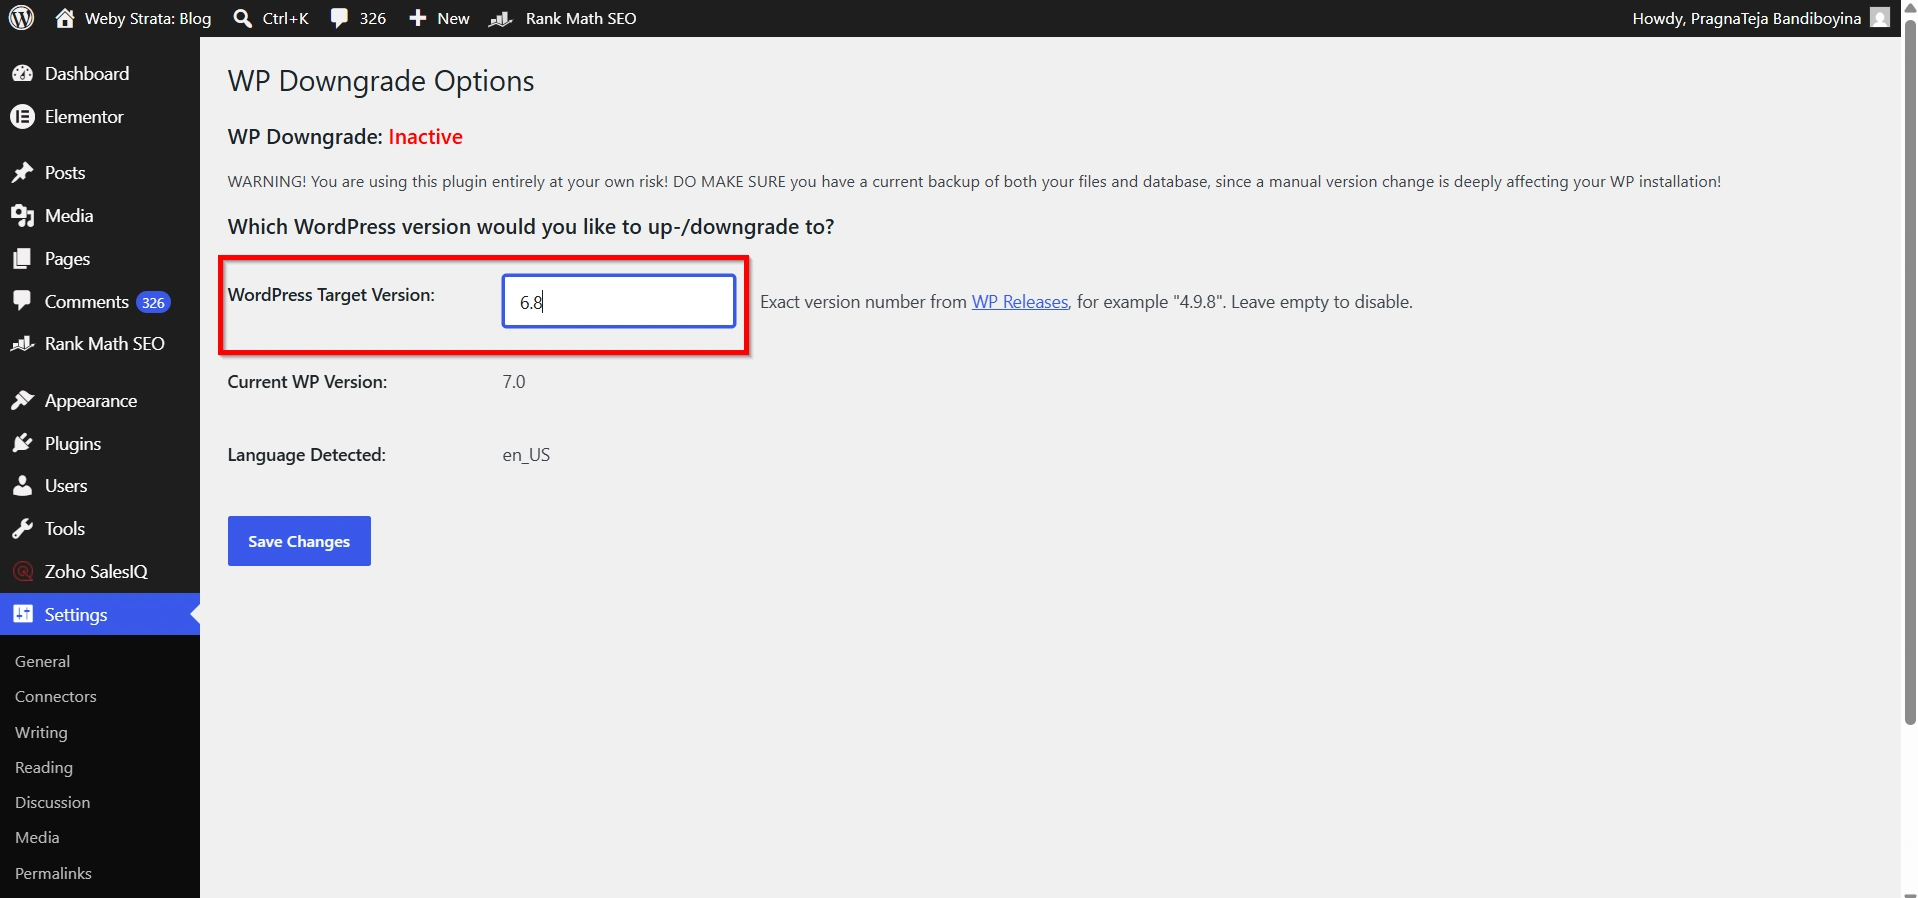
4. Once entered, click Save Changes.
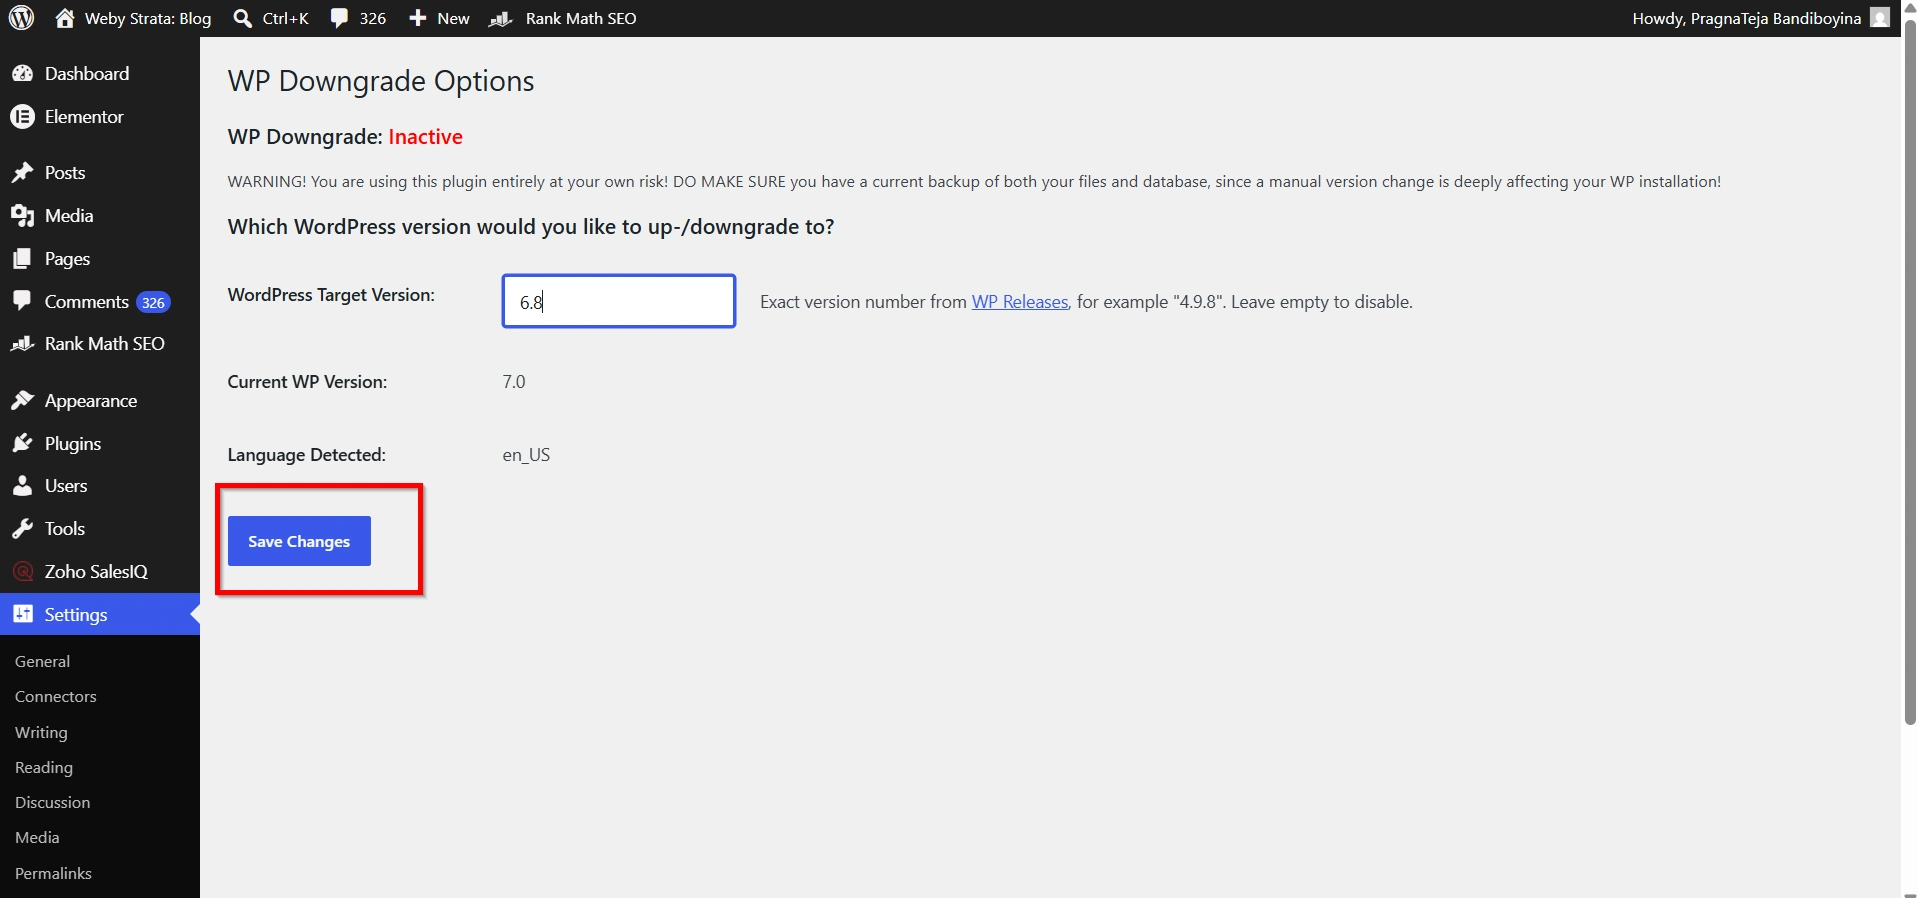
The plugin will now instruct WordPress to download and install the selected version.
Step 4: Update to the Selected Version
After saving the target version:
- Navigate to Dashboard > Updates.
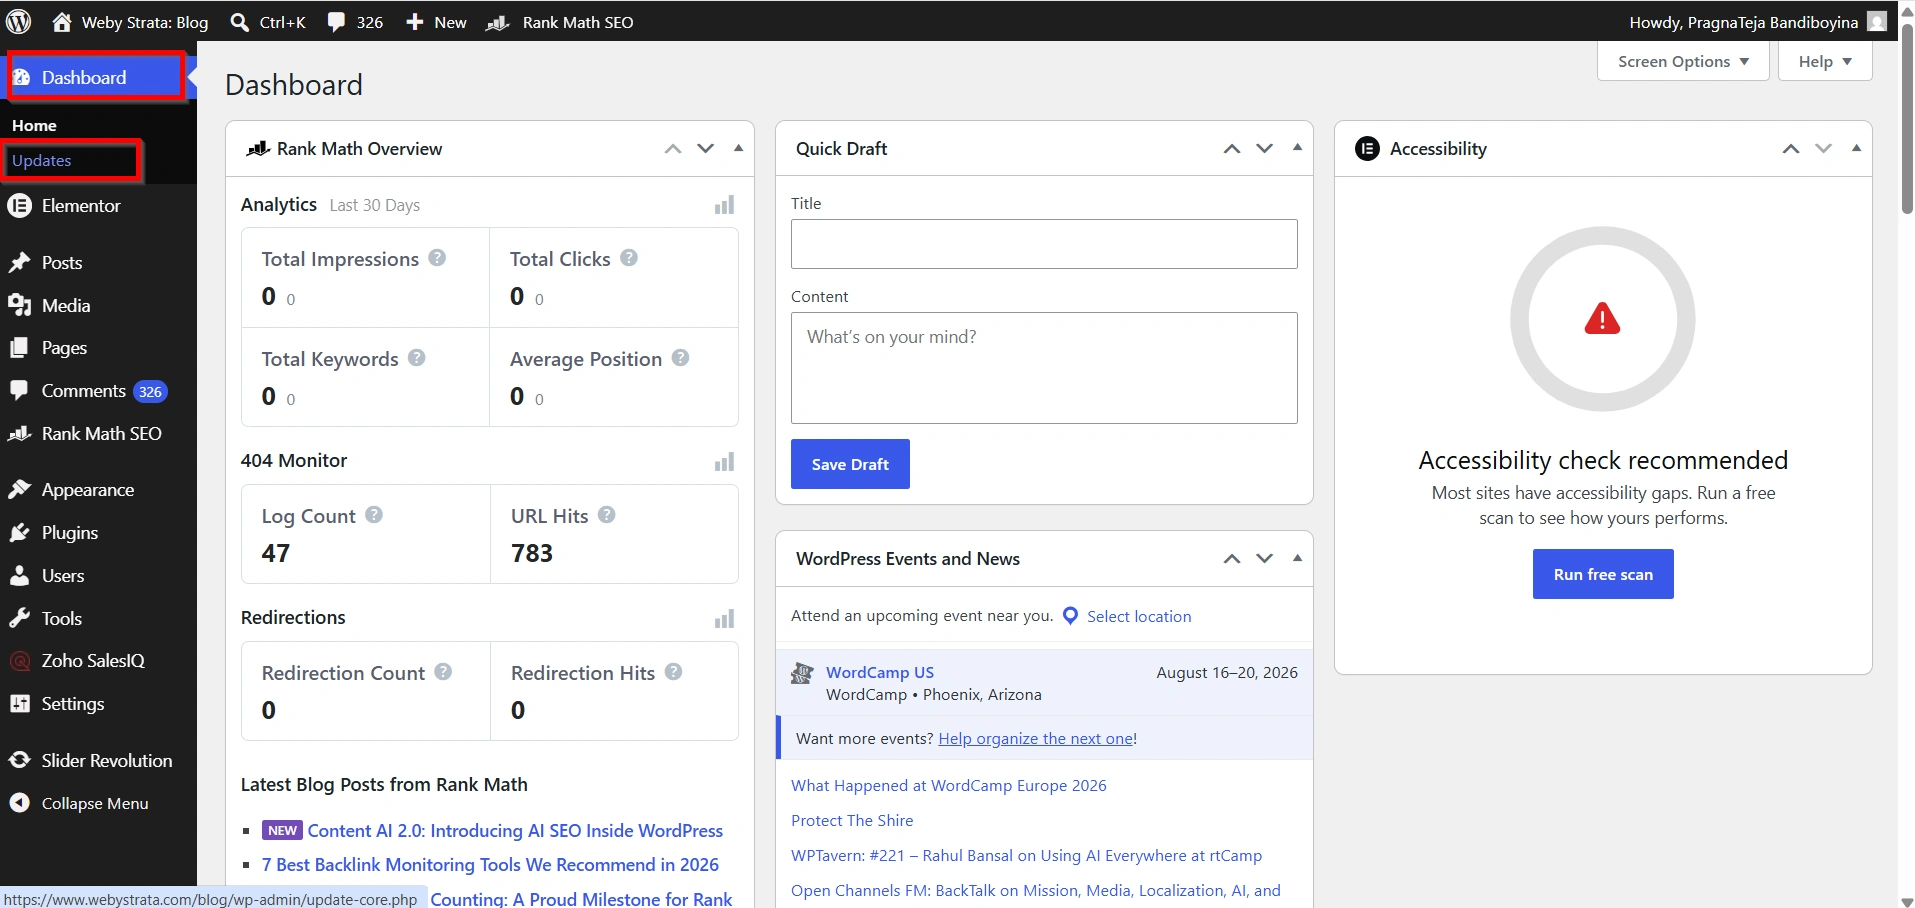
2. You will notice that WordPress now offers the option to reinstall the specified version.
3. Click Re-install Now.
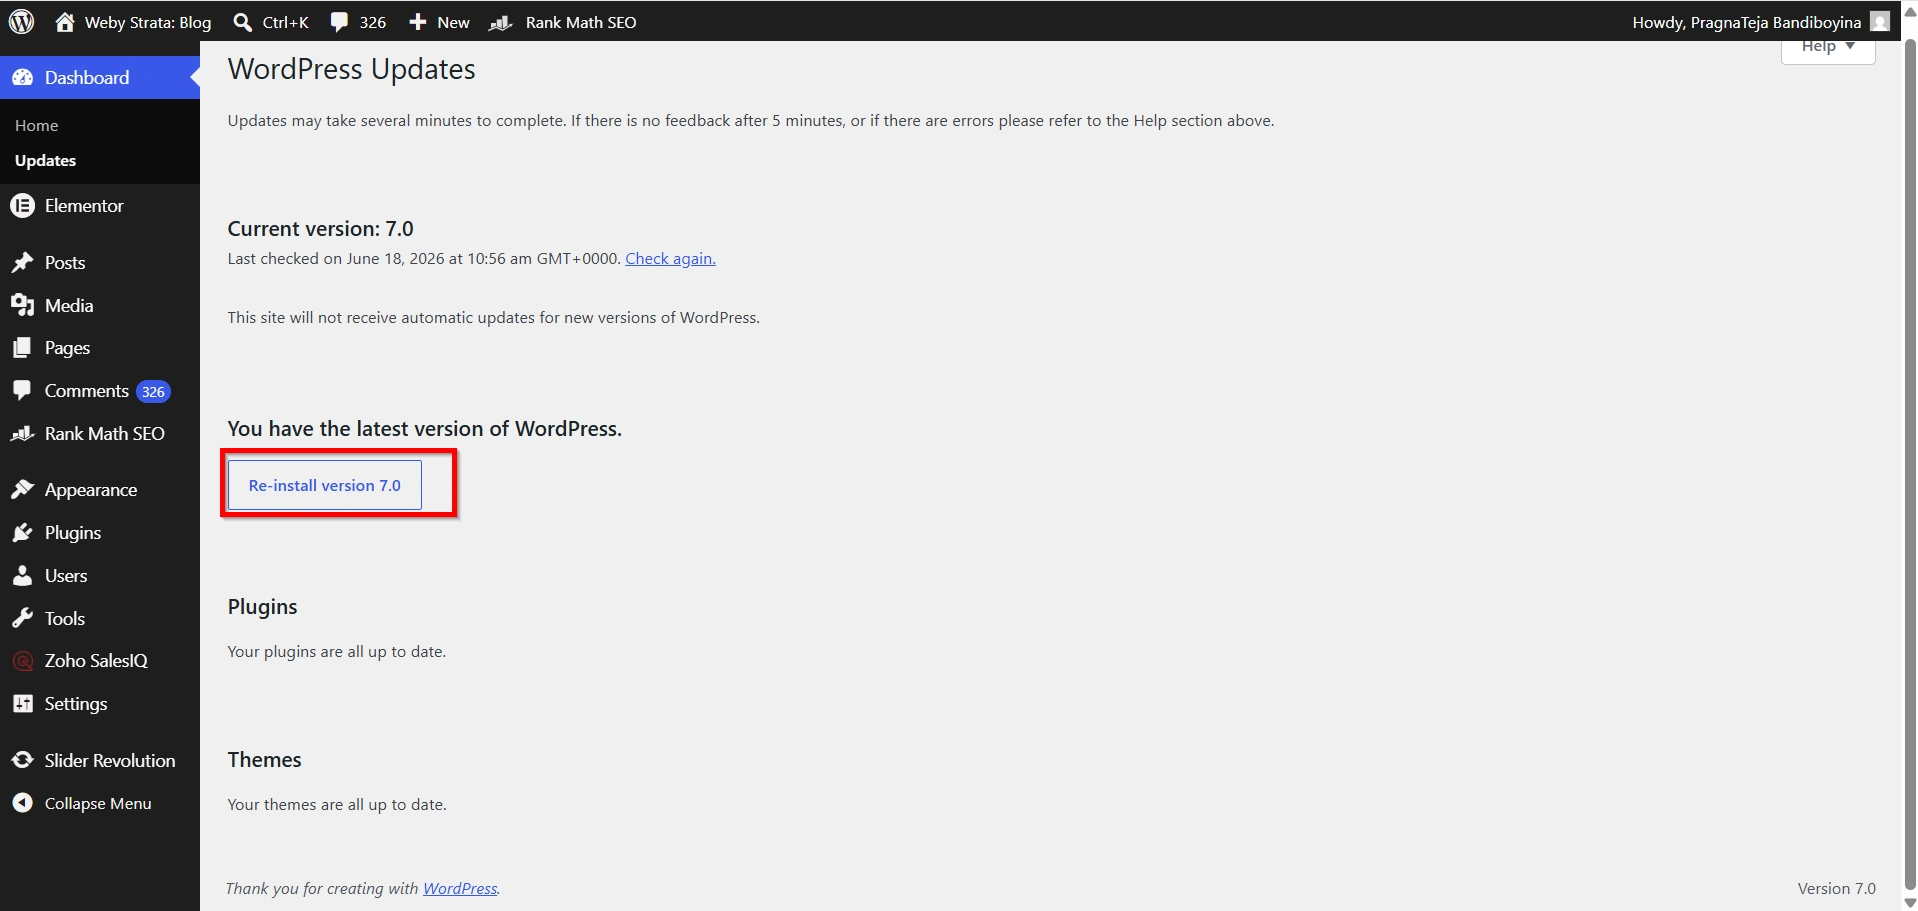
WordPress will automatically download and install the version you selected in the WP Downgrade settings.
Depending on your hosting environment and internet connection, this process may take a few moments.
Do not close your browser or interrupt the process until it has completed successfully.
Step 5: Verify the Downgrade
Once WordPress finishes installing the selected version:
- Go to Dashboard > Updates.
- Verify that the displayed WordPress version matches the version you selected.
- Browse through your website and perform thorough testing.
You should check:
- Website pages
- Contact forms
- Blog posts
- Theme functionality
- Plugin functionality
- User login and registration
- Custom features and integrations
Testing helps ensure that the downgrade successfully resolved the compatibility issue.
Why Would You Need to Downgrade WordPress?
When a WordPress update introduces conflicts, the quickest solution may be to Downgrade Your WordPress Version to a stable release that previously worked correctly. Many website administrators choose to Downgrade Your WordPress Version when troubleshooting plugin conflicts, theme errors, or custom functionality problems. While updates are generally recommended, knowing how to Downgrade Your WordPress Version is a valuable troubleshooting skill.
Benefits of Using WP Downgrade
The WP Downgrade plugin simplifies the process of helping you Downgrade Your WordPress Version without requiring technical expertise. Instead of manually replacing core files, you can Downgrade Your WordPress Version directly from the WordPress dashboard. This saves time and reduces the risk of making mistakes during the downgrade process.
- Simple and Beginner-Friendly
- No FTP Access Required
- Supports Specific Versions
- Faster Troubleshooting
- Reduced Risk of Errors
Conclusion
The WP Downgrade | Specific Core Version plugin provides a simple and reliable way to Downgrade Your WordPress Version when compatibility issues occur. Whether a plugin stops working or a theme becomes unstable, you can Downgrade Your WordPress Version directly from the dashboard without using FTP or manually replacing files. By following the steps in this guide, you can safely Downgrade Your WordPress Version, restore website functionality, and continue troubleshooting with confidence. Always create a backup before you Downgrade Your WordPress Version and upgrade to the latest stable release once the issue has been resolved.
Related Articles