Latest Updates
How to Enable Maintenance Mode in WHMCS
How to Enable Maintenance Mode in WHMCS Website maintenance is an essential part of managing any hosting business. Whether you are upgrading your WHMCS installation, installing a new module, troubleshooting issues, or performing server…
How to Enable Maintenance Mode in WHMCS
Website maintenance is an essential part of managing any hosting business. Whether you are upgrading your WHMCS installation, installing a new module, troubleshooting issues, or performing server maintenance, you may need to temporarily prevent clients from accessing your billing portal.
WHMCS includes a built-in Maintenance Mode feature that allows administrators to temporarily disable client access while displaying a maintenance message. This helps prevent users from encountering unexpected errors or incomplete functionality during updates.
In this guide, you’ll learn how to enable Maintenance Mode in WHMCS, when to use it, and the best practices for minimizing downtime.
What is Maintenance Mode in WHMCS?
Maintenance Mode in WHMCS is a feature that temporarily prevents clients from accessing the WHMCS client area while administrators perform important tasks.
When enabled, visitors will see a maintenance message instead of the normal WHMCS interface. Administrators can still access the admin area to manage settings, update configurations, and complete maintenance work.
Why Use Maintenance Mode in WHMCS?
There are several reasons to enable Maintenance Mode in WHMCS:
- Performing WHMCS upgrades
- Installing or testing modules
- Changing system configurations
- Troubleshooting technical issues
- Updating themes or templates
- Performing database maintenance
- Preventing client interruptions during changes
Using Maintenance Mode helps provide a better experience by avoiding broken pages or incomplete updates.
How to Enable Maintenance Mode in WHMCS
Follow these steps to enable Maintenance Mode in WHMCS:
Step 1: Login to WHMCS Admin Panel
First, log in to your WHMCS administrator dashboard using your admin credentials.
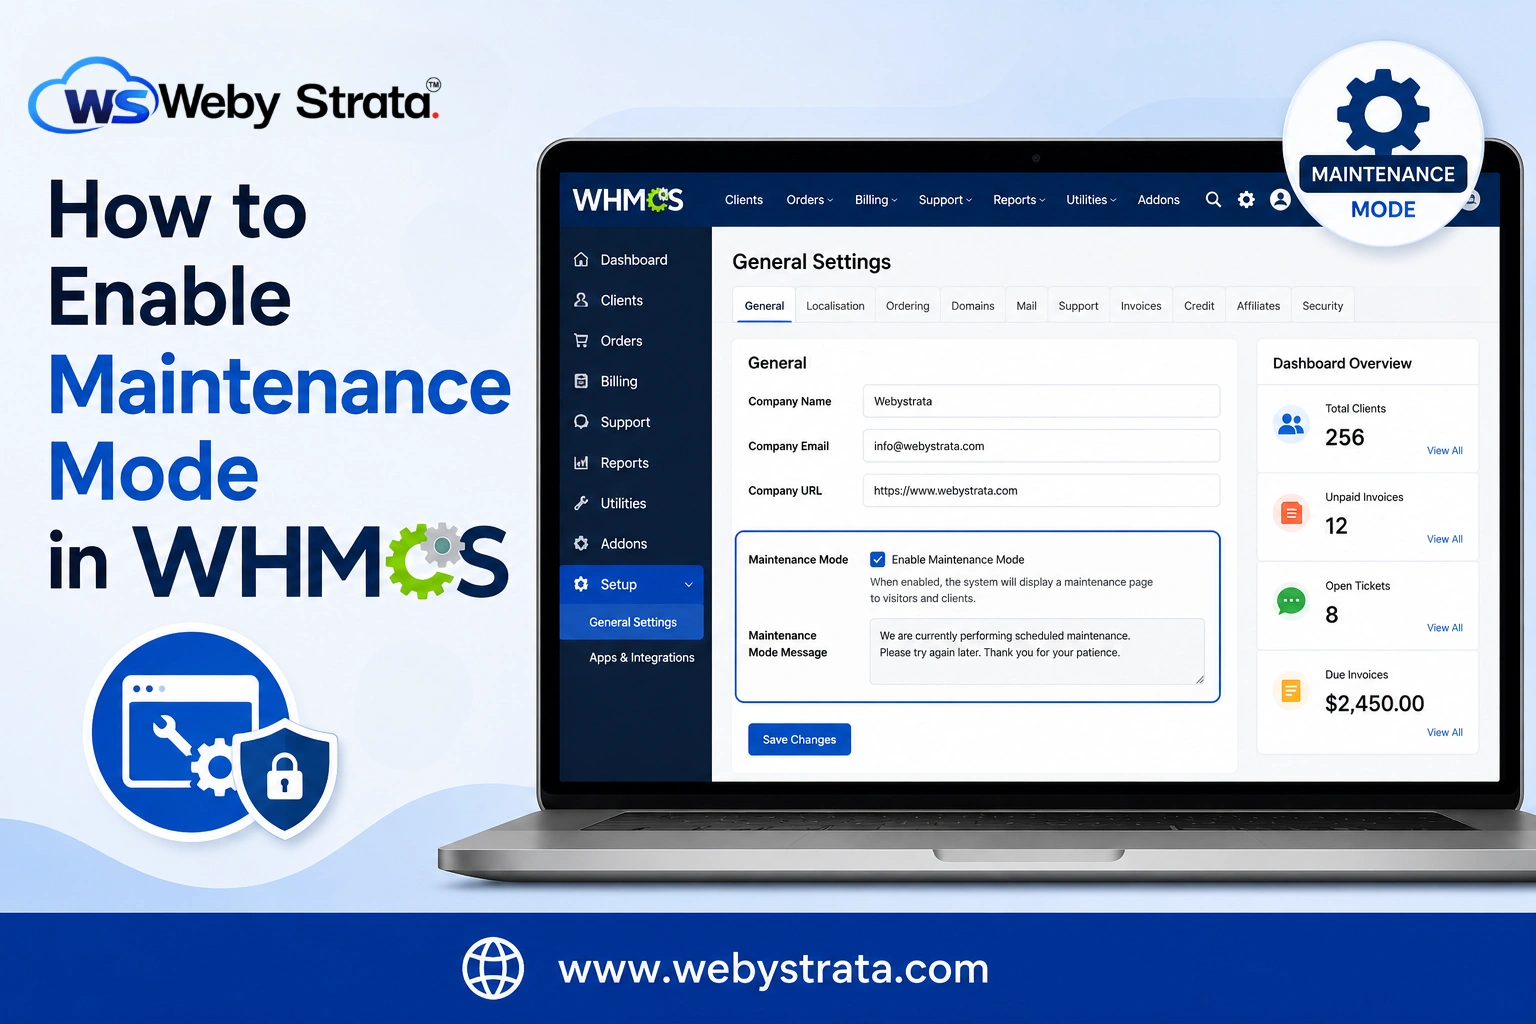
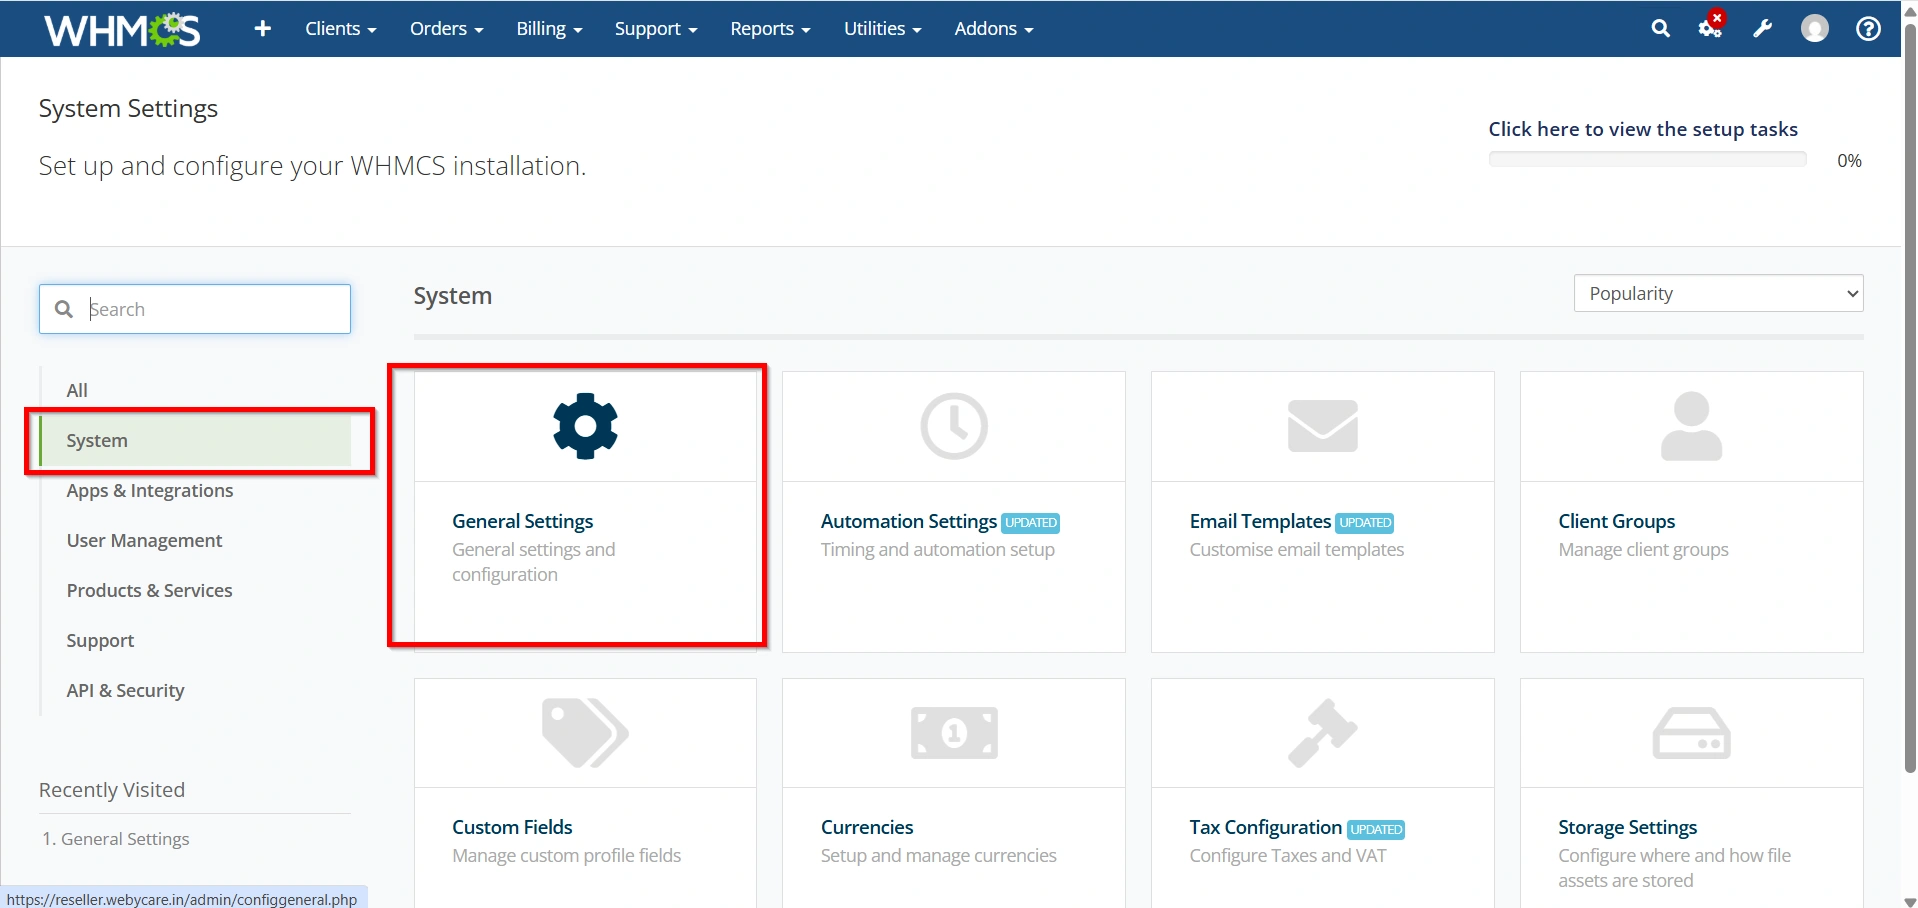
Step 2: Open General Settings
From the WHMCS admin dashboard, go to:
- Configuration Icon → System Settings
![]()
- Select General Settings
This section contains the main configuration options for your WHMCS installation.
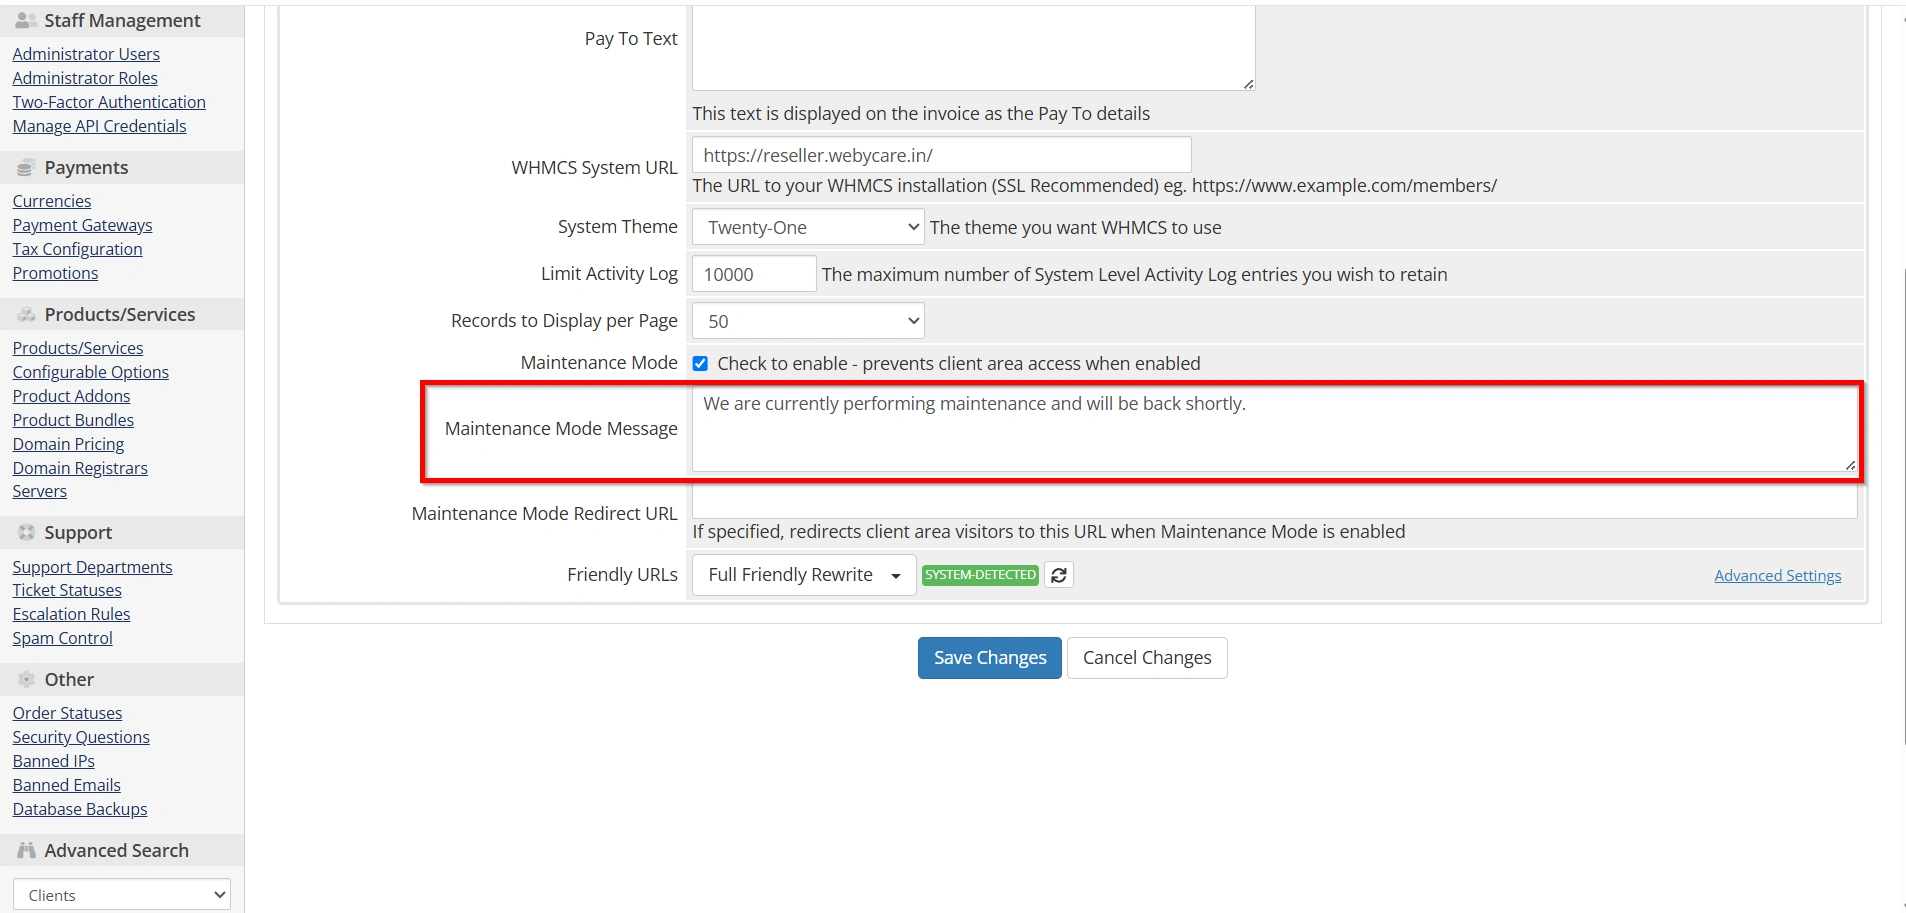
Step 3: Enable Maintenance Mode
- Under General Section.
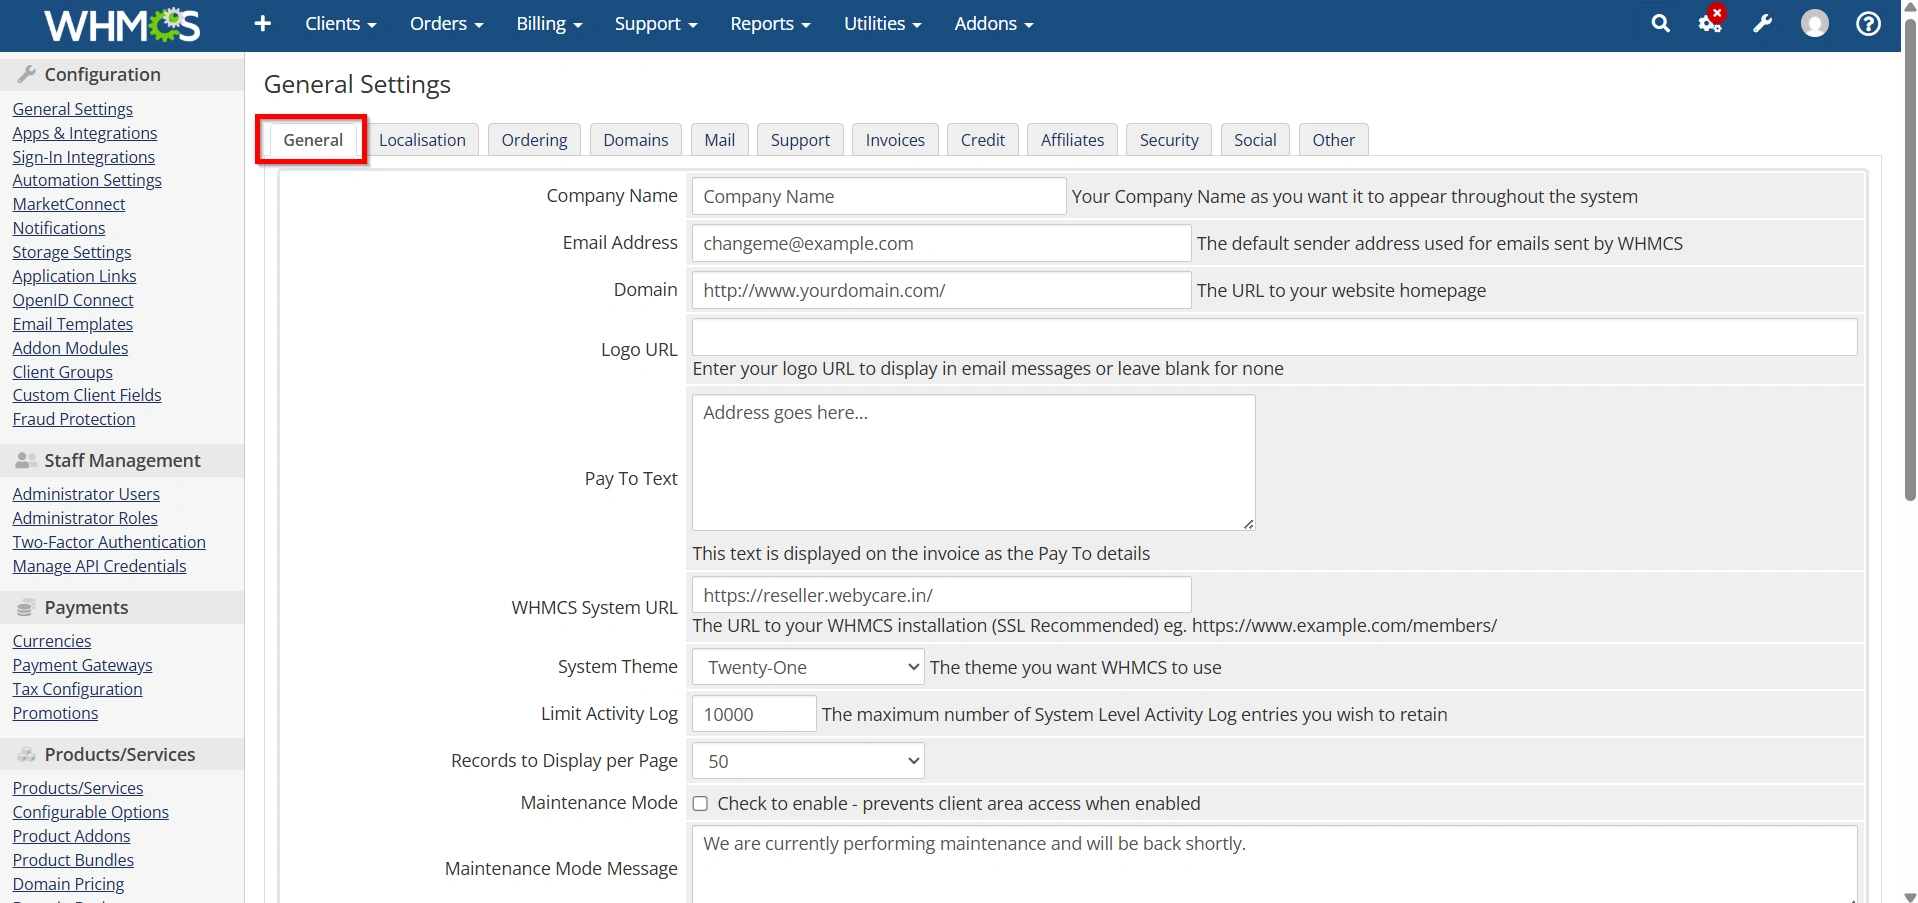
- Navigate to the Maintenance Mode option.
Enable the maintenance mode setting and add a custom message that will be displayed to visitors.
Example message:
“Website maintenance is currently in progress. Please check back soon.”
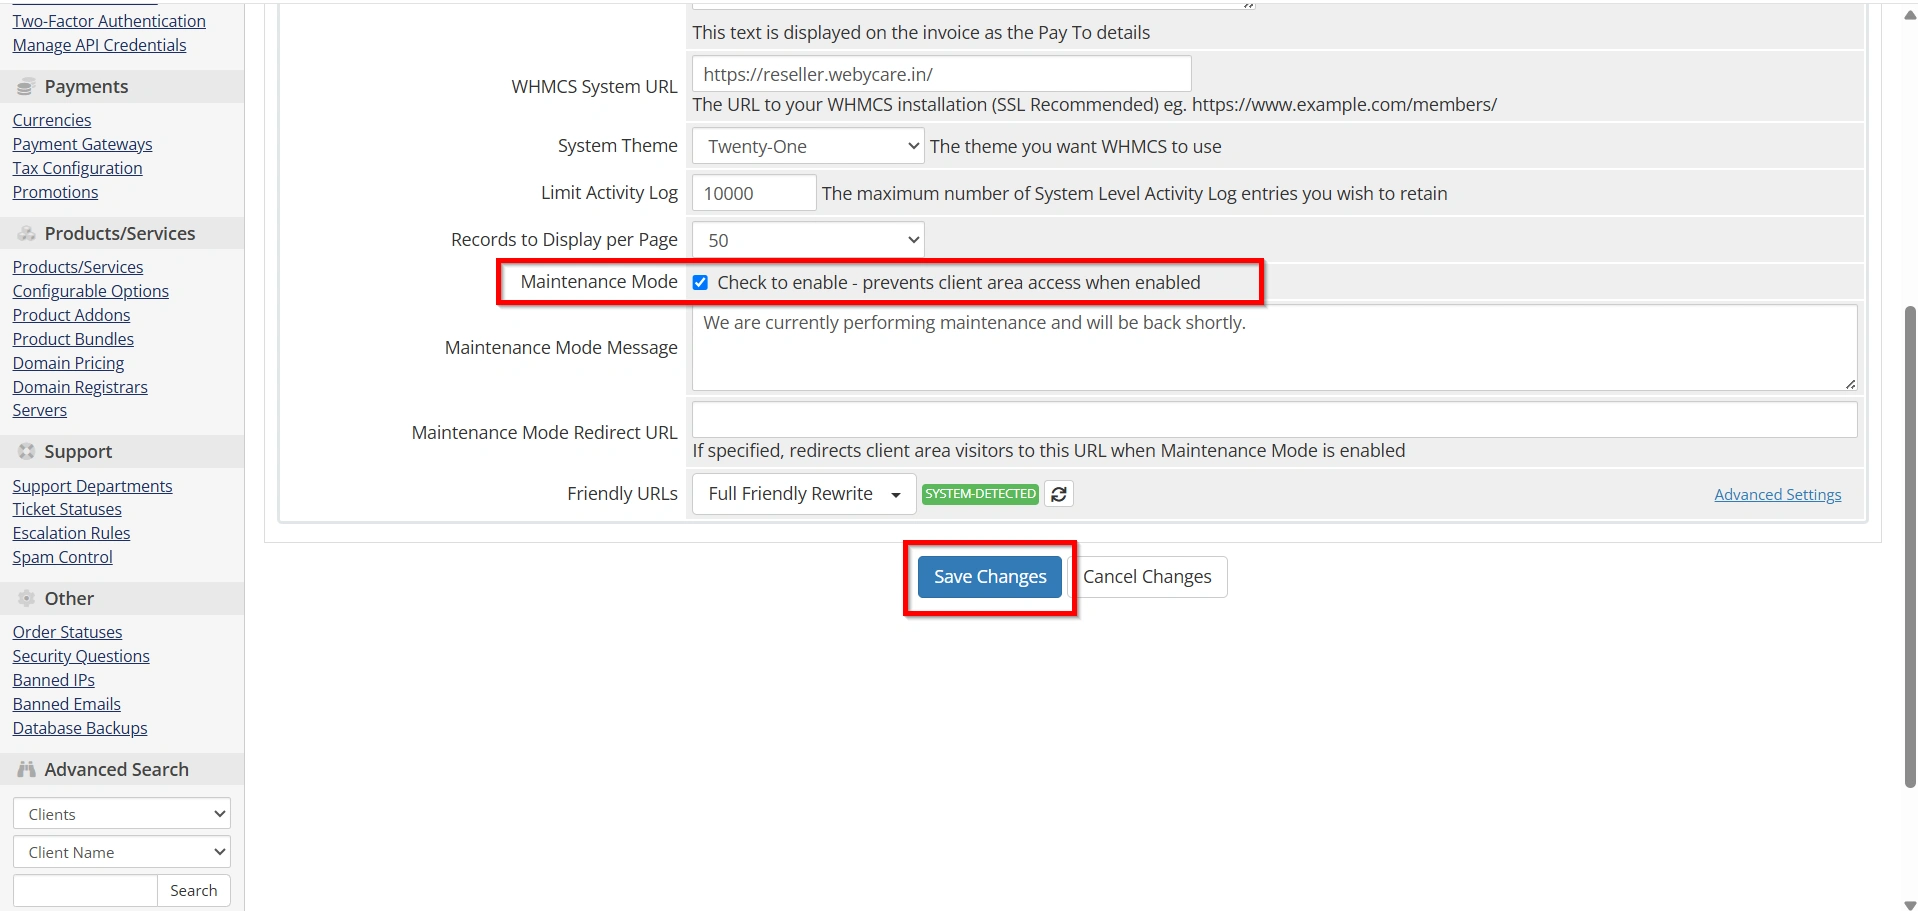
Step 4: Save Changes
After enabling Maintenance Mode, click the Save Changes button.
Your WHMCS client area will now display the maintenance page instead of allowing normal client access.

Customizing the Maintenance Message
WHMCS allows you to customize the message shown during maintenance.
A good maintenance message should include:
- Reason for maintenance (optional)
- Expected completion time
- Support contact information
- Alternative ways to contact your team
Example:
“We are currently performing scheduled maintenance to improve our services. Our team will restore access shortly. For urgent support, please contact our support team.”
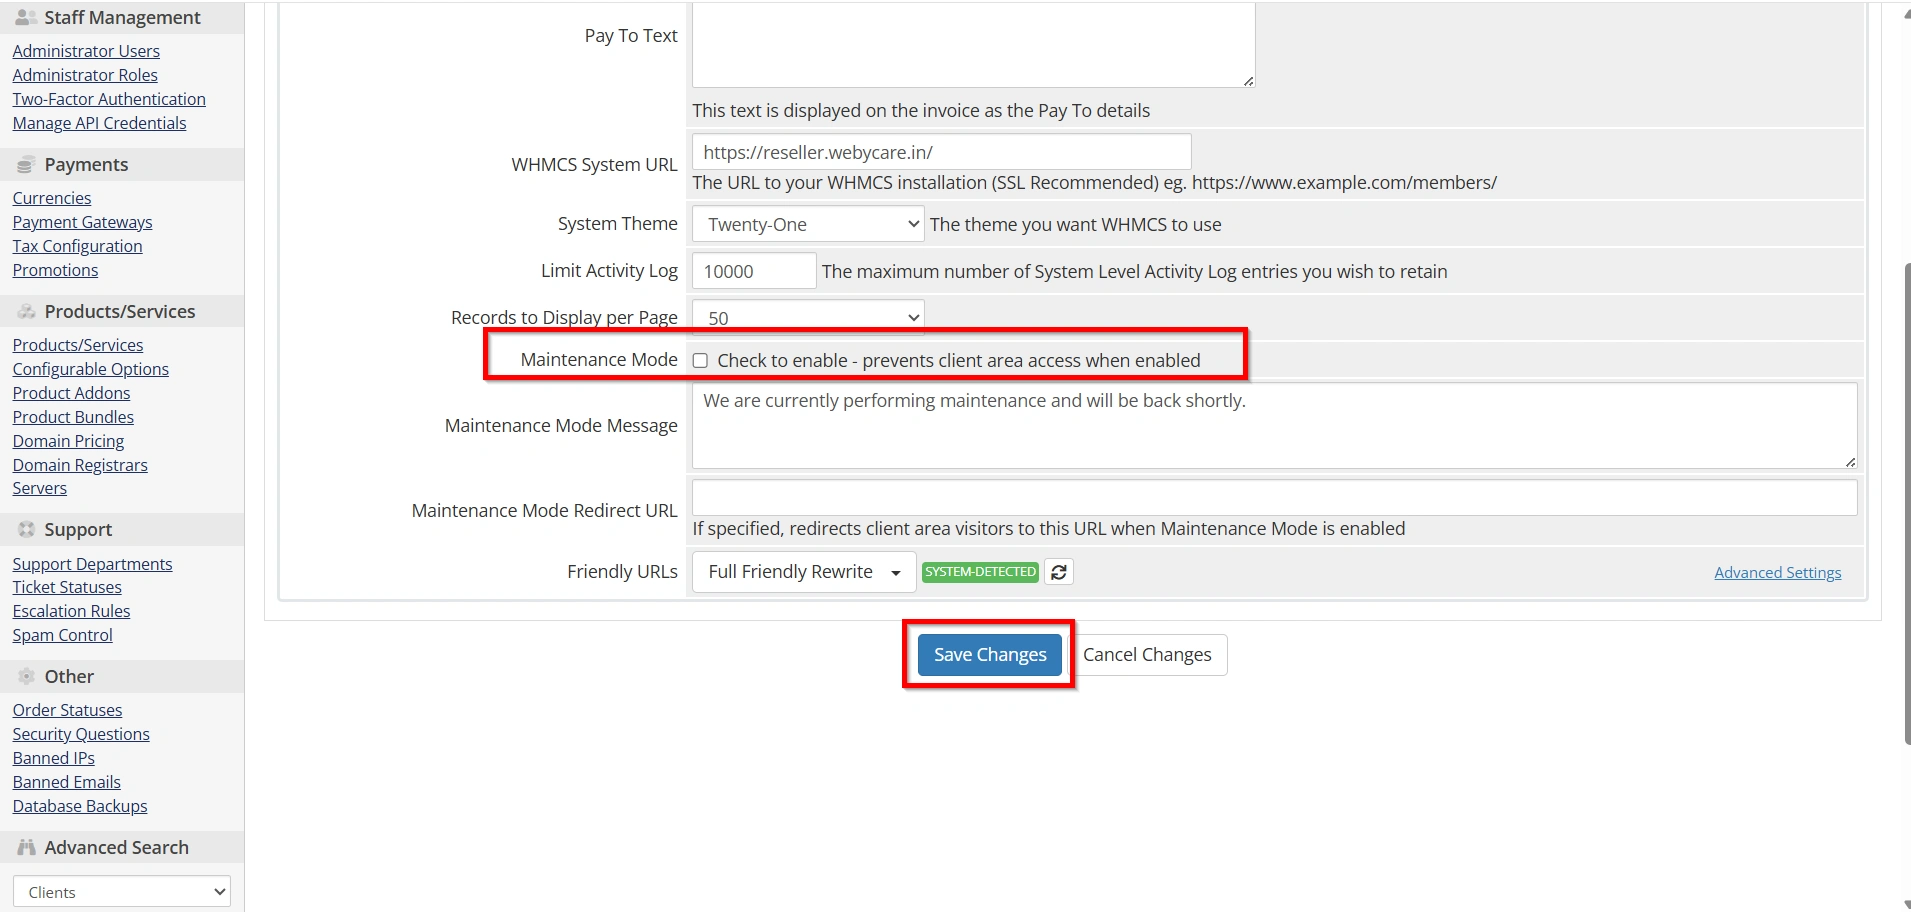
How to Disable Maintenance Mode in WHMCS
Once your maintenance work is completed, you should disable Maintenance Mode to restore normal client access.
Follow these steps:
- Login to the WHMCS Admin Area
- Go to Configuration → System Settings → General Settings
- Open the Maintenance Mode option
- Disable the setting
- Save changes
Your WHMCS client portal will become available again.
Best Practices When Using Maintenance Mode
To avoid issues while using Maintenance Mode in WHMCS, follow these best practices:
- Inform Clients Before Maintenance
- Perform Backups Before Changes
- Test Changes Before Going Live
- Disable Maintenance Mode After Completion
Conclusion
Enabling Maintenance Mode in WHMCS is a simple yet essential task for every administrator. Whether you’re upgrading your installation, installing new modules, performing server maintenance, or troubleshooting issues, Maintenance Mode helps protect your clients from errors while ensuring your work proceeds without interruptions.
By following the steps outlined in this guide, you can safely enable and disable Maintenance Mode whenever necessary, provide a better user experience, and maintain a professional hosting environment. Regular maintenance combined with proper planning, backups, and customer communication will keep your WHMCS installation secure, reliable, and running smoothly.
Related Articles