Latest Updates
How to Add an MX Record in cPanel Through DNS Zone Editor
How to Add an MX Record in cPanel Through DNS Zone Editor Email is one of the most important communication channels for any website, business, or organization. Whether you're using your hosting provider's email…
How to Add an MX Record in cPanel Through DNS Zone Editor
Email is one of the most important communication channels for any website, business, or organization. Whether you’re using your hosting provider’s email service or a third-party email platform such as Google Workspace, Microsoft 365, or Zoho Mail, proper DNS configuration is essential to ensure that emails are delivered correctly.
One of the key DNS records responsible for email delivery is the MX (Mail Exchange) record. MX records tell the internet which mail server should receive incoming emails for your domain.
If you need to connect your domain to a new email service or update your mail server settings, cPanel provides an easy way to manage MX records through the DNS Zone Editor.
In this guide, you’ll learn what MX records are, why they’re important, and how to add an MX record in cPanel through the DNS Zone Editor.
What Is an MX Record?
MX stands for Mail Exchange. An MX record is a DNS record that specifies the mail server responsible for receiving email messages sent to your domain.
For example, when someone sends an email to:
The sender’s mail server checks your domain’s MX records to determine where that email should be delivered.
Without a properly configured MX record, your domain may be unable to receive emails.
Prerequisites
Before adding an MX record, ensure you have:
- Access to your cPanel account
- The mail server hostname provided by your email provider
- The MX Priority value supplied by the provider
- DNS management access through cPanel
How to Add an MX Record in cPanel Through DNS Zone Editor
Step 1: Login to cPanel from Client Area
First, visit the WebyStrata website and log in to your client area account using your registered email address and password.
official Website www.webystrata.com
After logging in:
- Go to Services
- Click on My Services
- Select your active hosting service
- Click on Login to cPanel

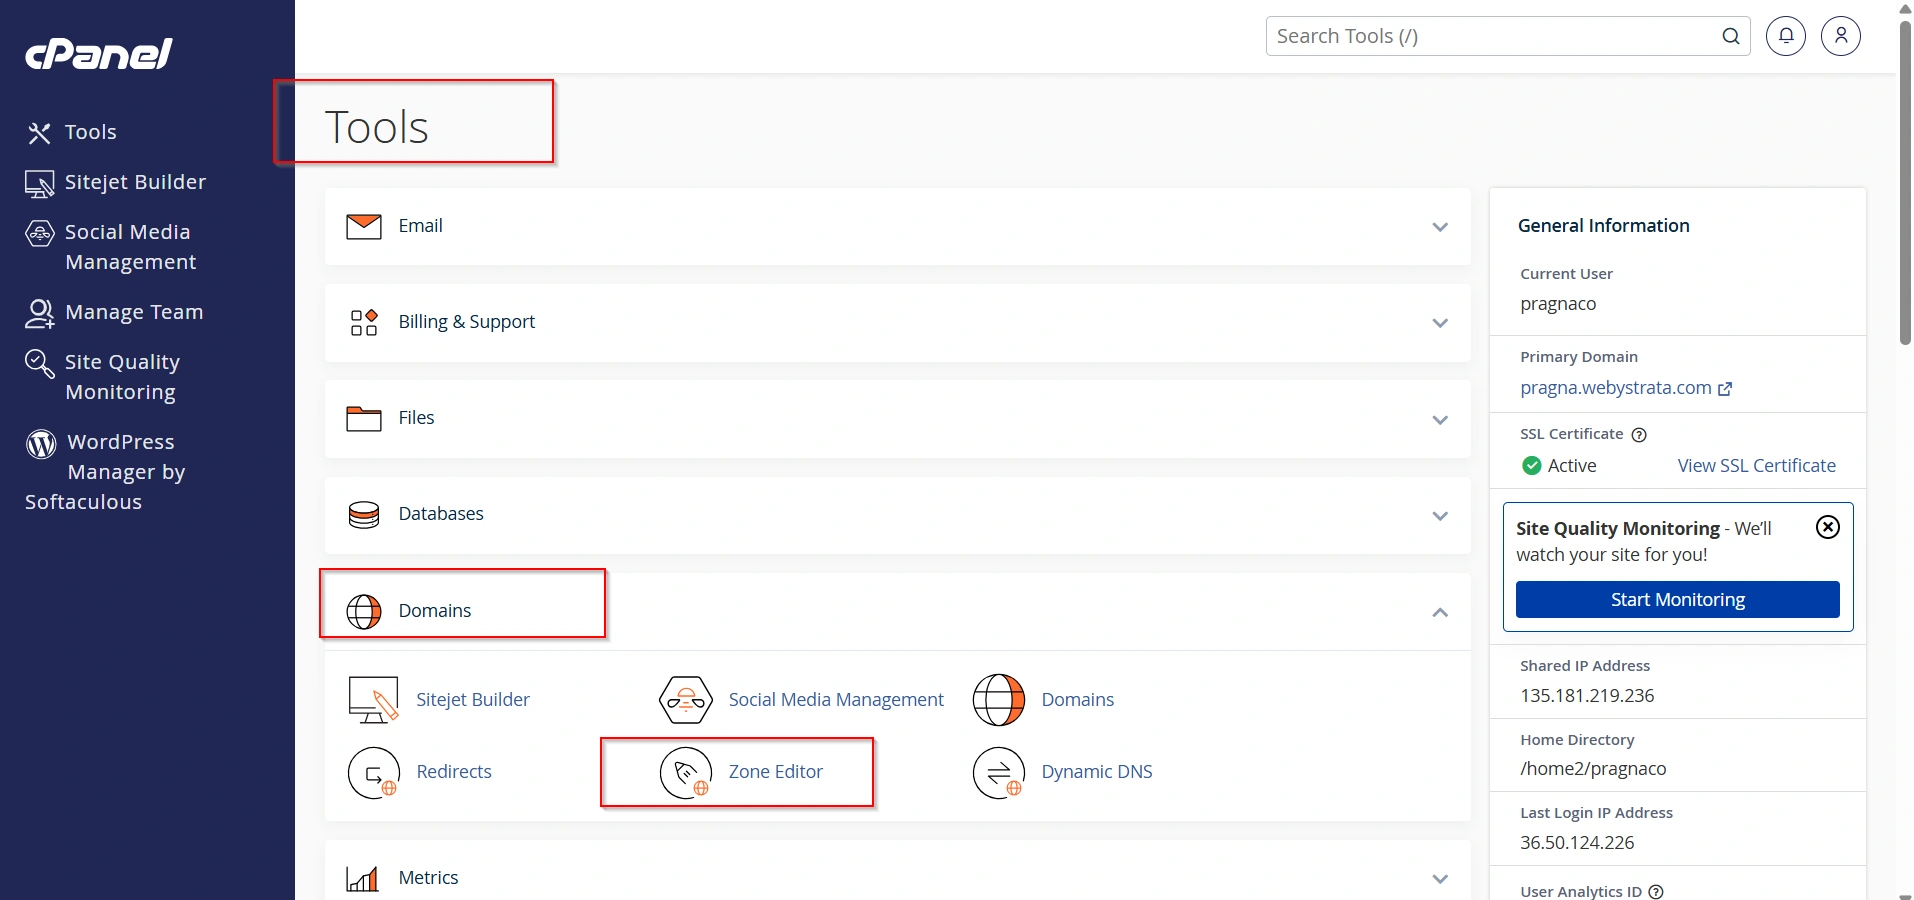
Step 2: Open the Zone Editor
- Scroll to the Domains section.
- Click Zone Editor.
The Zone Editor allows you to manage all DNS records associated with your domain.
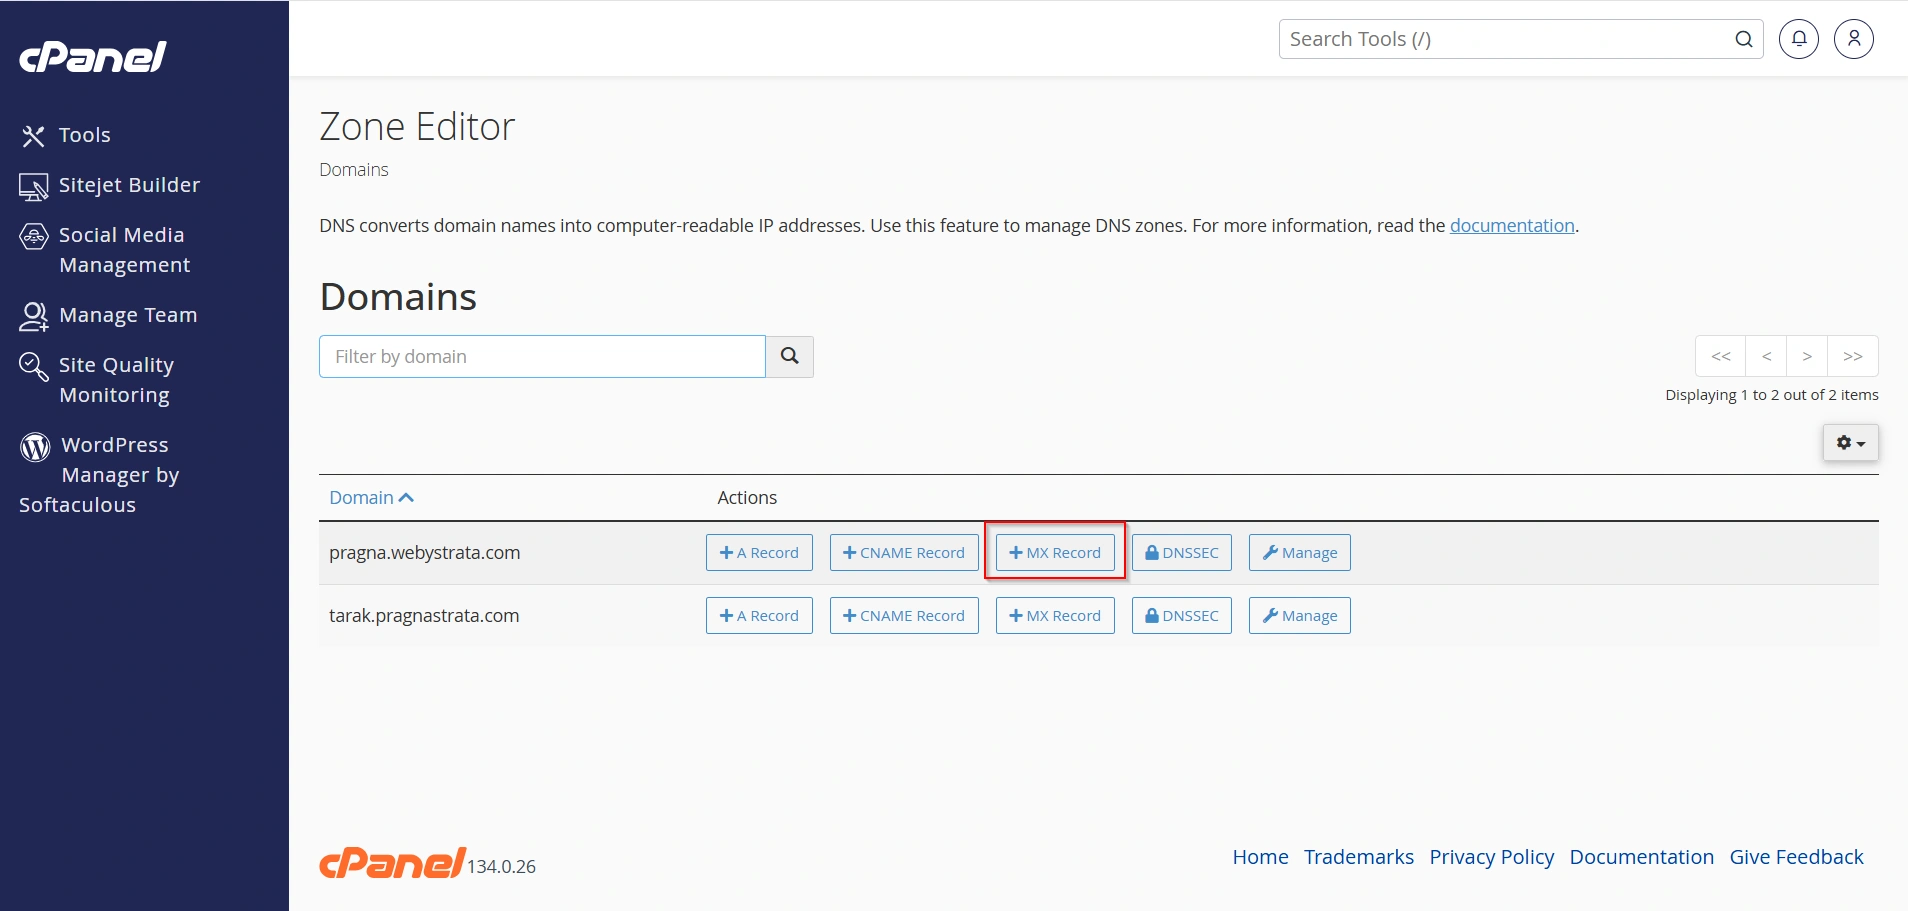
Step 3: Add a New MX Record
Locate the domain where you want to add the MX record.
- Click the + Add Record button.
- Select Add MX Record if available, or choose the MX record type manually.
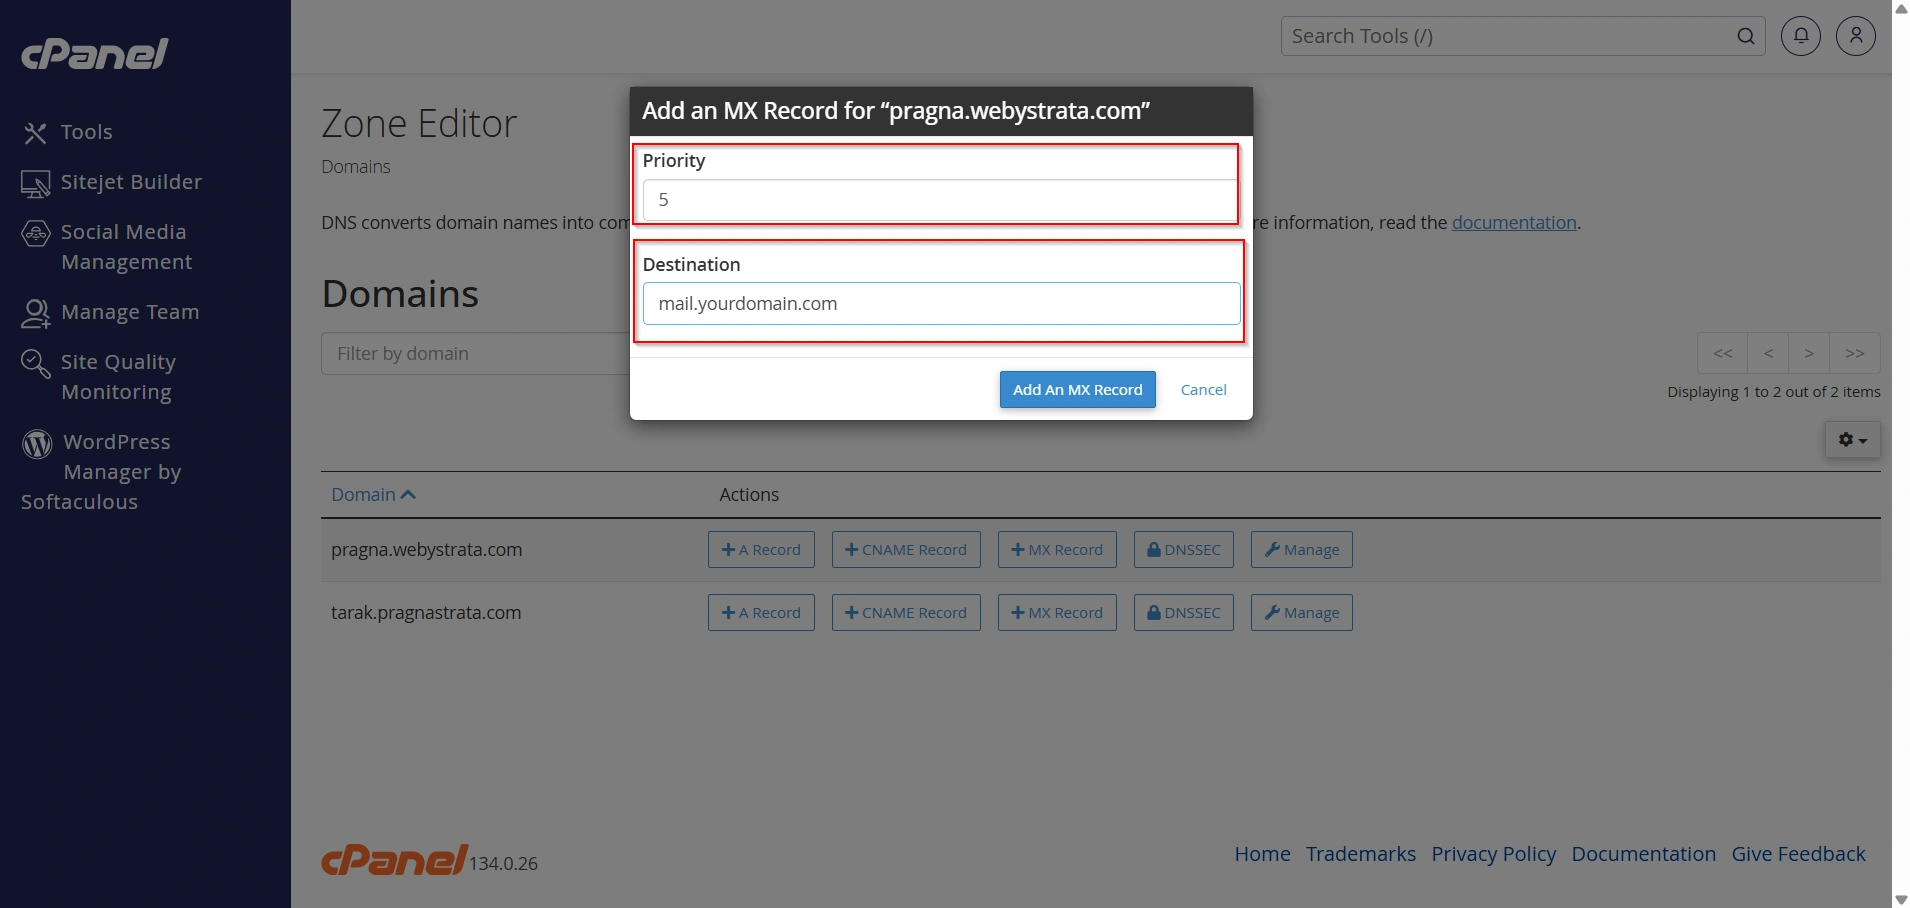
Step 4: Enter the MX Record Details
Fill in the required information:
Priority
Specify the priority number provided by your email service provider.
Example:
- 0
- 5
- 10
- 20
Lower numbers indicate higher priority.
Destination
Enter the mail server hostname.
Examples:
- mail.yourdomain.com
- aspmx.l.google.com
- mx.zoho.com
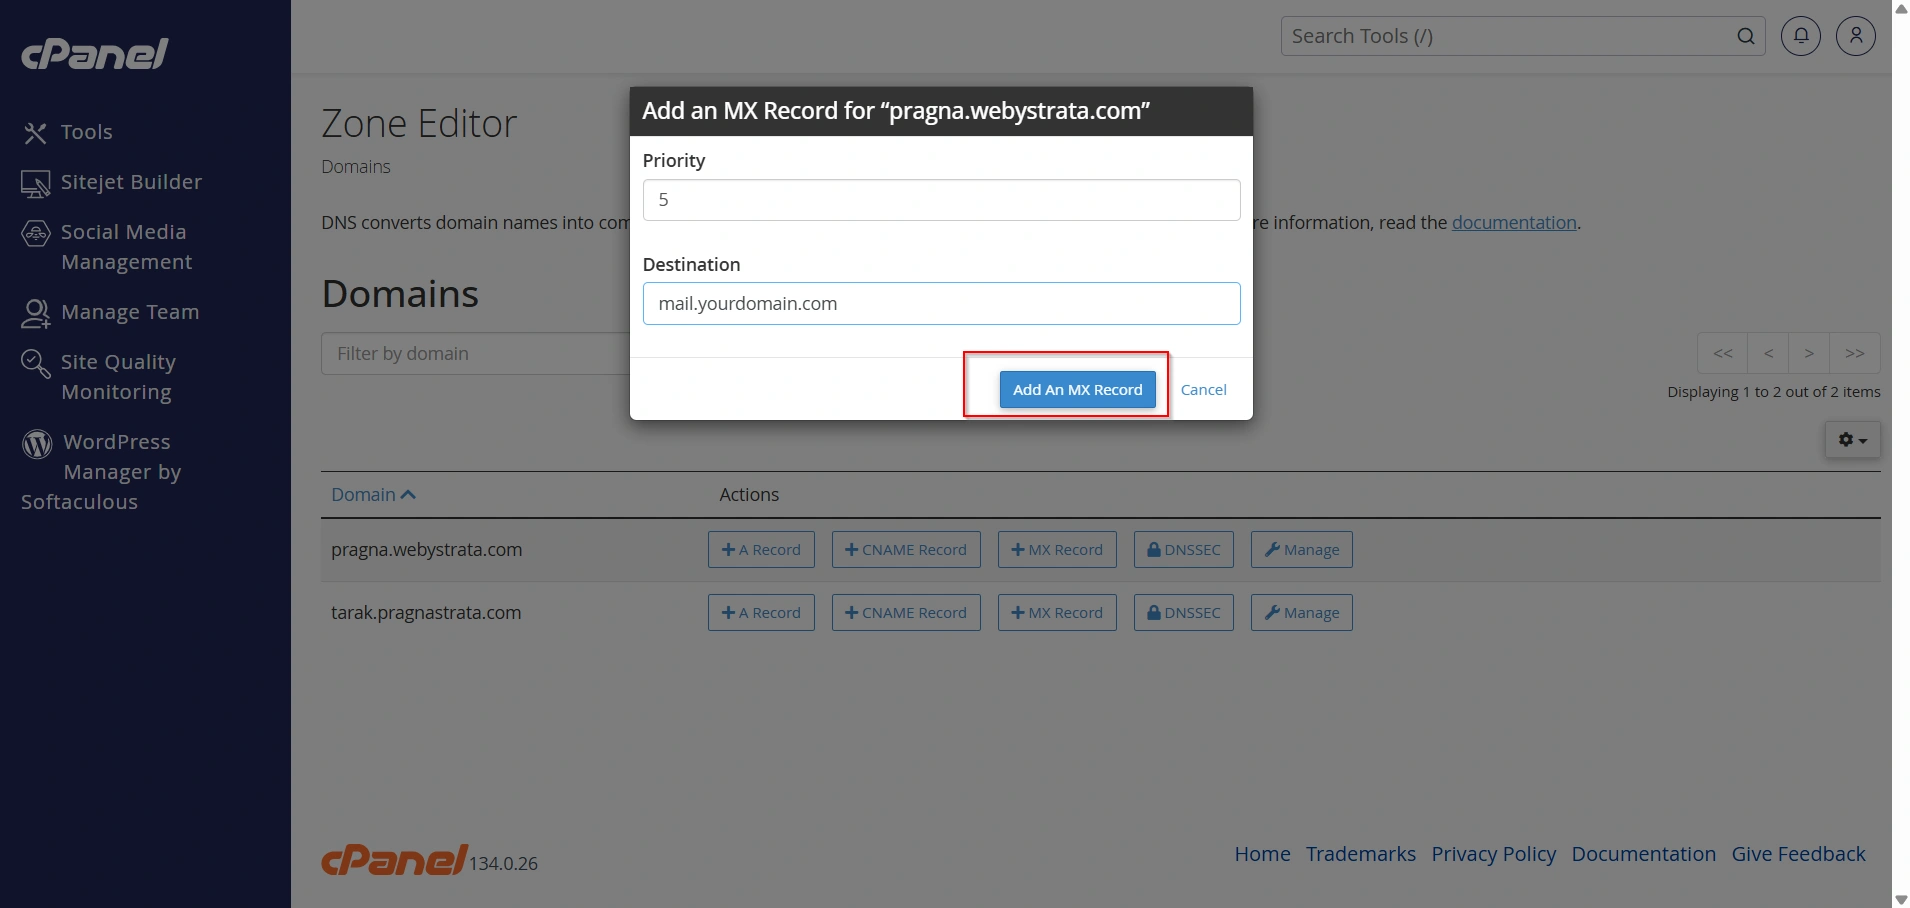
Step 5: Save the MX Record
Click Save Record or Add Record.
The new MX record will be added to your DNS zone.
How to Verify Your MX Record
After adding the record, you should verify it.
Method 1: Check in cPanel
Return to the Zone Editor and confirm the MX record appears in the DNS zone.

Method 2: Use Online DNS Lookup Tools
Search for:
- MXToolbox
- DNSChecker
- Google Admin Toolbox Dig
Enter your domain name to view active MX records.
Method 3: Command Line Verification
Windows:
nslookup -type=mx yourdomain.com
Linux/macOS:
dig mx yourdomain.com
The results should display the mail server you configured.
Why Would You Need to Add an MX Record?
You may need to add or modify MX records when:
- Setting up Google Workspace (Gmail for Business)
- Configuring Microsoft 365 email
- Using Zoho Mail
- Connecting a third-party email hosting provider
- Migrating email services
- Replacing old mail servers
- Improving email reliability and redundancy
Benefits of Proper MX Record Configuration
A properly configured MX record provides:
- Reliable Email Delivery
- Improved Email Security
- Better Business Communication
- Seamless Third-Party Email Integration
Supports services such as:
- Google Workspace
- Microsoft 365
- Zoho Mail
- Rackspace Email
- Fastmail
Conclusion
Adding an MX record in cPanel through the DNS Zone Editor is an essential task when configuring email services for your domain. Whether you’re setting up Google Workspace, Microsoft 365, Zoho Mail, or another email platform, correct MX record configuration ensures that incoming emails are routed to the proper mail server.
By following the steps outlined in this guide, you can successfully add MX records, configure email routing, verify DNS settings, and maintain reliable email communication for your business or website. Proper DNS management not only improves email delivery but also enhances the overall professionalism and reliability of your online presence.
Related Articles