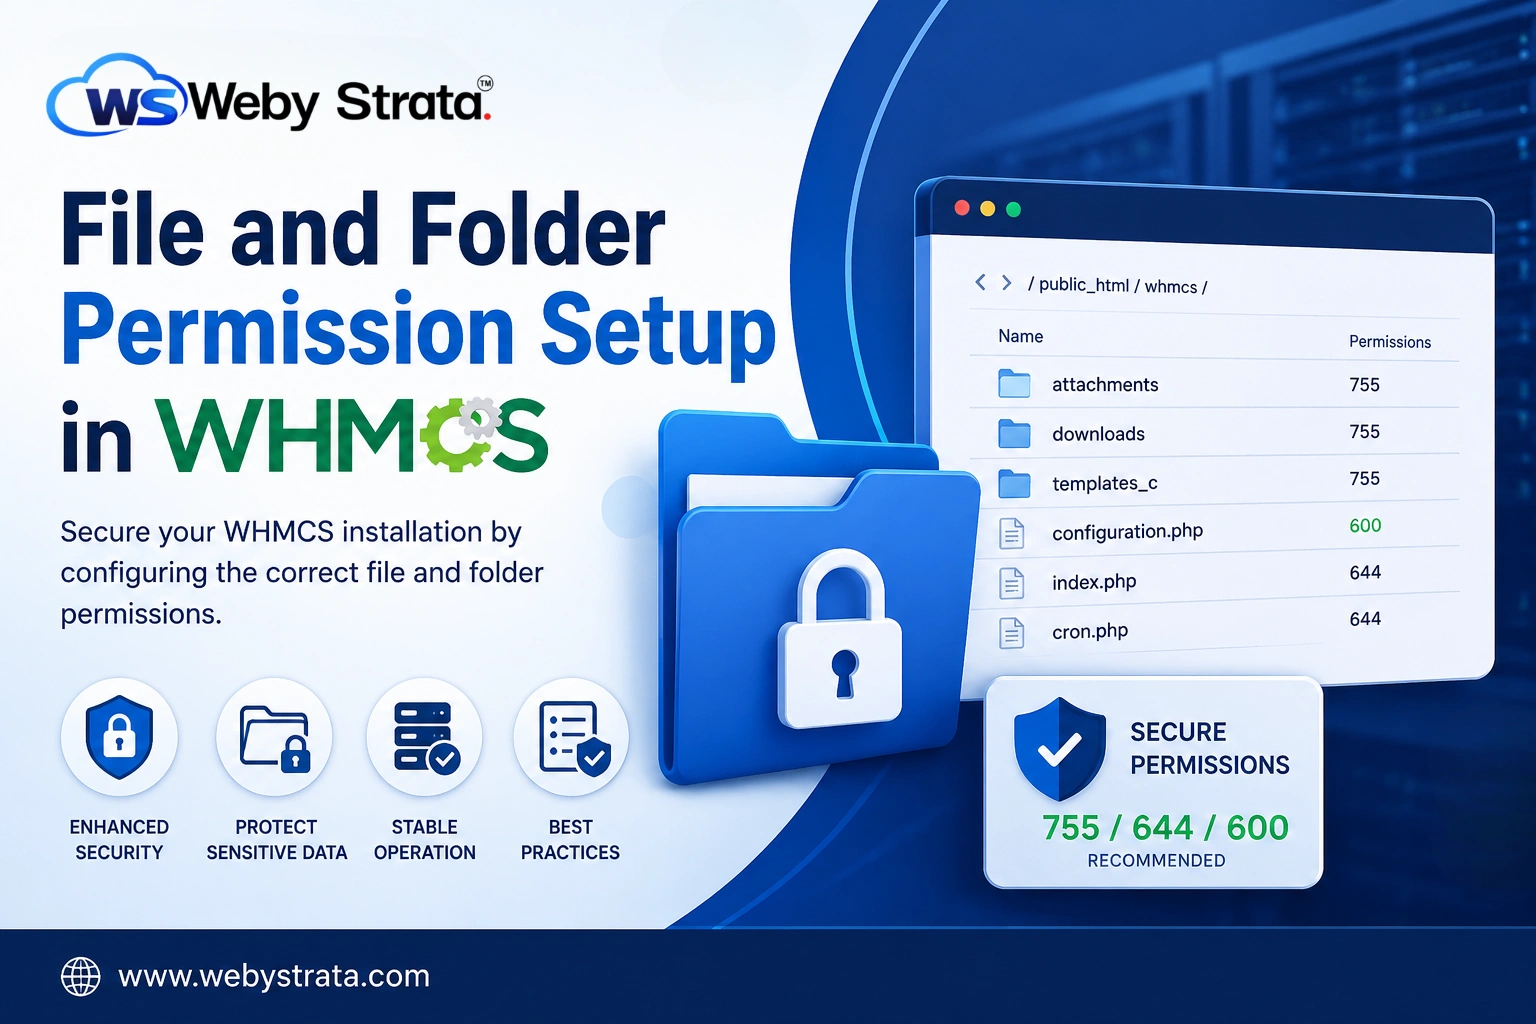
cPanel
How To Install Let’s Encrypt SSL Certificate In cPanel
Step 1: Login To cPanel And Search For Let’s Encrypt After logging into cPanel, use the search bar located at the top of the dashboard and search for: Let’s Encrypt As shown in the…
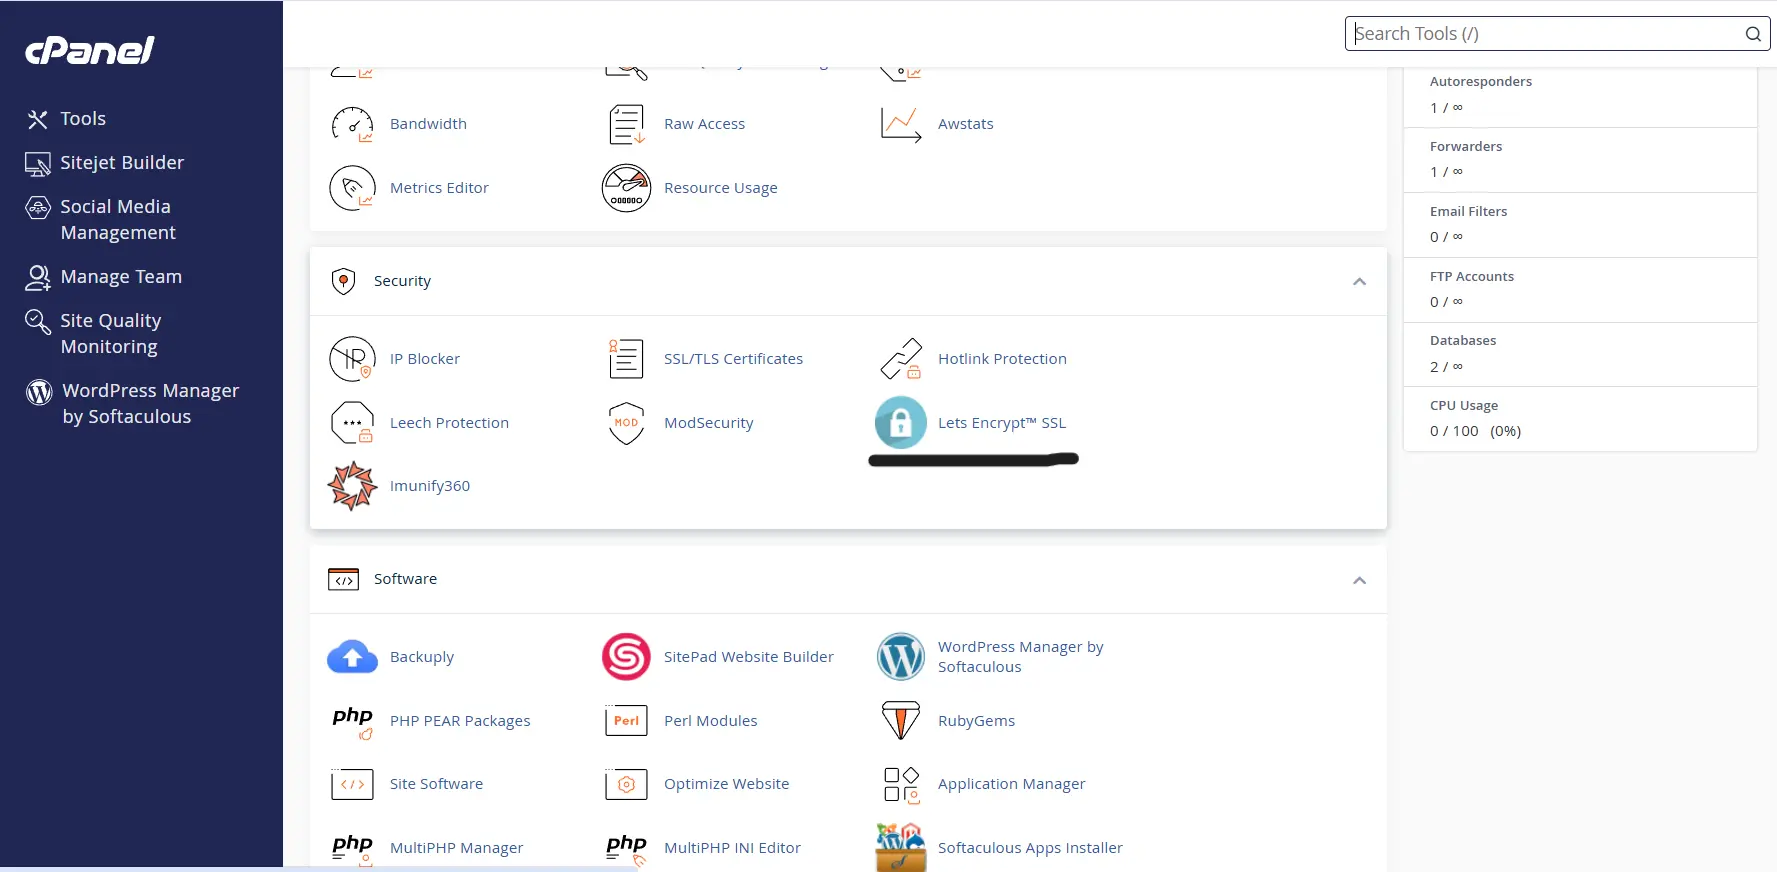
Step 1: Login To cPanel And Search For Let’s Encrypt
After logging into cPanel, use the search bar located at the top of the dashboard and search for: Let’s Encrypt
As shown in the image below, Click on the Let’s Encrypt SSL option to continue.
Step 2: Issue A New SSL Certificate
As shown in the image below, locate the domain name you want to secure from the available domains list inside the Let’s Encrypt SSL interface.

Under the Actions section, click on the “Issue” button next to your selected domain to start generating and installing the SSL certificate.
Step 3: Configure Domain SSL Options
On the next page, you will see multiple SSL configuration options.
cPanel subdomains are those such as cpanel. and webmail. , which when added, allow access to cPanel services via that subdomain.
Step 4: Choose SSL Validation Method
HTTP Validation (http-01) – You will usually want to use the HTTP validation method.
DNS Validation (dns-01) – If your domain’s nameservers point to cPanel, then you have the option of using the DNS validation method instead.

Wildcard SSL certificates require DNS validation.
Step 5: Click On Issue
After selecting the preferred validation method, click on the Issue button.
Once the process is completed, the Let’s Encrypt SSL certificate will be automatically installed on your domain. The server configuration will be updated automatically, and Apache services will restart in the background to activate the SSL certificate successfully.

Related Articles