Latest Updates
Renaming WHMCS Admin Folder
Renaming WHMCS Admin Folder Security should always be a top priority when managing a WHMCS installation. WHMCS serves as the central platform for handling clients, billing, support tickets, domain registrations, and hosting services. Because…

Renaming WHMCS Admin Folder
Security should always be a top priority when managing a WHMCS installation. WHMCS serves as the central platform for handling clients, billing, support tickets, domain registrations, and hosting services. Because of its importance, the WHMCS administration area is often targeted by hackers, bots, and malicious users attempting to gain unauthorized access.
By default, WHMCS uses the /admin directory for administrator logins. Since this location is widely known, attackers frequently target it with automated login attempts and brute-force attacks. One simple yet effective security measure is Renaming WHMCS Admin Folder to a unique and less predictable directory name.
In this guide, you’ll learn why renaming the admin folder is beneficial, how it improves security, and the steps required to safely update your WHMCS installation.
Why Consider Renaming WHMCS Admin Folder?
The default admin directory is one of the first locations that attackers check when scanning websites running WHMCS. Since the URL is predictable, automated tools can repeatedly attempt to access the login page and test stolen or guessed credentials.
Renaming WHMCS Admin Folder helps reduce these risks by moving the administration area to a custom location that only authorized administrators know.
Benefits include:
- Reducing automated login attempts.
- Hiding the default WHMCS administration URL.
- Improving overall website security.
- Decreasing exposure to brute-force attacks.
- Adding another layer of protection alongside security best practices.
- Making it more difficult for bots to identify your WHMCS installation.
While Renaming WHMCS Admin Folder does not replace strong passwords or two-factor authentication, it significantly enhances your overall security strategy.
Prerequisites Before Renaming the Admin Folder
Before making any modifications, ensure you have the following:
- Access to your hosting control panel.
- Permission to manage website files.
- Access to the WHMCS root directory.
- A recent backup of your WHMCS files.
- A backup of your WHMCS database.
Creating backups is important because it allows you to restore your installation if any configuration errors occur during the process.
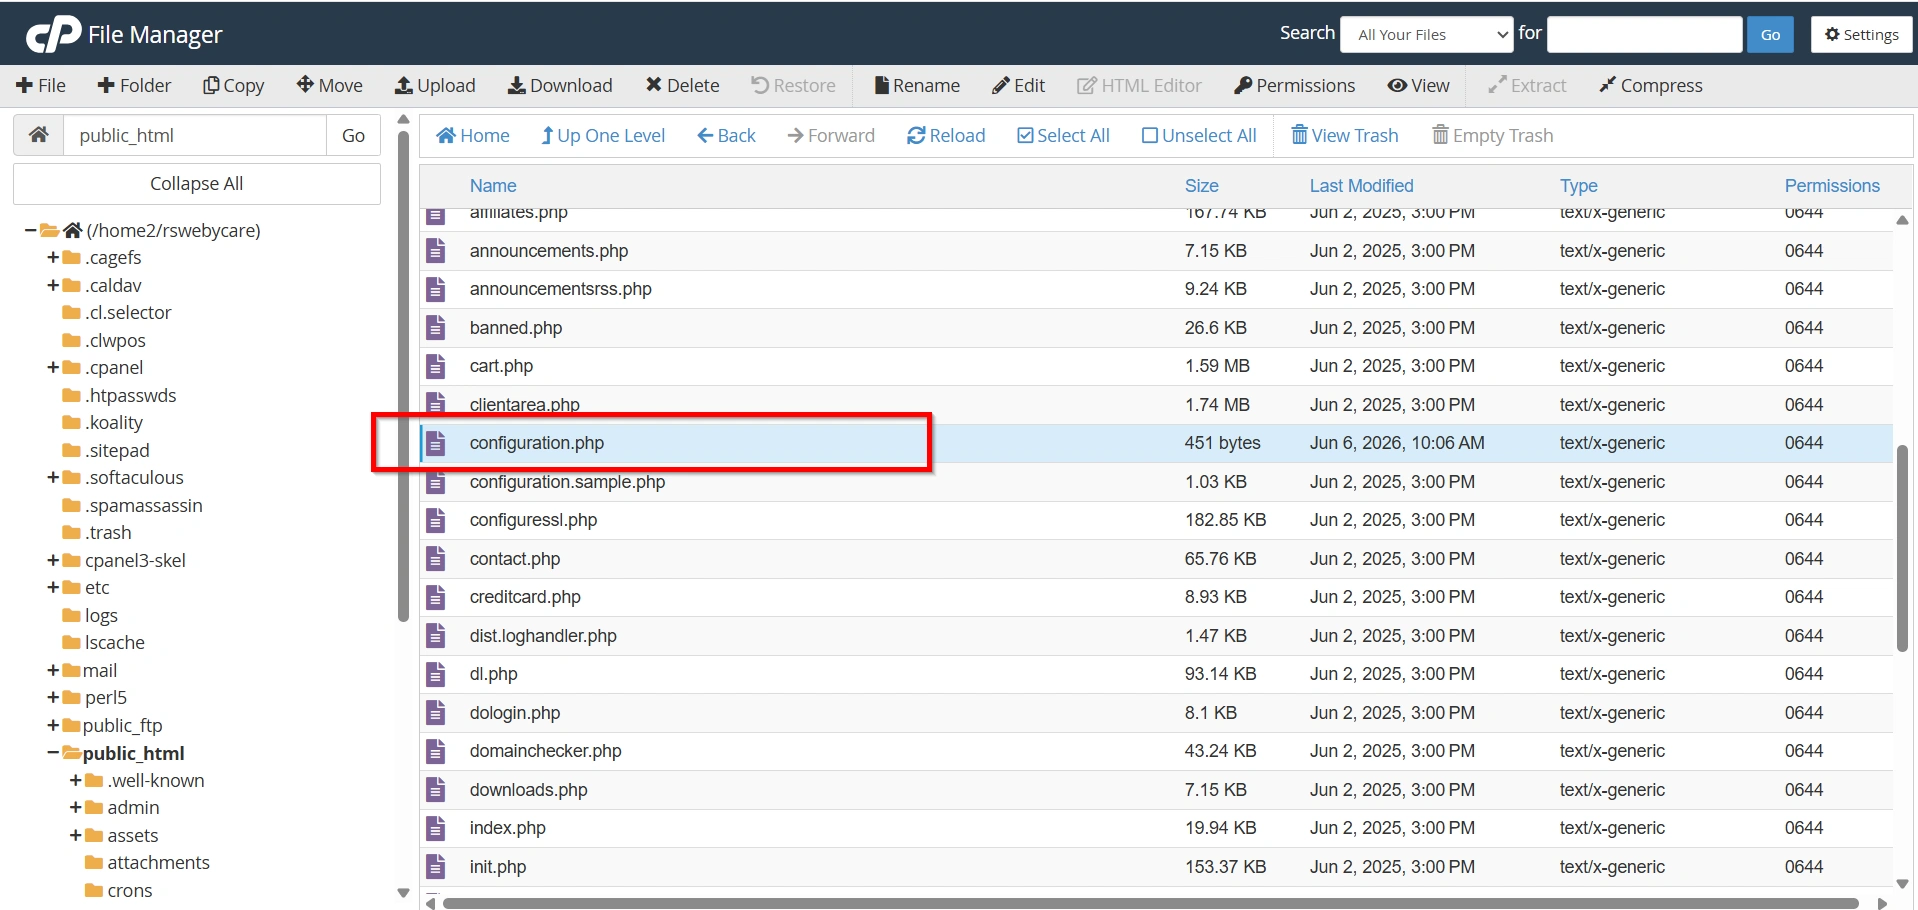
Step 1: Access the WHMCS Installation Directory
- Log in to your hosting control panel such as cPanel, DirectAdmin, or Plesk.
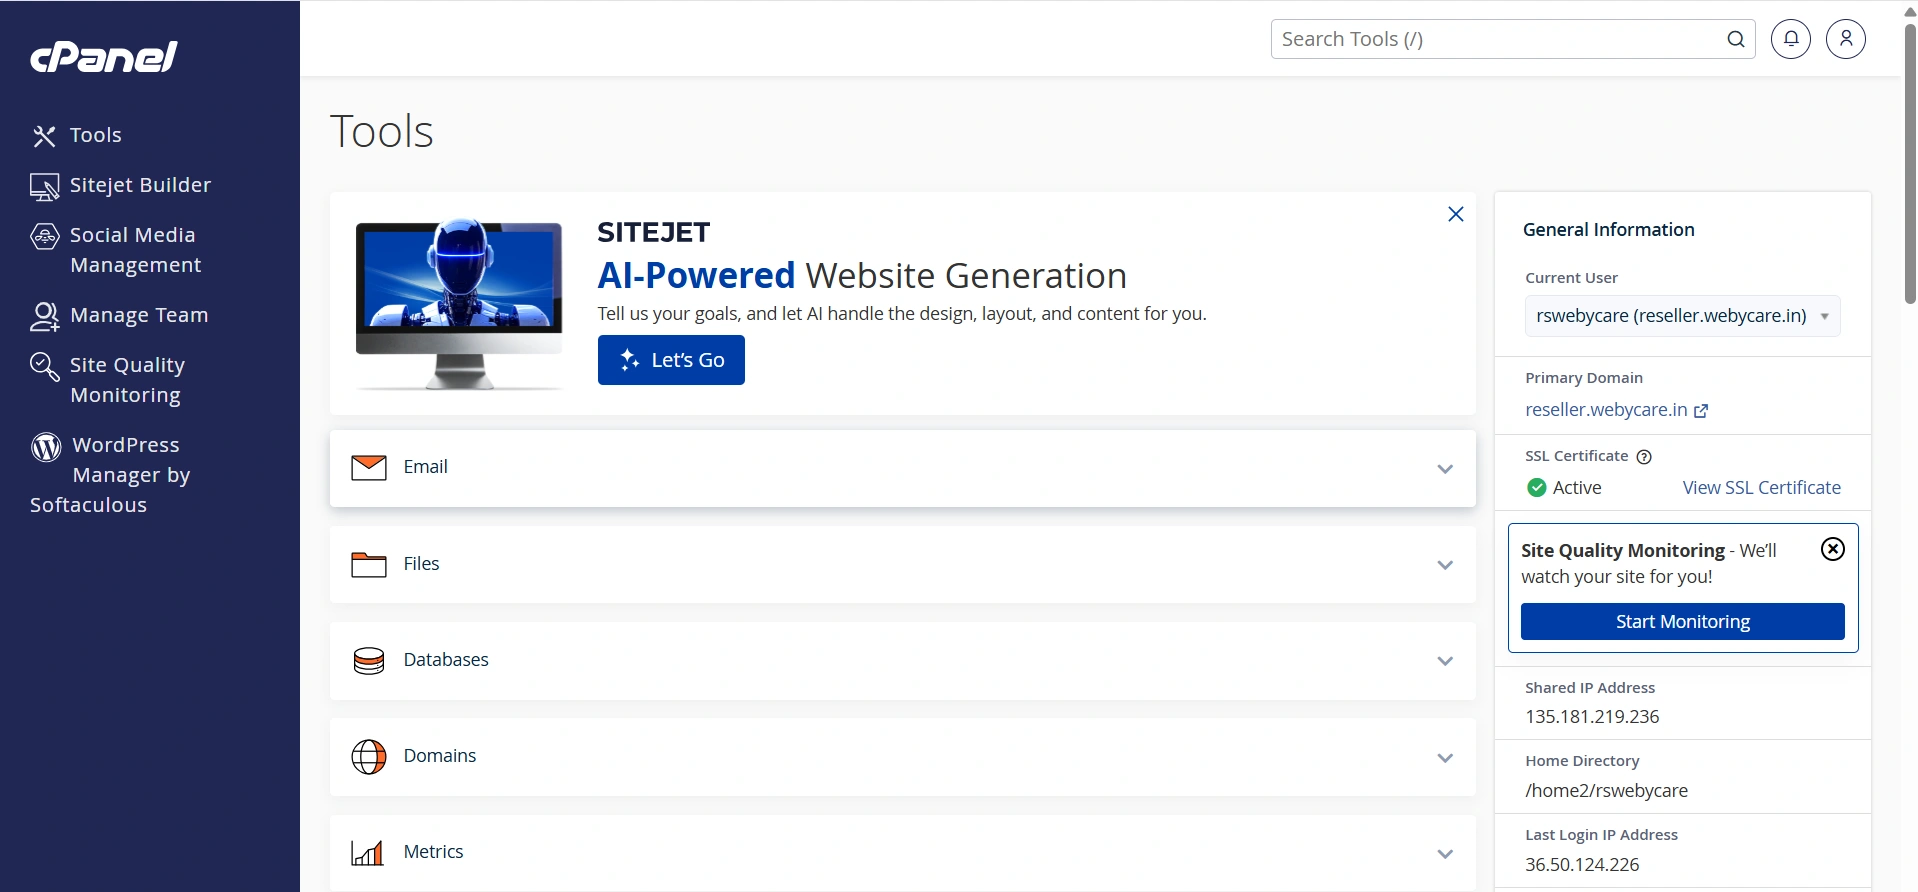
2. Open Files then Click File Manager.
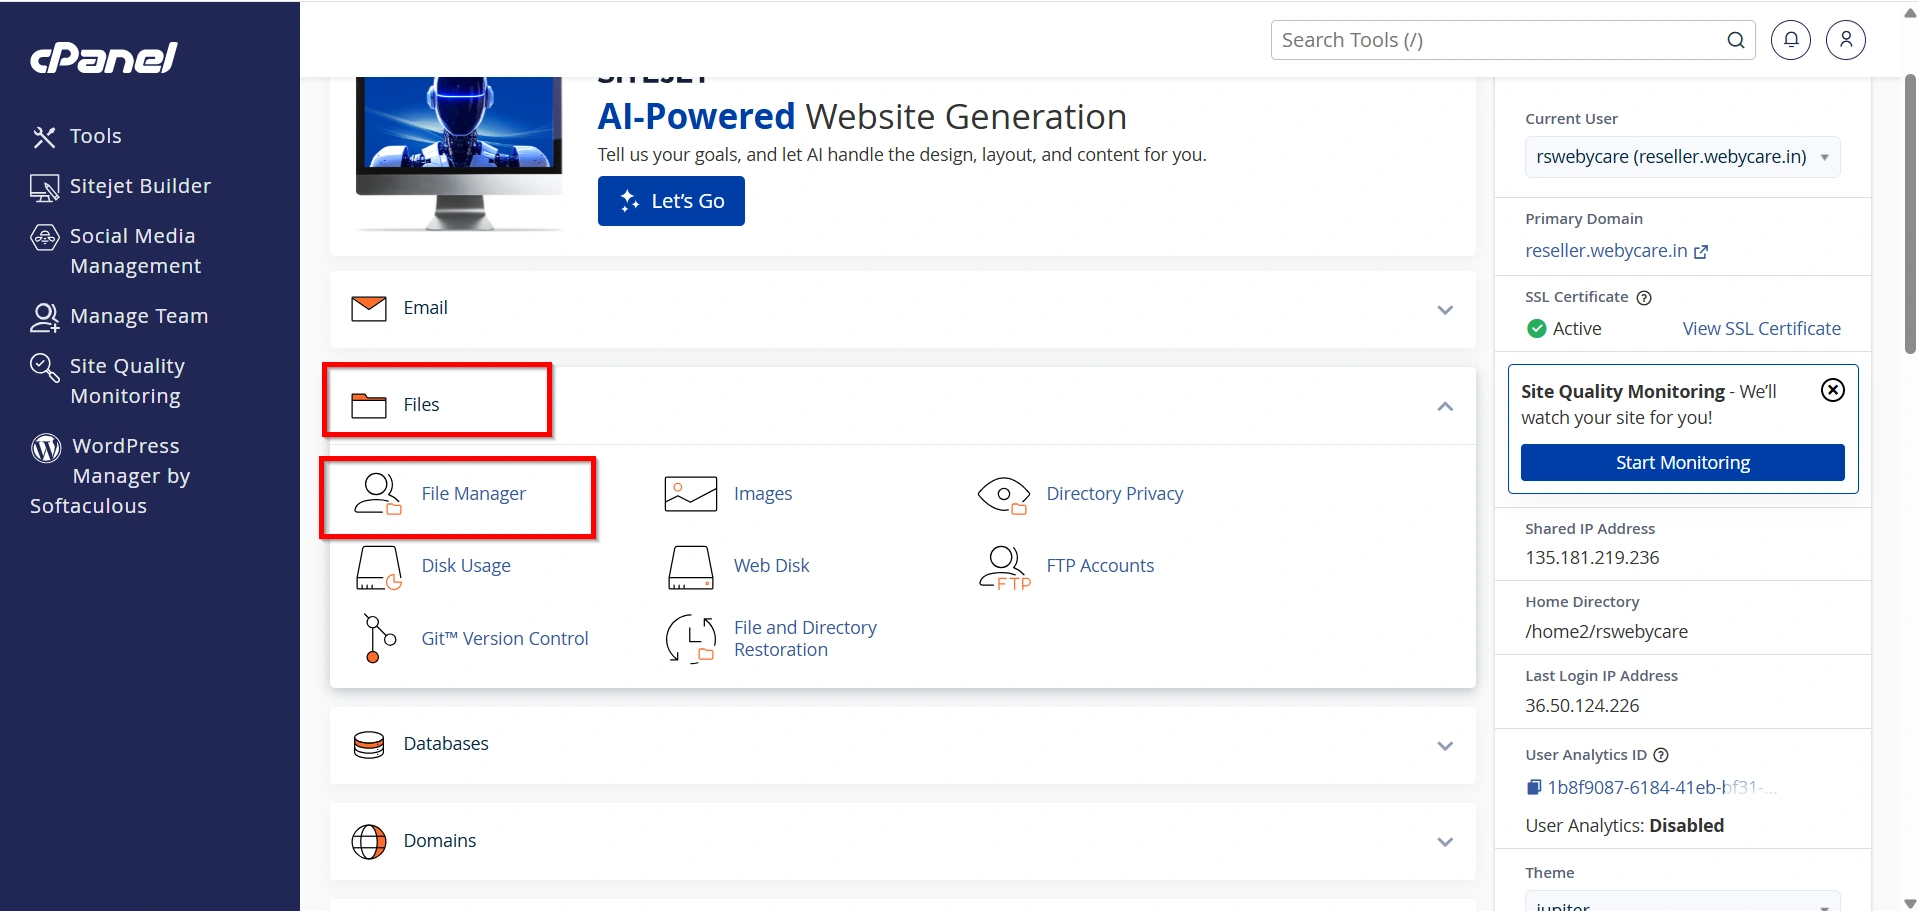
3. Navigate to your WHMCS installation directory, usually
- public_html
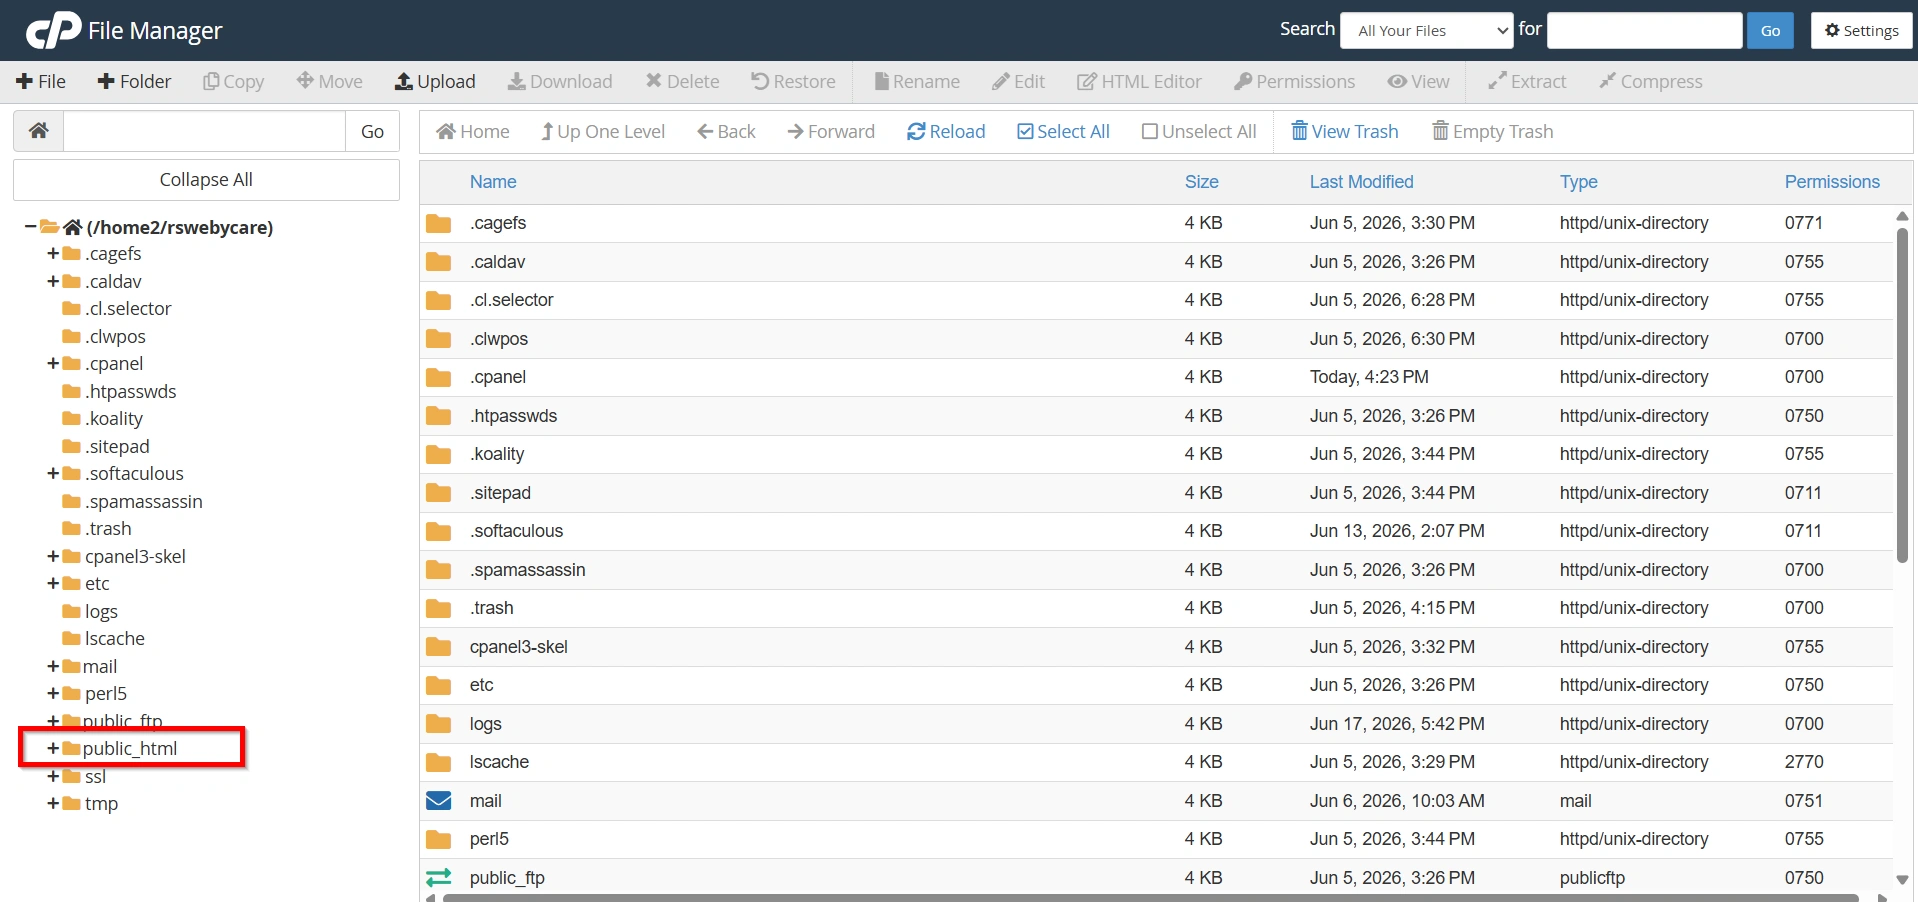
4. Locate the folder named:
ex: admin
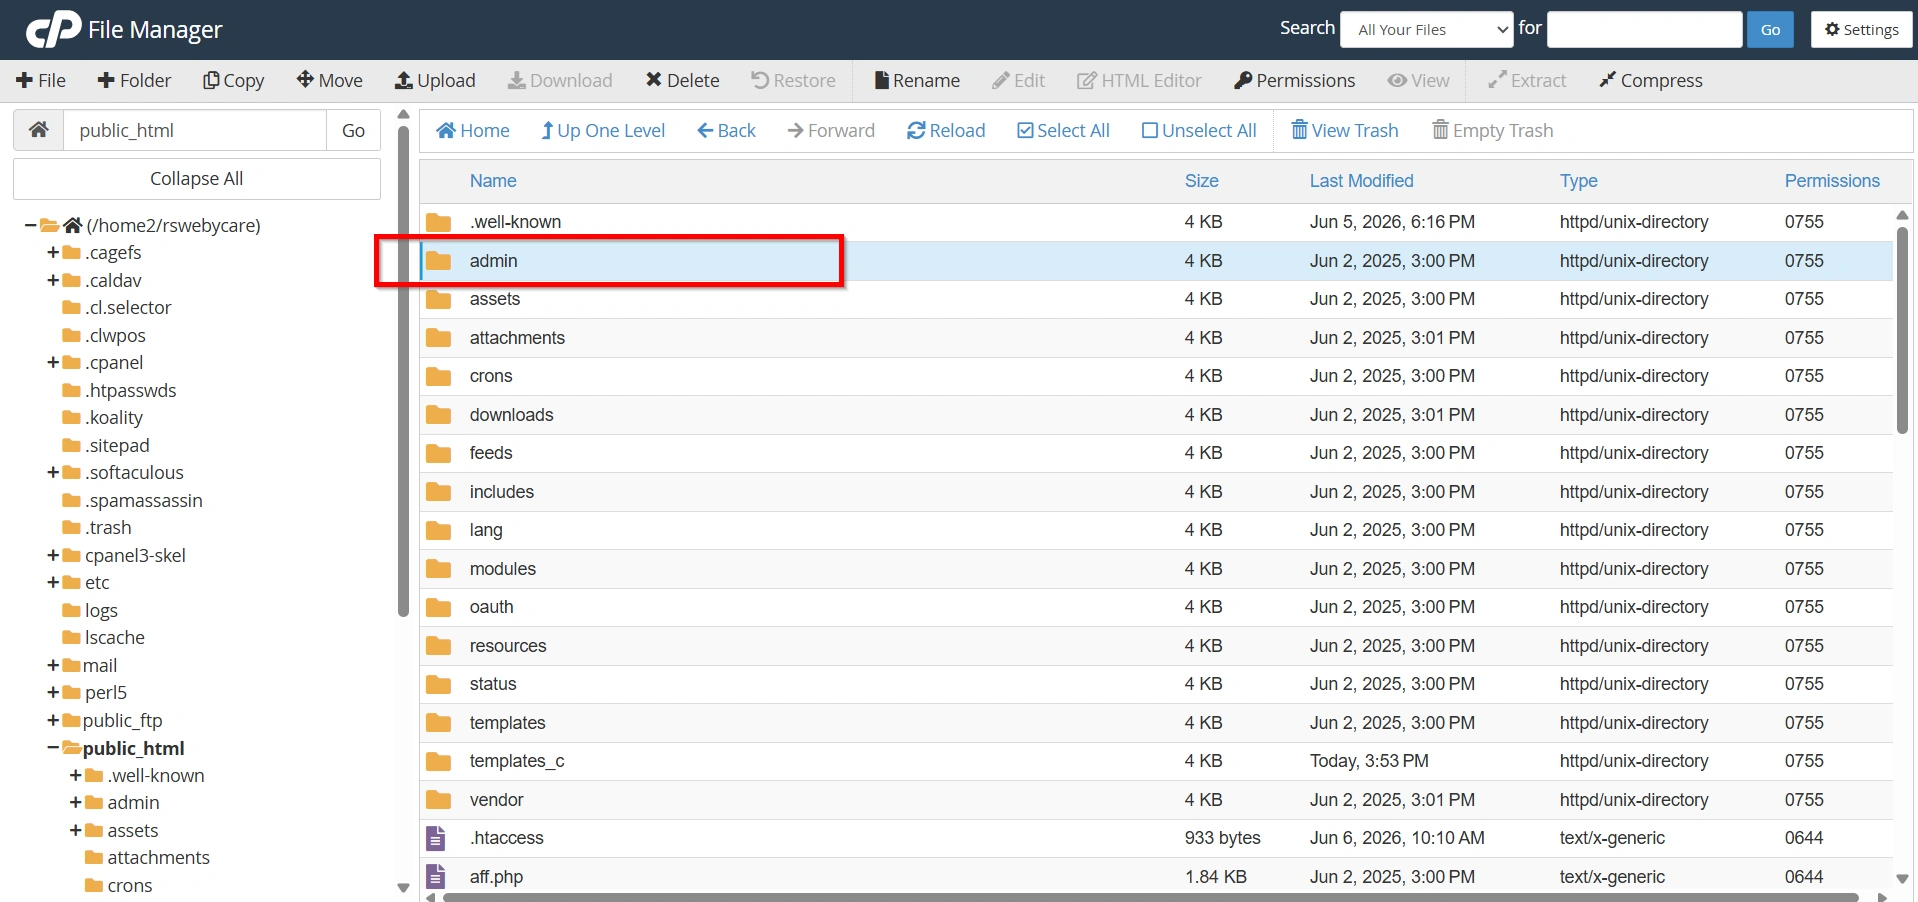
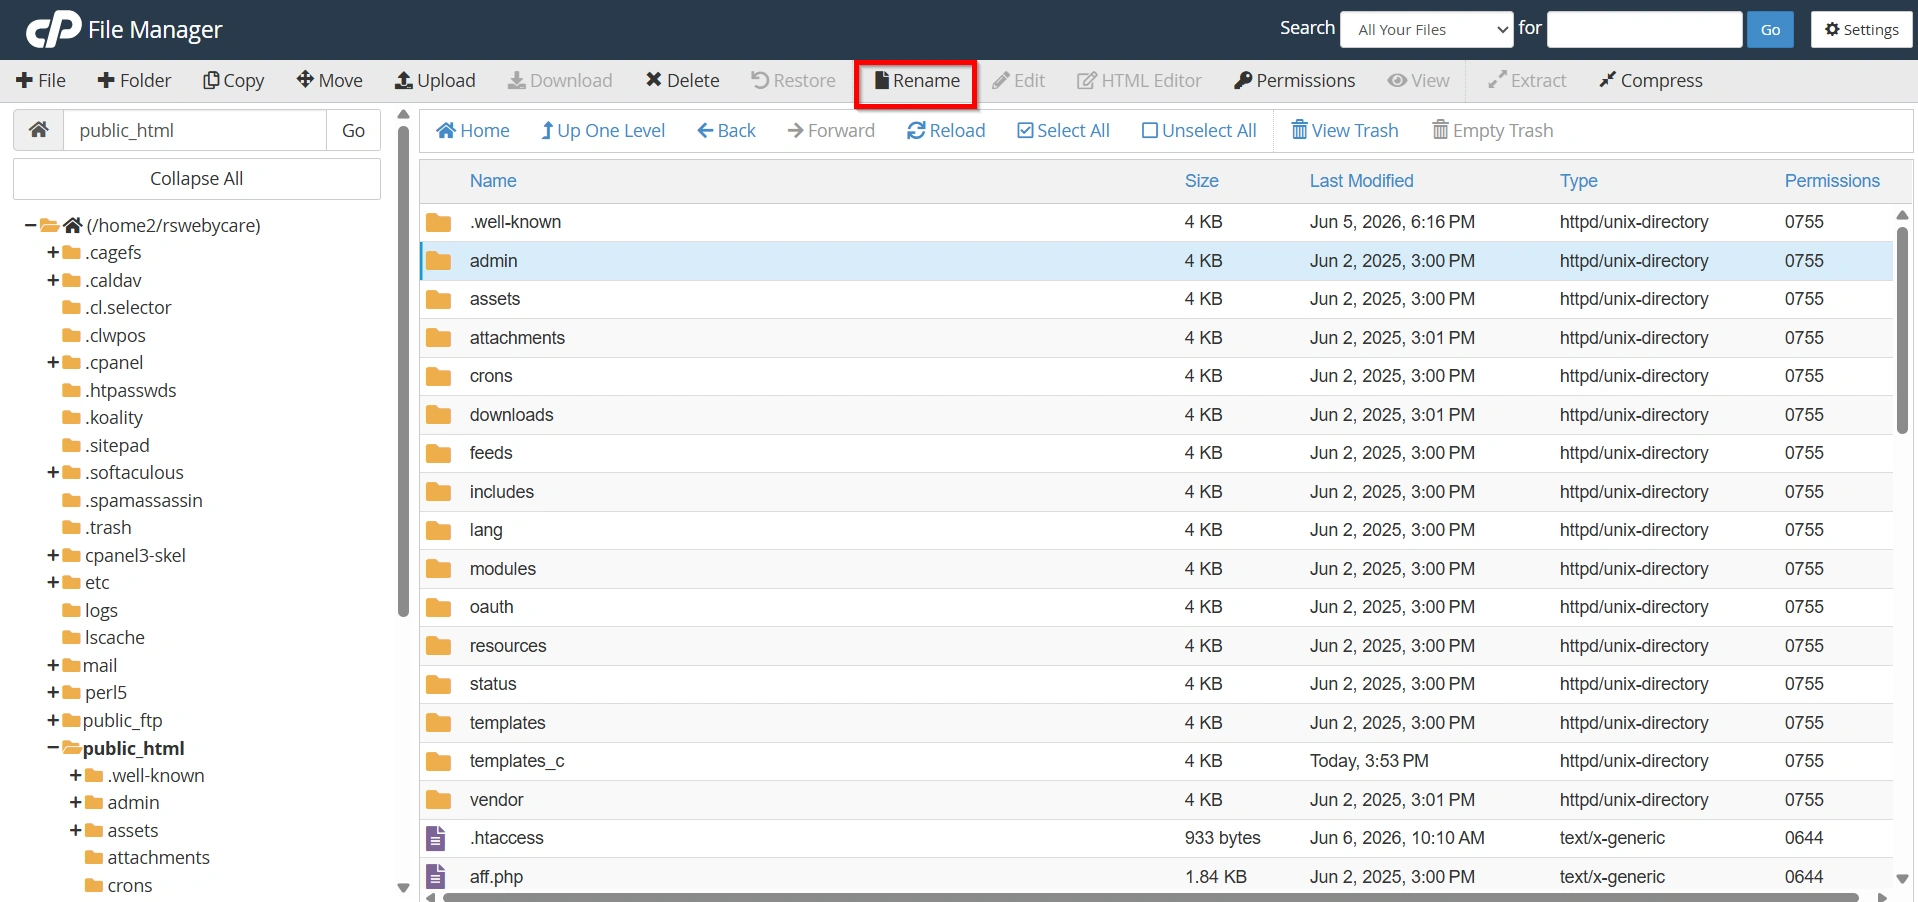
Step 2: Rename the Admin Folder
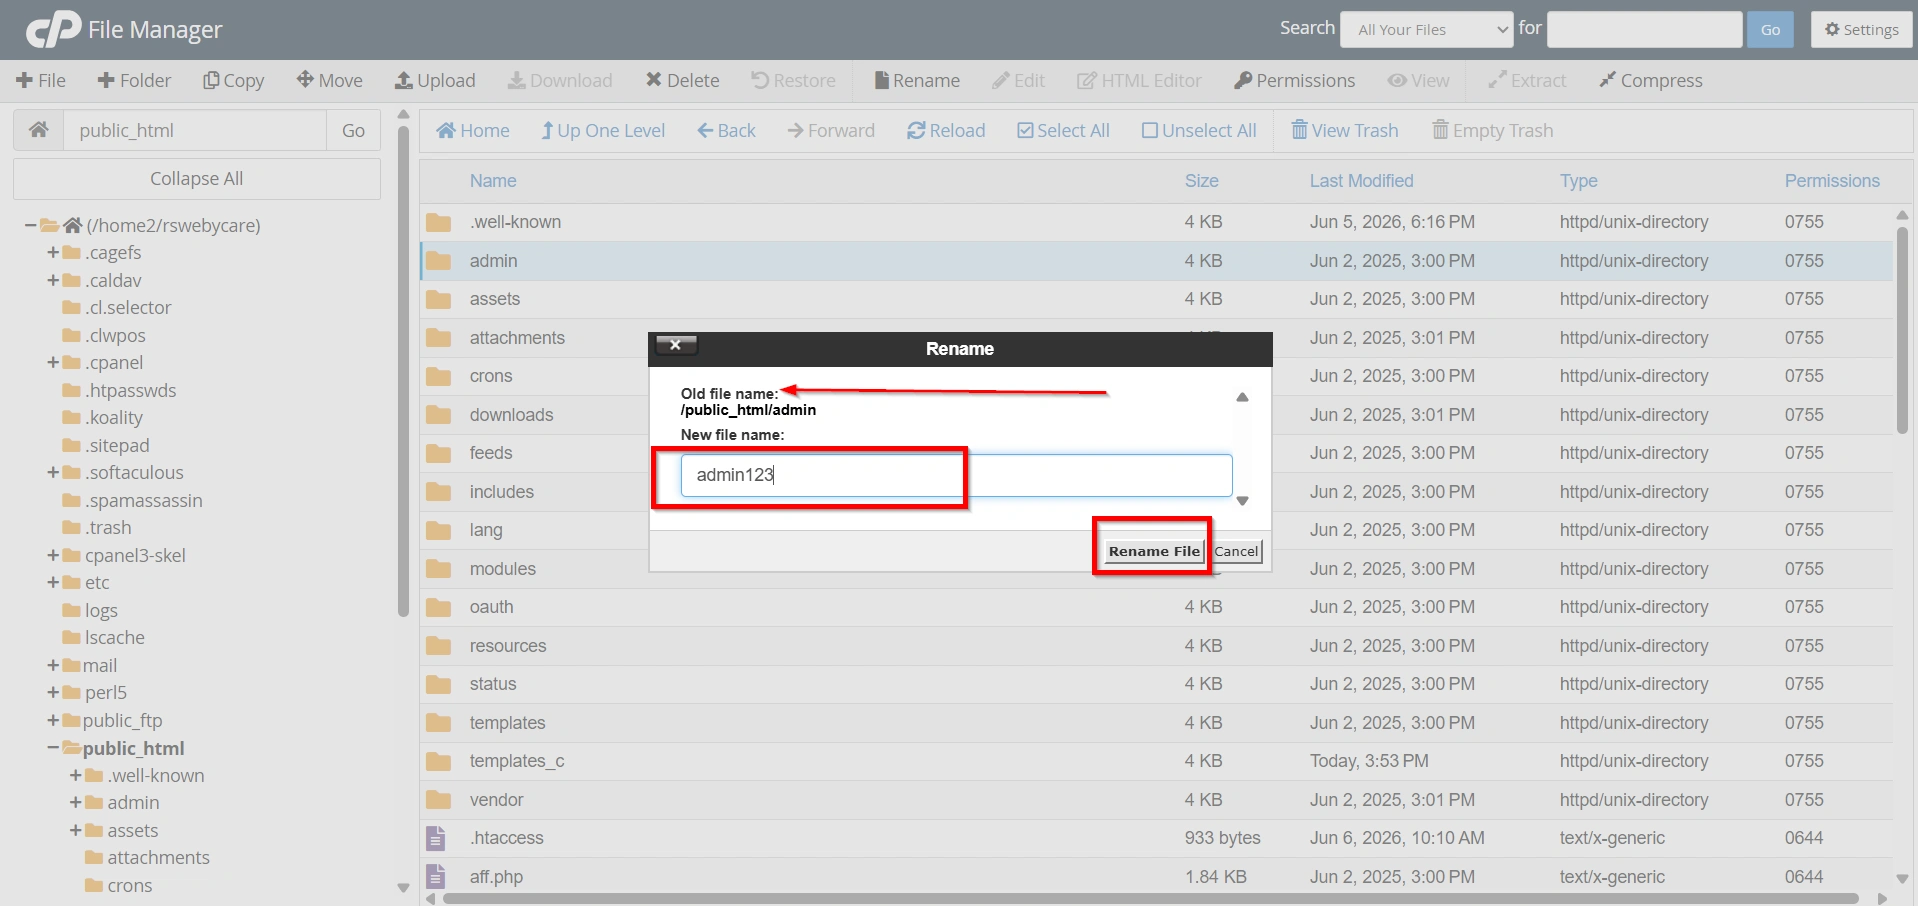
- Select the admin folder and choose the Rename option from your file manager.
- Replace the default folder name with a unique name that is difficult to guess.
Examples:
securepanel
clientportalcontrol
manageclients
controlcenter
mysecureportal
Avoid using names that still contain obvious terms such as “admin” whenever possible. A unique name provides better protection against automated scans.
This step is the most important part of Renaming WHMCS Admin Folder because it changes the URL used to access your administrator area.
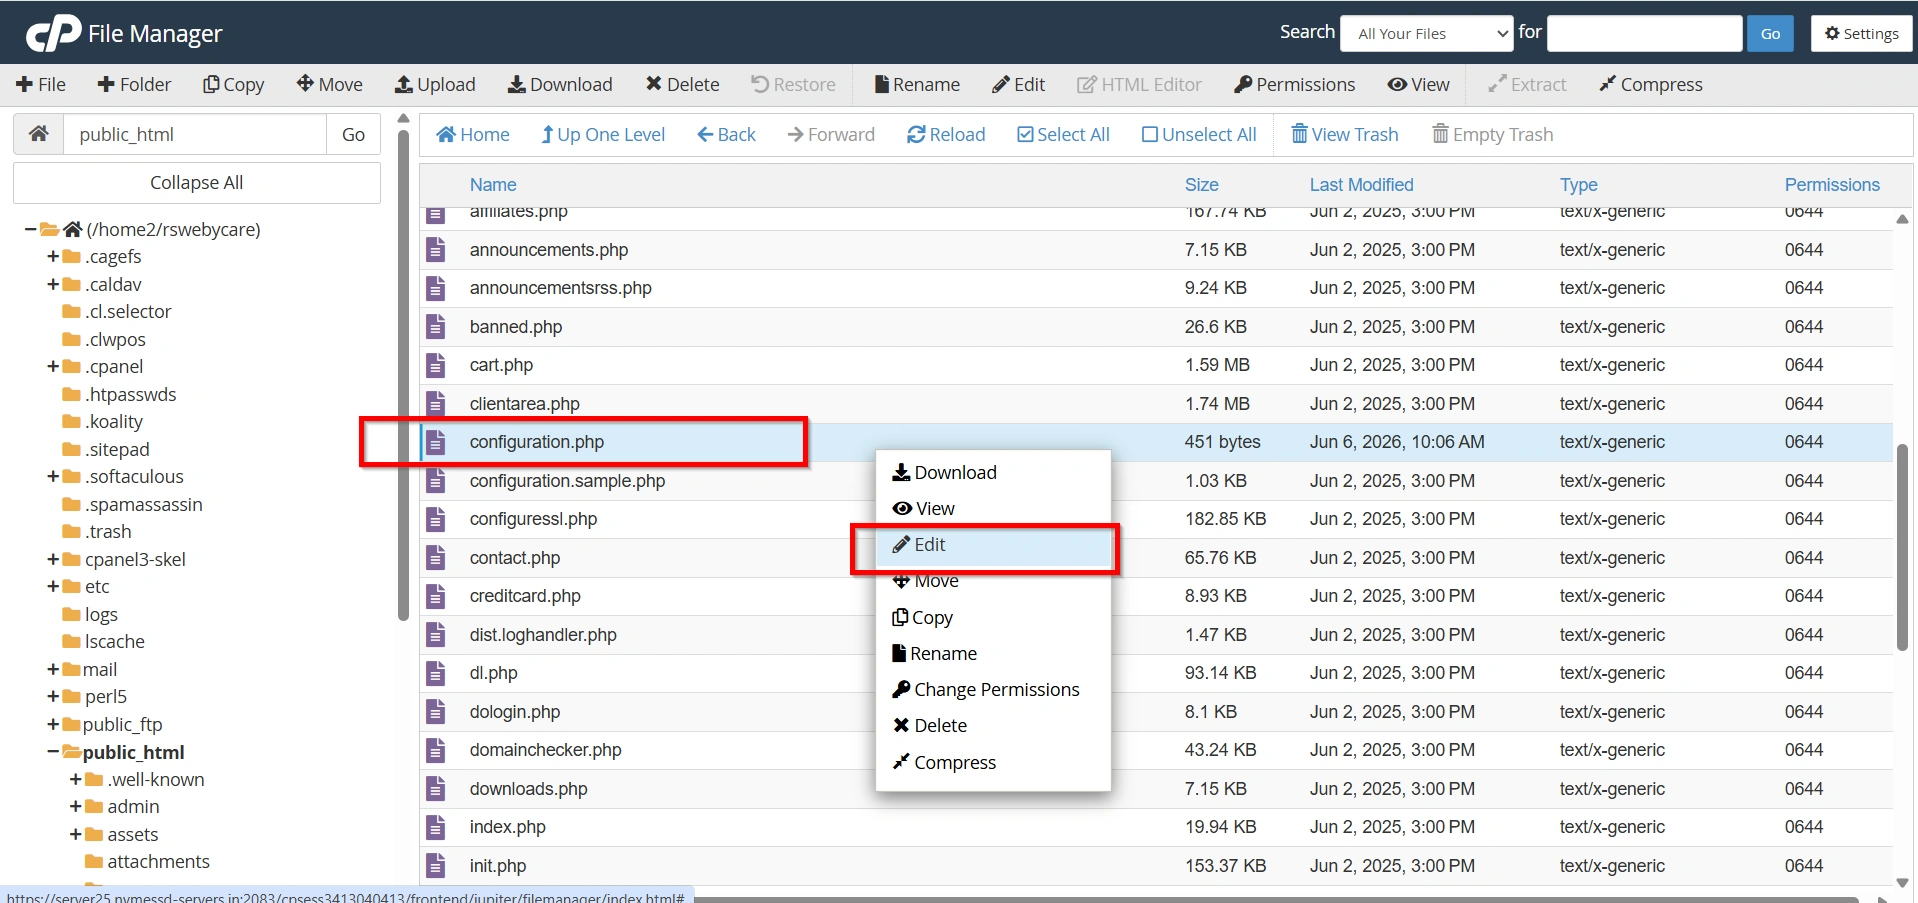
Step 3: Update the WHMCS Configuration File
After renaming the folder, WHMCS must be informed of the new admin directory location.
- Locate the file:
configuration.php
This file is located in the root directory of your WHMCS installation.
- Click Edit
- add or update the following line:
$customadminpath = "securepanel";
Replace “securepanel” with the exact name of your renamed folder.
For example:
$customadminpath = "controlcenter";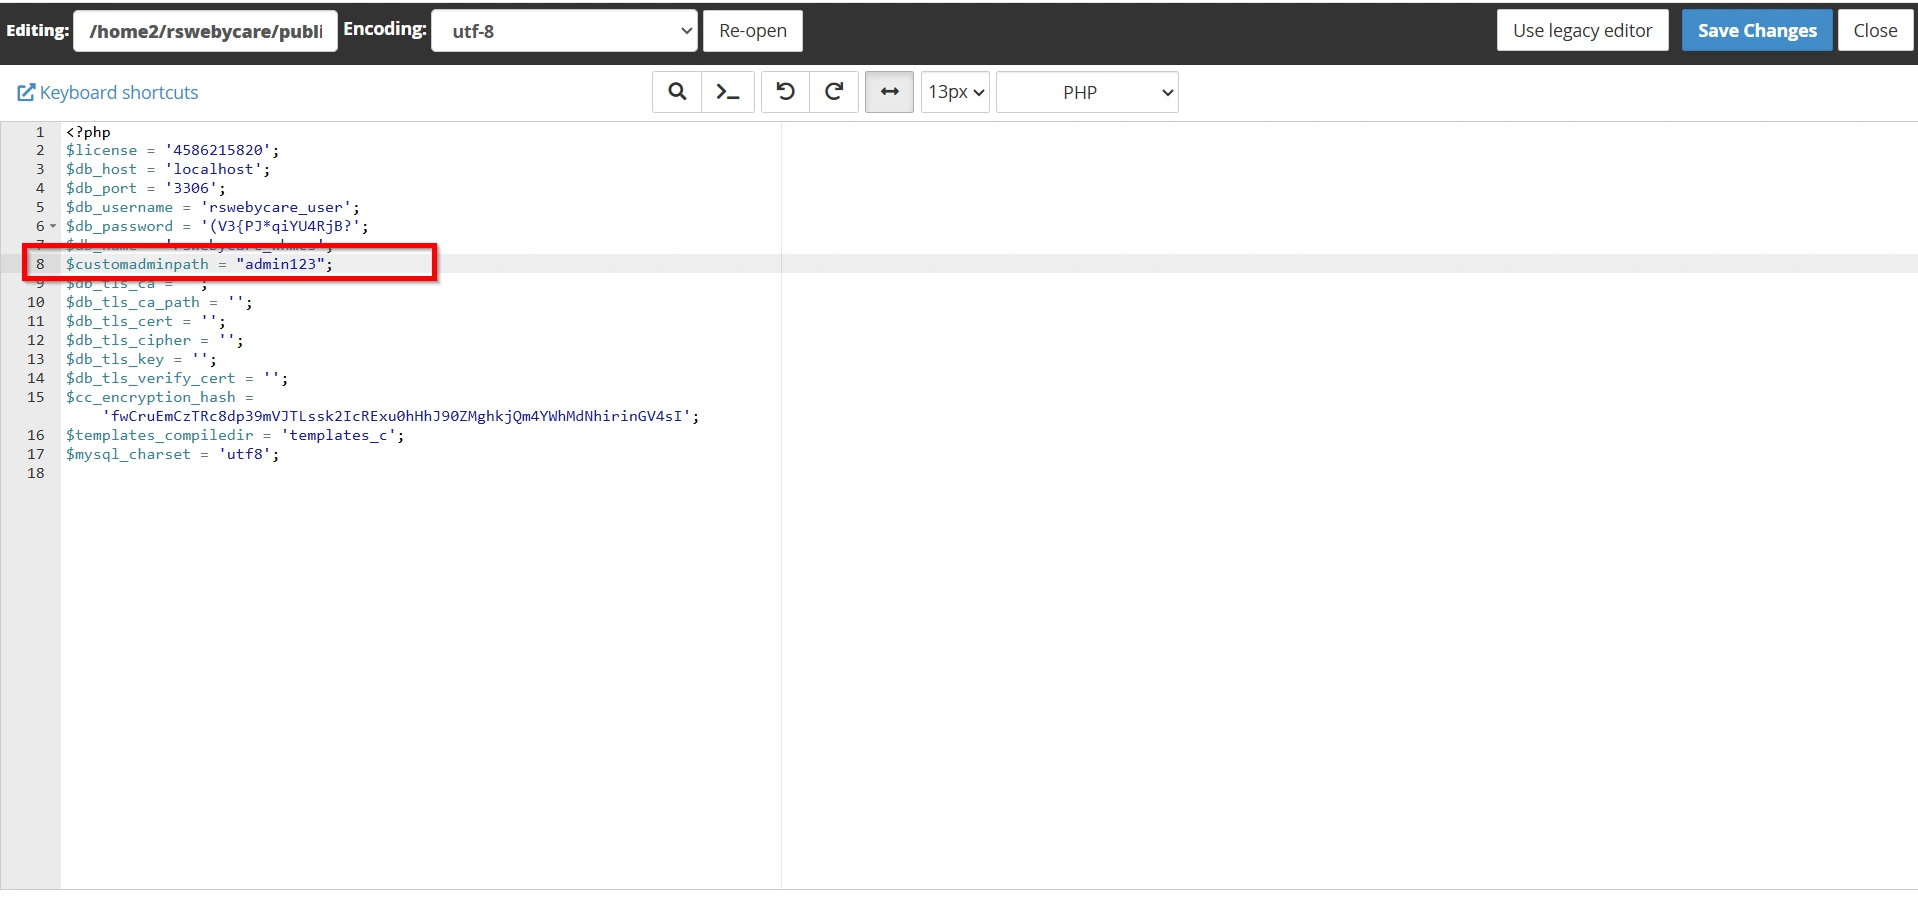
- Save the file after making the changes by clicking Save Changes.
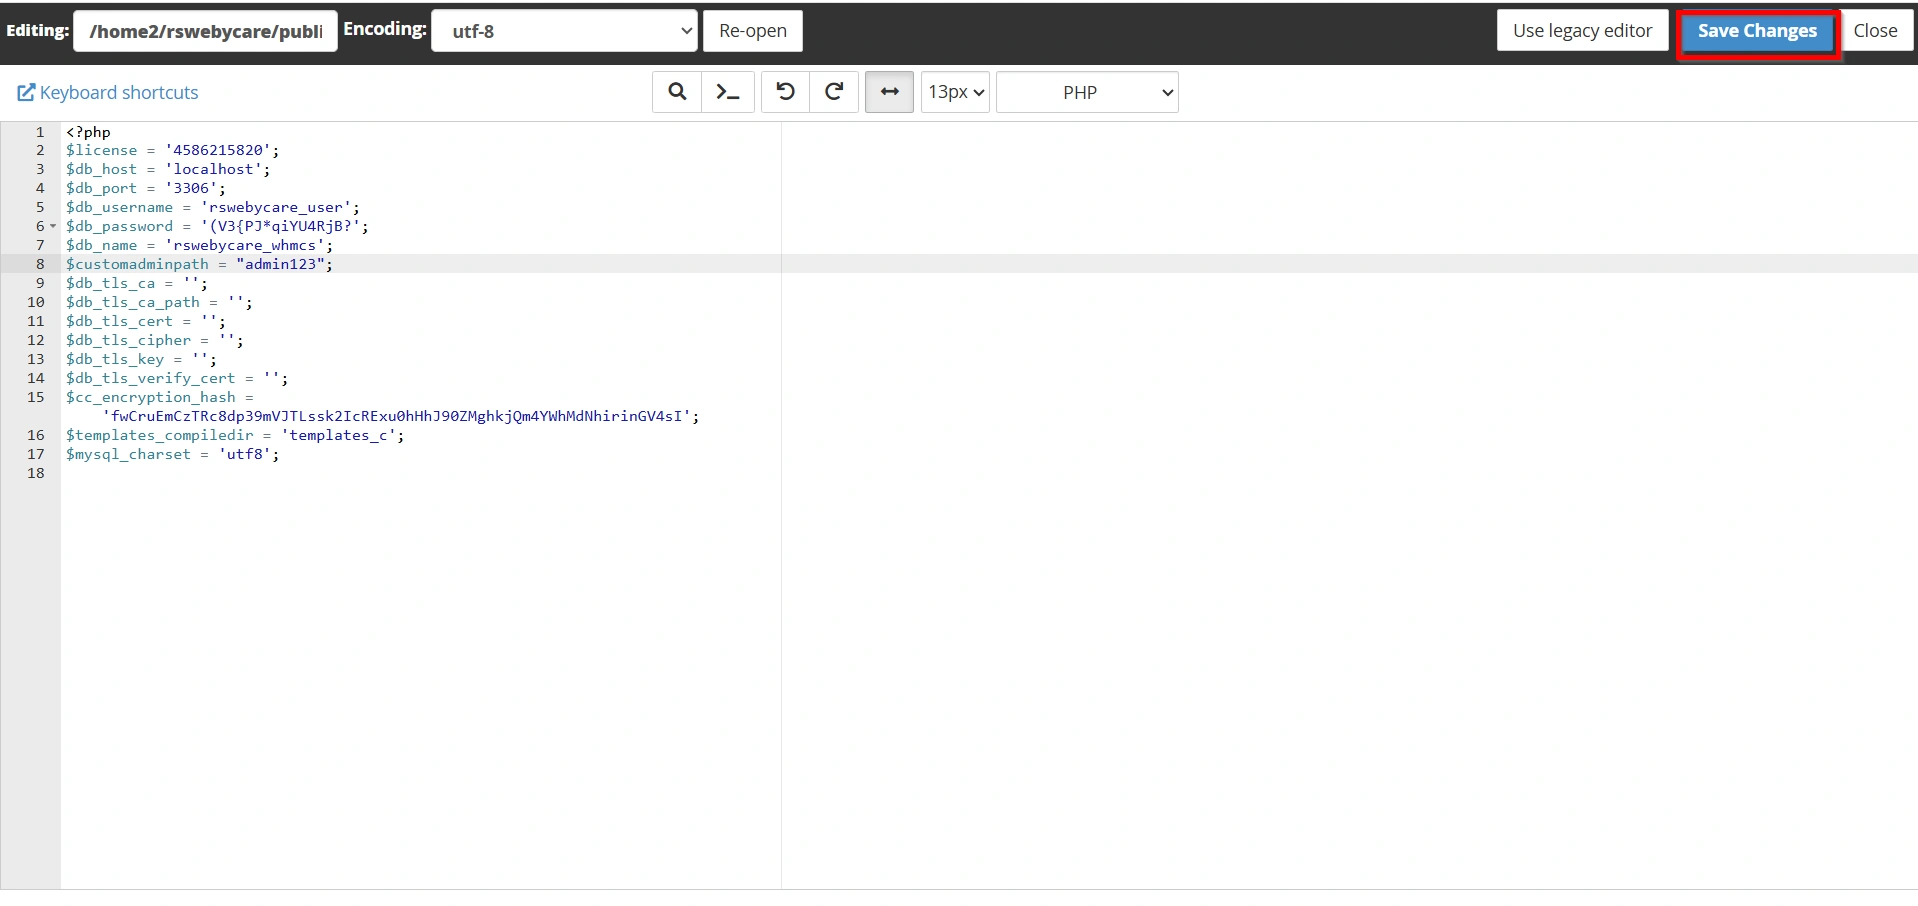
Updating this configuration ensures that WHMCS can correctly identify and load the custom administration directory.
Step 4: Test the New Admin URL
Once the configuration has been updated, open your web browser and access the new administrator URL.
Example:
https://yourdomain.com/securepanel/
Log in using your administrator credentials.
Verify that:
- The login page loads successfully.
- Dashboard access works normally.
- Client management functions operate correctly.
- Billing and support modules are accessible.
- No errors appear during navigation.
Testing confirms that Renaming WHMCS Admin Folder has been completed successfully.
Step 5: Update Administrator Bookmarks
Many administrators save bookmarks for quick access to the WHMCS dashboard.
If the previous URL was:
https://yourdomain.com/admin/
Update it to the new location:
https://yourdomain.com/securepanel/
If multiple team members manage the WHMCS installation, inform them about the new login URL to avoid confusion.
Benefits of Renaming WHMCS Admin Folder
- Reduces Automated Login Attempts
- Improves Overall Security
- Protects Against Brute-Force Attacks
- Limits Unwanted Traffic to the Login Page
- Makes Your WHMCS Installation Less Predictable
- Enhances Security Alongside Other Protection Measures
- Easy to Implement
- Helps Protect Sensitive Business Data
Conclusion
Renaming WHMCS Admin Folder is one of the simplest ways to strengthen the security of your WHMCS installation. By changing the default admin directory and updating the corresponding configuration setting, you make it more difficult for attackers and automated bots to discover and target your administration area.
Although this process only takes a few minutes, it can contribute significantly to your overall security posture. When combined with strong passwords, two-factor authentication, regular updates, and proper access controls, Renaming WHMCS Admin Folder becomes an important part of maintaining a secure and reliable WHMCS environment.
For WHMCS administrators seeking additional protection against unauthorized access, implementing a custom admin directory is a recommended best practice that should be included in every security checklist.
Related Articles