cPanel
How to Manually Install WHMCS via cPanel
How to Manually Install WHMCS via cPanel WHMCS is a powerful web hosting automation and billing platform that helps hosting providers manage clients, invoices, support tickets, domains, and hosting services from a single interface.…
How to Manually Install WHMCS via cPanel
WHMCS is a powerful web hosting automation and billing platform that helps hosting providers manage clients, invoices, support tickets, domains, and hosting services from a single interface. While many hosting providers offer one-click installers, manually installing WHMCS via cPanel gives you greater control over the setup process and helps you understand the application’s structure and requirements.
In this guide, we will walk through the complete manual installation process of WHMCS using cPanel. By the end of this tutorial, you will have a fully functional WHMCS installation ready to manage your hosting business.
Why to Install WHMCS Manually via cPanel?
Manual installation is often preferred when:
- Auto-installers are unavailable.
- You want complete control over the installation process.
- You need a custom deployment location.
- You are setting up a new hosting business.
- You want to learn the underlying WHMCS installation workflow.
Prerequisites
Before starting the installation, ensure you have:
- Access to your cPanel account.
- A valid WHMCS license.
- The latest WHMCS ZIP package.
- A domain or subdomain configured on your hosting account.
- MySQL database support enabled.
- SSL installed on your domain.
Steps to Manually Install WHMCS via cPanel:
Follow the below Steps
Step 1: Upload WHMCS ZIP File in cPanel
- Log in to your cPanel account. You can also login through Webystrata Client Area using Official Website www.webystrata.com
- Go to File Manager.
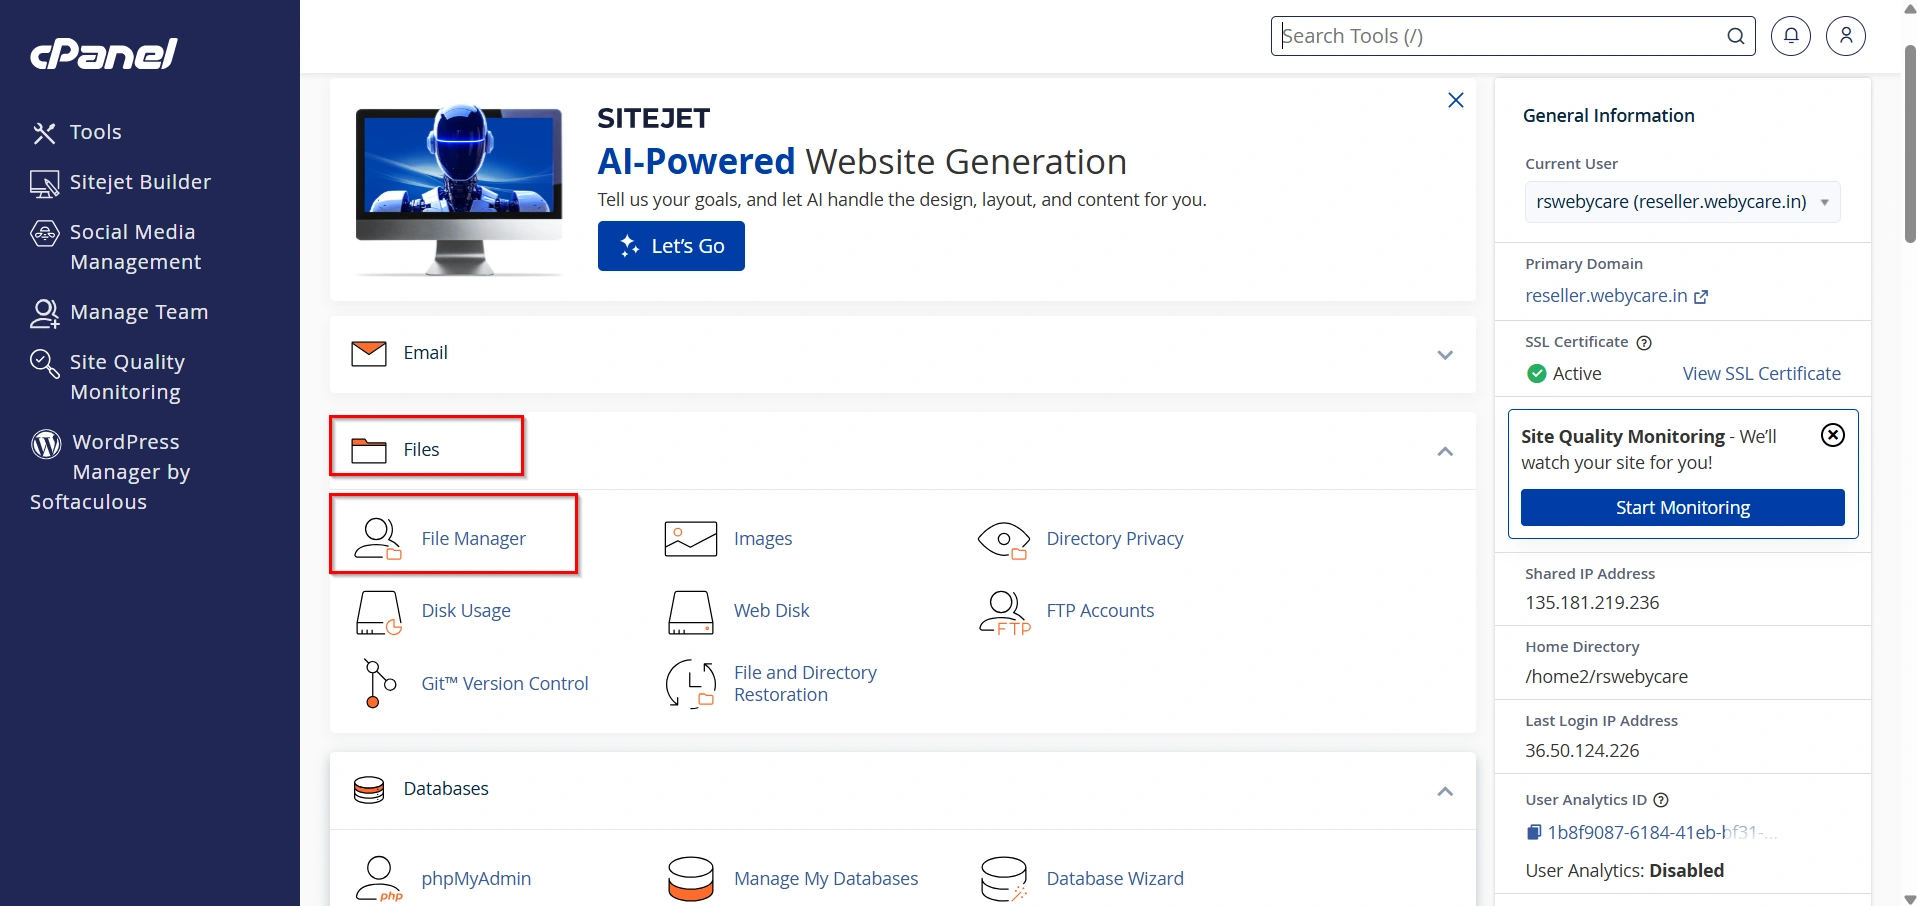
3. Open the directory where you want to install WHMCS:
- Usually:
public_html/(for main domain) - Or a subfolder like
public_html/billing/
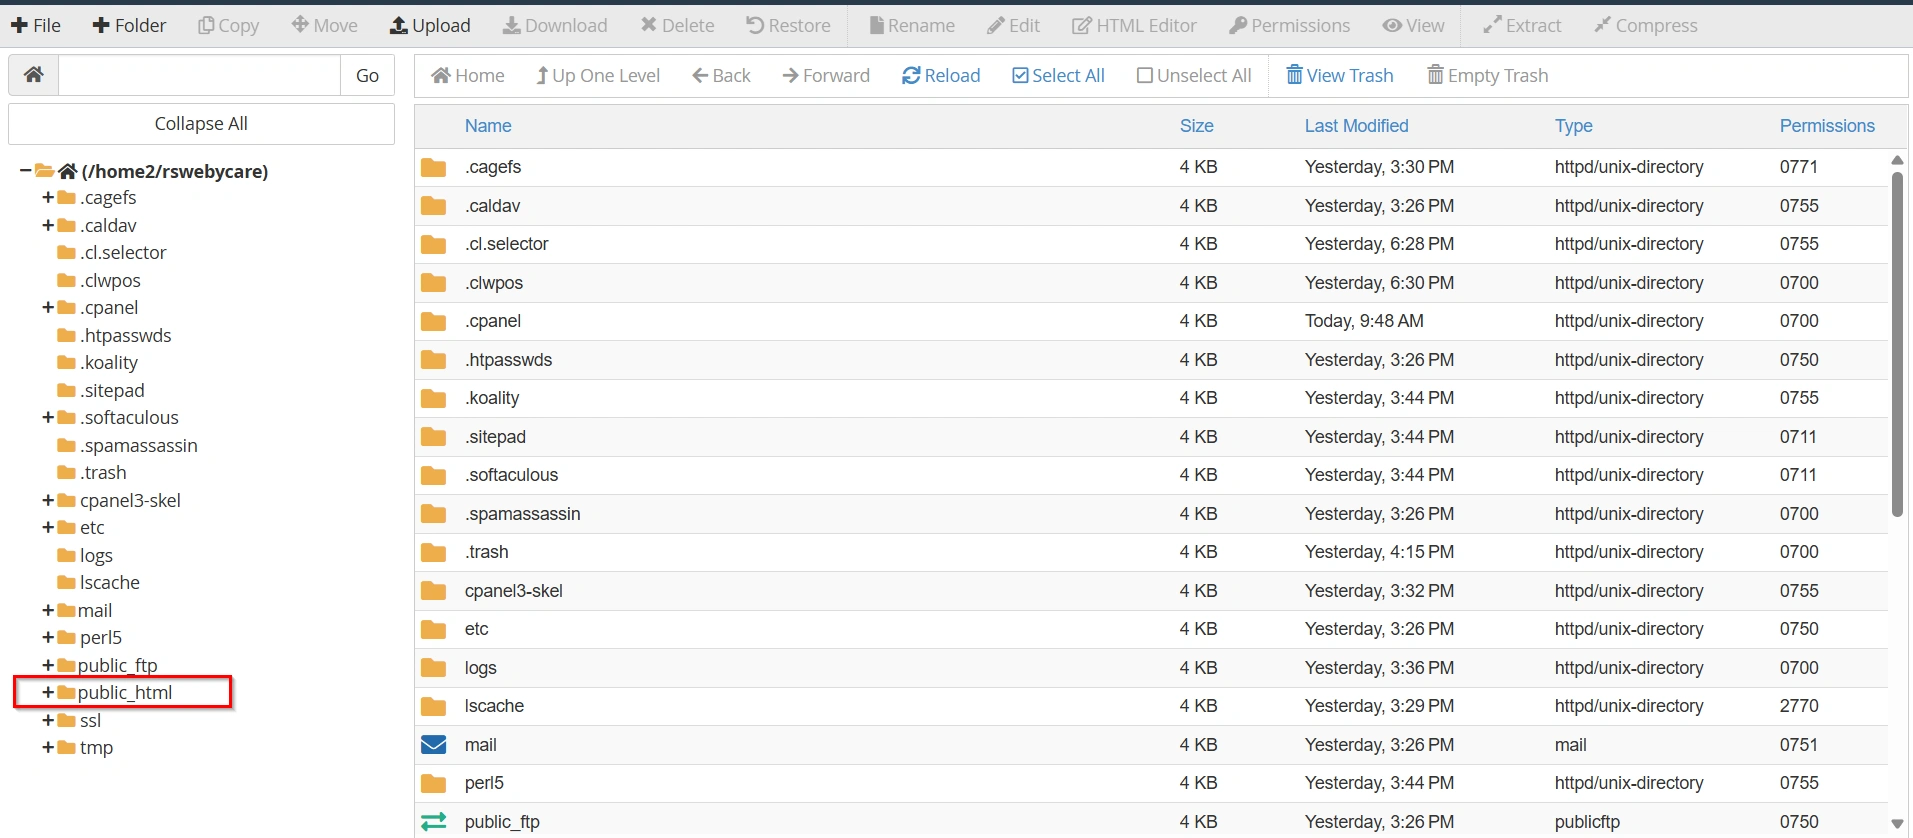
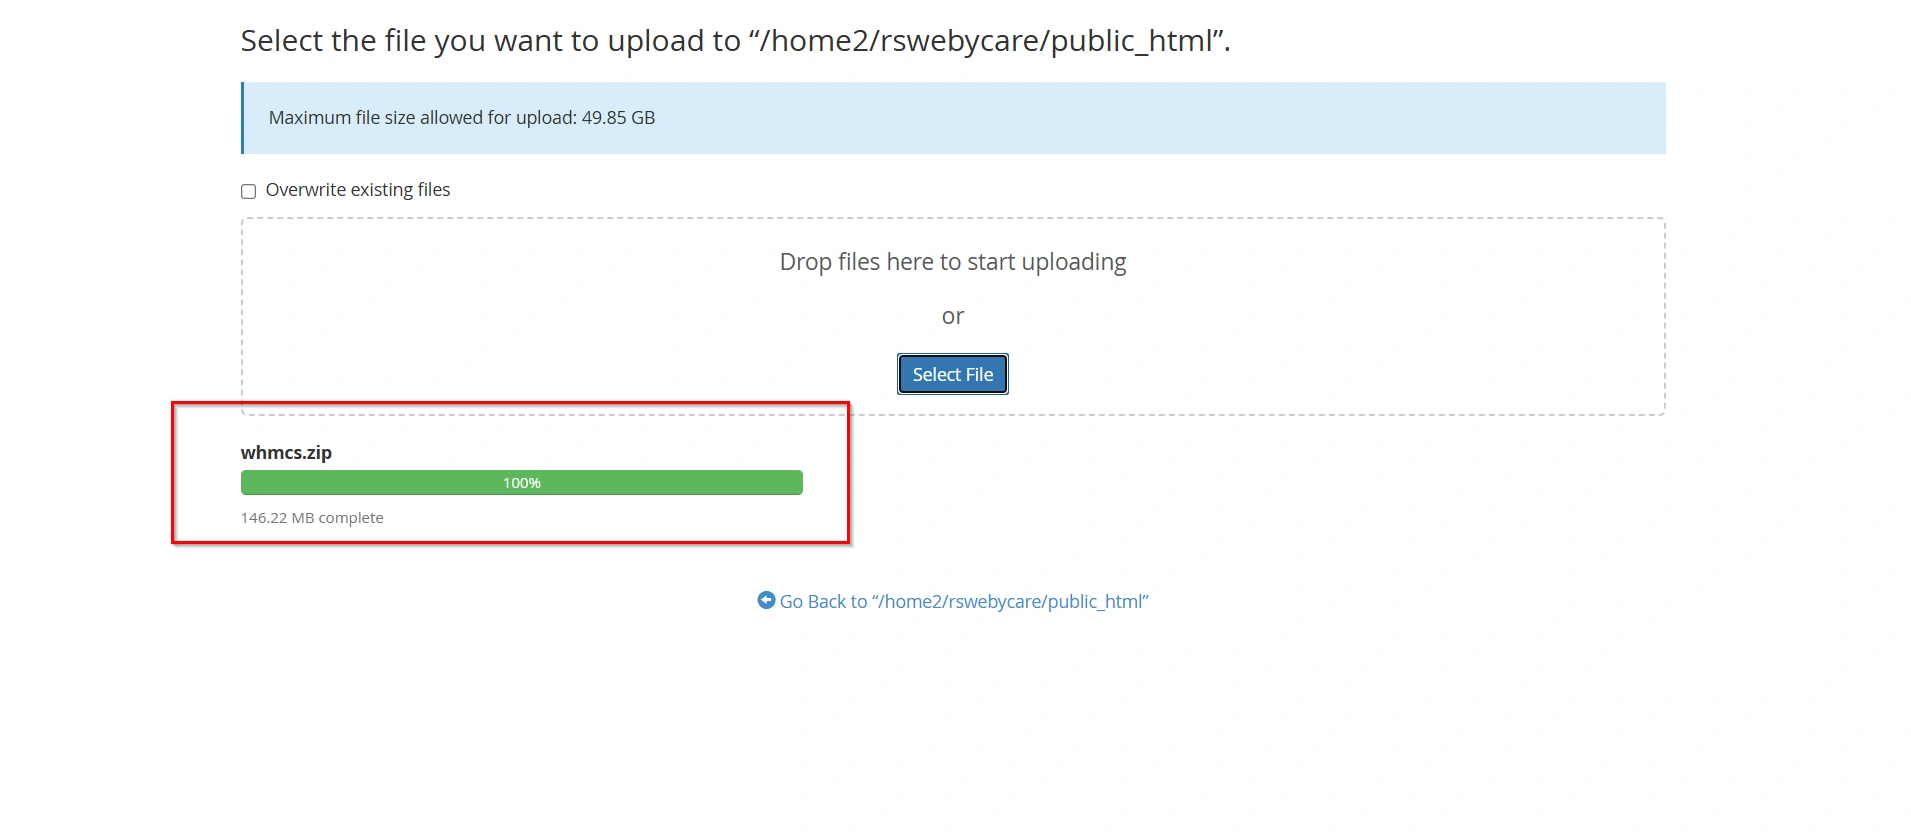
4. Click Upload from the top menu.
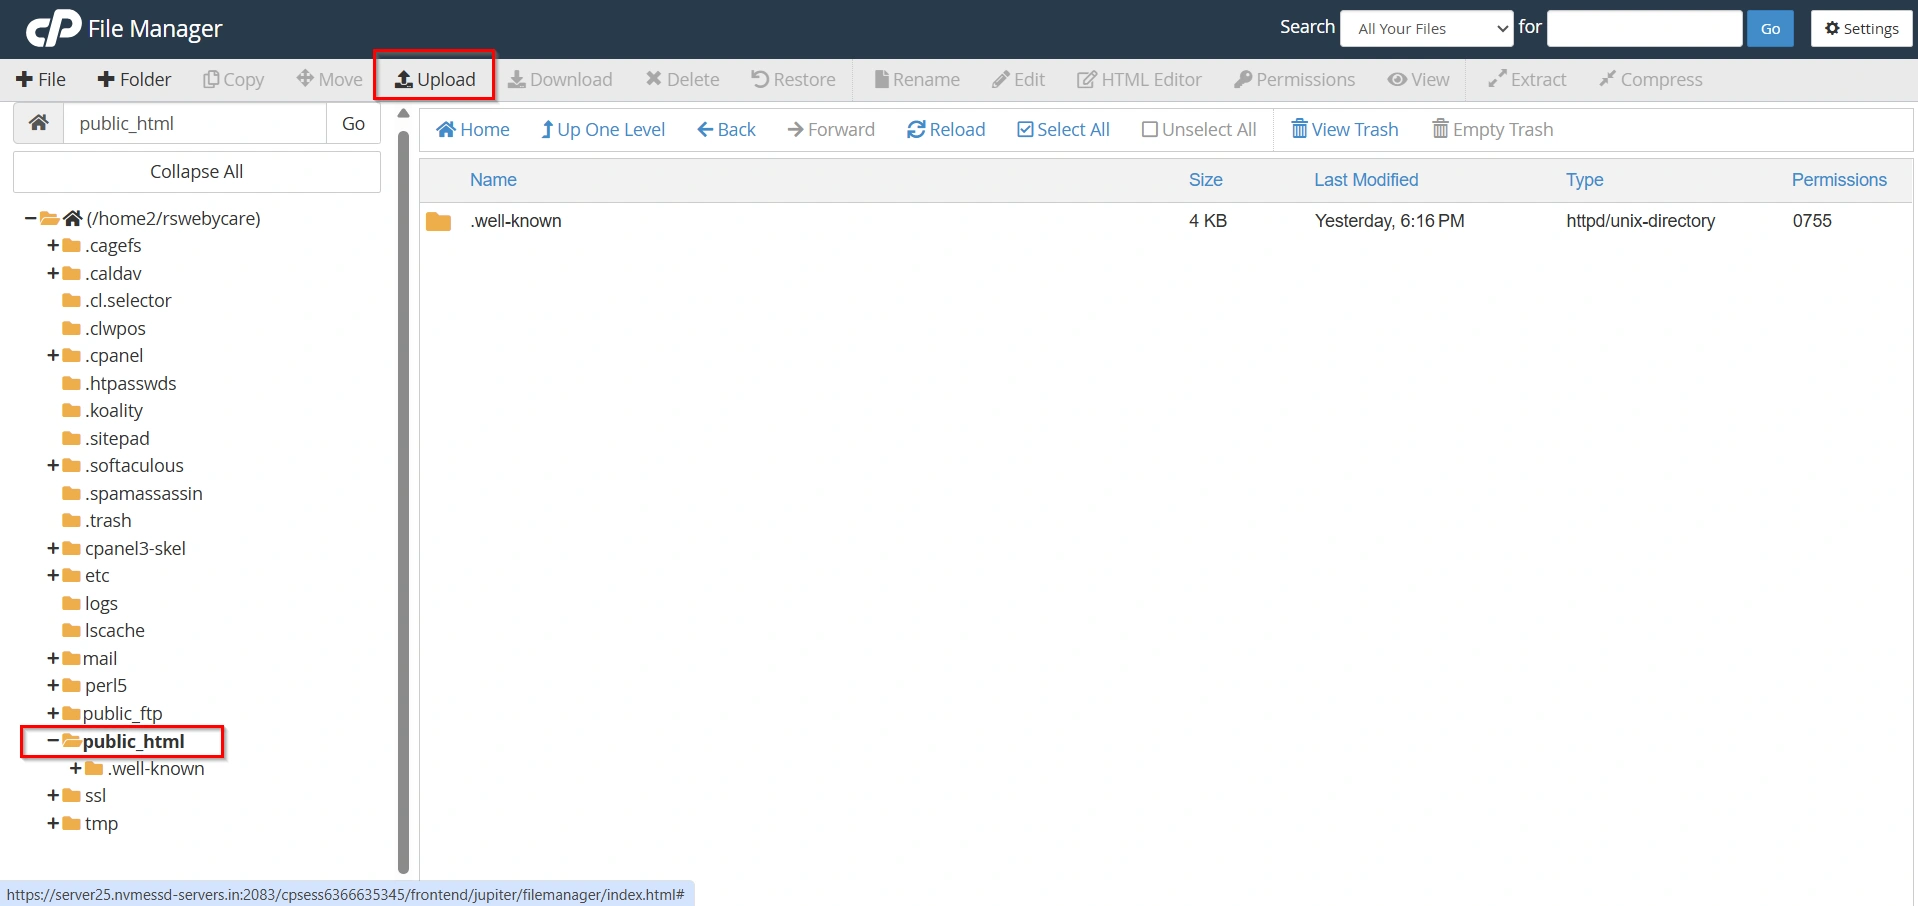
5. Select the whmcs.zip file from your computer and upload it.
Once uploaded, you will see the ZIP file in the directory.
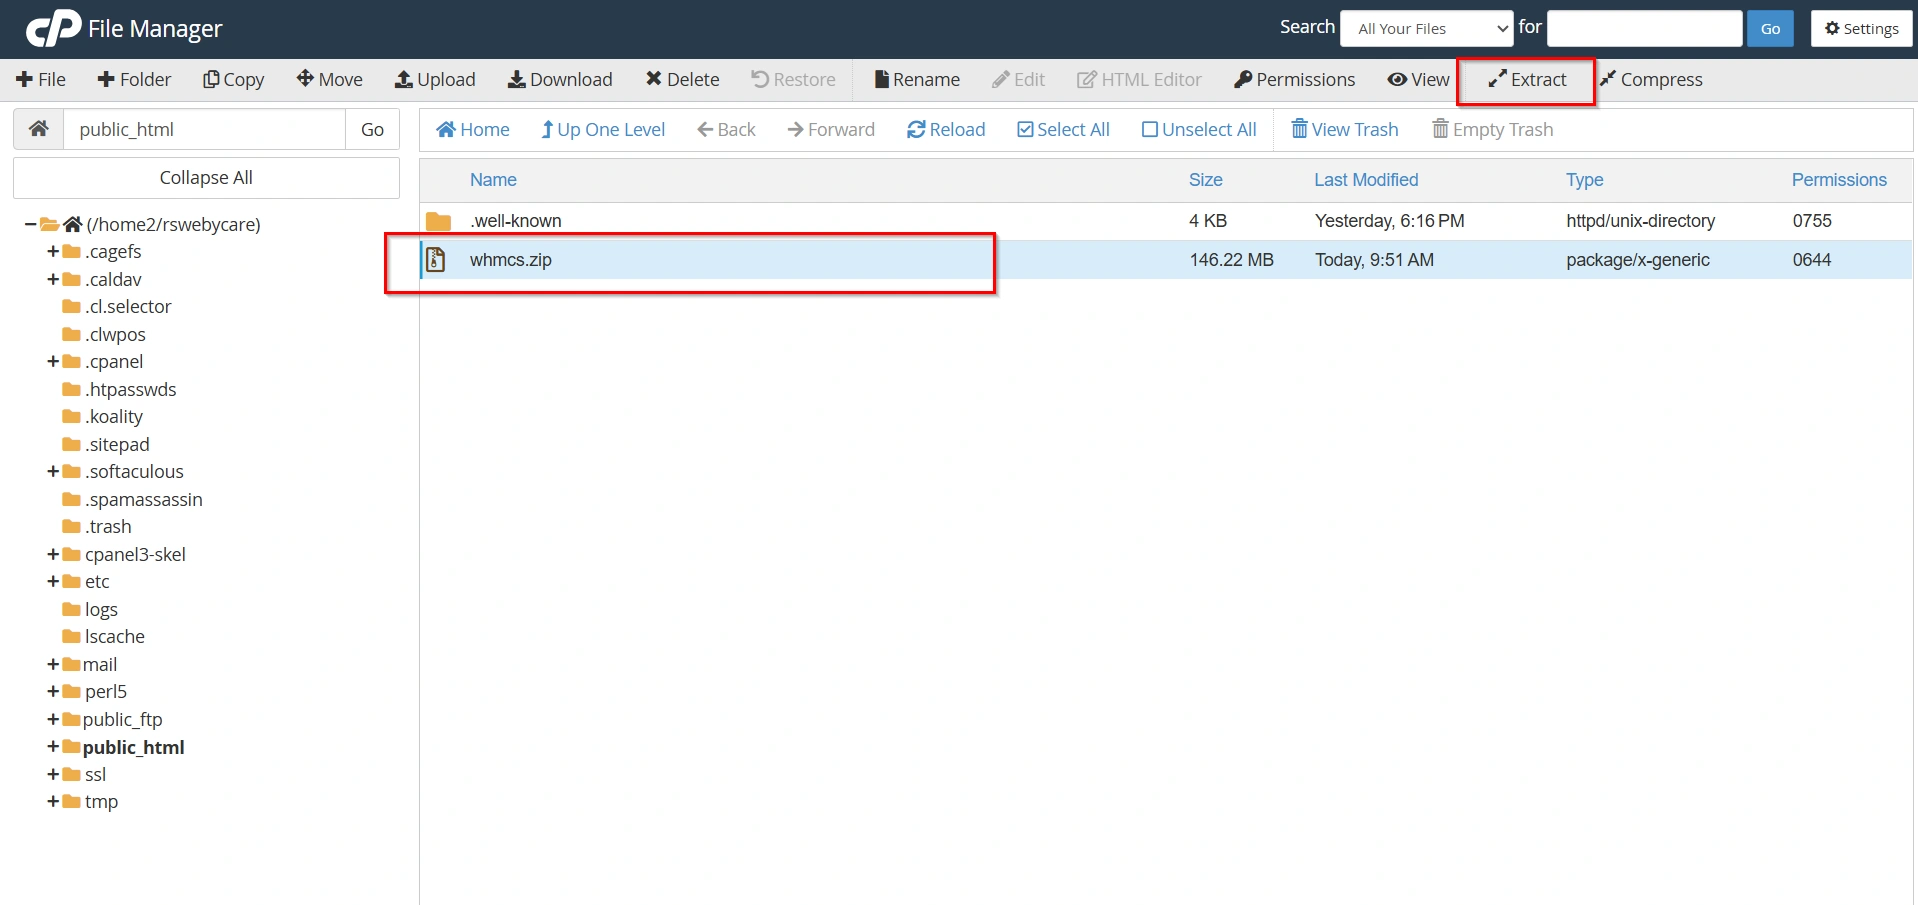
Step 2: Extract WHMCS Files
- Select the uploaded
whmcs.zipfile.
2. choose Extract.
3. Confirm the extraction path (same folder is recommended). Click Extract files
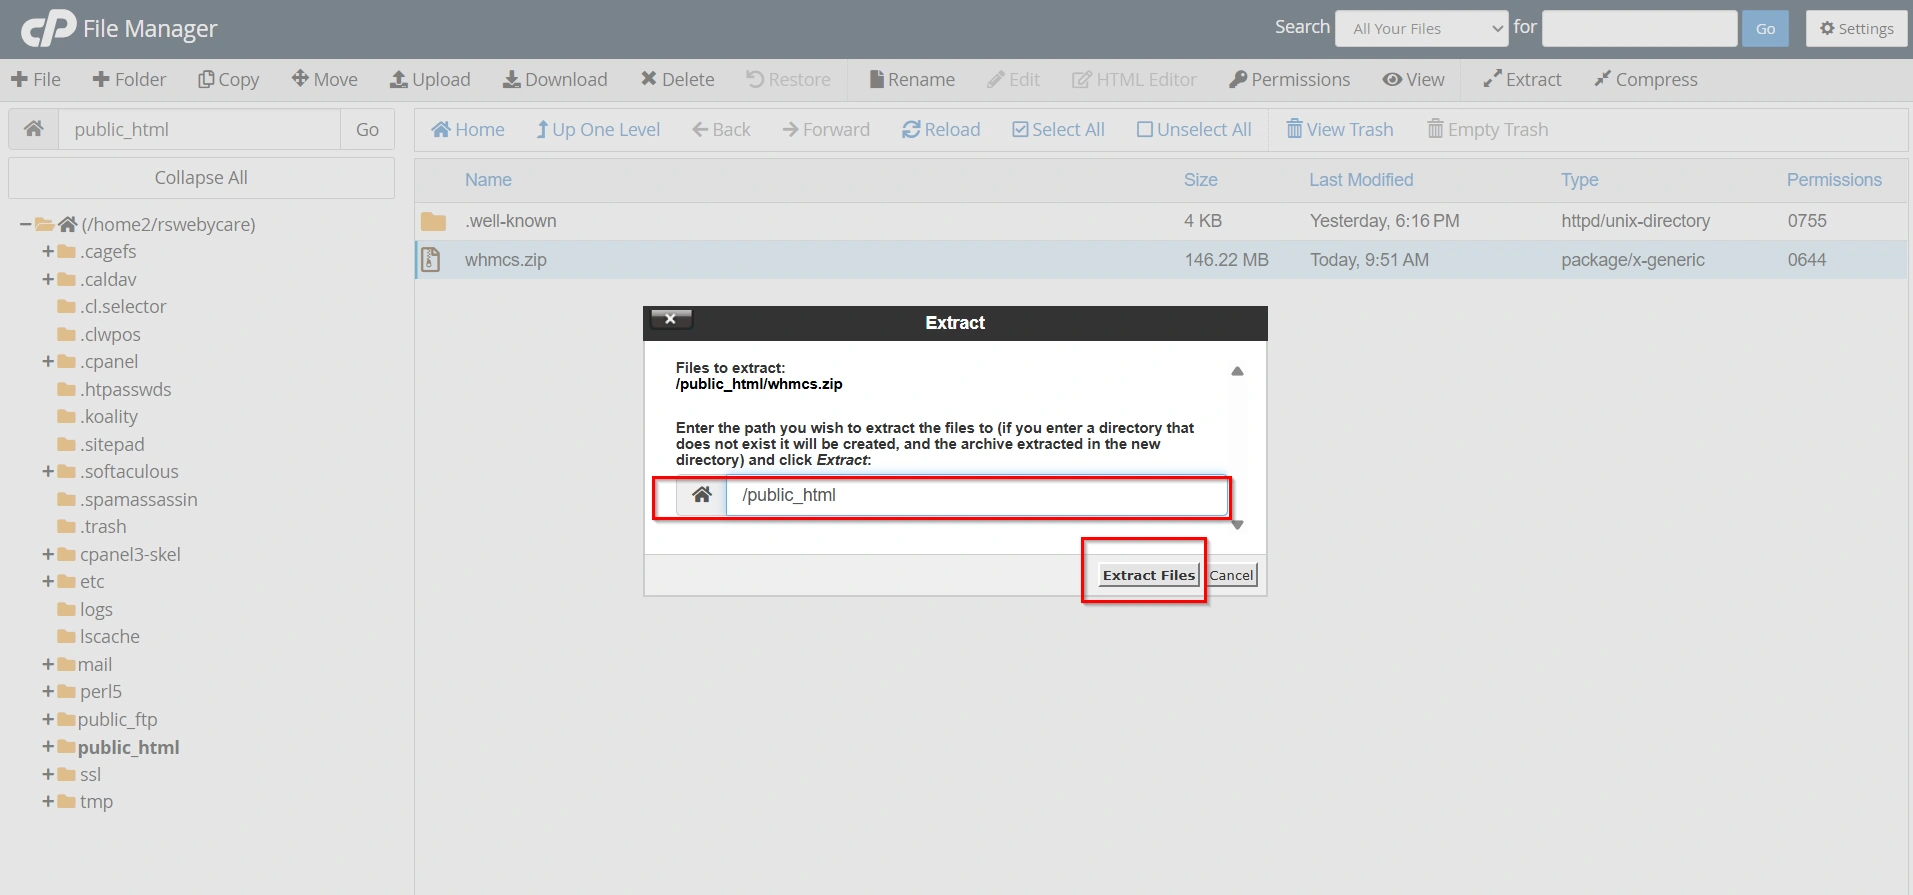
4. After extraction, you will see WHMCS files and folders such as:
/admin/clientarea/includes/templates
Important: If files are inside a subfolder (like whmcs/), move them to the correct directory (e.g., public_html) so your domain loads properly.
Step 3: Create MySQL Database in cPanel
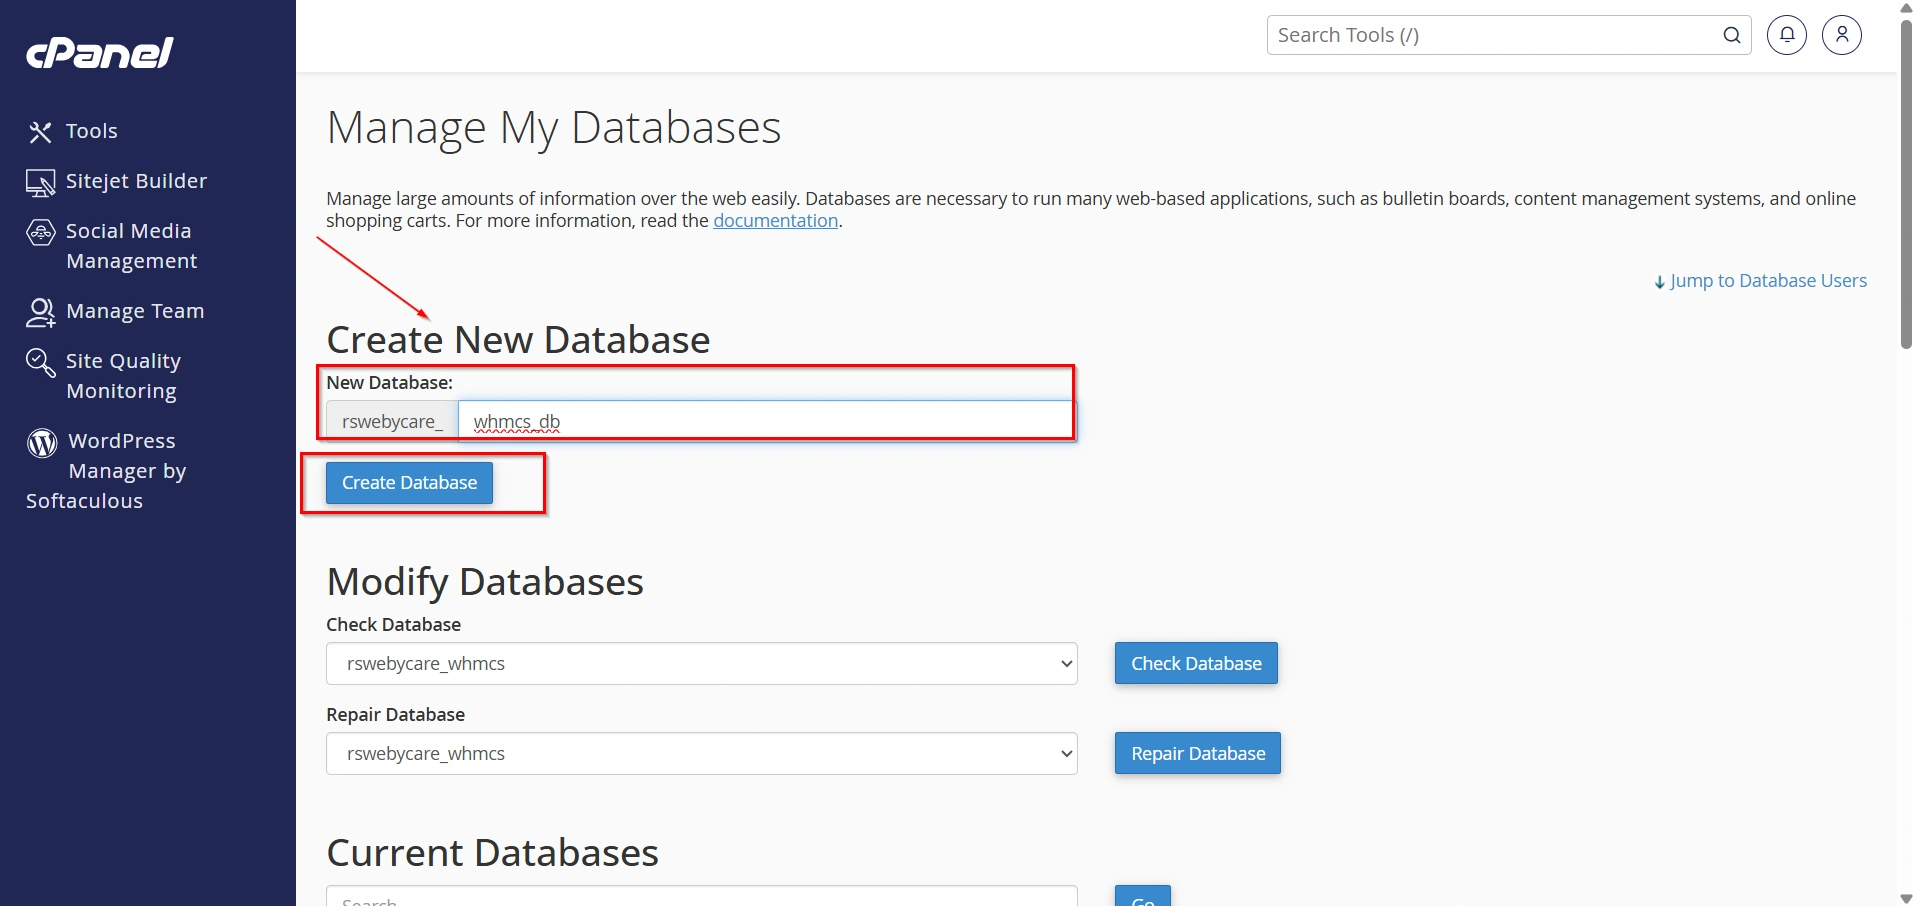
WHMCS requires a database to store all data like clients, invoices, and settings.
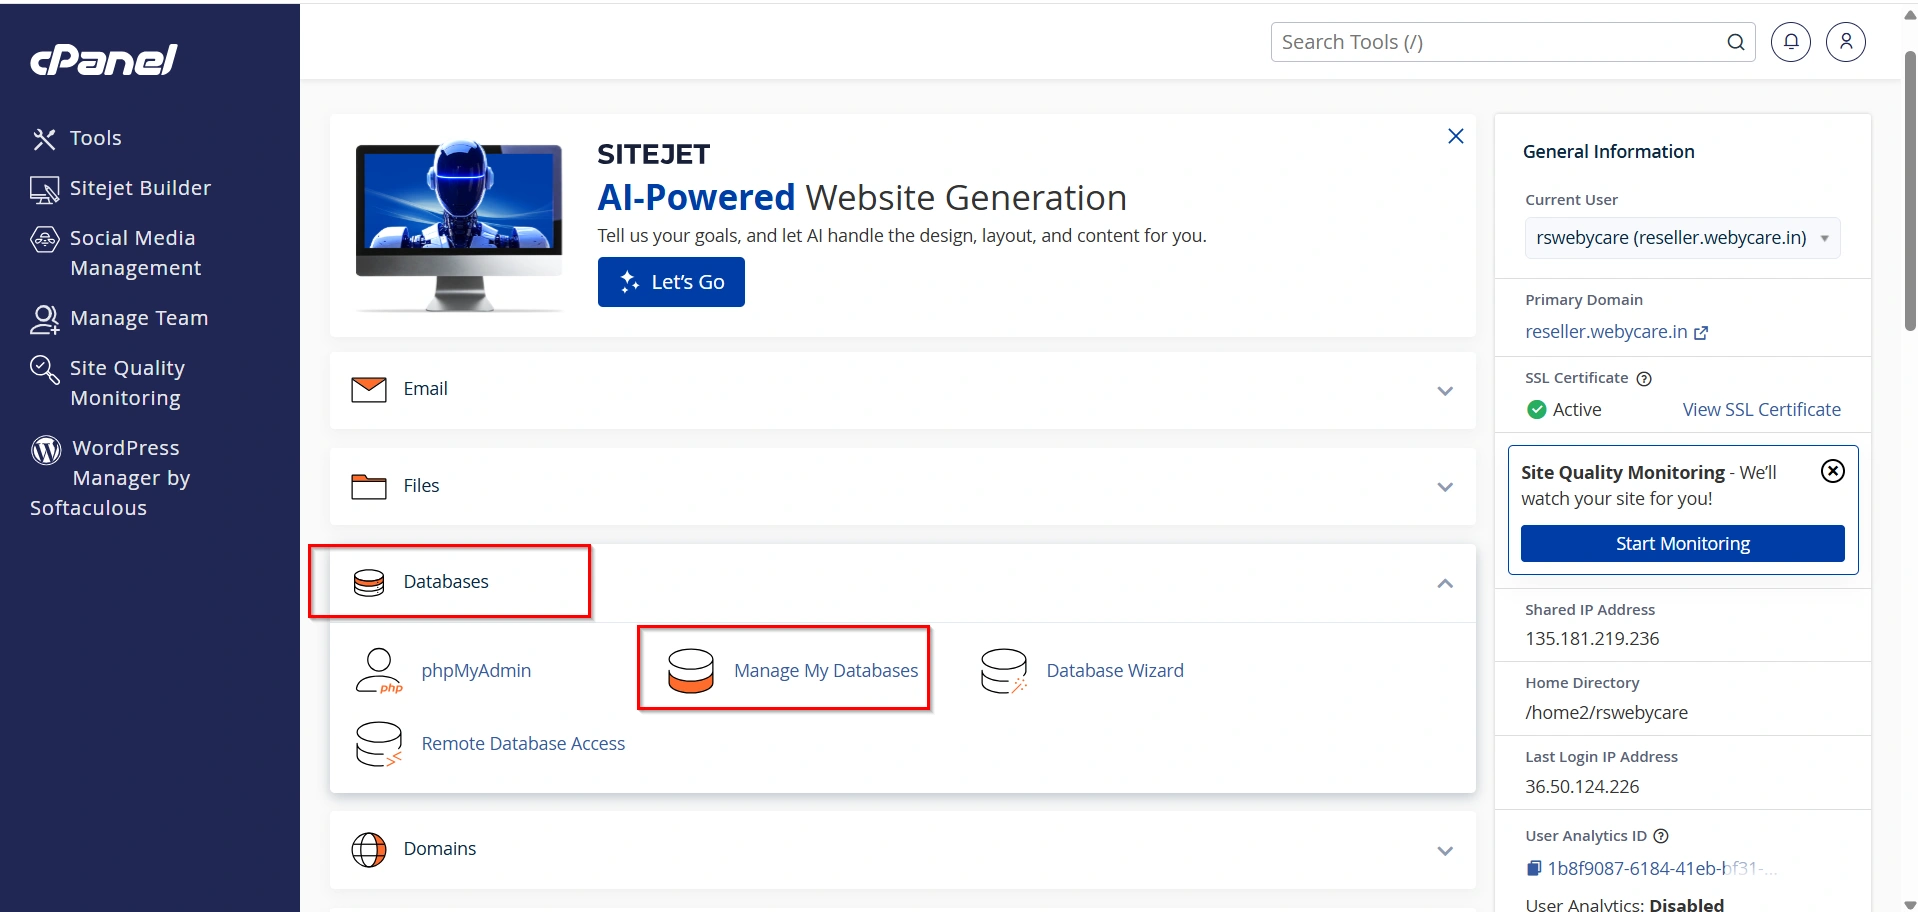
- Go to cPanel → Databases → Manage My Databases
2. Under “Create New Database”, enter a name (example: whmcs_db)
3. Click Create Database
Step 4: Create Database User
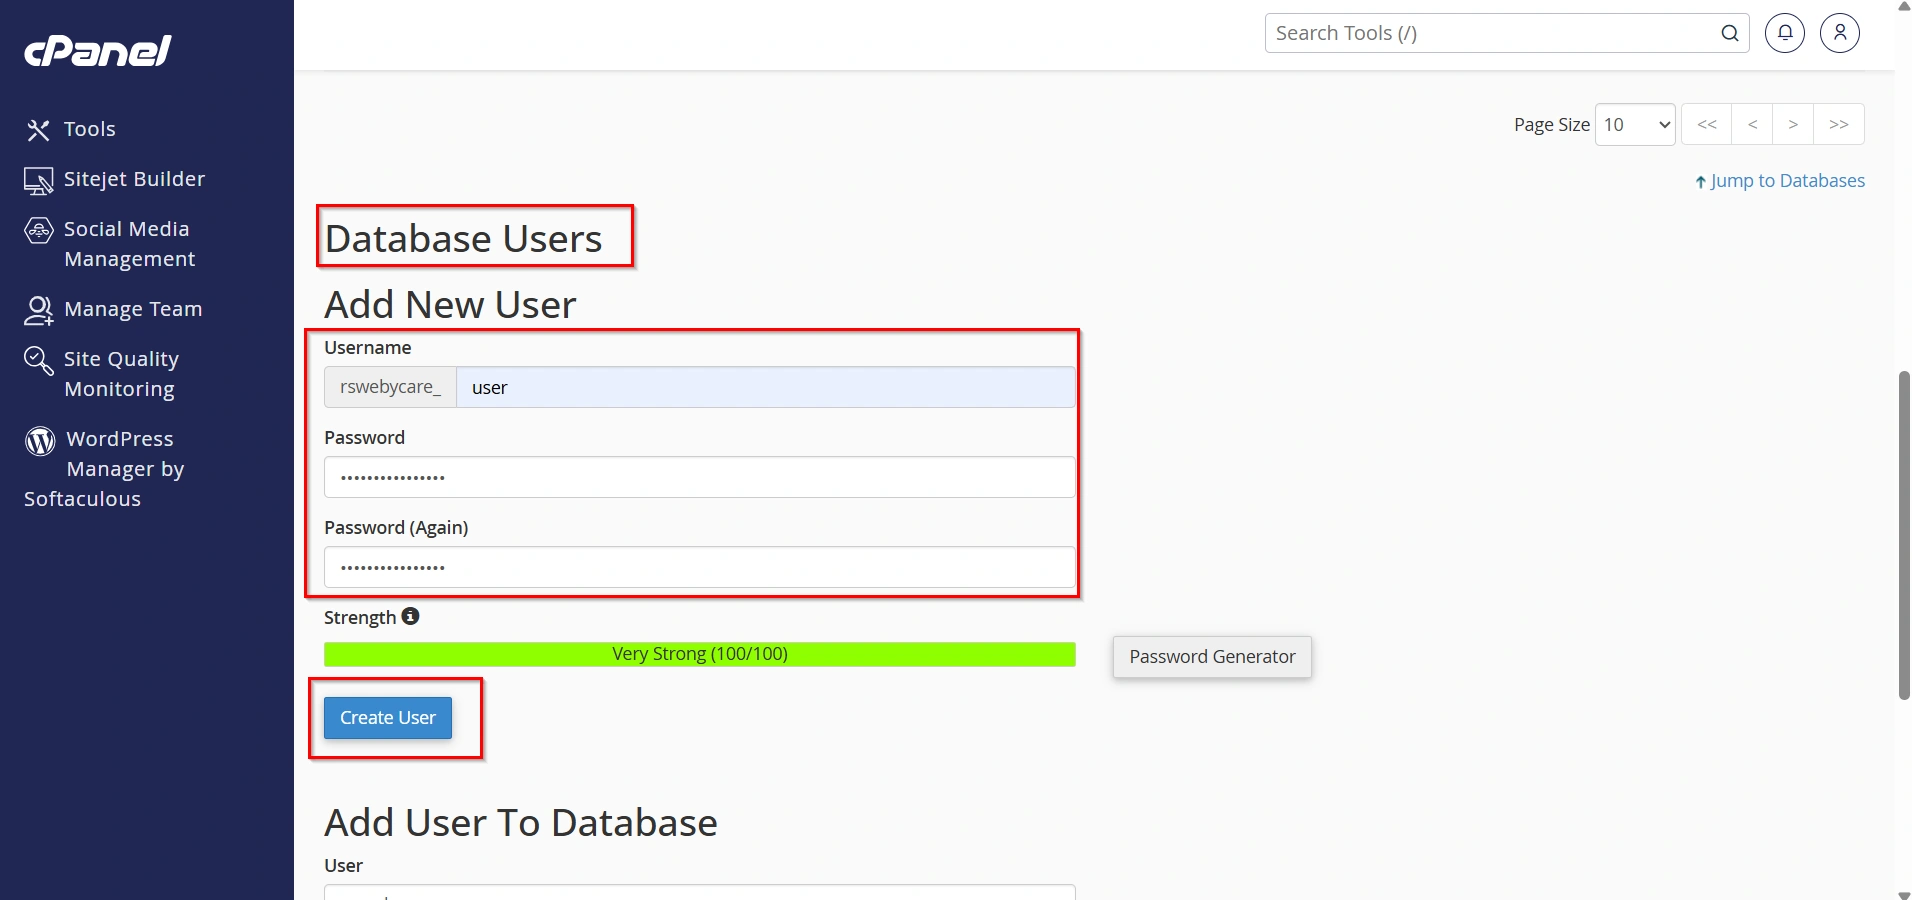
- Scroll to Database Users section
- Create a new user:
- Username:
whmcs_user - Password: use a strong password
- Username:
- Click Create User
Step 5: Assign User to Database (Privileges)
This is a very important step.
- Go to Add User to Database
- Select:
- User:
whmcs_user - Database:
whmcs_db
- User:
- Click Add

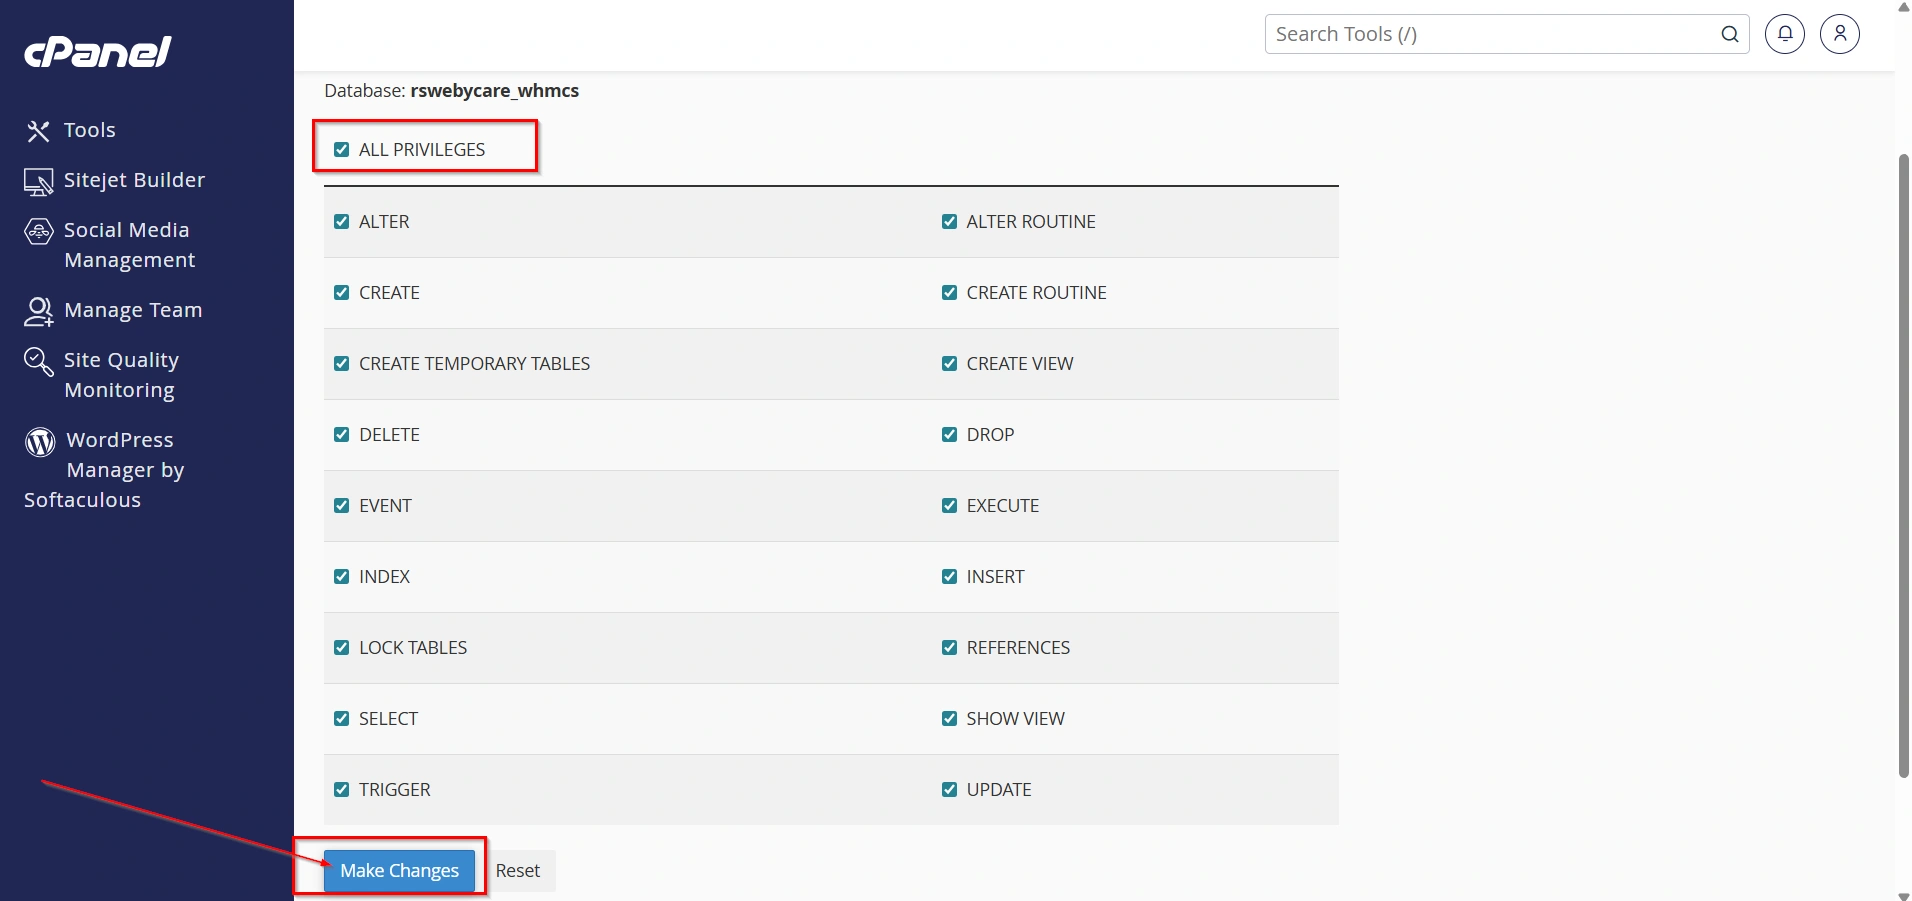
4. On the privileges screen, select:
- ALL PRIVILEGES
5. Click Make Changes
Now your database is ready for WHMCS installation.
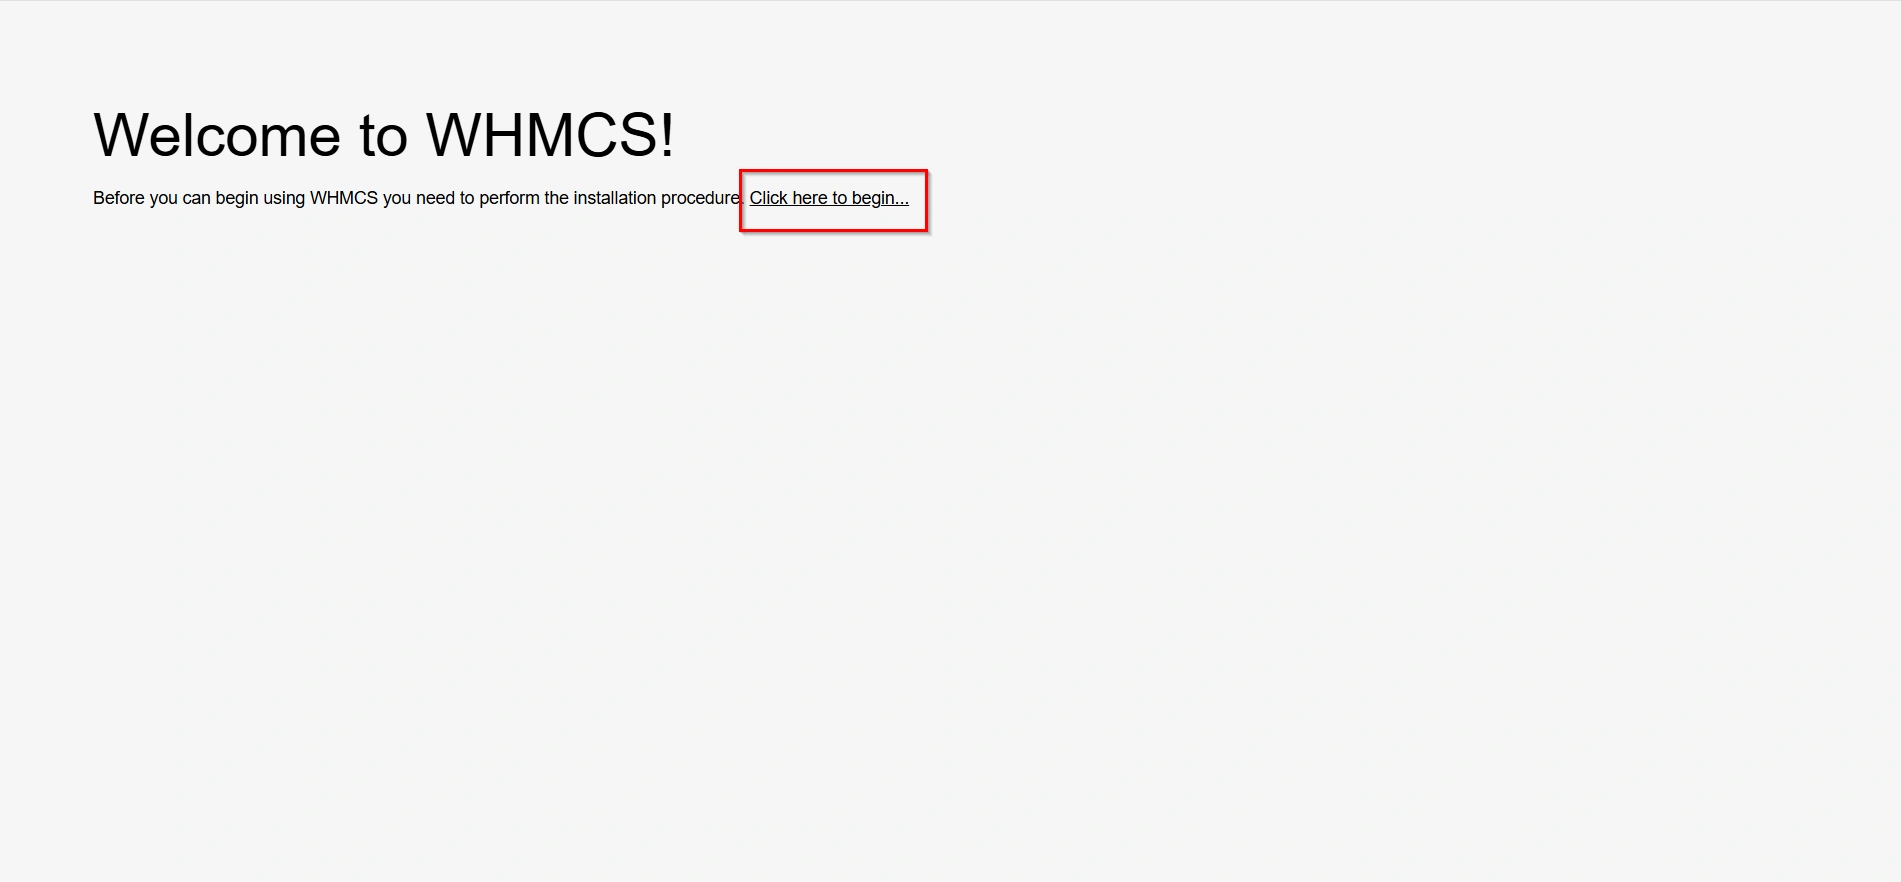
Step 6: Start WHMCS Installation via Browser
Now open your domain in a browser.
Example:
https://yourdomain.com/
orhttps://yourdomain.com/billing/(if installed in subfolder)
You will see the WHMCS installation wizard. Click on Click here to begin
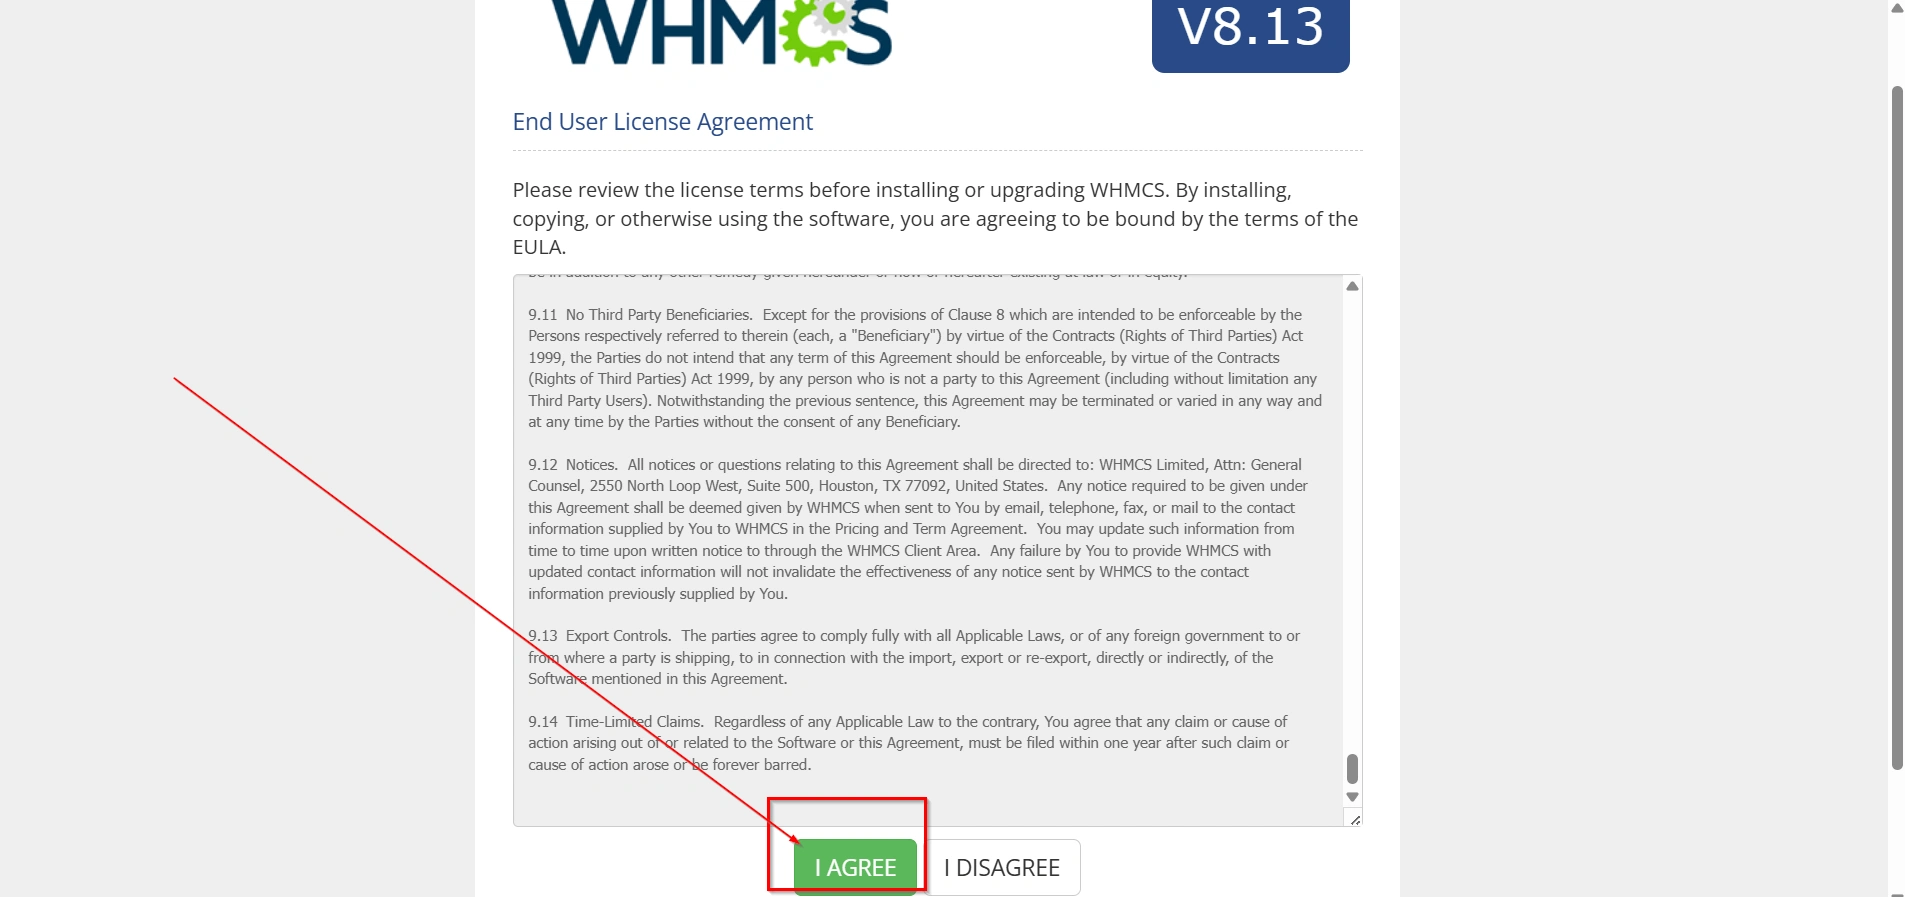
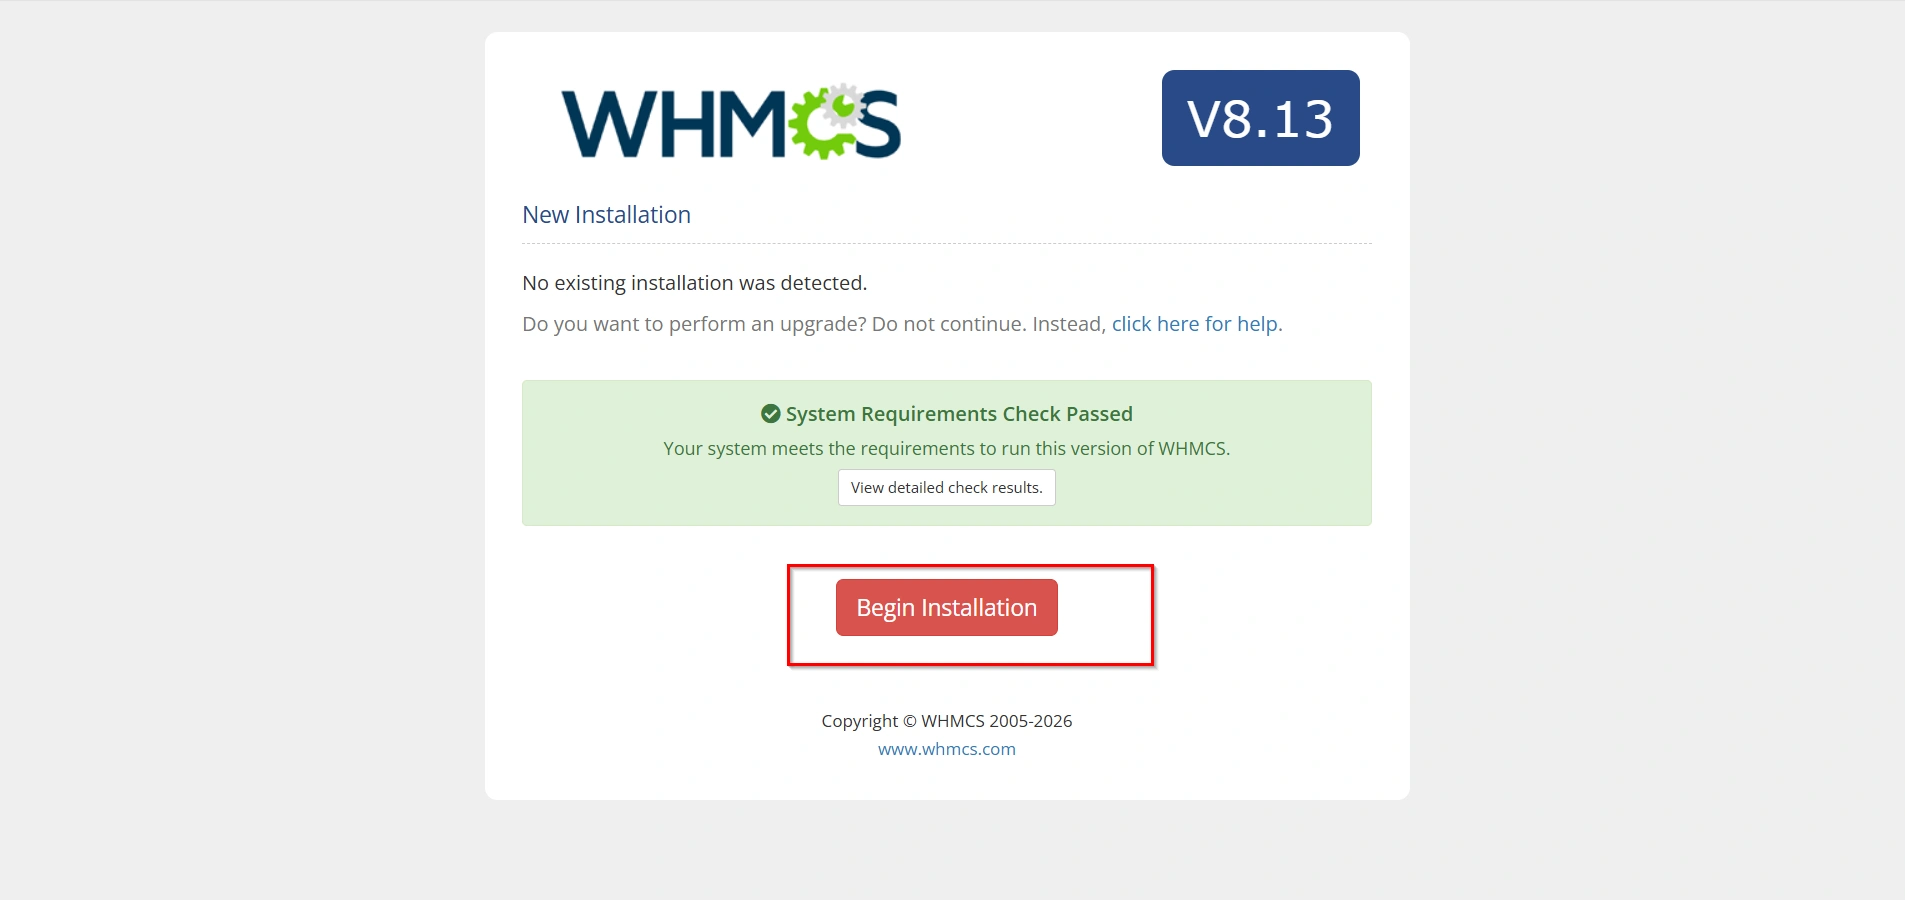
Step 7: Pre-Installation Checks
WHMCS will automatically check your server configuration:
- PHP version compatibility
- Required PHP extensions
- File permissions
If everything is green, click on I Agree
- Click on Begin Installation
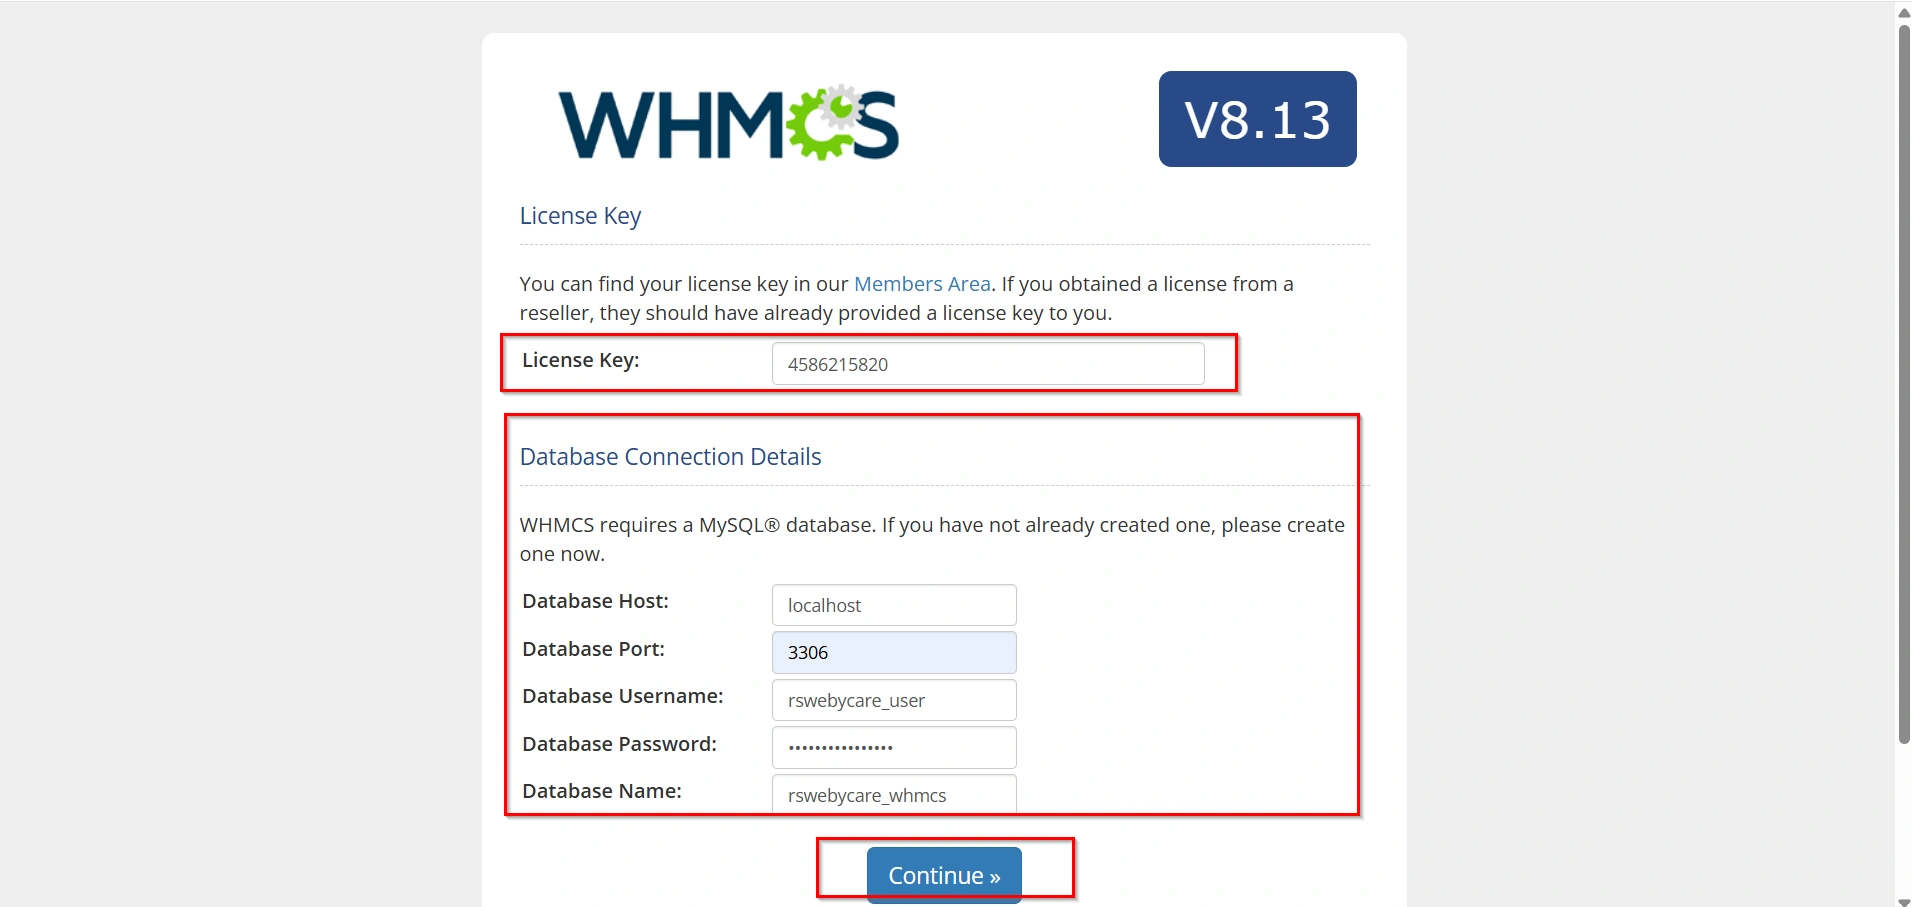
Step 8: Enter Database Details
Now provide the database information you created earlier:
- License Key
- Database Name:
whmcs_db - Database Username:
whmcs_user - Database Password: (your password)
- Database Host:
localhost - Database Port
Click Continue.
WHMCS will now connect to the database and initialize tables.
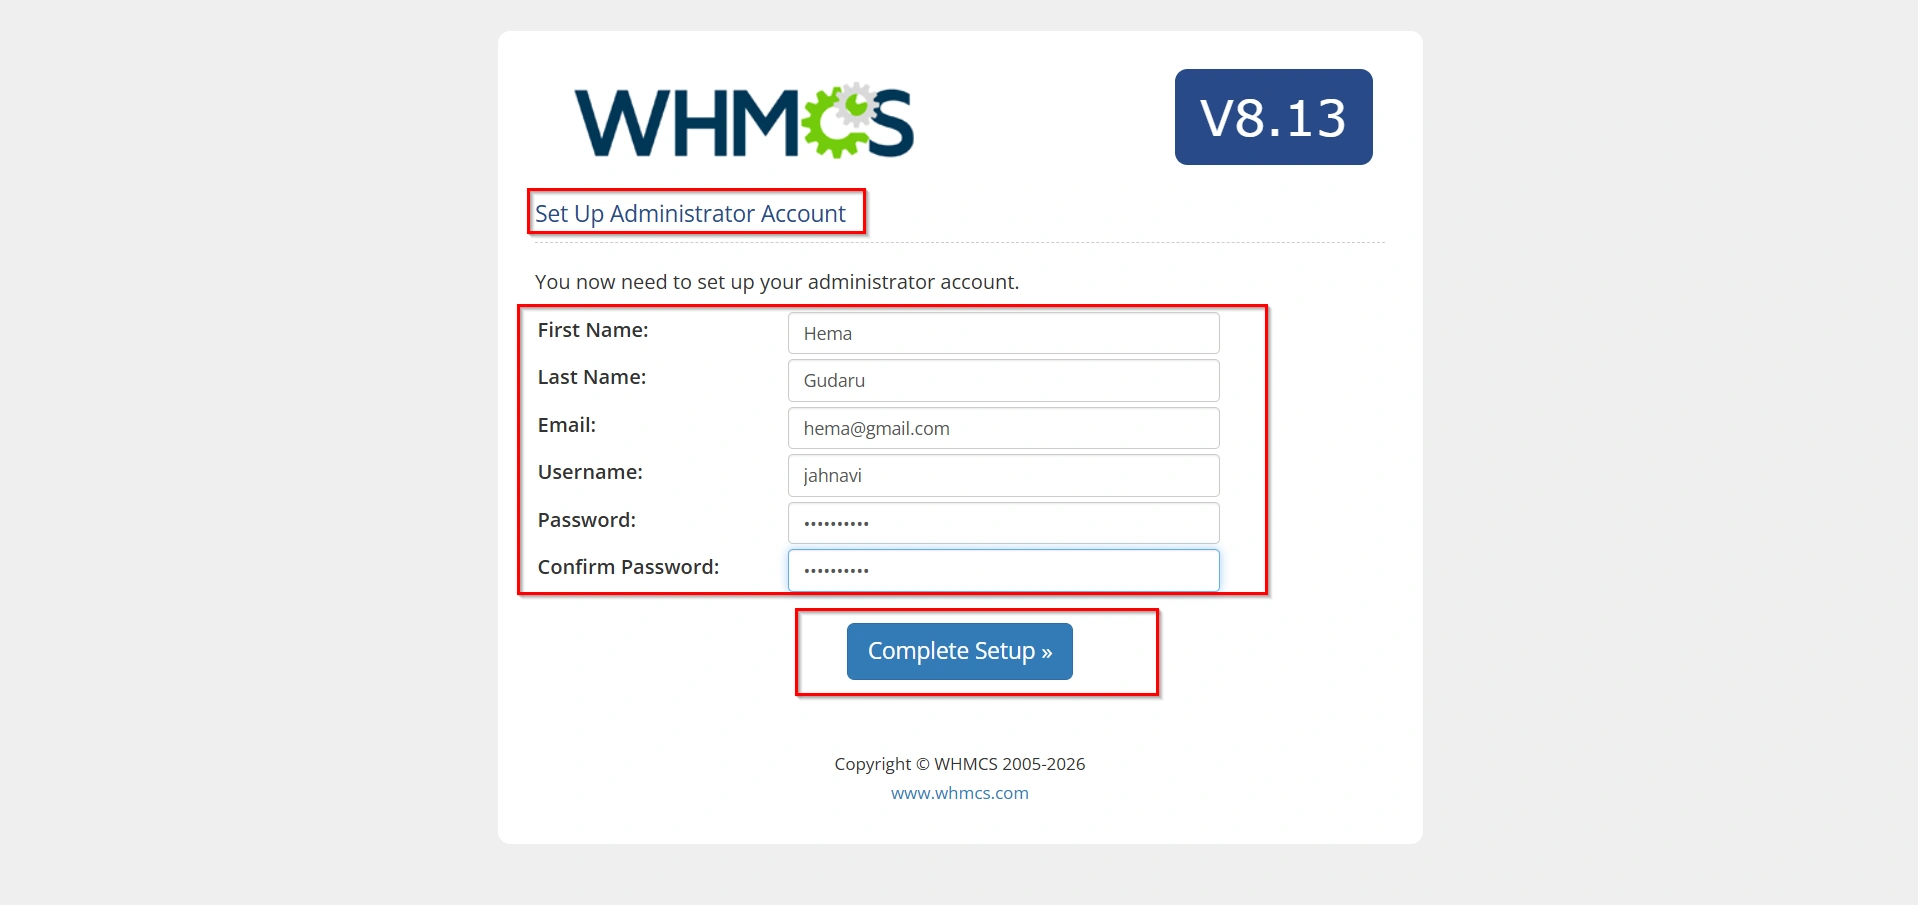
Step 9: Set Admin Account
Next, you need to create the WHMCS admin login:
- First Name
- Last Name
- Email Address: your email
- Admin Username: (choose username)
- Password: (strong password)
- Confirm Password
Click on Complete Setup
This account will be used to manage WHMCS admin panel.
Step 10: Complete Installation
After setup:
- WHMCS will finalize installation
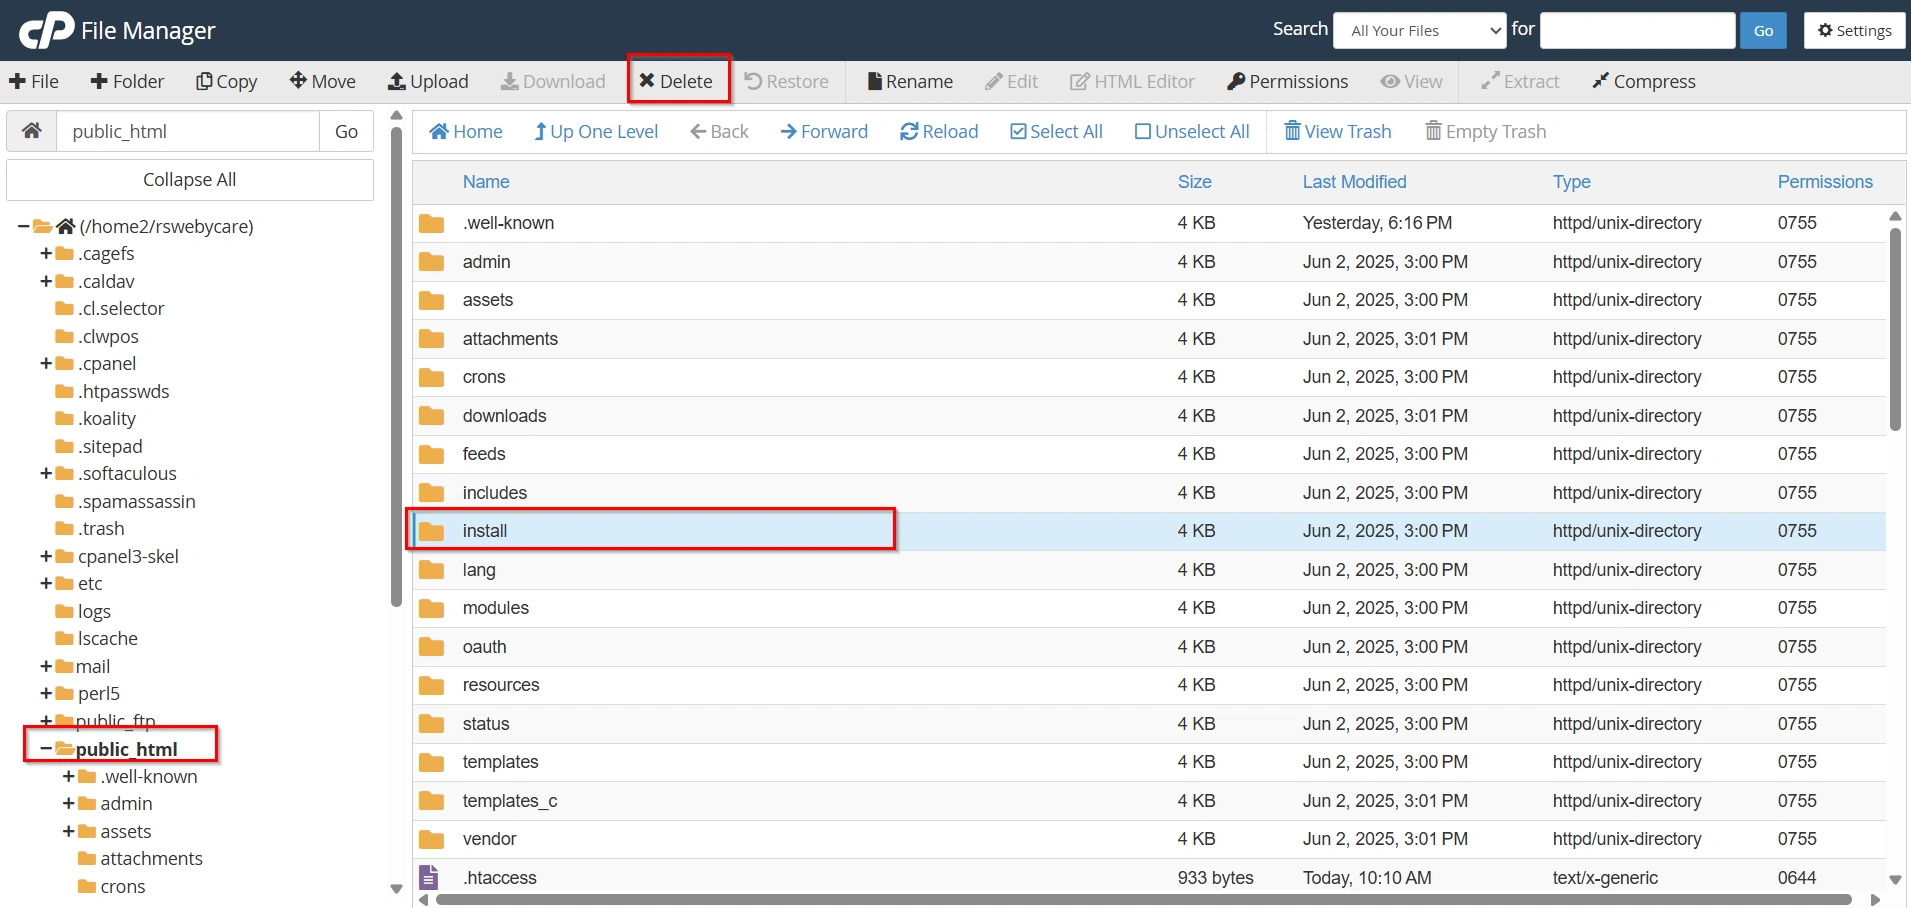
- It may ask you to delete the
installfolder (important for security)
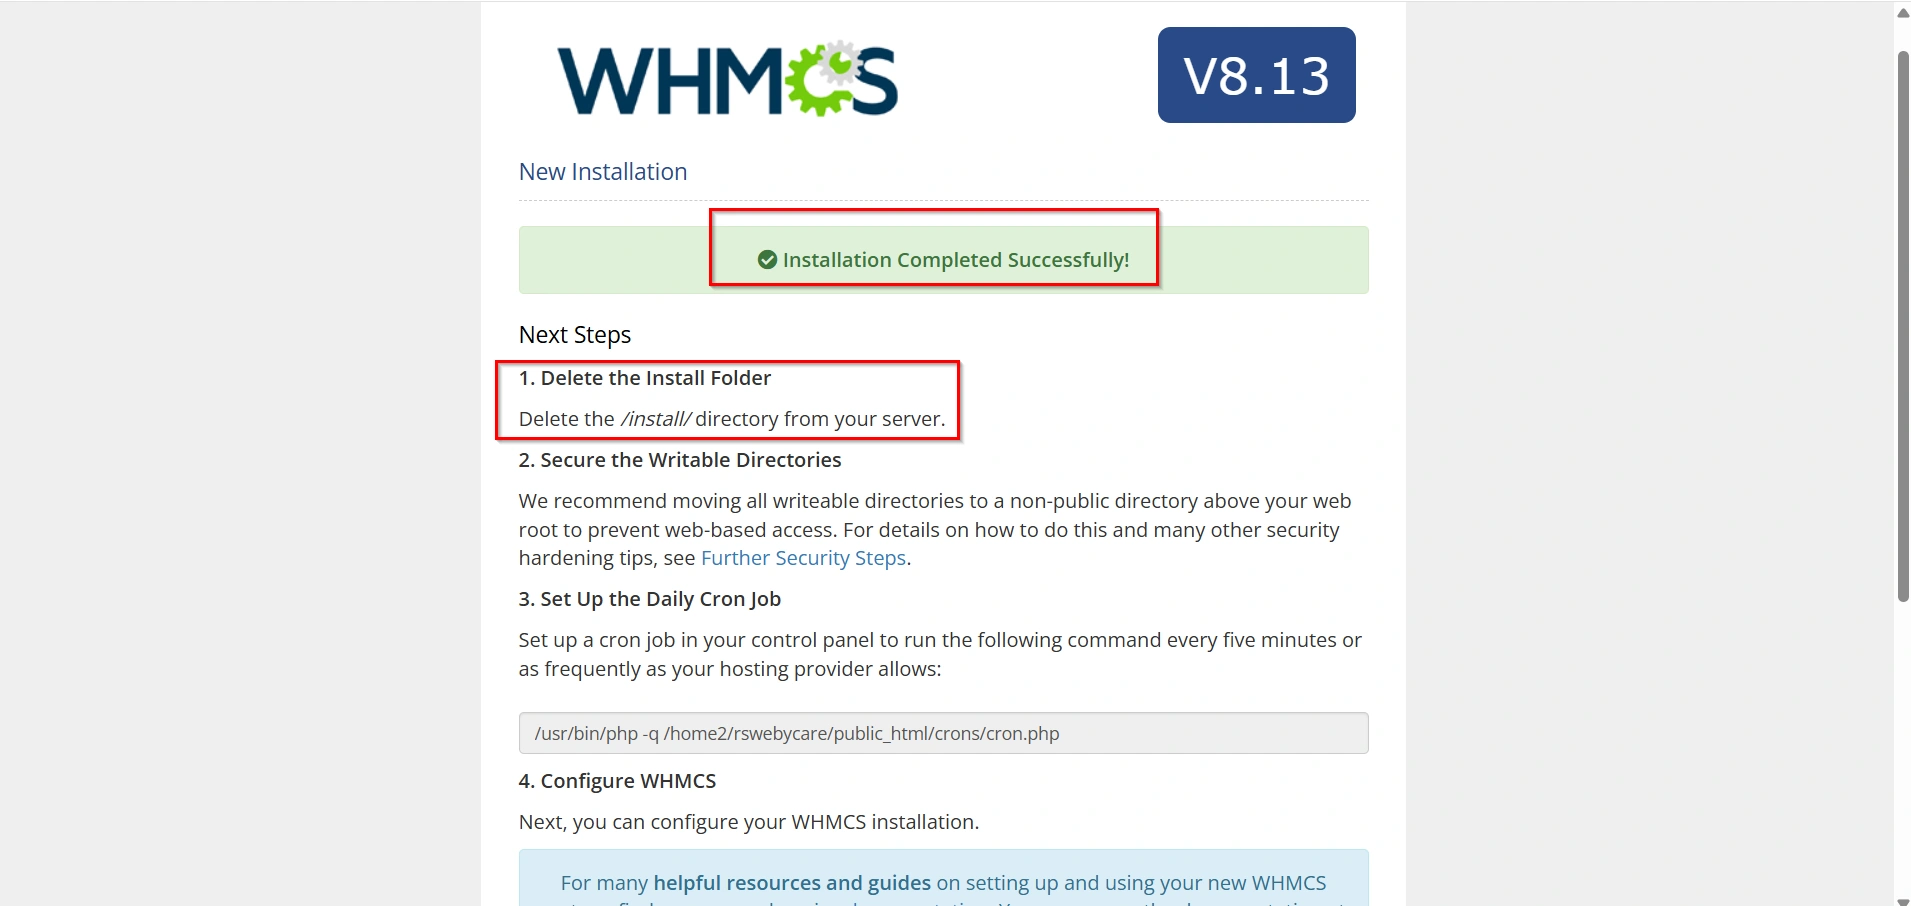
3. Go back to File manager and then delete the Install folder
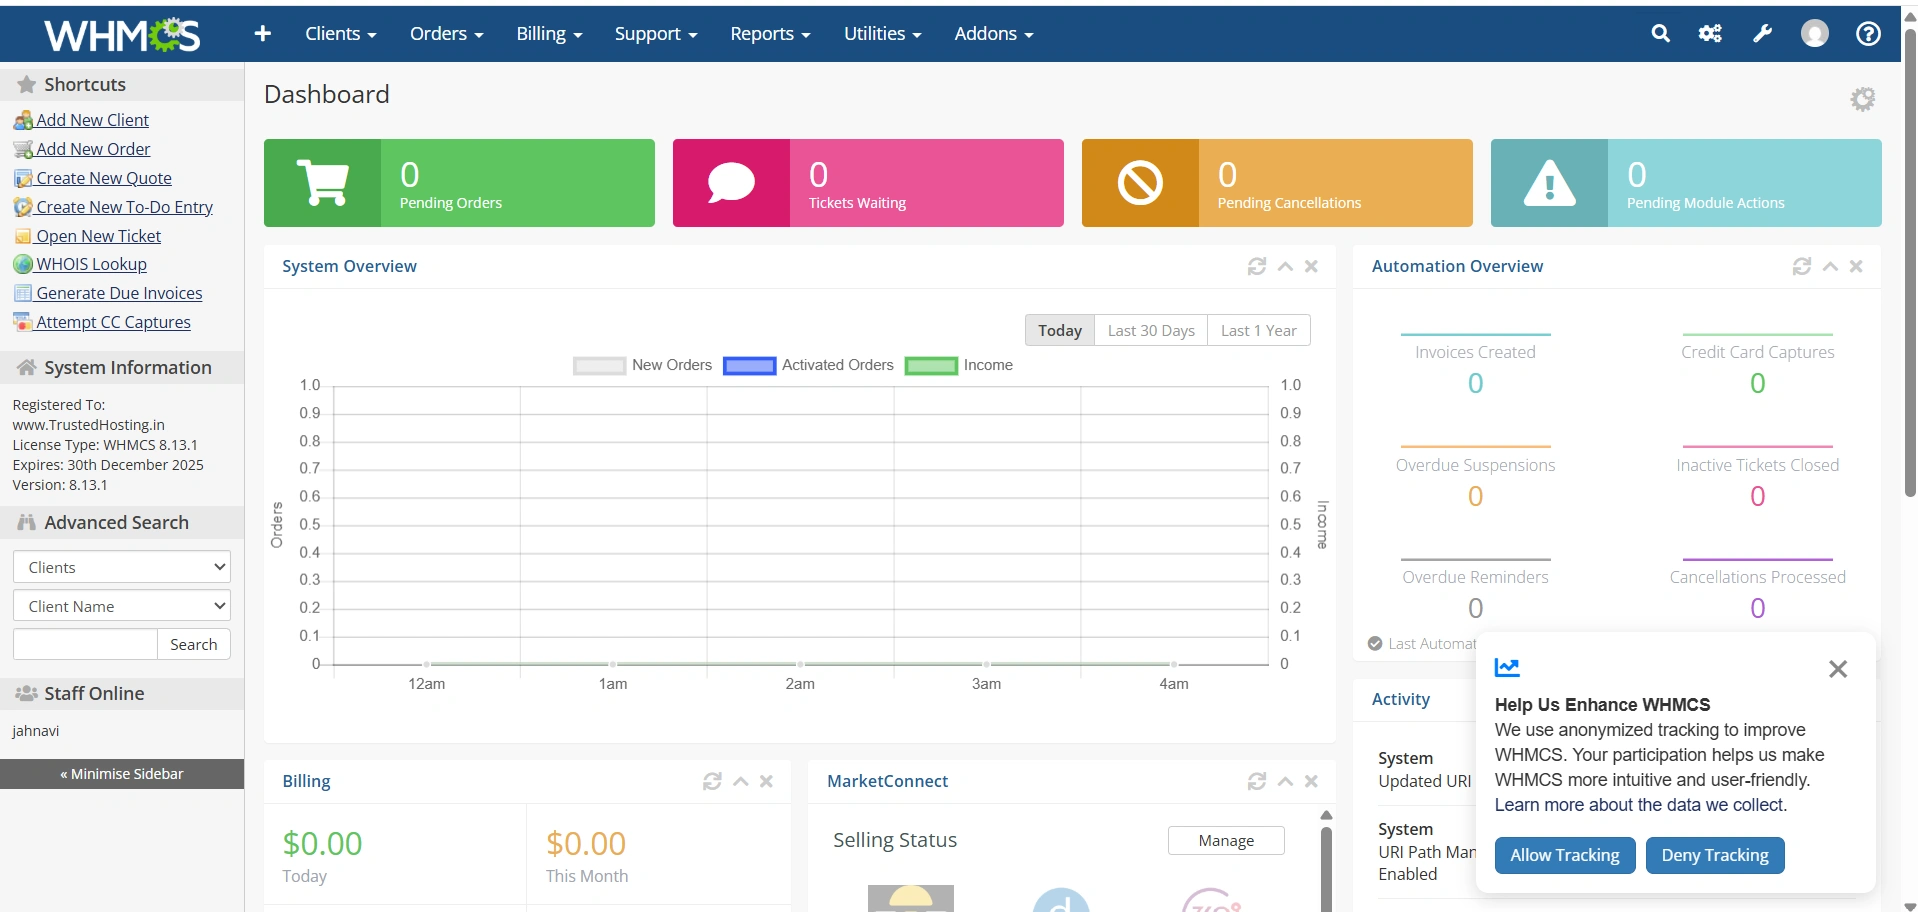
4. You will get login access to admin panel:
- Enter Username and Password
- Click Login
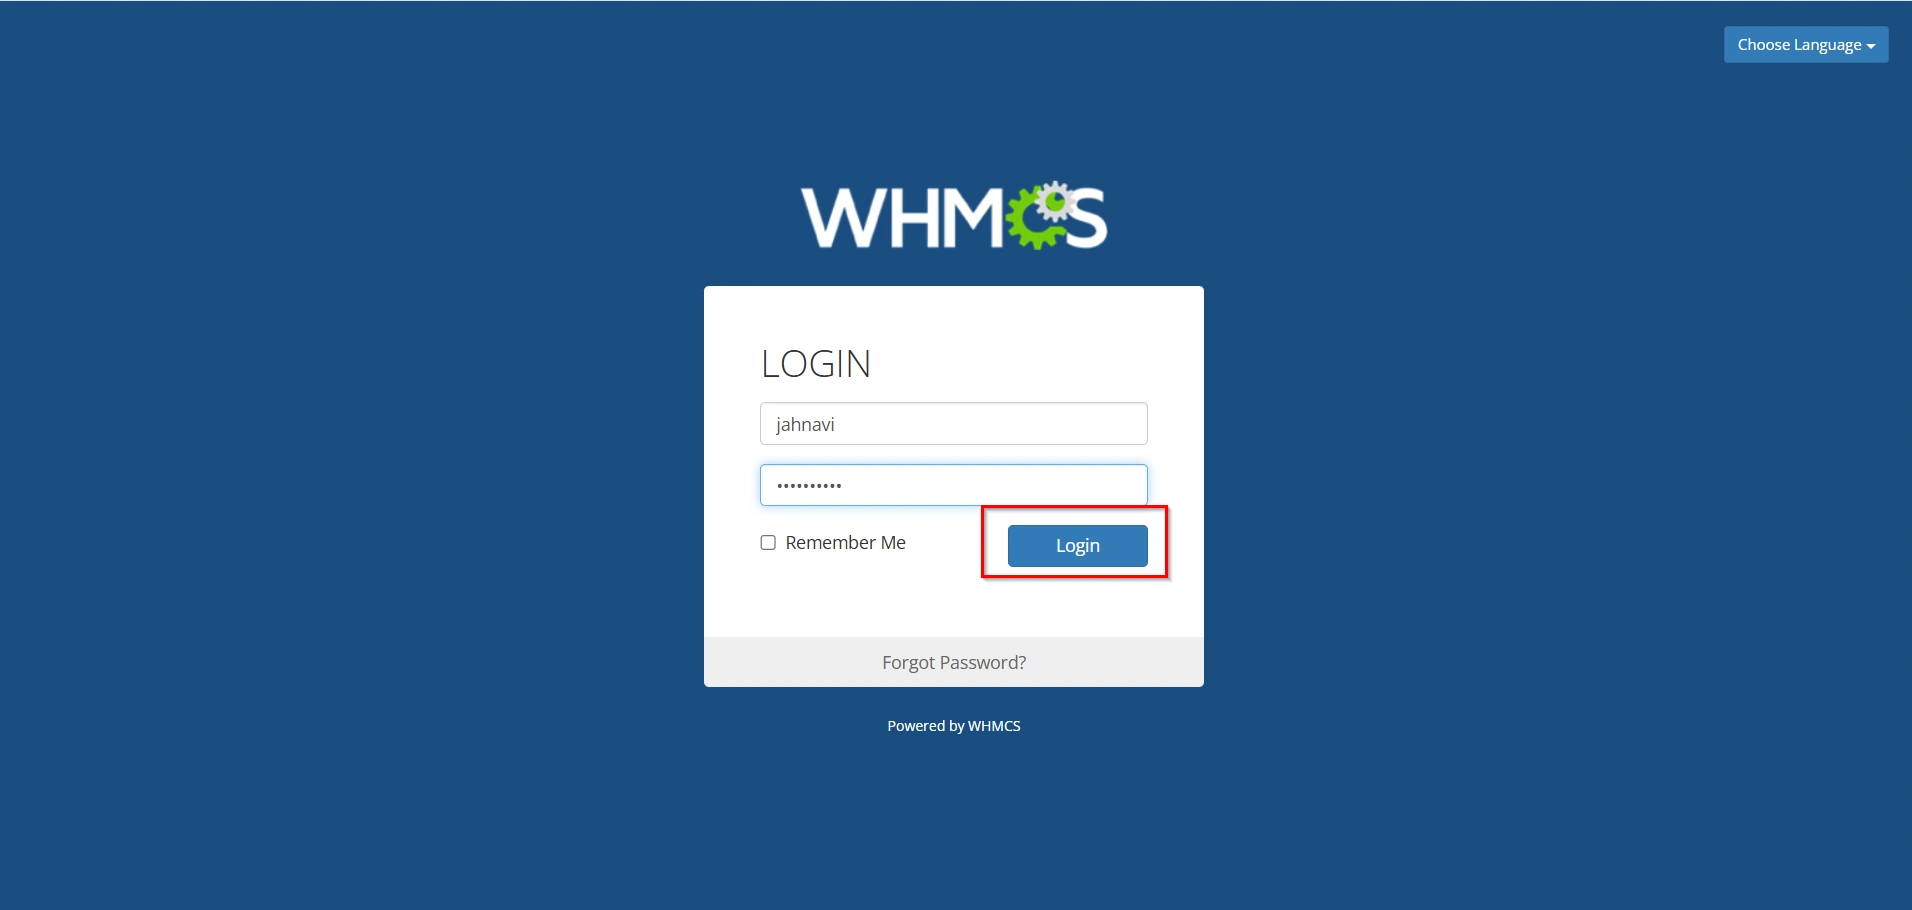
- You will see WHMCS Interface
Important Post-Installation Tasks
After installation, complete these important security steps:
Delete the Install Directory
The installation directory should be removed immediately to prevent unauthorized access.
Enable SSL
Ensure your WHMCS installation uses HTTPS to protect client data and login credentials.
Configure Cron Jobs
WHMCS relies on cron jobs for automation tasks such as:
- Invoice generation
- Payment reminders
- Service suspensions
- Domain renewals
Configure the recommended cron job within cPanel.
Update System Settings
Review and configure:
- Company information
- Payment gateways
- Email templates
- Domain registrars
- Product packages
Test the Installation
Before going live:
- Create a test client.
- Generate a test invoice.
- Verify email delivery.
- Confirm admin access.
This ensures everything functions correctly.
Benefits of Installing WHMCS via cPanel
Manual install via cpanel offers several advantages:
- Greater installation control.
- Better understanding of WHMCS architecture.
- Easier troubleshooting.
- Flexible deployment options.
- Enhanced customization opportunities.
It is also a valuable skill for hosting providers and server administrators who regularly deploy billing and automation platforms.
Conclusion
WHMCS manually install via cPanel is a straightforward process that involves uploading the WHMCS ZIP file, extracting the contents, creating a MySQL database, assigning user privileges, and completing the web-based installation wizard. While it requires a few more steps than automated installers, manual installation provides greater flexibility and control over your hosting environment.
By following this guide carefully, you can successfully deploy WHMCS and begin managing clients, billing operations, support tickets, domains, and hosting services efficiently from a single platform.
Related Articles