Latest Updates
How to Install an SSL Certificate in WHM
How to Install an SSL Certificate in WHM Website security has become a necessity rather than an option. Whether you run a personal blog, business website, eCommerce store, or web application, protecting your visitors'…
How to Install an SSL Certificate in WHM
Website security has become a necessity rather than an option. Whether you run a personal blog, business website, eCommerce store, or web application, protecting your visitors’ data is critical. One of the most effective ways to secure a website is by installing an SSL (Secure Sockets Layer) certificate.
WHM (Web Host Manager) makes SSL certificate installation straightforward for server administrators and resellers. By enabling SSL, your website can use HTTPS, ensuring secure communication between visitors and your server.
In this guide, we will explain how to install an SSL certificate in WHM, its benefits, prerequisites, and troubleshooting tips.
What is an SSL Certificate?
An SSL certificate is a digital certificate that encrypts data transmitted between a user’s browser and a web server. It helps prevent unauthorized access to sensitive information such as:
- Login credentials
- Contact form submissions
- Payment information
- Customer data
- Personal information
When an SSL certificate is installed successfully, visitors will see a padlock icon in their browser’s address bar, indicating that the website is secure.
Prerequisites
Before beginning the installation process, ensure you have:
- Access to WHM with sufficient privileges.
- A valid SSL certificate issued by a trusted Certificate Authority (CA).
- The Private Key (KEY).
- The SSL Certificate (CRT).
- The Certificate Authority Bundle (CA Bundle), if provided by your SSL provider.
Having these files ready will make the installation process smooth and efficient.
How to Install an SSL Certificate in WHM
Follow these steps to install your SSL certificate.
Step 1: Log in to WHM
Start by accessing your WHM dashboard.
Common WHM login URLs include:
Enter your WHM username and password to log in.
Once authenticated, you will be directed to the WHM home page where all server management tools are available.
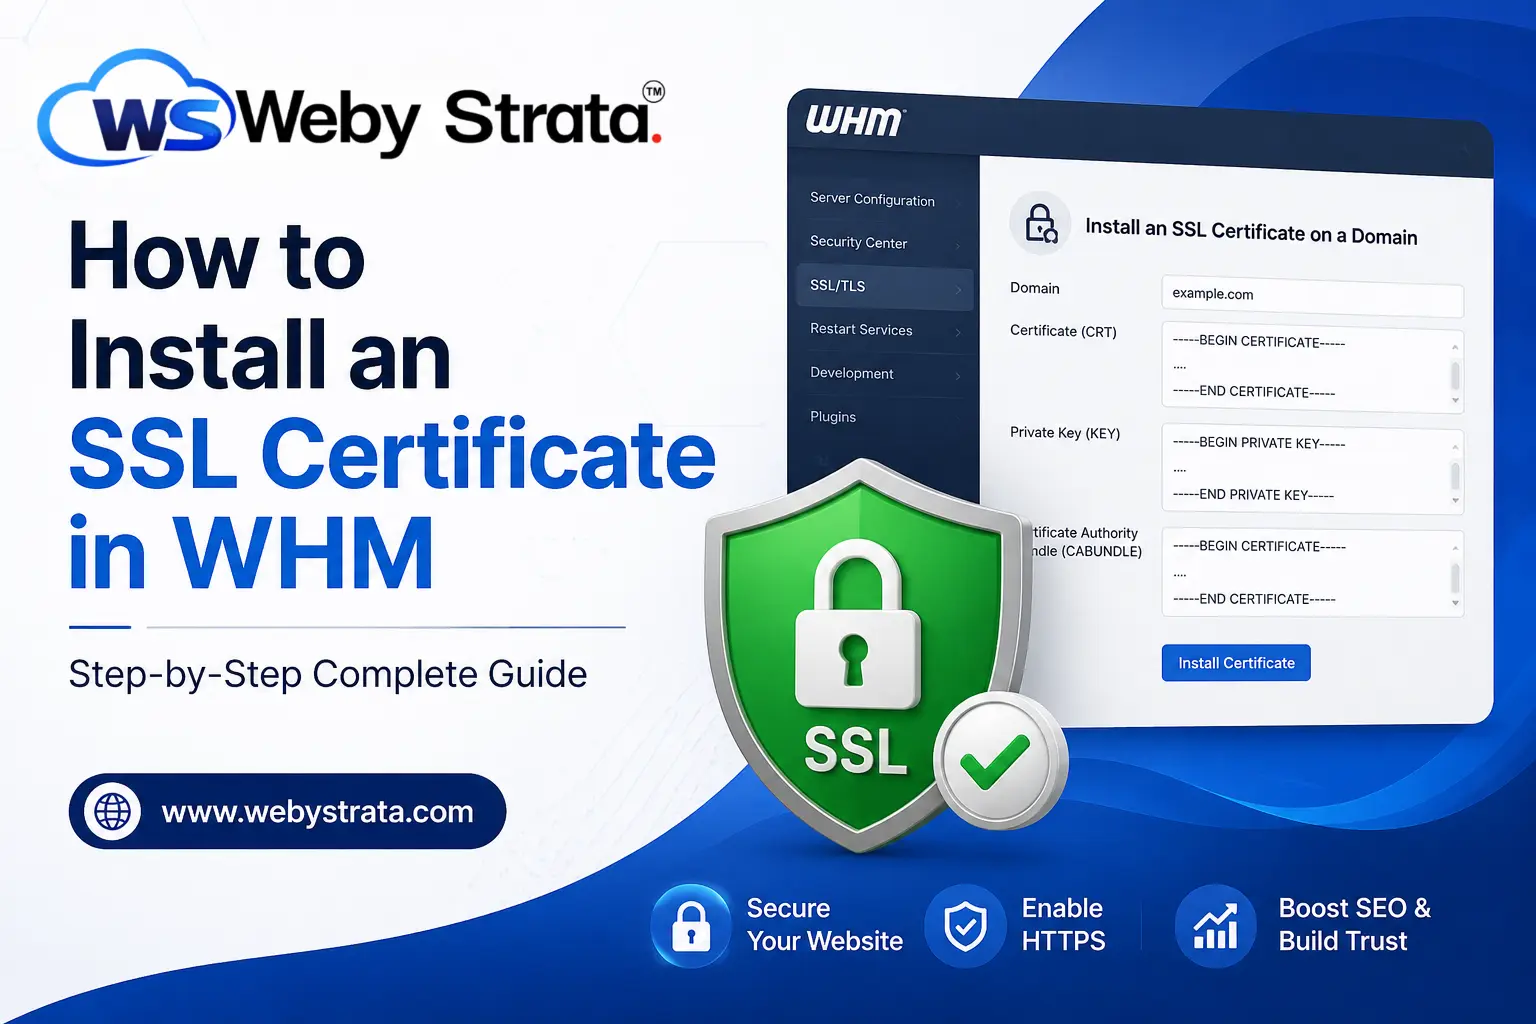
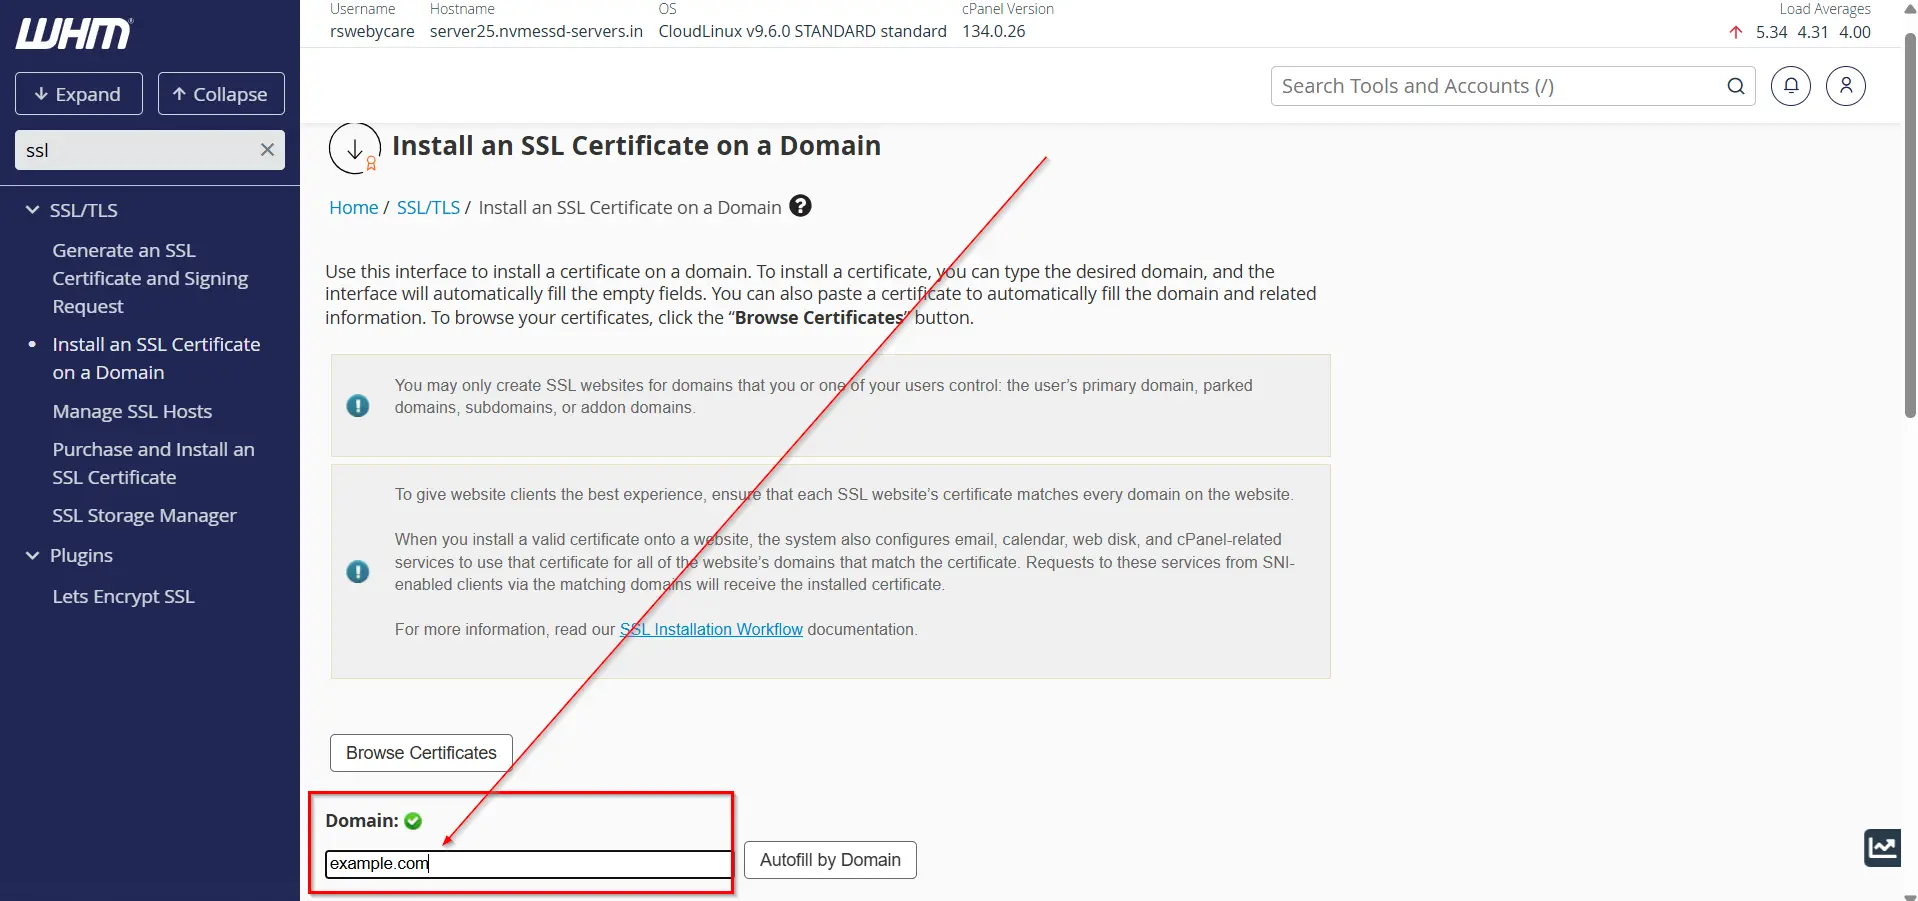
Step 2: Navigate to SSL Installation
- Locate the search box on the left side of the WHM interface.
- Type Install SSL.
- Select Install an SSL Certificate on a Domain from the SSL/TLS section.
This interface allows you to install SSL certificates for hosted domains.

Step 3: Enter the Domain Name
In the Domain field:
- Enter the domain name for which the SSL certificate was issued.
- Example:example.com
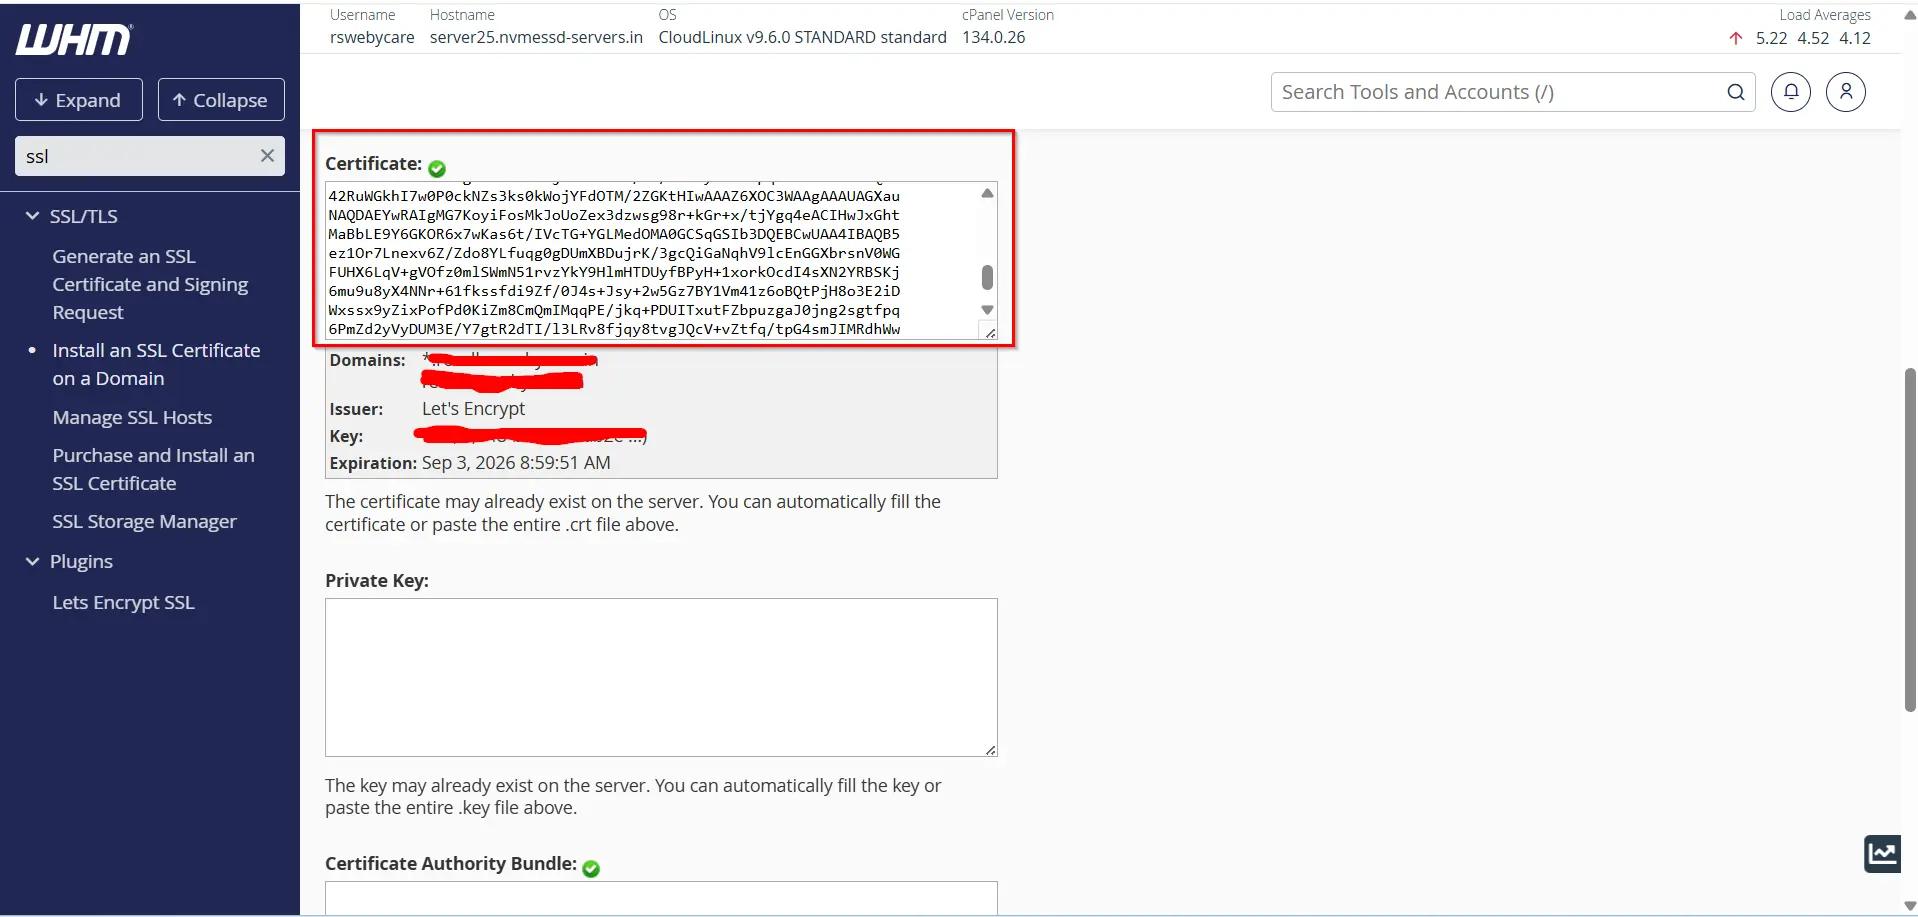
Step 4: Paste the SSL Certificate
- Copy the SSL certificate provided by your Certificate Authority.
- Paste it into the Certificate (CRT) field.
WHM may automatically populate the following fields if the certificate is valid:
- Domain
- Private Key (KEY)
- Certificate Authority Bundle (CABUNDLE)
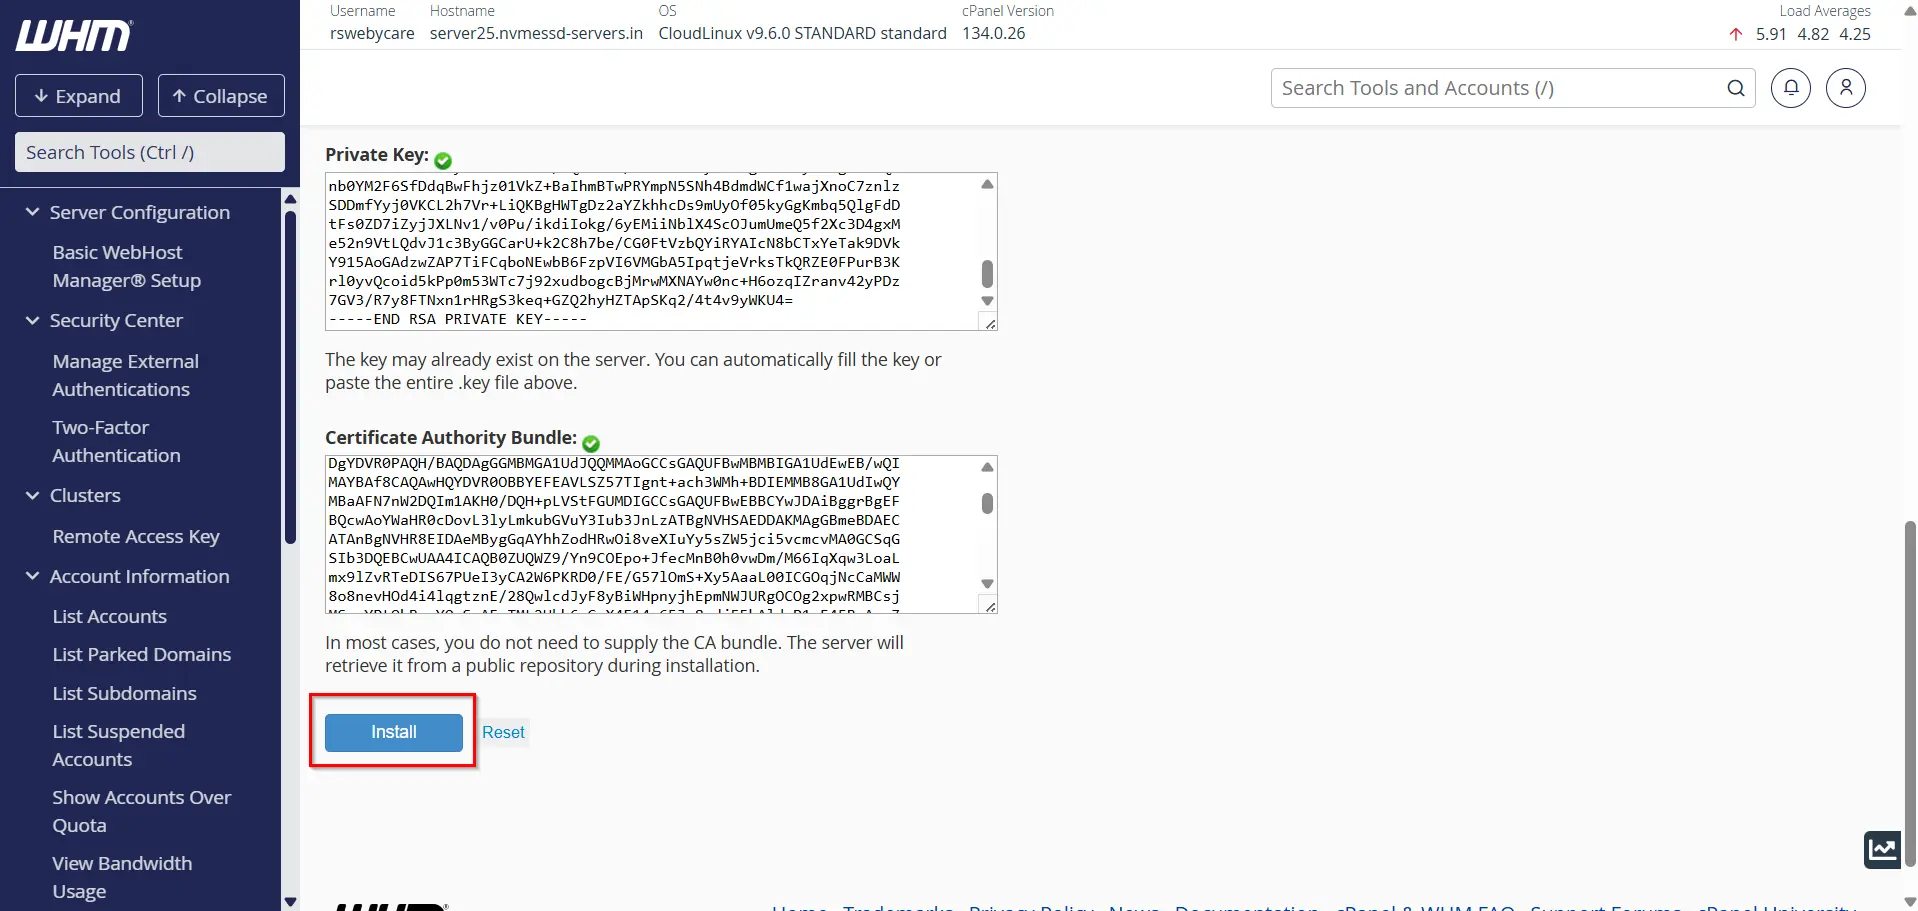
Step 5: Verify the Private Key
The Private Key (KEY) is essential for SSL functionality.
- Verify that WHM automatically detects the correct private key.
- If it does not appear automatically, manually paste the private key into the designated field.
Make sure the private key matches the SSL certificate. A mismatch will cause installation errors.
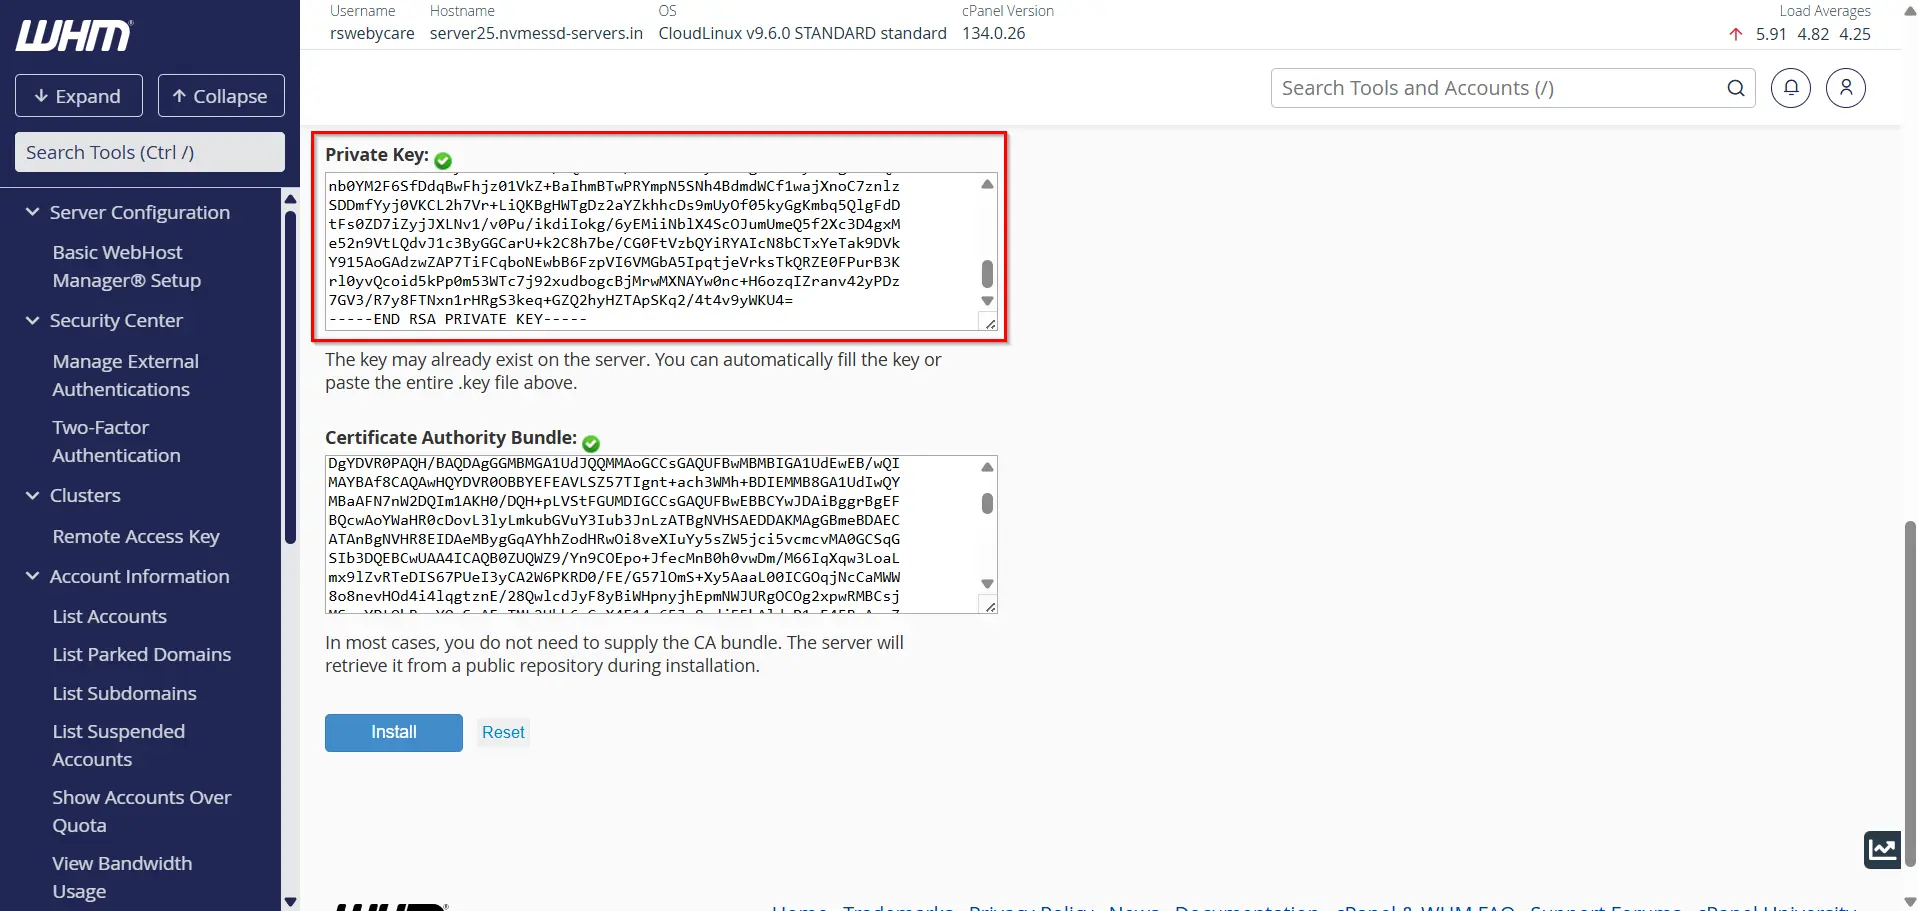
Step 6: Add the CA Bundle
The CA Bundle helps browsers verify the complete certificate chain.
- Locate the Certificate Authority Bundle (CABUNDLE) field.
- Paste the CA Bundle supplied by your SSL provider.
Although some SSL providers may not require manual entry, adding the CA Bundle ensures maximum compatibility across browsers and devices.
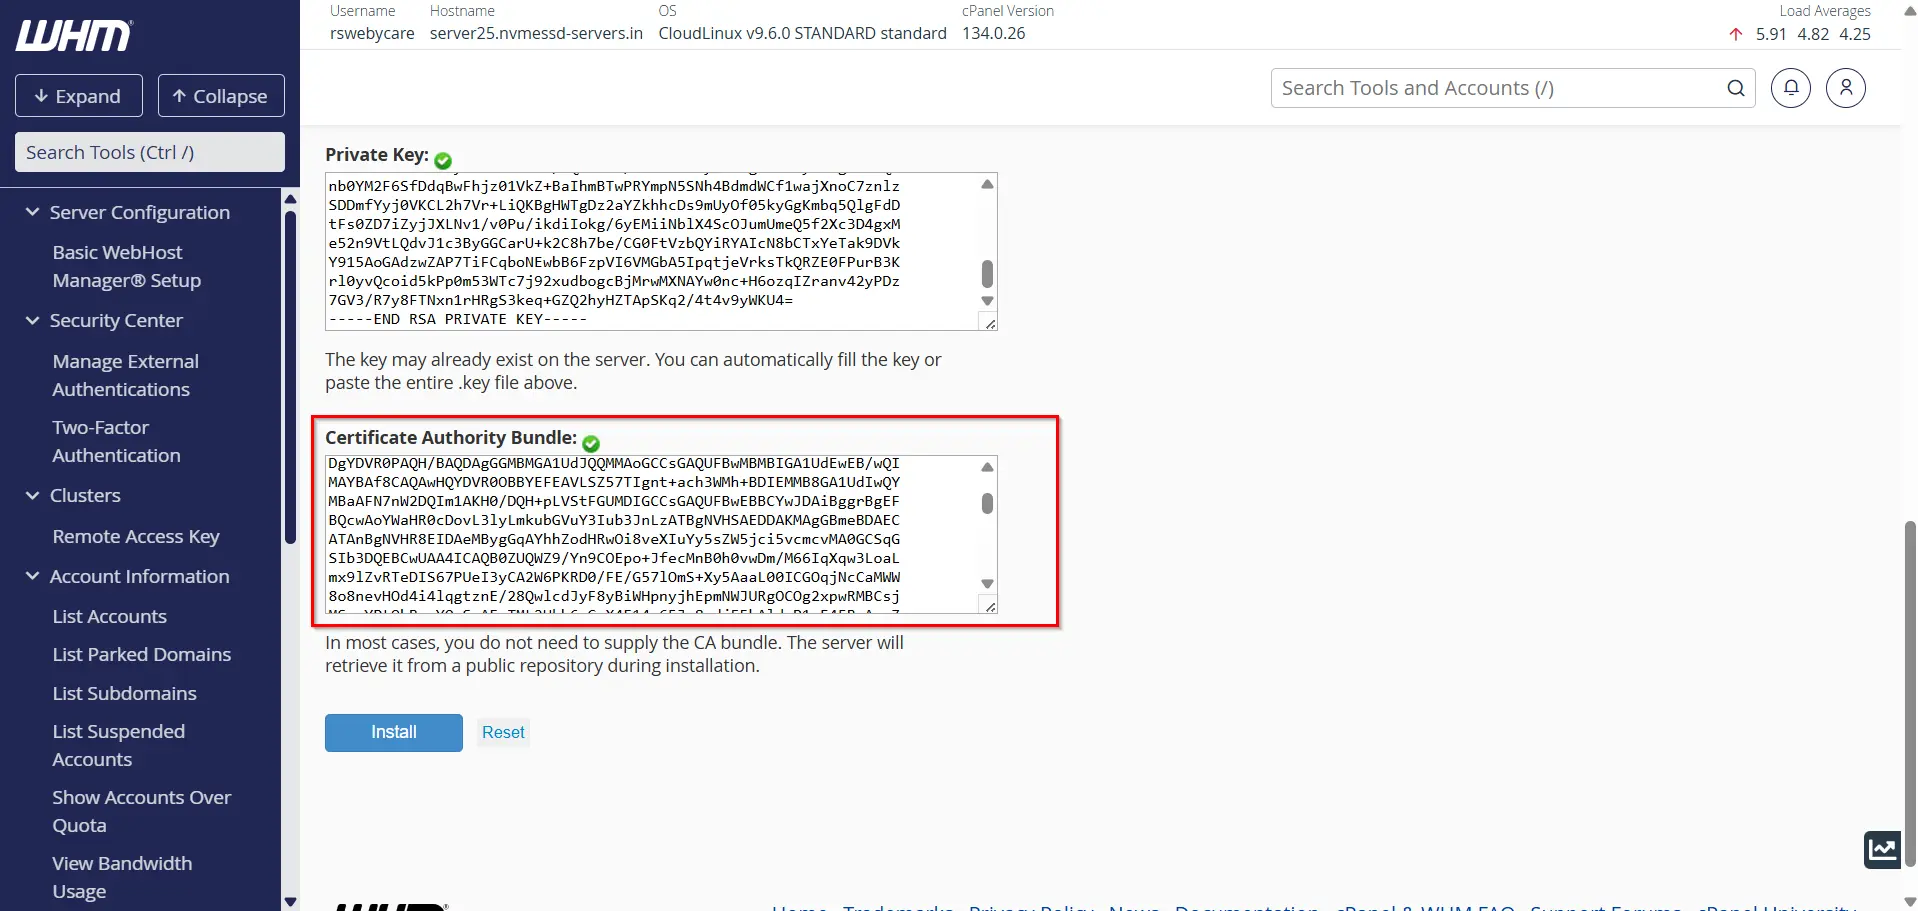
Step 7: Install the SSL Certificate
After verifying all information:
- Review the entered details.
- Click Install Certificate.
WHM will process the request and display a success message once the installation is complete.
How to Verify SSL Installation
After installation, it is important to confirm that the certificate is working correctly.
Method 1: Browser Verification
- Open your website using HTTPS.
- Look for the padlock icon in the browser address bar.
- Click the padlock to view certificate details.
Method 2: Online SSL Testing Tools
Use SSL verification tools to check:
- Certificate validity
- Certificate chain
- Expiration date
- Security configuration
These tools can help identify any configuration issues.
Benefits of Installing an SSL Certificate in WHM
Installing an SSL certificate offers several advantages:
1. Enhanced Security
SSL encrypts all communication between the website and visitors, making it difficult for attackers to intercept data.
2. Improved Customer Trust
Users are more likely to trust websites displaying HTTPS and the secure padlock icon.
3. Better Search Engine Rankings
Google considers HTTPS a ranking factor. Websites with SSL certificates often perform better in search results than unsecured websites.
4. Secure Online Transactions
For eCommerce websites, SSL protects payment information and customer details during checkout.
5. Compliance with Security Standards
Many industry regulations and payment providers require SSL encryption for handling sensitive data.
Conclusion
Installing an SSL certificate in WHM is a crucial step in securing websites hosted on your server. SSL encryption protects sensitive information, improves visitor trust, enhances search engine rankings, and supports secure online transactions.
By following the steps outlined in this guide, you can successfully install and manage SSL certificates through WHM with minimal effort. Whether you manage a single website or multiple hosting accounts, SSL implementation should be a standard part of your website security strategy.
For more WHM management tutorials and step-by-step guides,
visit our WHM knowledge base: www.webystrata.com/blog/category/whm-panel/
Related Articles