cPanel
Learn to Import a MySQL Database in cPanel
Learn to Import a MySQL Database in cPanel Databases are the backbone of most modern websites and web applications. Whether you're running WordPress, Joomla, Magento, Laravel, or a custom-built website, your data is typically…
Learn to Import a MySQL Database in cPanel
Databases are the backbone of most modern websites and web applications. Whether you’re running WordPress, Joomla, Magento, Laravel, or a custom-built website, your data is typically stored in a MySQL database. There may come a time when you need to restore a backup, migrate a website to a new server, or import data from another environment. In such cases, knowing how to import a MySQL database in cPanel is an essential skill.
Fortunately, cPanel makes database management simple through its built-in tool, phpMyAdmin. With just a few clicks, you can upload and import SQL database files directly from your browser.
In this guide, you’ll learn everything you need to know about importing a MySQL database in cPanel, including prerequisites, step-by-step instructions, troubleshooting tips, and best practices.
What Is a MySQL Database?
A MySQL database is a structured collection of data used by websites and applications to store information such as:
- User accounts
- Website content
- Product catalogs
- Orders and transactions
- Settings and configurations
- Comments and form submissions
Most content management systems (CMS) and web applications rely heavily on MySQL databases to function properly.
Why Would You Need to Import a MySQL Database?
There are several situations where importing a database becomes necessary:
- Website Migration
- Restoring a Backup
- Local Development Deployment
- Cloning Websites
- Application Installation
Prerequisites Before Importing a Database
Before beginning the import process, ensure you have:
- Access to your cPanel account
- A MySQL database created in cPanel
- A database user assigned to that database
- Full database privileges
- A valid SQL backup file
- Adequate hosting resources
Common database file formats include:
.sql.zip.gz
Step-by-Step Guide to Import a MySQL Database in cPanel
Step 1: Login to cPanel from Client Area
First, visit the WebyStrata website and log in to your client area account using your registered email address and password.
official Website www.webystrata.com
After logging in:
- Go to Services
- Click on My Services
- Select your active hosting service
- Click on Login to cPanel

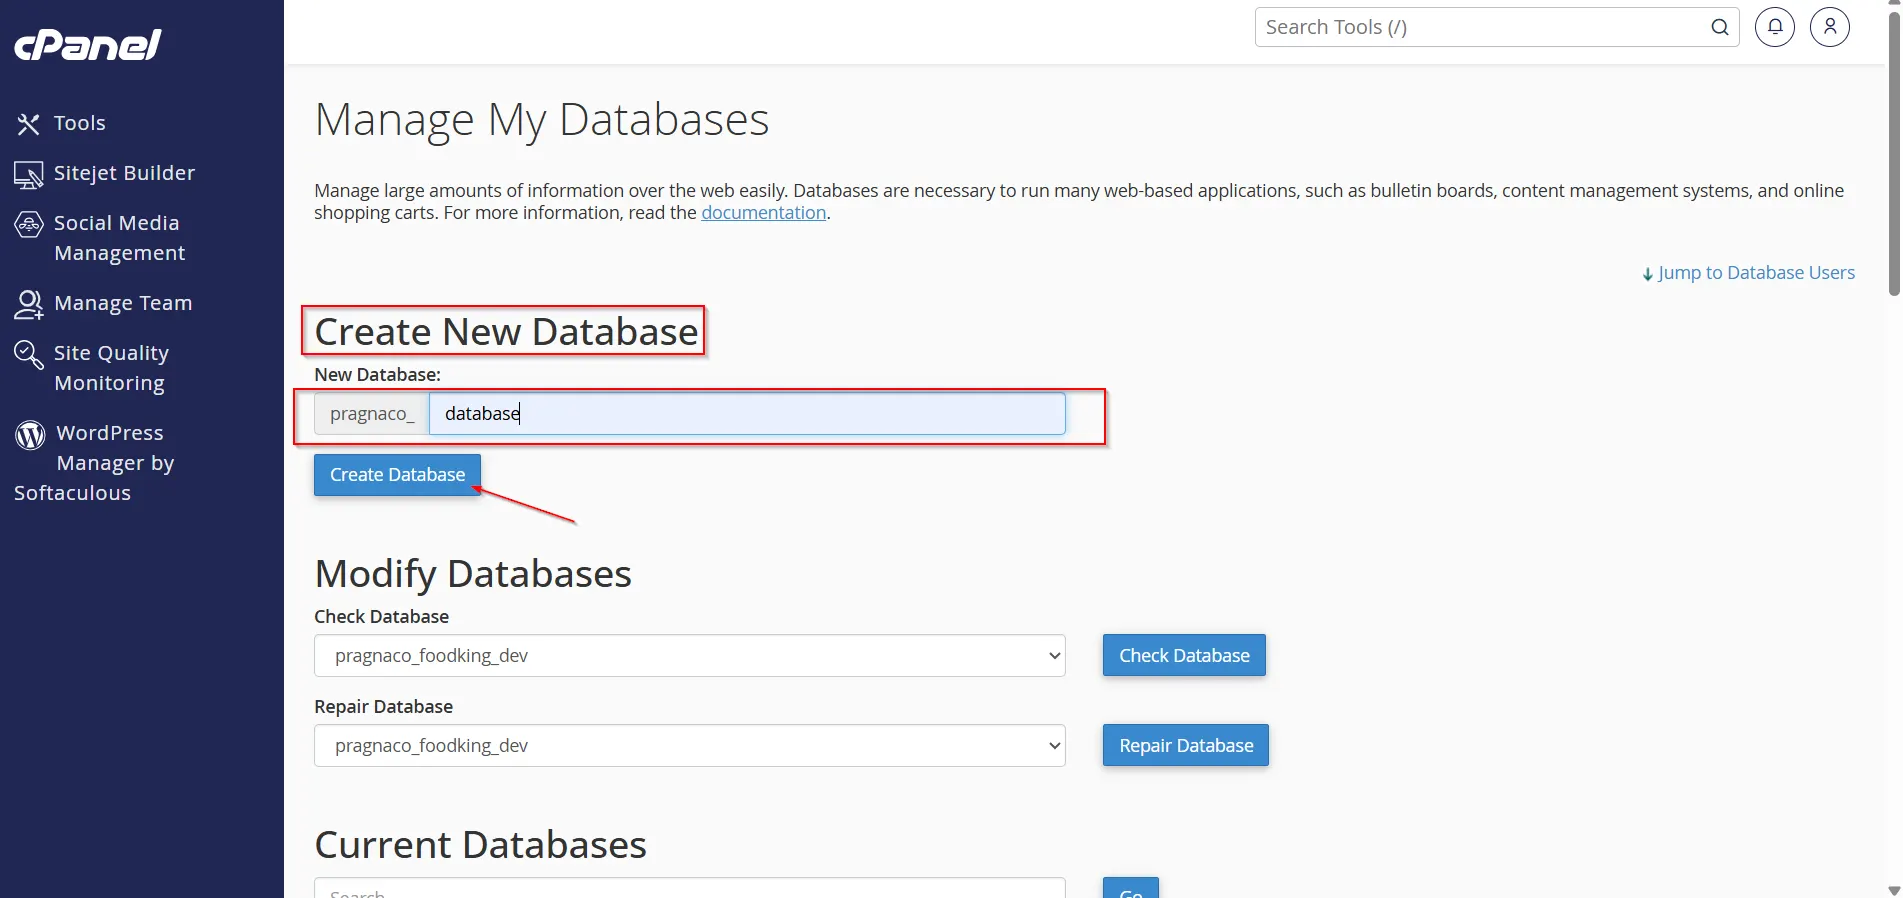
Step 2: Create a MySQL Database (If Needed)
If you have not already created a database:
- Open MySQL Databases.
- Enter a database name.
- Click Create Database.
- Note the full database name for future use.
If a database already exists, you can proceed to the next step.
Step 3: Create a Database User
To access and manage the database:
- Scroll to the MySQL Users section.
- Create a new database user.
- Enter a secure password.
- Click Create User.
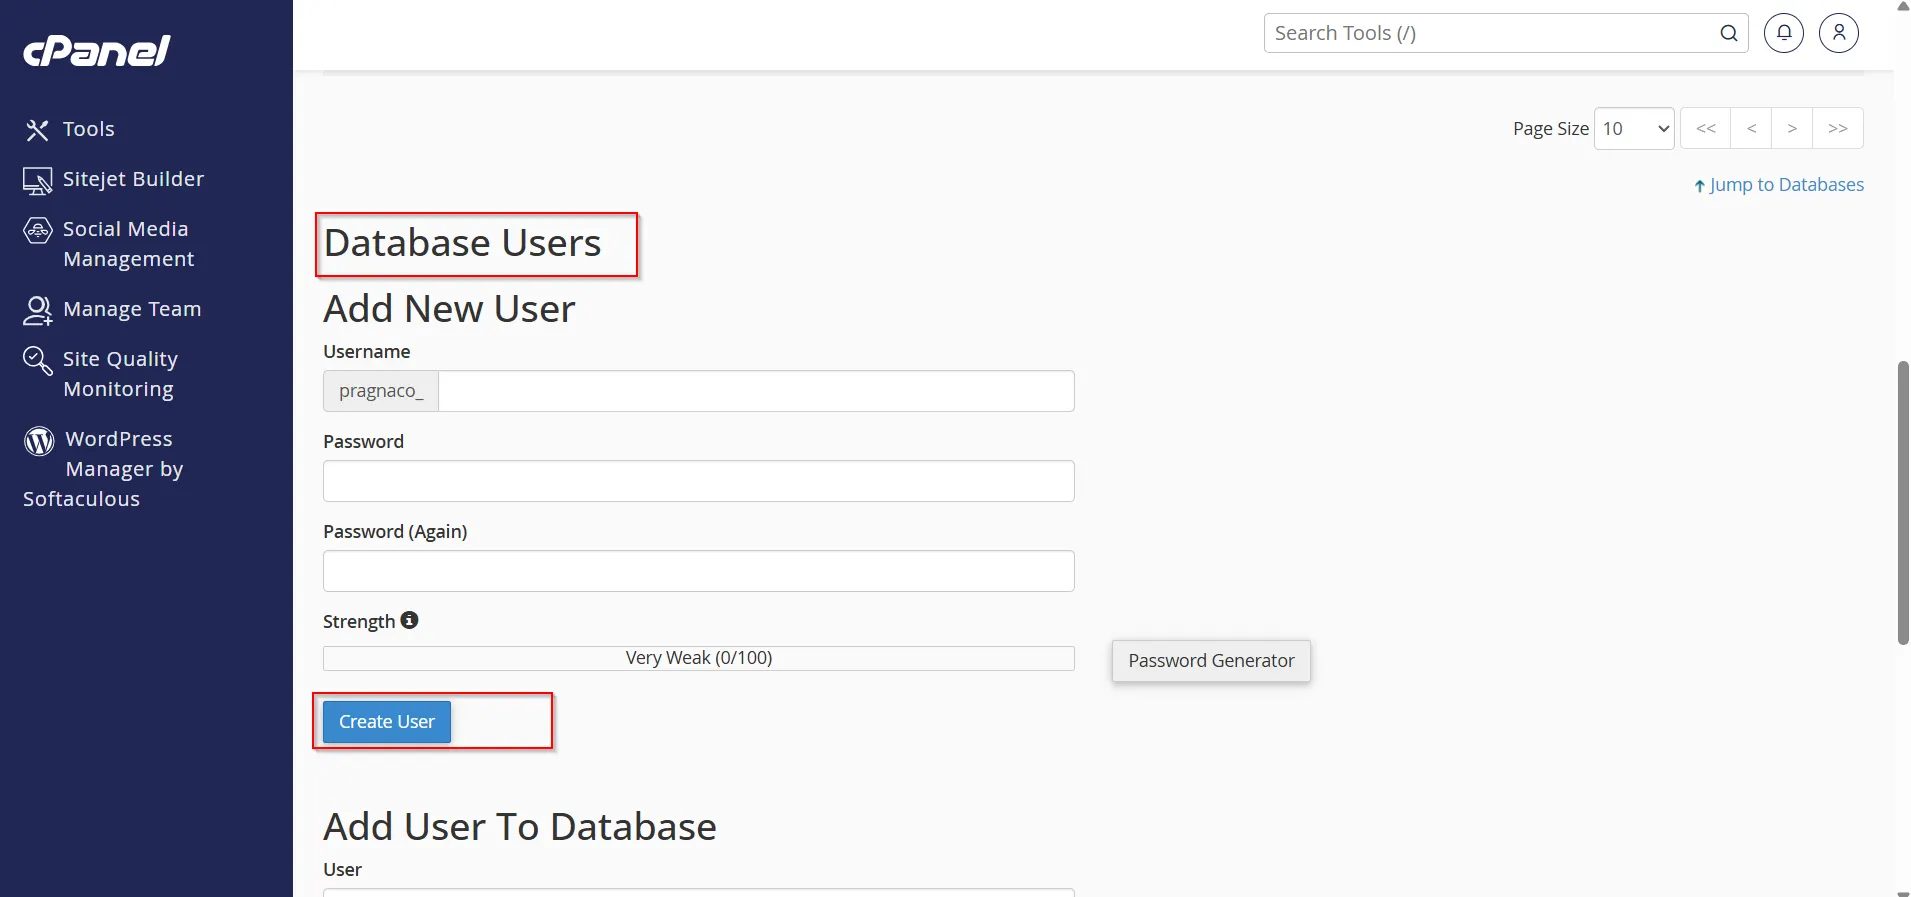
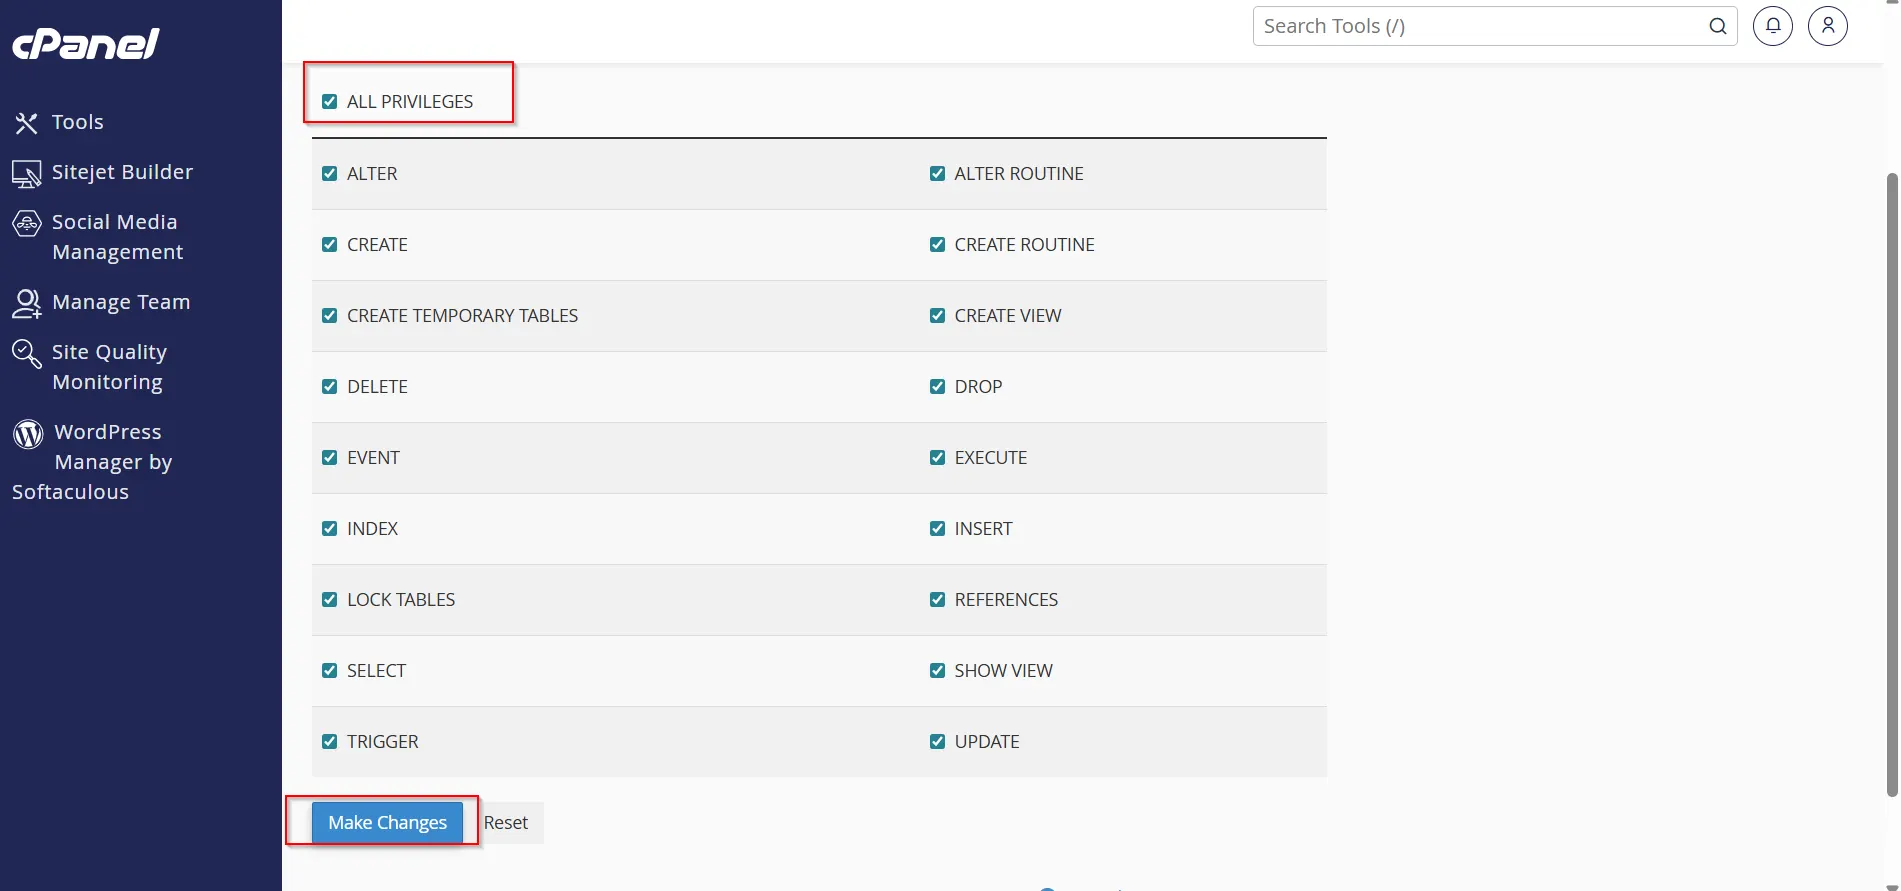
Step 4: Assign the User to the Database
After creating the user:
- Locate the Add User to Database section.
- Select the database user.
- Select the database.
- Click Add.
- Grant ALL PRIVILEGES.
- Save the changes.
This ensures the database can be accessed properly by your application.
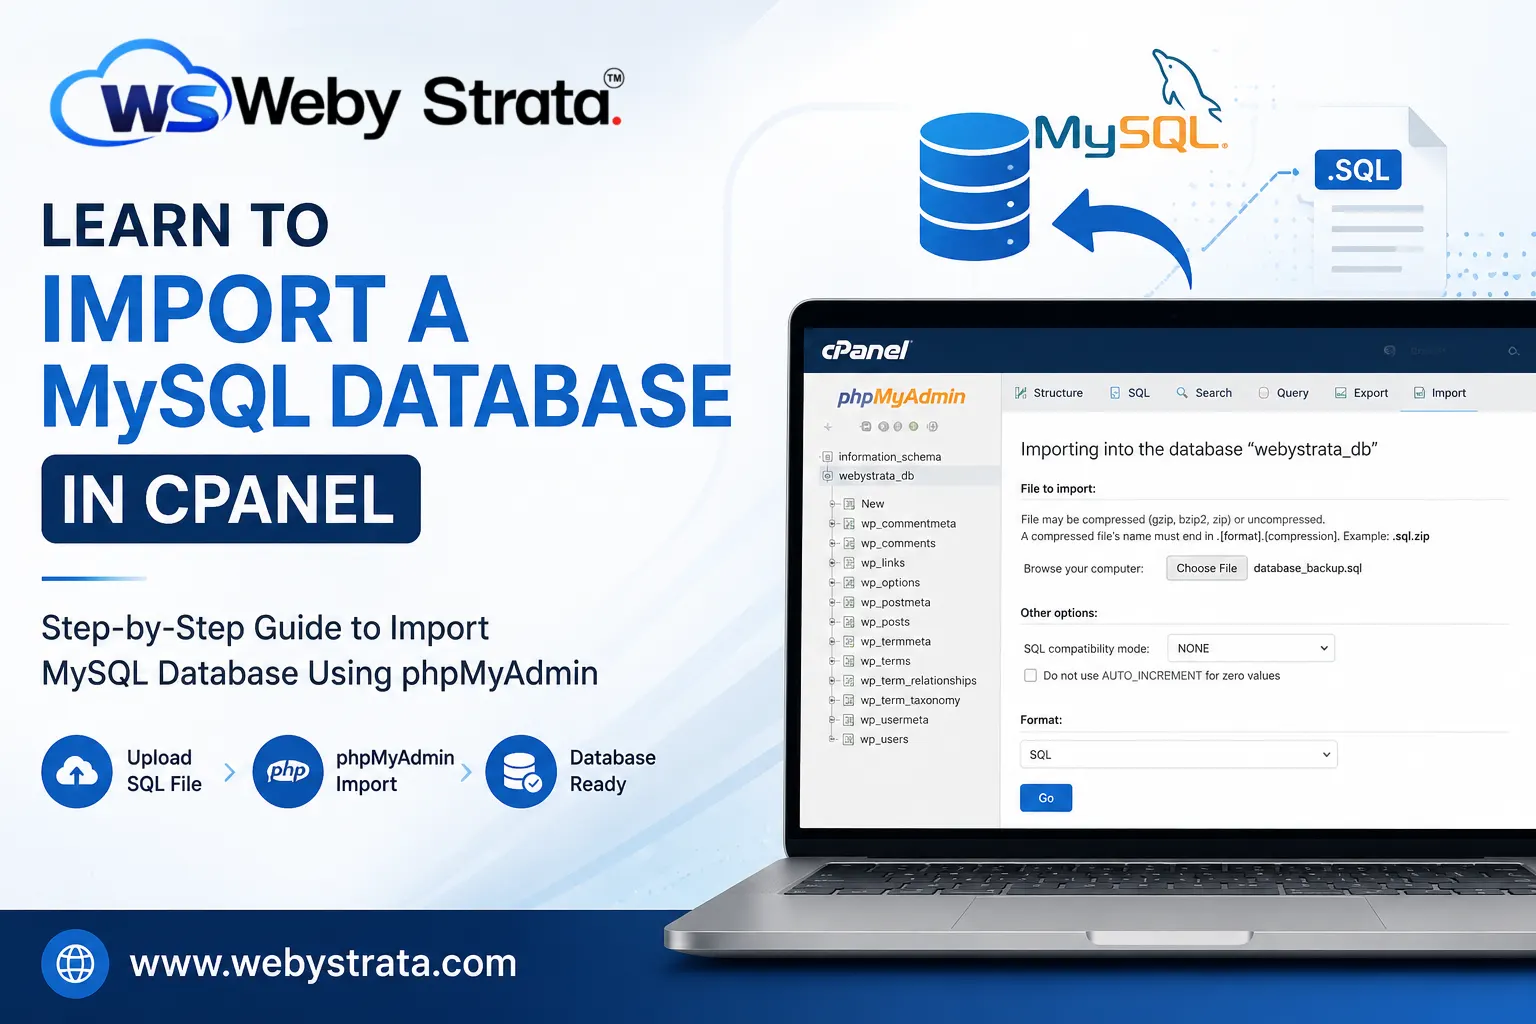
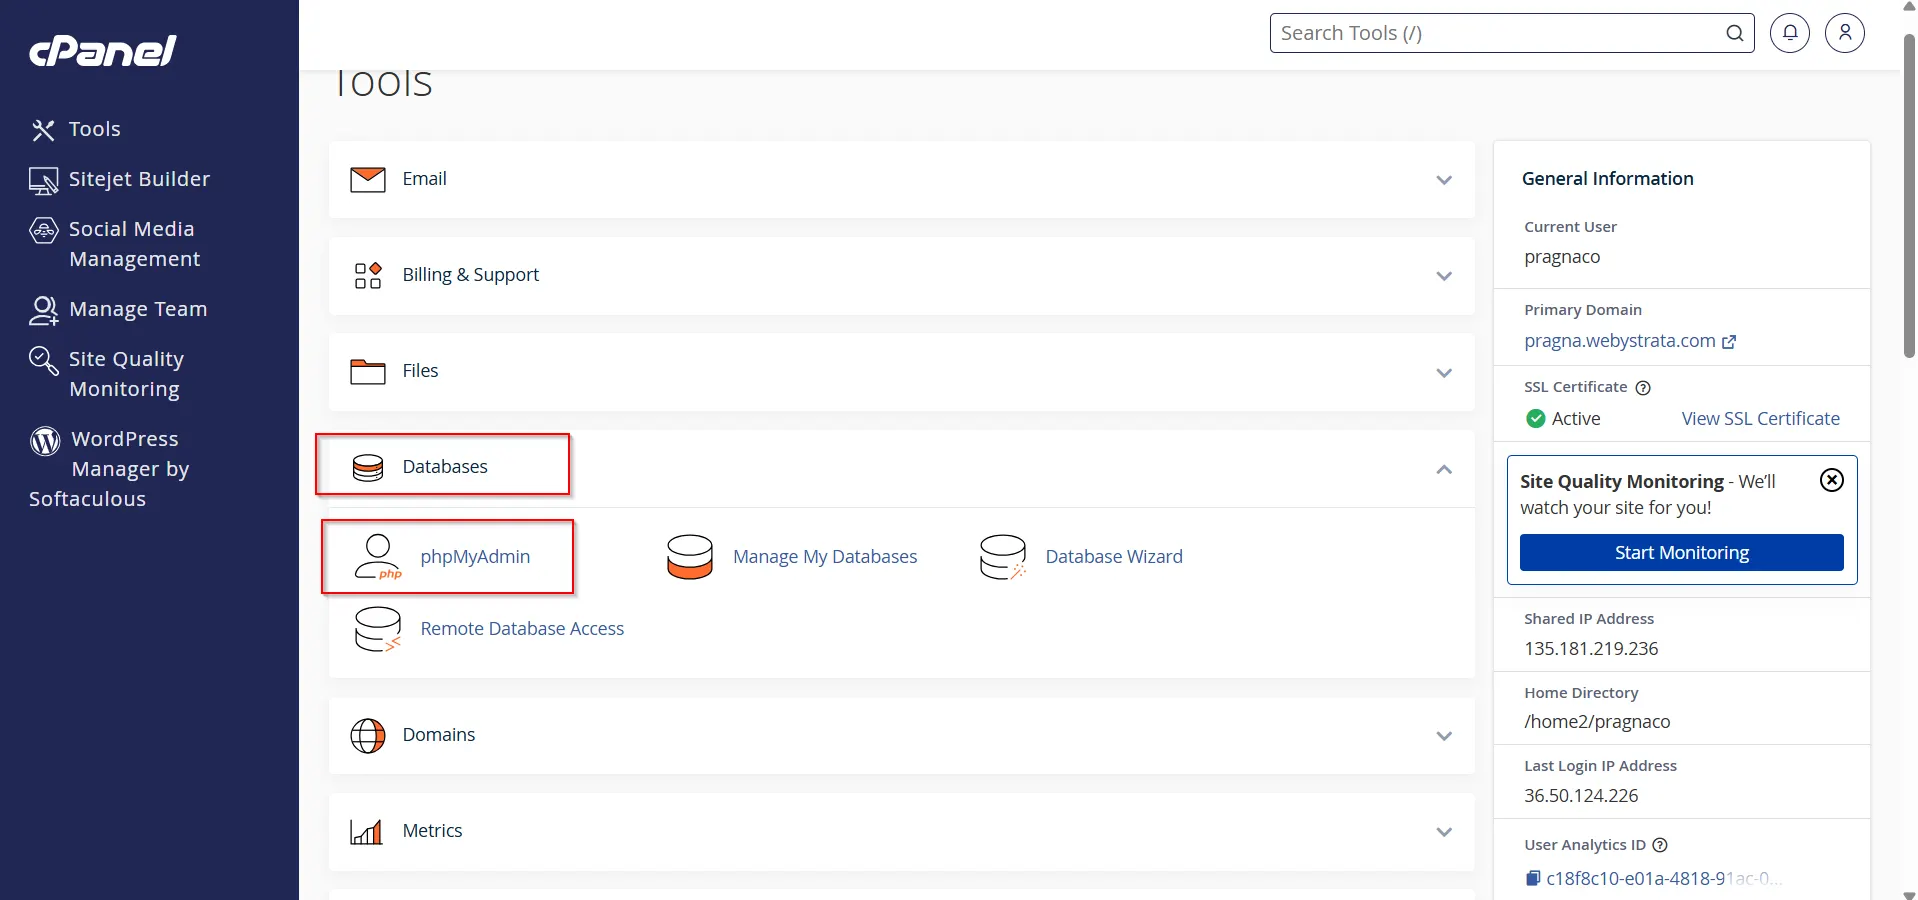
Step 5: Open phpMyAdmin
- Return to the cPanel home page.
- Click phpMyAdmin under the Databases section.
- phpMyAdmin will open in a new interface.
phpMyAdmin is the primary tool used for importing and managing MySQL databases within cPanel.
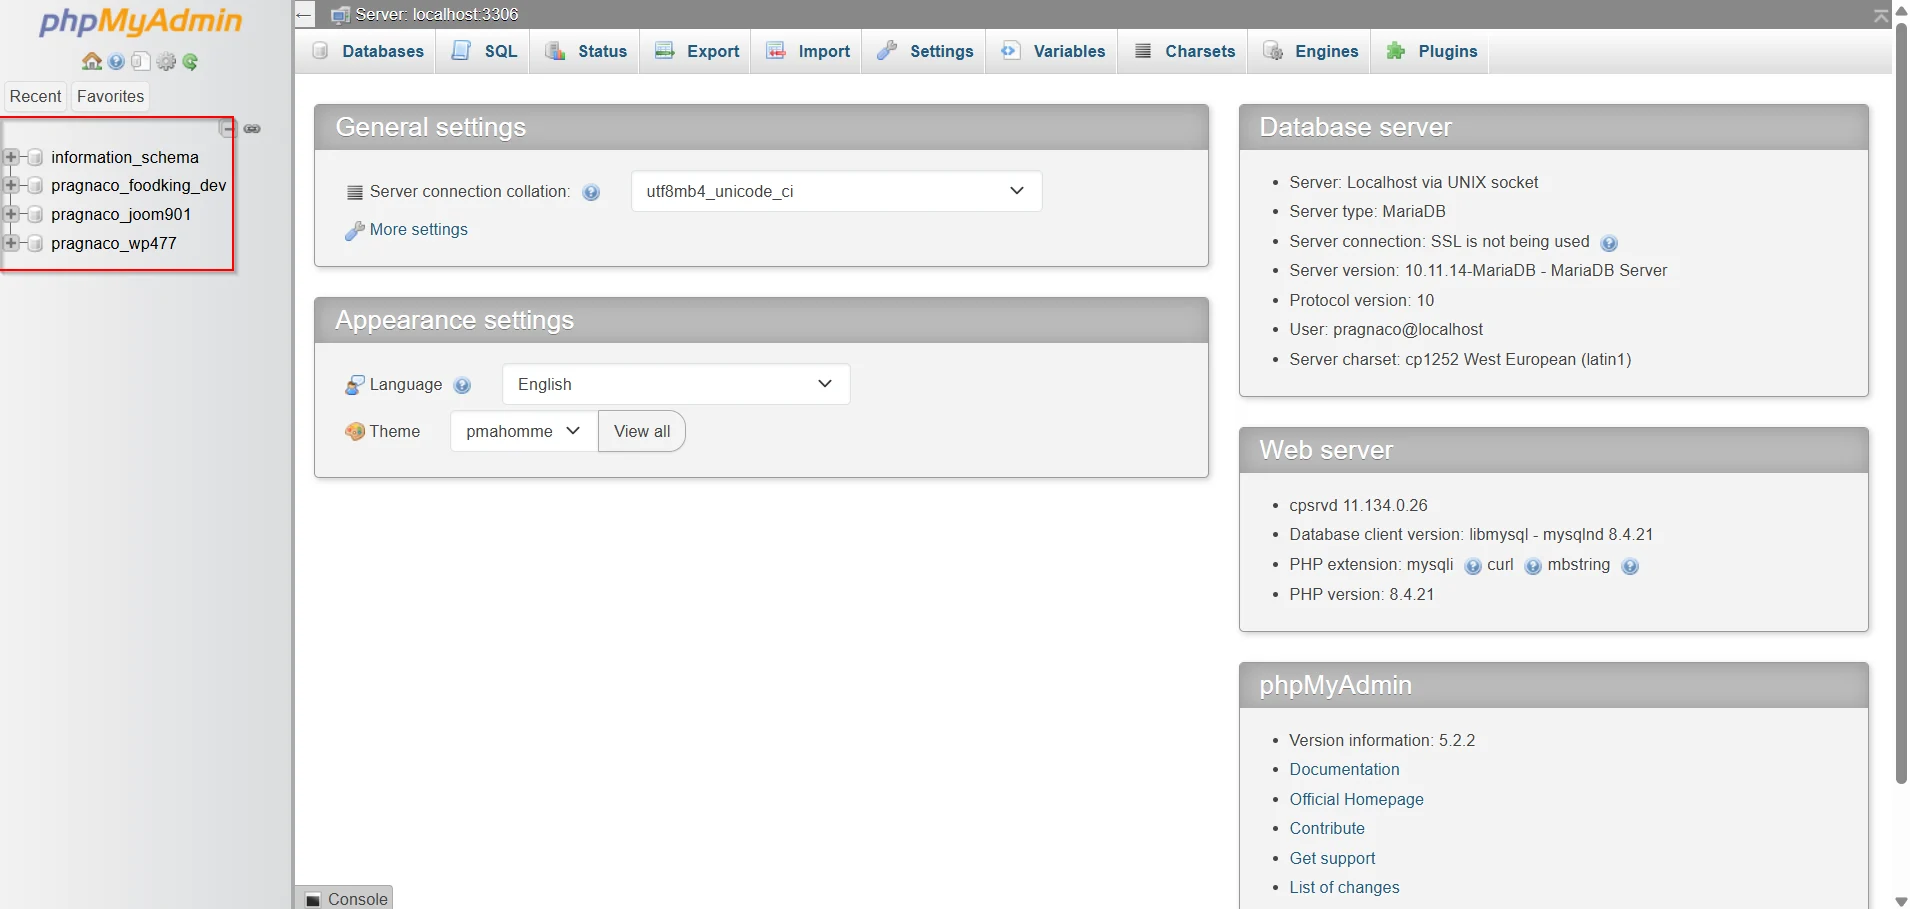
Step 6: Select the Target Database
In phpMyAdmin:
- Locate the database list in the left sidebar.
- Click the database where you want to import the data.
Ensure you select the correct database before proceeding.
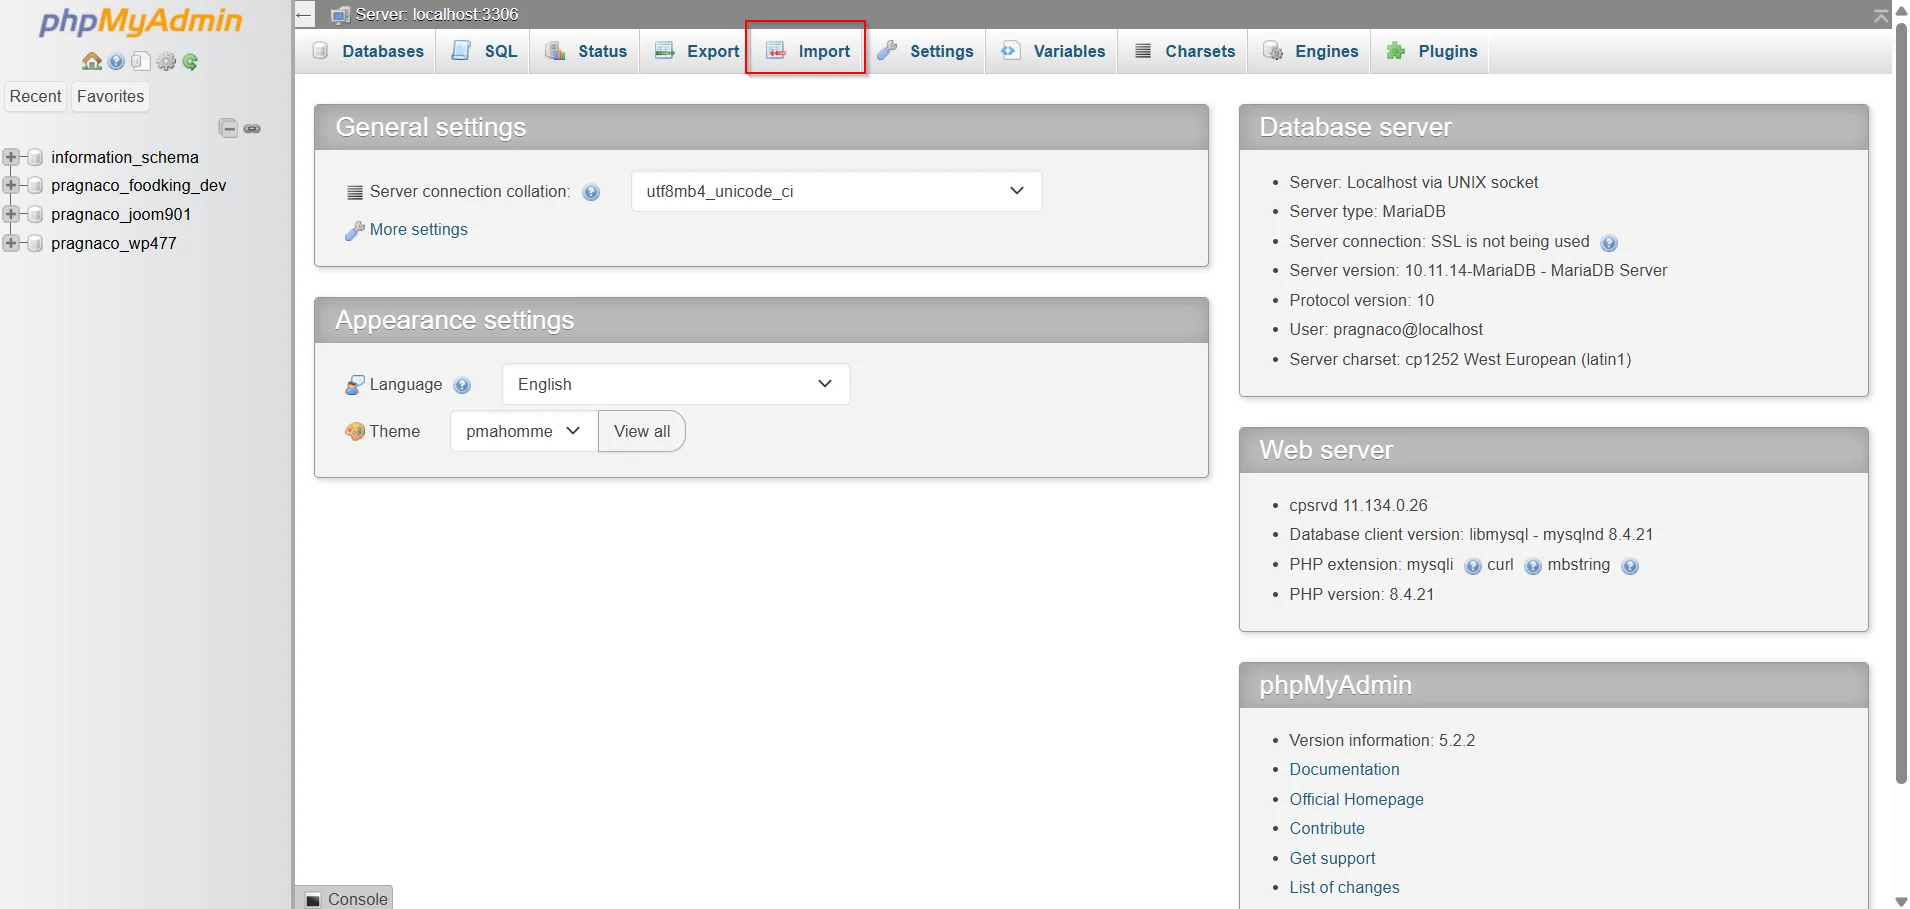
Step 7: Click the Import Tab
After selecting the database:
- Click the Import tab located at the top of phpMyAdmin.
- The database import screen will appear.
This section allows you to upload and execute SQL files directly on the server.
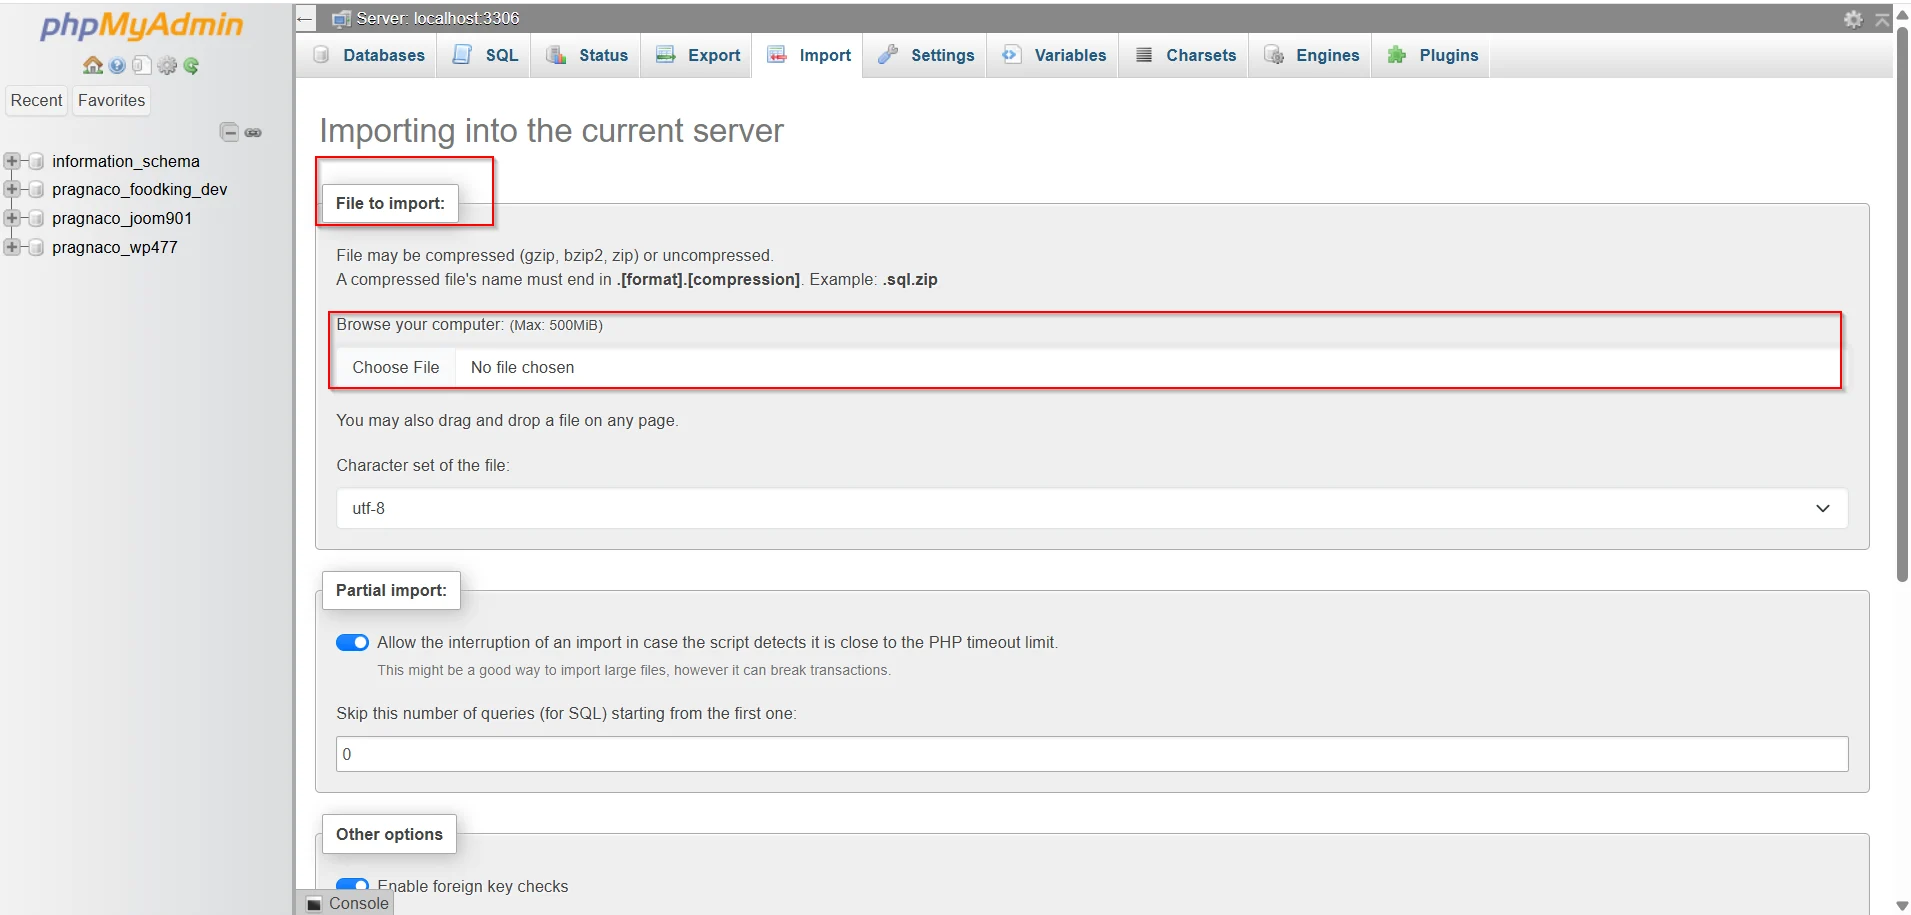
Step 8: Upload the Database Backup File
- Click Choose File.
- Browse your computer and select the database backup file.
- Supported formats typically include:
.sql.zip.gz
Ensure the file is not corrupted before uploading.
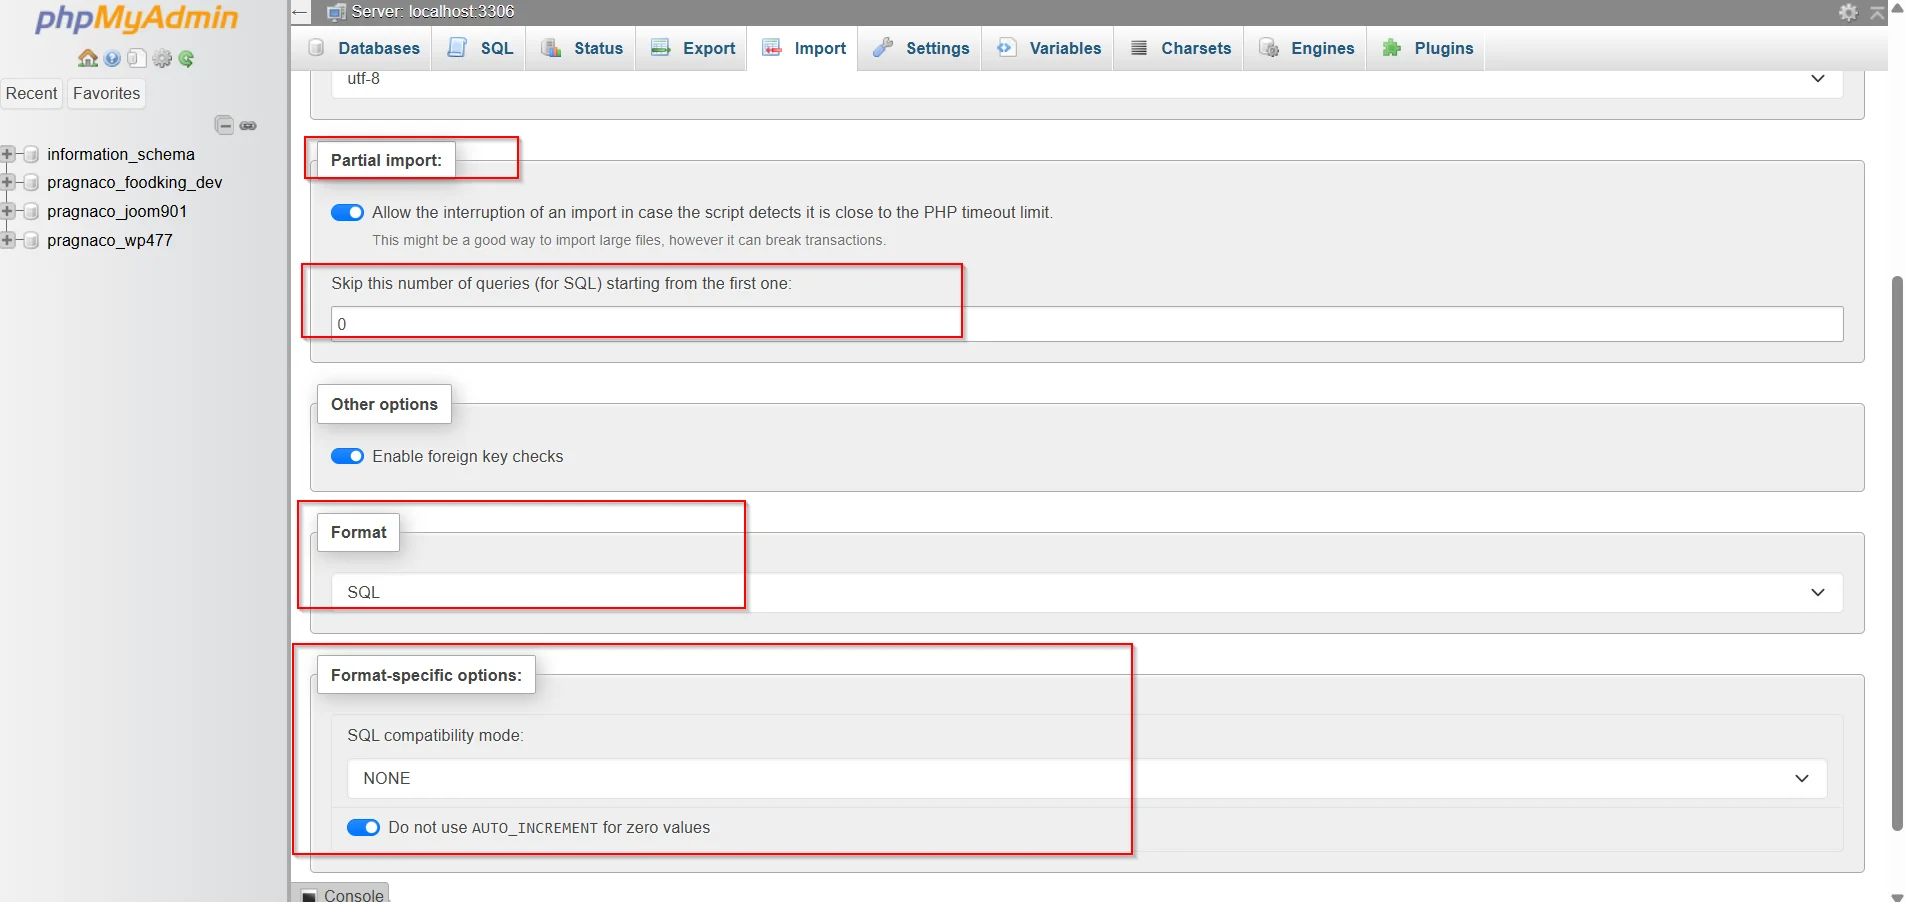
Step 9: Configure Import Settings
For most users, the default import settings are sufficient.
Verify the following:
- Format is set to SQL
- Character set remains unchanged unless required
- Partial import options remain at default settings
Advanced users may adjust these settings according to their specific requirements.
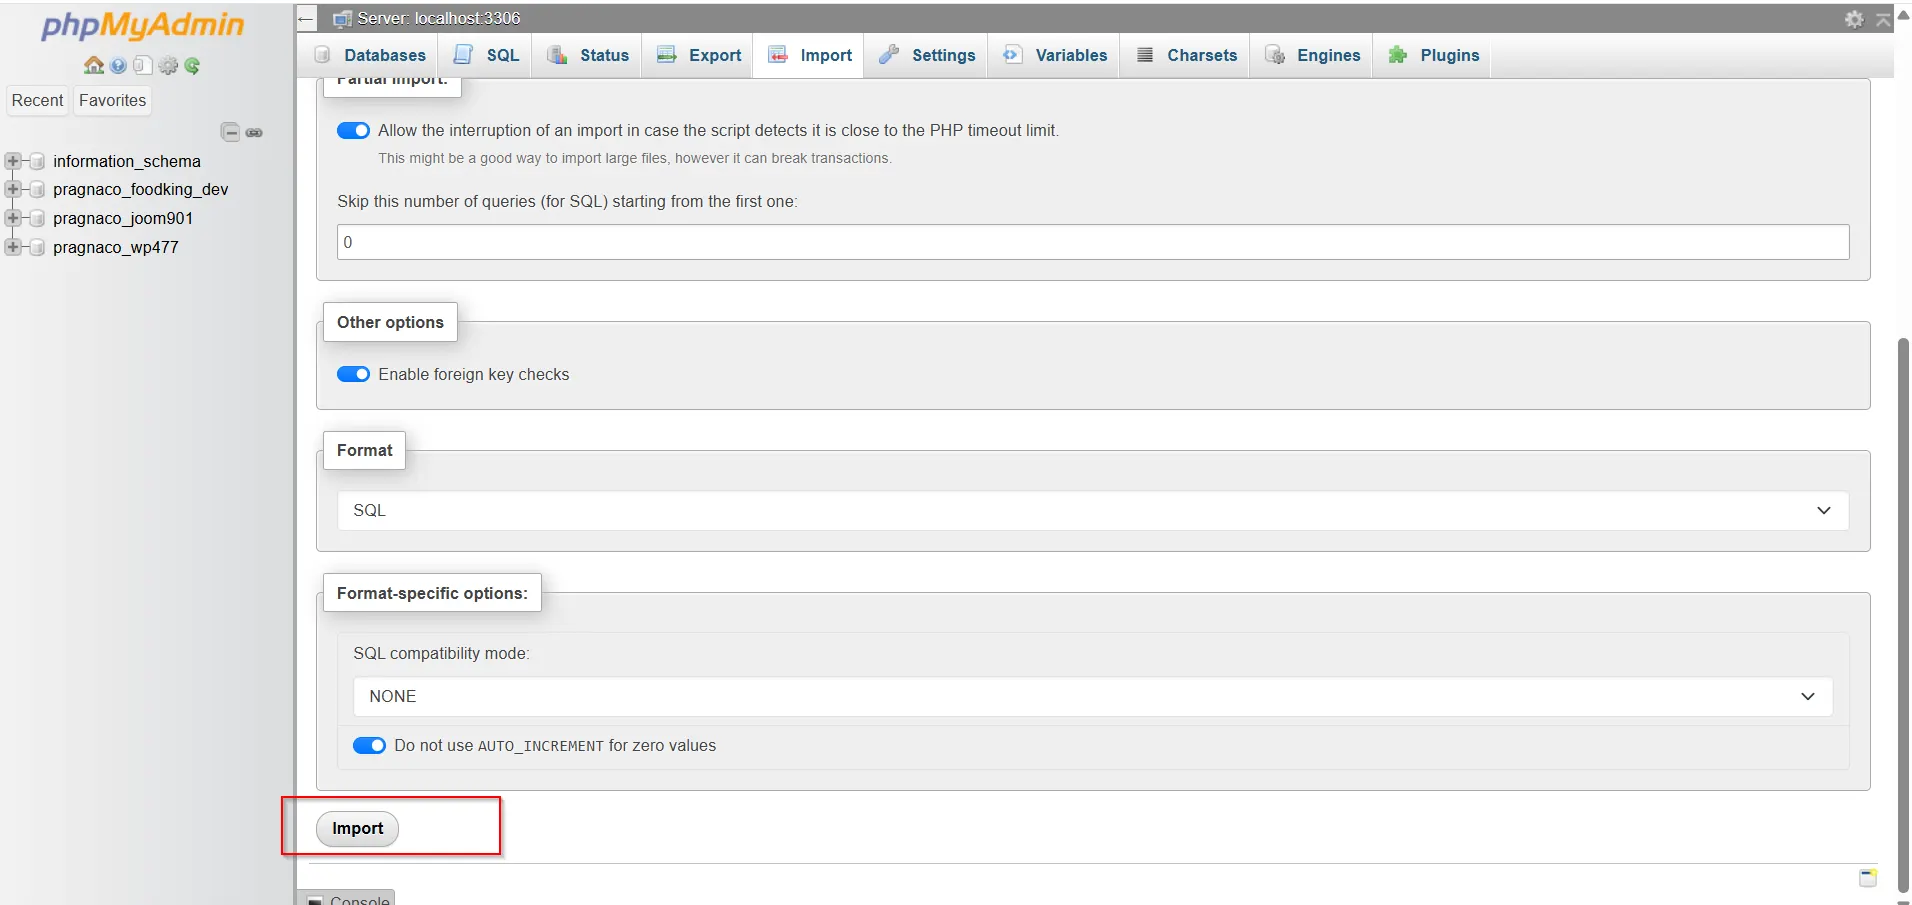
Step 10: Start the Import Process
- Scroll to the bottom of the page.
- Click the Import button.
phpMyAdmin will begin processing the database file.
The import duration depends on:
- Database size
- Server resources
- Hosting performance
- Network speed
Step 11: Verify Successful Import
After the process completes, phpMyAdmin will display a success message.
To verify the import:
- Browse the database tables.
- Check that all tables appear correctly.
- Review sample records if necessary.
- Test your website or application.
A successful import confirms that the database data has been restored correctly.
Benefits of Using phpMyAdmin for Database Imports
phpMyAdmin remains popular because it offers:
- Easy-to-use interface
- Browser-based access
- No command-line knowledge required
- Quick database management
- Compatibility with most hosting environments
For beginners and experienced administrators alike, it is one of the most efficient ways to manage MySQL databases.
Conclusion
Importing a MySQL database in cPanel is a straightforward process that allows website owners, developers, and administrators to restore backups, migrate websites, and manage data efficiently. Using phpMyAdmin, you can upload SQL files, recreate databases, and get websites running quickly without requiring advanced technical knowledge.
By following the steps outlined in this guide and implementing best practices such as maintaining backups and verifying permissions, you can ensure smooth and successful database imports every time. Whether you’re transferring a website to a new host or recovering lost data, mastering database imports is an important skill for effective website management.
Related Articles