Latest Updates
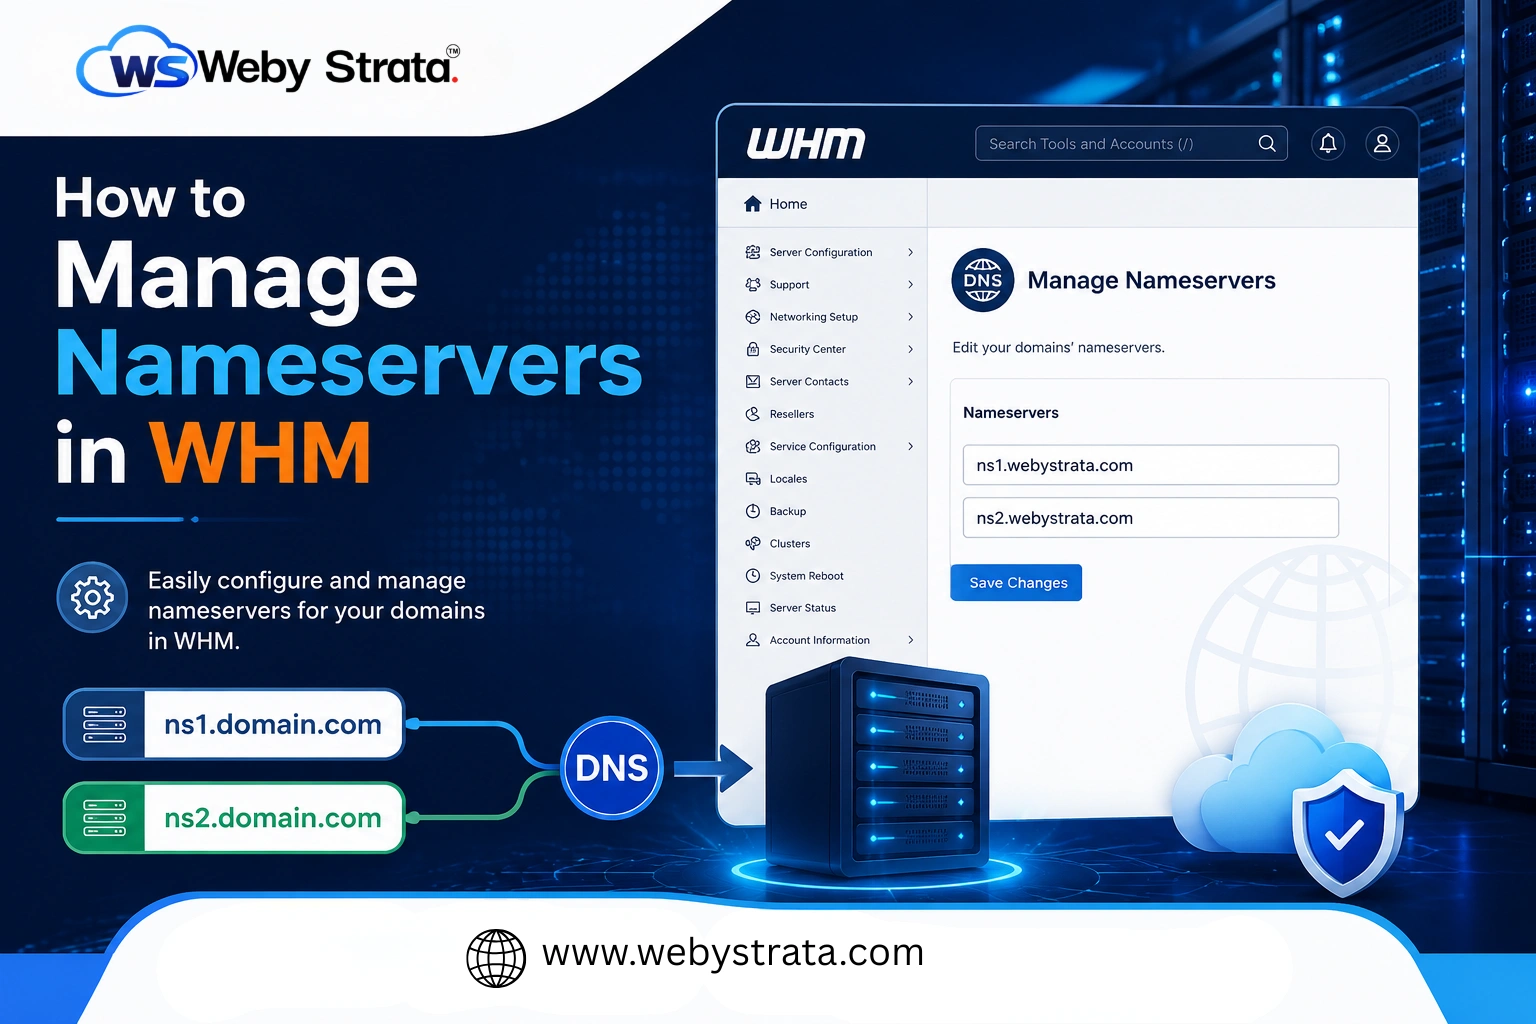
How to Manage Nameservers in WHM
How to Manage Nameservers in WHM Nameservers are one of the most important components of your hosting environment. They act as the bridge between a domain name and the server where a website is…
How to Manage Nameservers in WHM
Nameservers are one of the most important components of your hosting environment. They act as the bridge between a domain name and the server where a website is hosted. Whenever someone enters a domain name into their browser, nameservers help direct the request to the correct server, ensuring that websites, emails, and other online services function properly.
WHM (Web Host Manager) provides administrators and resellers with tools to manage nameserver settings for hosting accounts. Proper nameserver configuration helps maintain reliable DNS resolution, improves website accessibility, and ensures smooth email delivery.
In this guide, you’ll learn what nameservers are, why they are important, their benefits, and how to manage nameservers in WHM.
What Are Nameservers?
Nameservers are specialized DNS servers that translate domain names into IP addresses. They allow users to access websites using easy-to-remember domain names instead of numerical IP addresses.
For example:
- Domain: example.com
- IP Address: 192.0.2.1
When a visitor enters example.com into a browser, the nameserver directs the request to the server associated with that domain.
Without nameservers, users would need to remember numerical IP addresses for every website they visit.
Types of Nameservers
Default Hosting Provider Nameservers
Many hosting providers assign shared nameservers to customer accounts.
Examples:
- ns1.hostingprovider.com
- ns2.hostingprovider.com
These nameservers are maintained and managed by the hosting provider.
Private Nameservers
Private nameservers use your own domain name.
Examples:
- ns1.yourdomain.com
- ns2.yourdomain.com
Private nameservers provide branding benefits and create a more professional hosting environment.
Prerequisites
Before managing nameservers in WHM, ensure that:
- You have access to WHM.
- You own the domain used for private nameservers.
- DNS services are functioning properly.
- You know the server IP address.
- Your domain registrar supports custom nameserver registration.
How to Manage Nameservers in WHM
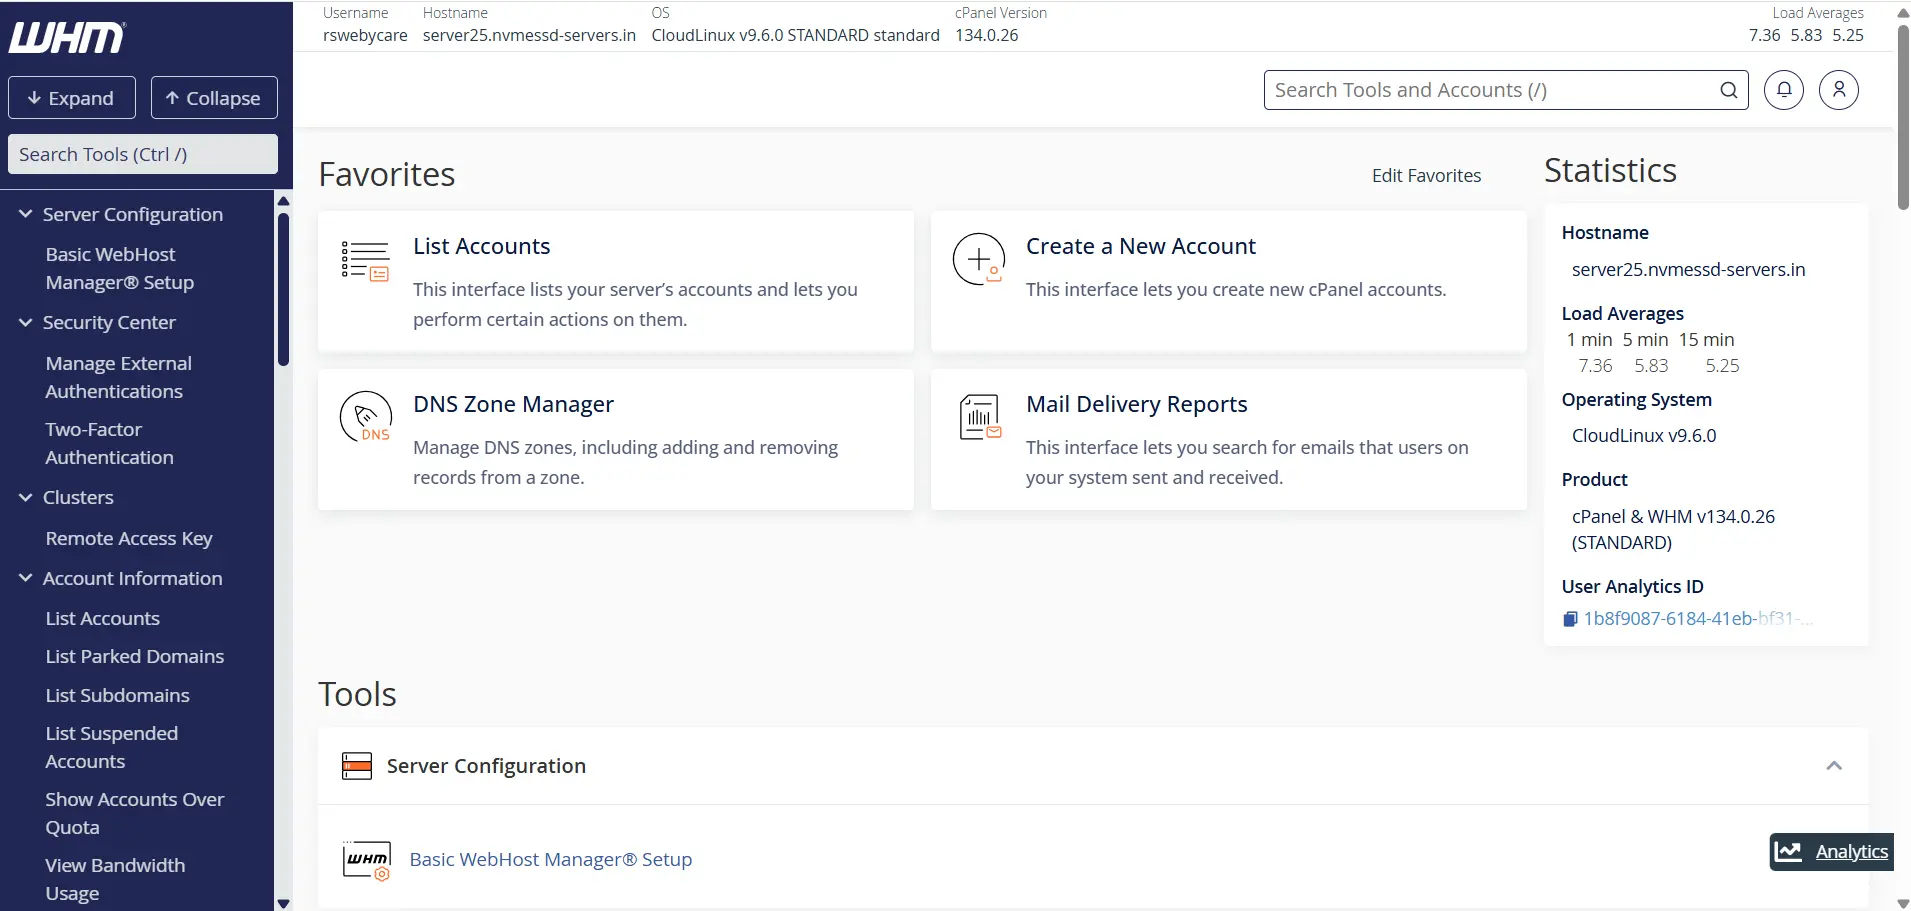
Step 1: Log in to WHM
Start by accessing your WHM dashboard.
Common WHM login URLs include:
Enter your WHM username and password to log in.
Once authenticated, you will be directed to the WHM home page where all server management tools are available.
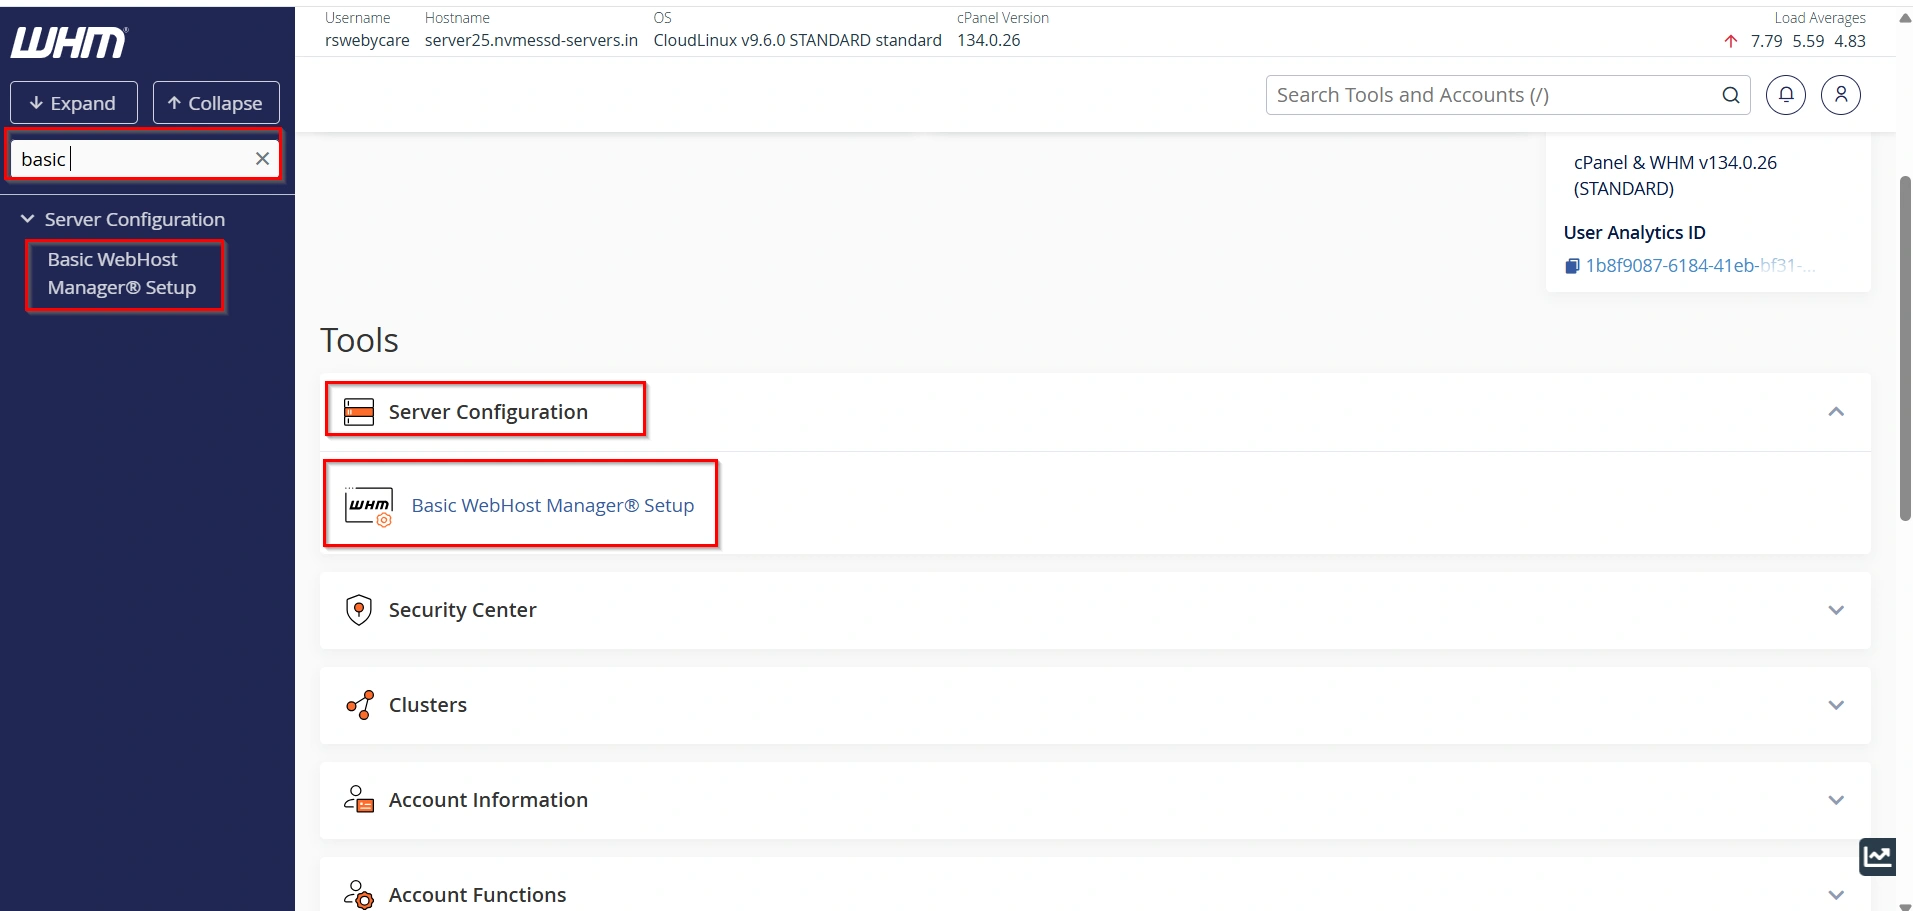
Step 2: Navigate to Basic WebHost Manager® Setup
In the WHM search bar, type:
Basic WebHost Manager Setup
Click Basic WebHost Manager® Setup under the Server Configuration section.
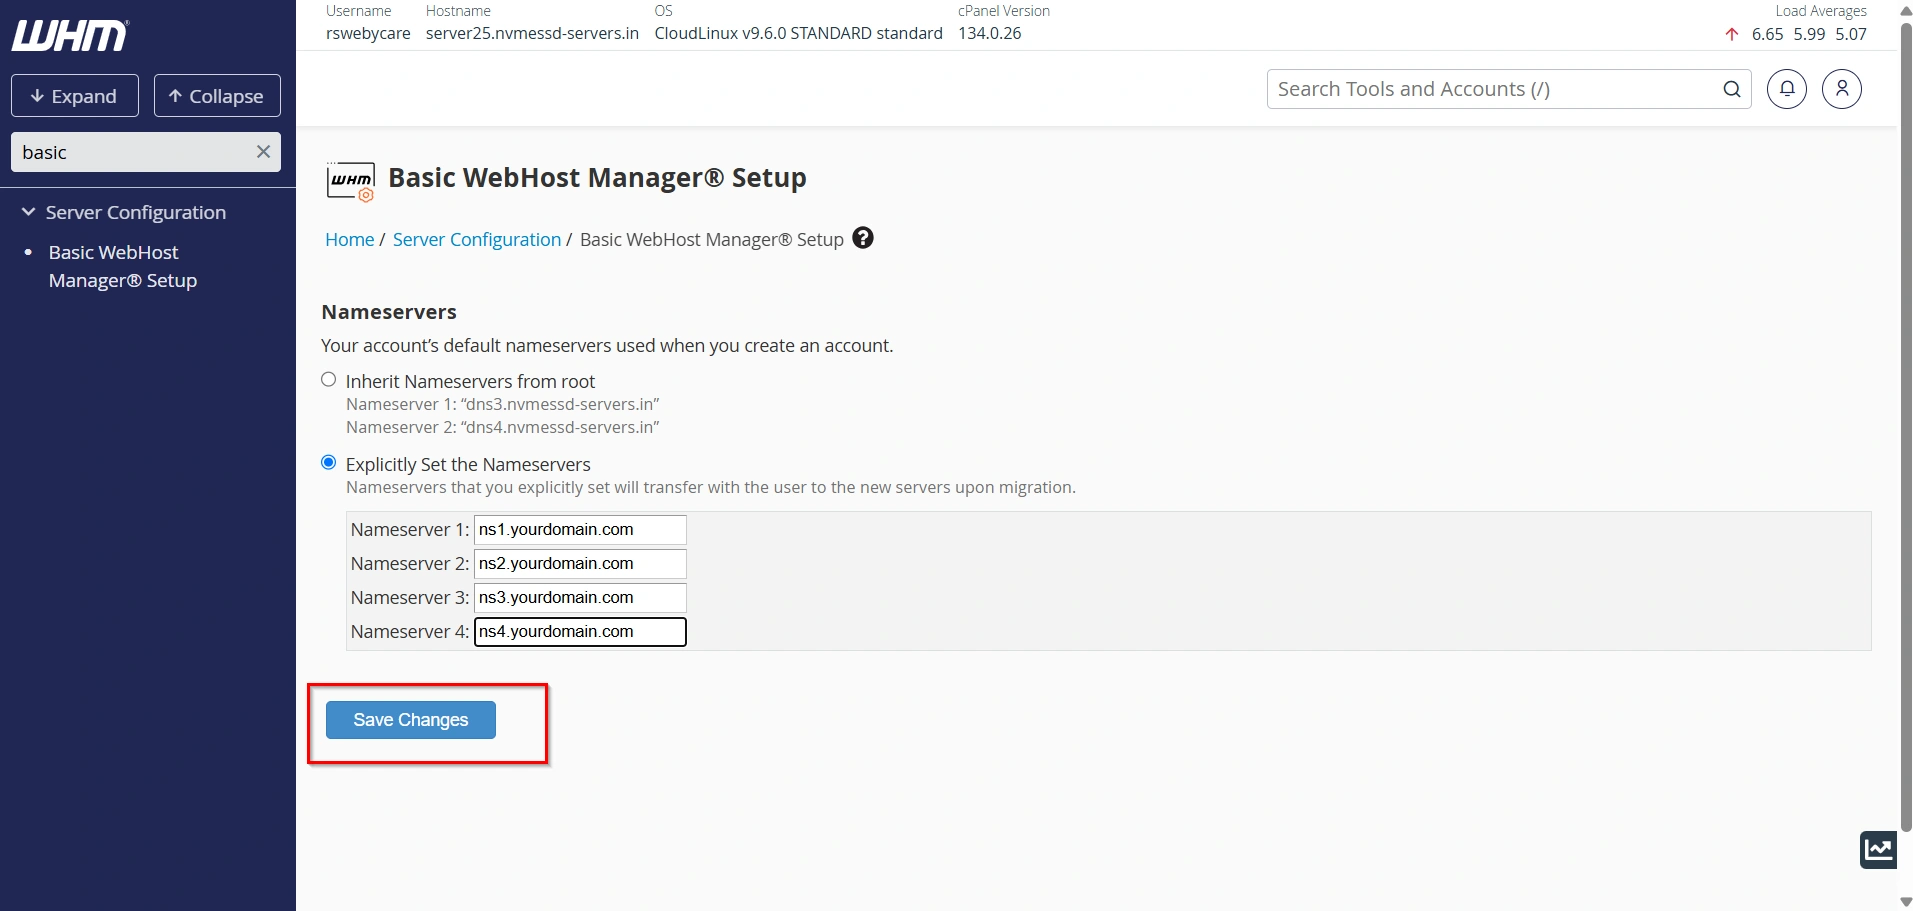
Step 3: Locate the Nameservers Section
Scroll down until you find the Nameservers section.
Here, you’ll see the default nameservers assigned to your reseller account.
Example:
- dns3.nvmessd-servers.in
- dns4.nvmessd-servers.in
These nameservers will automatically be assigned to newly created hosting accounts.
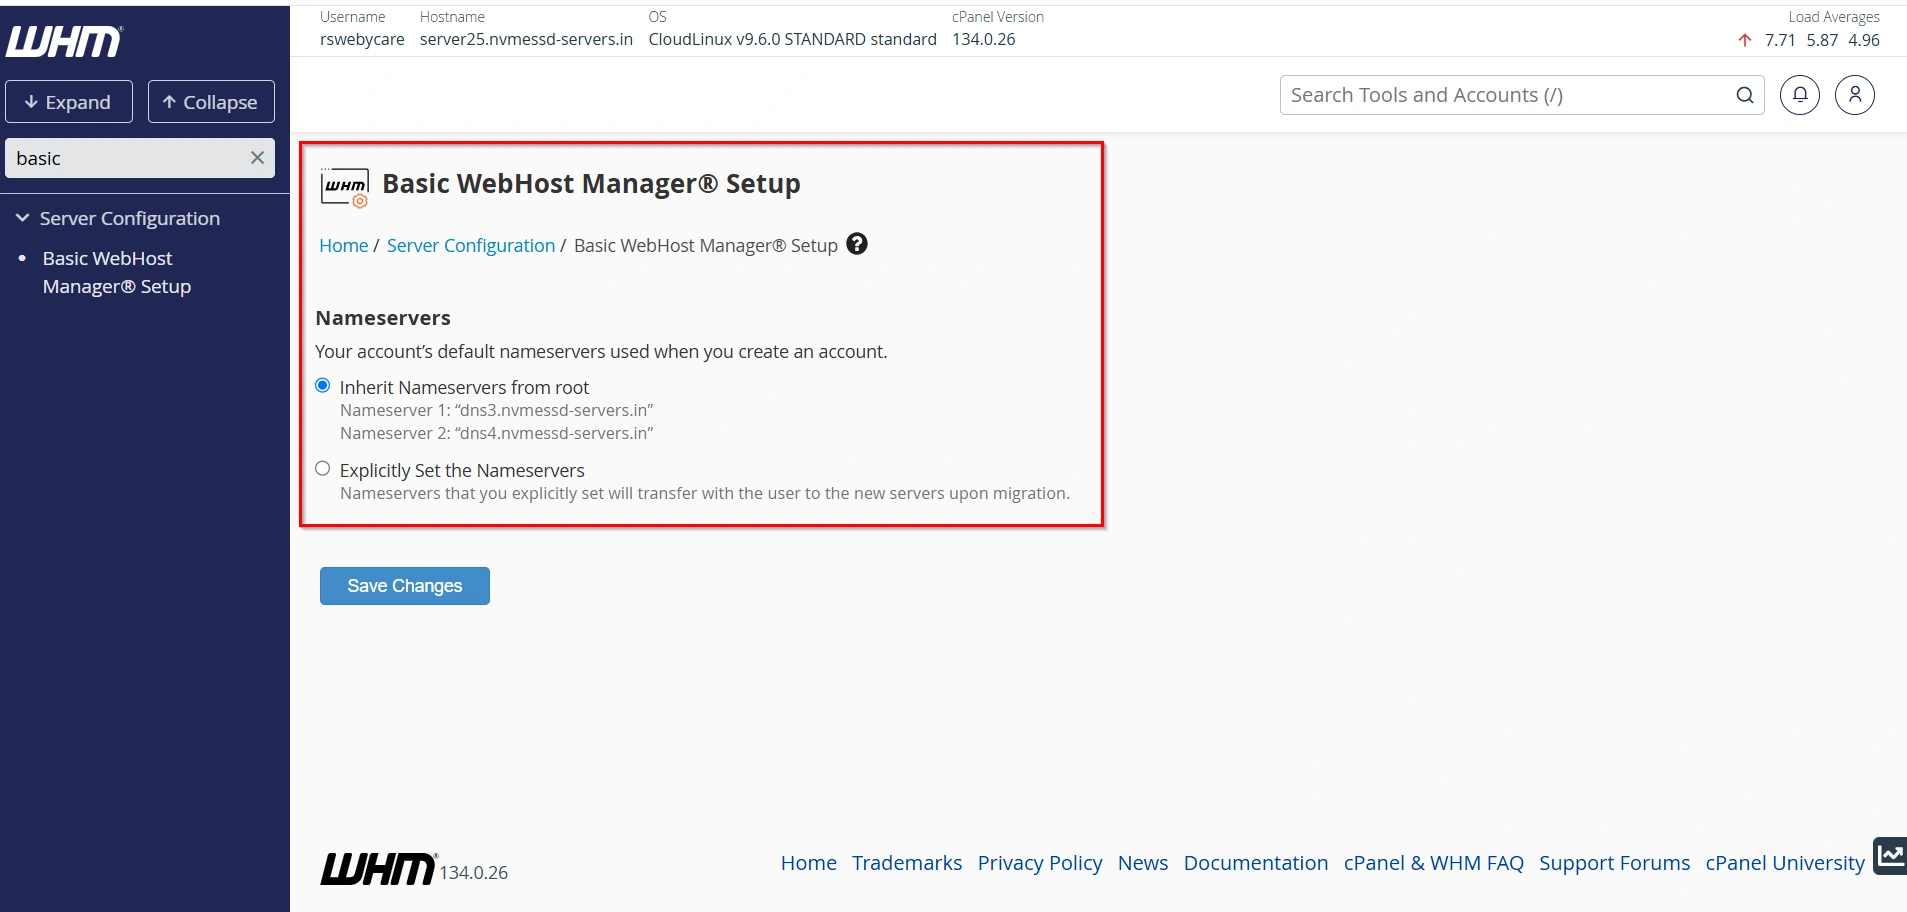
Step 4: Review the Current Nameserver Configuration
WHM provides two configuration options.
Inherit Nameservers from Root
When selected, your reseller account uses the nameservers configured by the server administrator.
This ensures consistency across the hosting server.
Explicitly Set the Nameservers
This option allows you to define custom nameservers for your reseller account.
These nameservers can be transferred if accounts are migrated to another server.
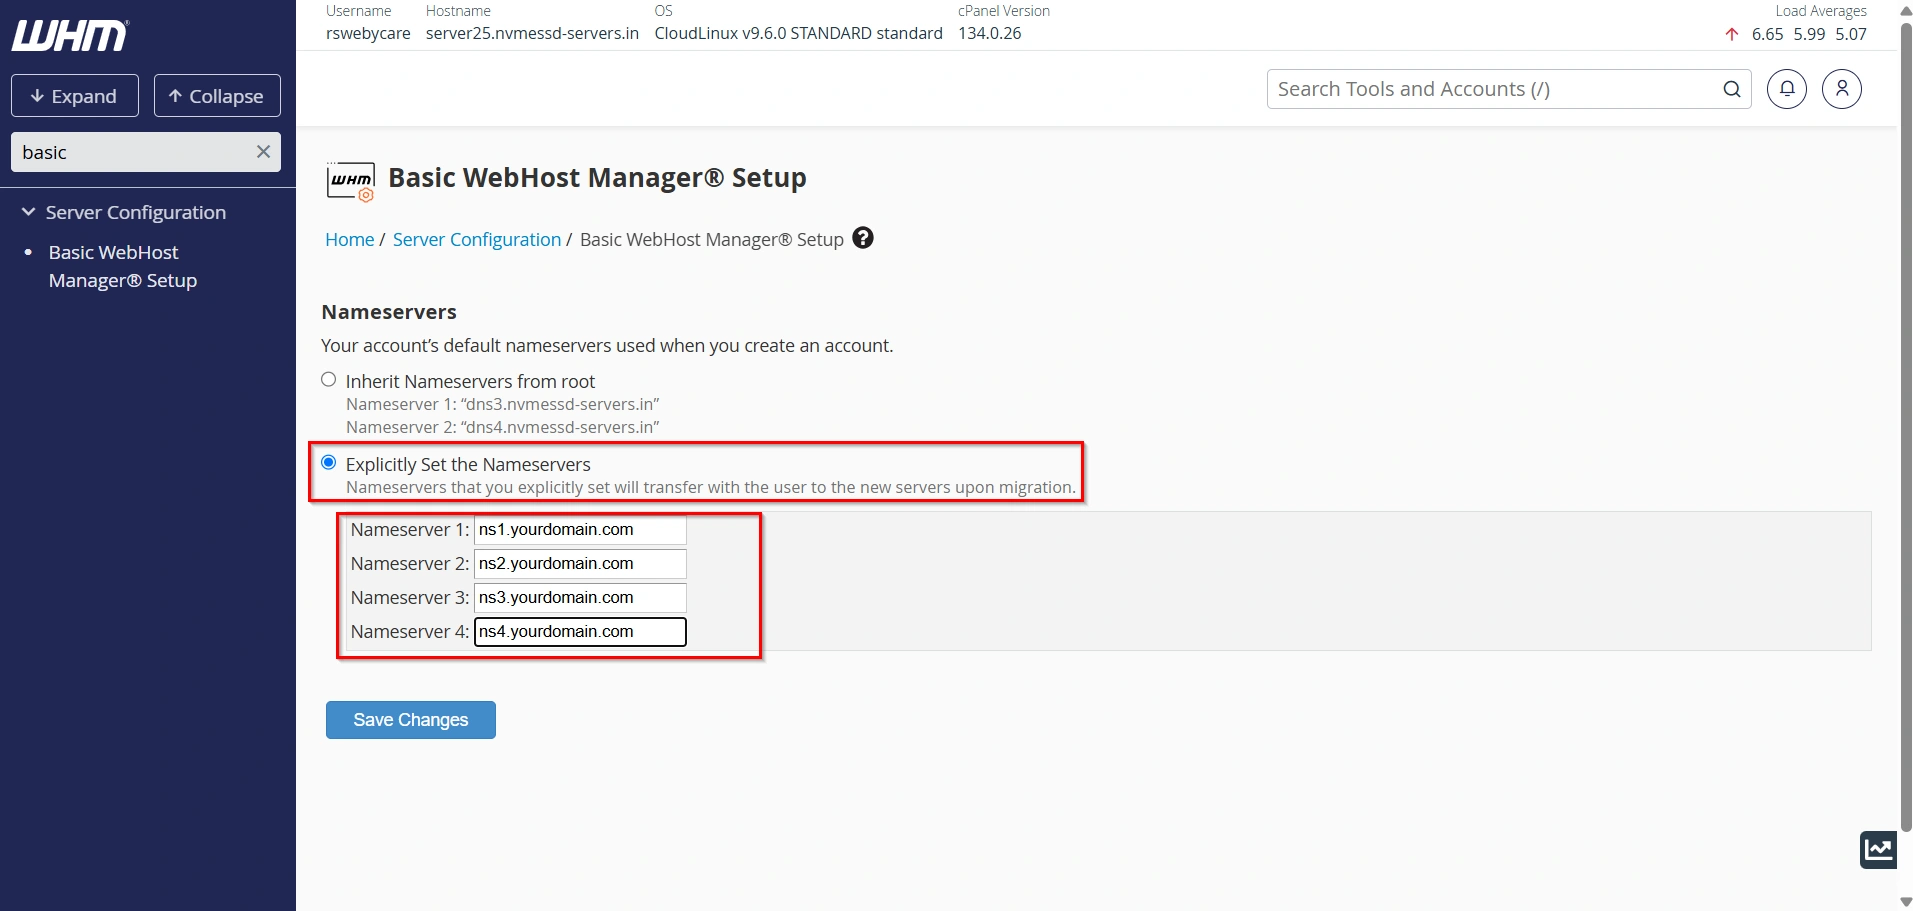
Step 5: Select the Desired Nameserver Option
Choose the configuration that best suits your hosting requirements.
- Select Inherit Nameservers from Root to use the server’s default nameservers.
- Select Explicitly Set the Nameservers to use custom nameservers.
Step 6: Enter Custom Nameservers (Optional)
If you choose custom nameservers, enter the nameserver values.
Example:
- ns1.yourdomain.com
- ns2.yourdomain.com
Before using custom nameservers, ensure they are properly registered with your domain registrar and point to valid server IP addresses.
Step 7: Save the Changes
After reviewing your configuration:
- Click Save Changes.
- Wait for WHM to update the settings.
The selected nameservers will now be used for future hosting accounts.
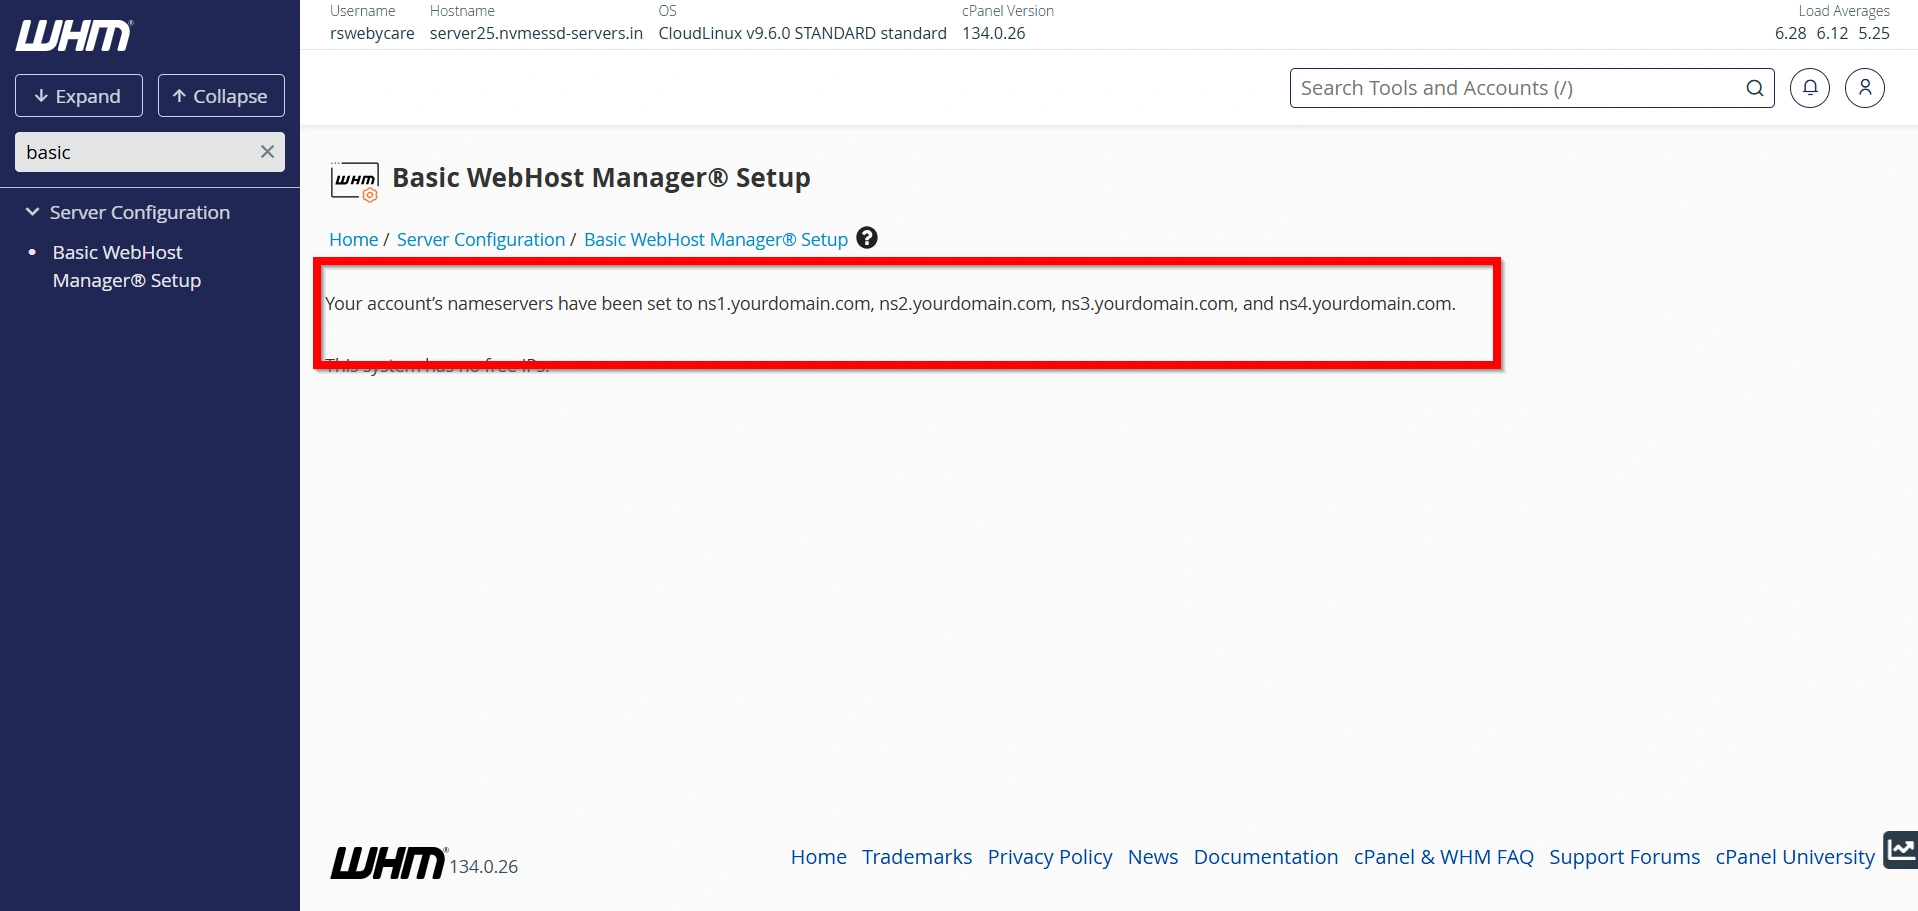
Step 8: Verify the Nameserver Configuration
Return to the Basic WebHost Manager® Setup page and confirm that the correct nameservers are displayed.
You can also verify the configuration through your registrar’s control panel or DNS lookup tools.
Step 9: Test Domain Resolution
After updating nameservers, allow time for DNS propagation.
DNS propagation may take:
- A few minutes
- Several hours
- Up to 48 hours in some cases
Once propagation is complete, verify that websites and email services are functioning correctly.
Nameservers vs DNS Records
Many users confuse nameservers with DNS records.
Nameservers
Nameservers determine which DNS servers are authoritative for a domain.
DNS Records
DNS records control specific services and functions.
Examples include:
- A Records
- MX Records
- CNAME Records
- TXT Records
Nameservers host and manage these DNS records.
Why Nameservers Are Important
Nameservers play a critical role in internet communication and website accessibility.
They are responsible for:
- Directing website traffic
- Routing email services
- Managing DNS records
- Supporting domain resolution
- Maintaining website accessibility
- Connecting domain names to server IP addresses
If nameservers are configured incorrectly, websites may become inaccessible, and email services may stop functioning properly.
Benefits of Using Private Nameservers
- Professional Branding
- Improved Customer Confidence
- Easier Reseller Hosting Management
- Greater Administrative Control
- Improved Website Availability
- Reliable Email Delivery
- Simplified DNS Management
- Better Brand Recognition
- Easier Account Provisioning
- Consistent Hosting Configuration
Conclusion
Managing nameservers in WHM is an essential task for hosting providers, resellers, and server administrators. Proper nameserver configuration ensures reliable website accessibility, accurate DNS resolution, and smooth email delivery. Whether you choose to use the server’s default nameservers or configure custom private nameservers, maintaining correct settings is vital for the stability of your hosting environment.
By understanding how nameservers work, reviewing your configuration regularly, and following DNS management best practices, you can provide a more reliable and professional hosting experience for your customers and websites.
For more WHM management tutorials and step-by-step guides,
visit our WHM knowledge base: www.webystrata.com/blog/category/whm-panel/
Related Articles