Latest Updates
How to Manage Users in WordPress
How to Manage Users in WordPress WordPress is one of the most popular content management systems (CMS) in the world, powering millions of websites. Whether you're running a personal blog, business website, online store,…
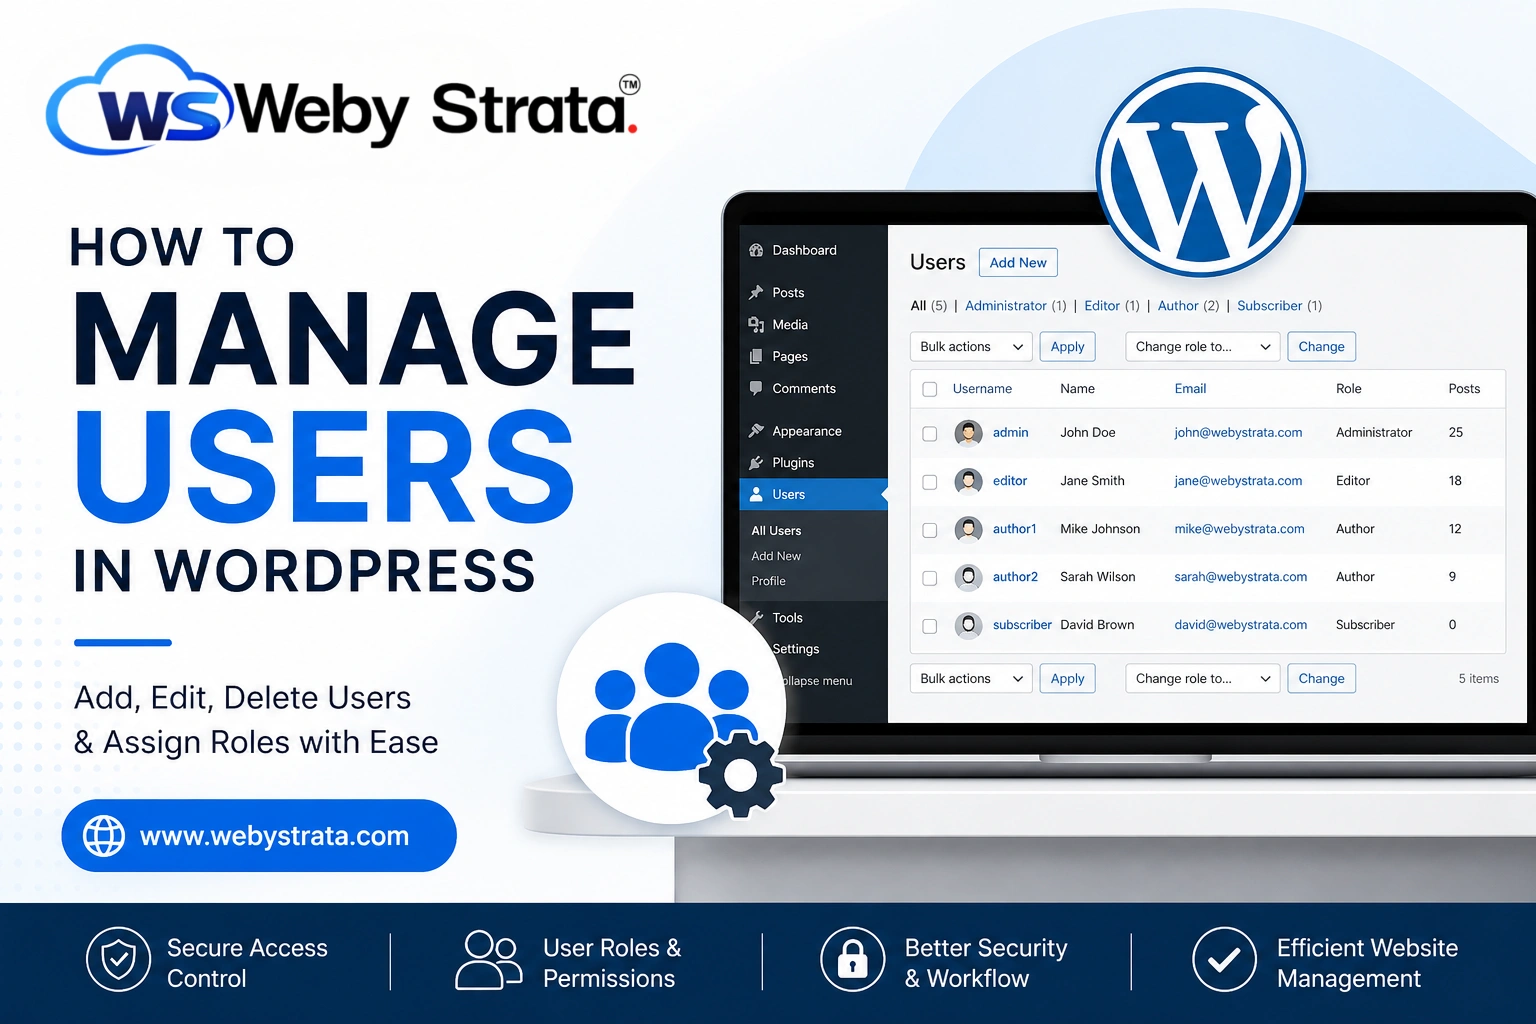
How to Manage Users in WordPress
WordPress is one of the most popular content management systems (CMS) in the world, powering millions of websites. Whether you’re running a personal blog, business website, online store, or membership portal, managing users effectively is essential for maintaining website security, workflow efficiency, and content quality.
WordPress includes a powerful user management system that allows administrators to control who can access the website and what actions they can perform. By understanding user roles and permissions, you can ensure that every team member has the right level of access without compromising your site’s security.
In this guide, we’ll walk through everything you need to know about managing users in WordPress, including adding users, editing profiles, assigning roles, resetting passwords, and removing accounts.
Why User Management Matters in WordPress
Proper user management helps website owners:
- Control access to sensitive website areas.
- Improve website security.
- Assign responsibilities to team members.
- Prevent accidental changes to important settings.
- Manage content creation workflows efficiently.
- Track user activities and accountability.
For websites with multiple contributors, editors, or administrators, user management is a critical part of daily operations.
Understanding WordPress User Roles
Before managing users, it’s important to understand the default user roles available in WordPress.
1. Administrator
The Administrator role has complete control over the website.
Administrators can:
- Install and remove plugins.
- Change themes.
- Manage all website settings.
- Add, edit, and delete users.
- Publish and manage all content.
Since administrators have unrestricted access, this role should only be assigned to trusted individuals.
2. Editor
Editors can manage website content but cannot modify system settings.
Editors can:
- Create, edit, publish, and delete posts.
- Manage content created by other users.
- Moderate comments.
- Manage categories and tags.
This role is ideal for content managers and editorial staff.
3. Author
Authors can create and publish their own content.
They can:
- Write posts.
- Publish posts.
- Edit their own content.
- Upload media files.
Authors cannot edit posts created by other users.
4. Contributor
Contributors can create content but cannot publish it.
Their permissions include:
- Writing posts.
- Editing their own drafts.
- Submitting content for review.
This role is commonly used for guest writers and freelance contributors.
5. Subscriber
Subscribers have the lowest level of access.
They can:
- Log into the website.
- Manage their profile.
- Access restricted content if applicable.
Subscribers are commonly used on membership websites and online communities.
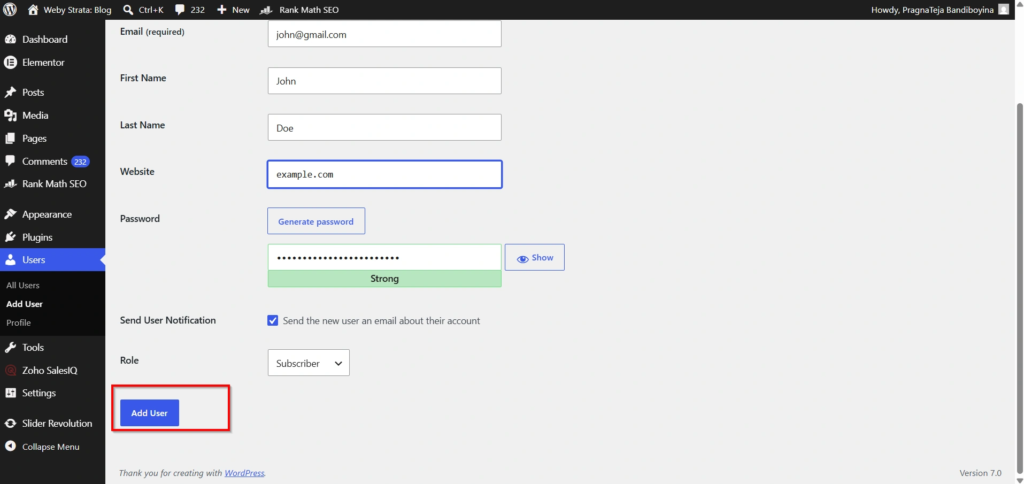
How to Add a New User in WordPress
Adding new users is simple.
Step 1: Log In to WordPress
Access your WordPress dashboard using an administrator account.
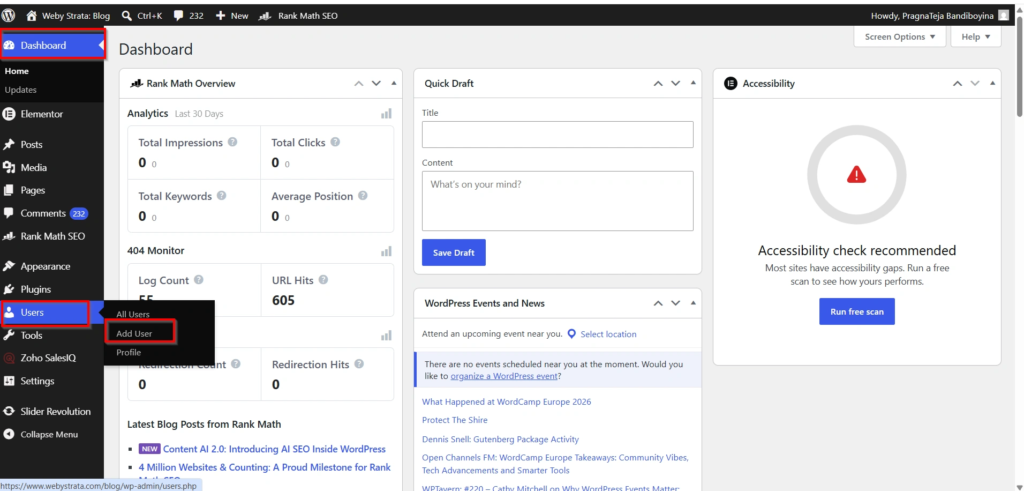
Step 2: Navigate to Add New User
From the WordPress Dashboard, go to:
Users → Add New
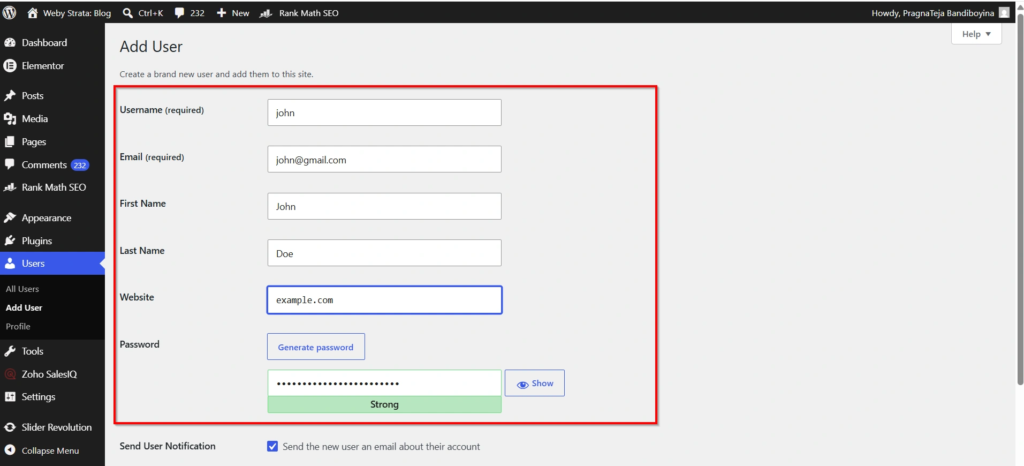
Step 3: Enter User Details
Fill in:
- Username
- Email Address
- First Name
- Last Name
- Website (optional)
- Password
Step 4: Assign a Role
Choose the appropriate role from the dropdown menu.
For example:
- Administrator
- Editor
- Author
- Contributor
- Subscriber
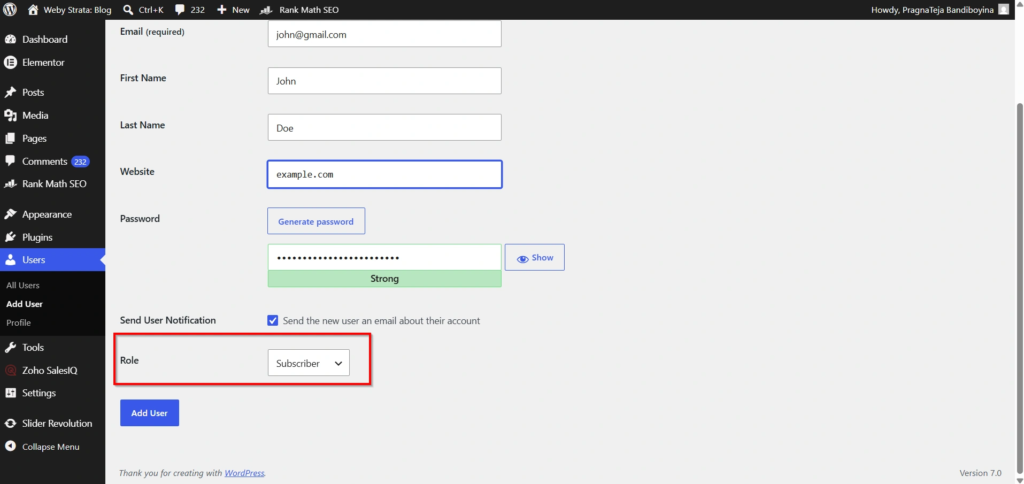
Step 5: Click Add New User
The new user account will be created immediately.
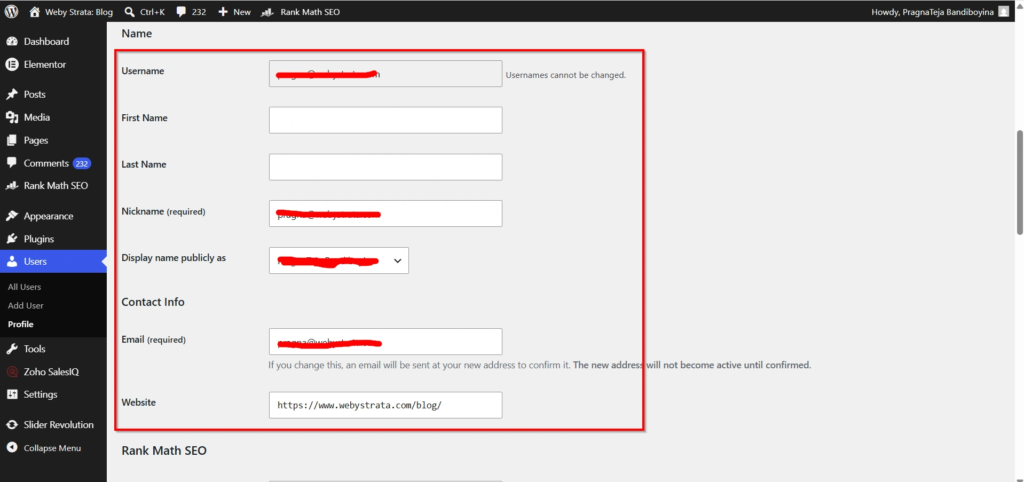
How to Edit User Information
Sometimes you may need to update user details.
Step 1: Log In to WordPress
Access your WordPress dashboard using an administrator account.
Step 2: Go to All Users
Navigate to:
Users → All Users

Step 3: Select the User
Hover over the username and click Edit.

Step 4: Modify Information
You can update:
- Display name
- Email address
- Website URL
- Biography
- Password
- User role
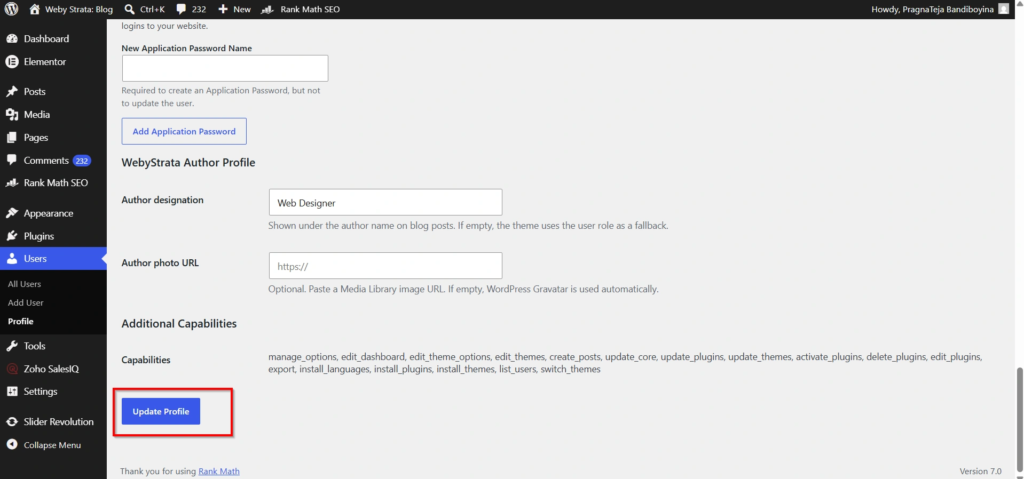
Step 5: Save Changes
Click Update Profile.
The modifications will take effect immediately.
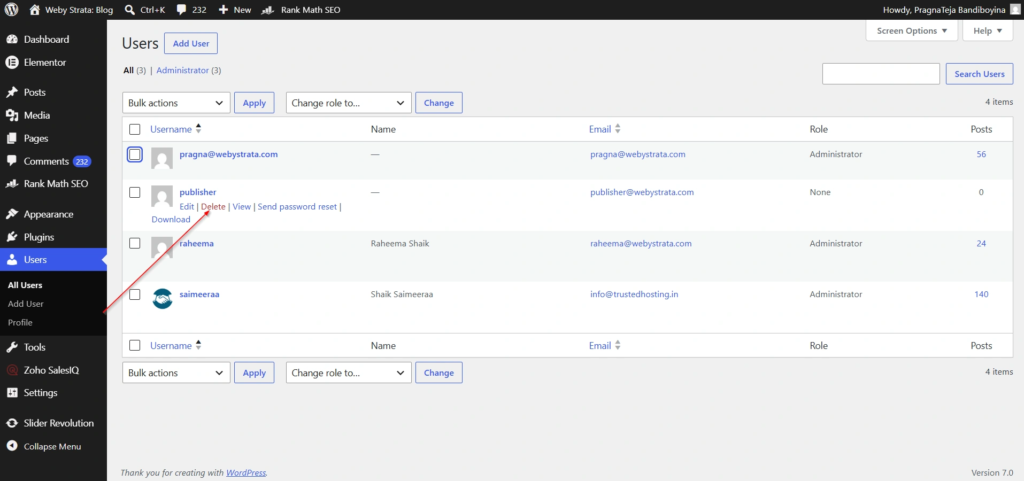
How to Delete a User
Removing inactive or unnecessary accounts improves website security.
Step 1: Log In to WordPress
Access your WordPress dashboard using an administrator account.
Step 2: Open User Management
Navigate to:
Users → All Users

Step 3: Select the User
Hover over the username and click Delete.
Step 4: Manage Existing Content
WordPress will ask whether you want to:
- Delete all content associated with the user.
- Attribute content to another user.
Choose the most appropriate option.
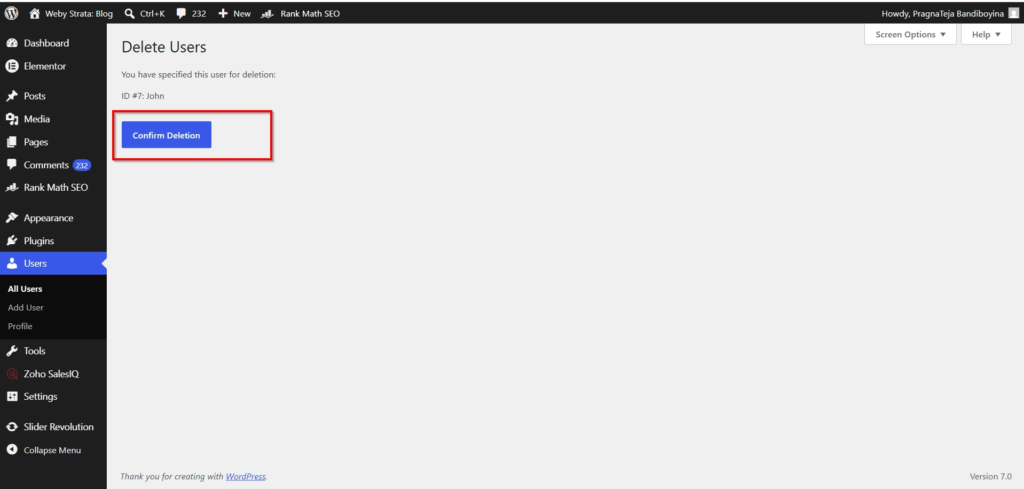
Step 5: Confirm Deletion
Click Confirm Deletion.
The user account will be permanently removed.
Benefits of Proper User Management
Effective user management provides several advantages:
- Enhanced website security
- Better content workflow management
- Reduced risk of accidental changes
- Improved accountability among team members
- Easier administration of large websites
- Better user experience for contributors and editors
Conclusion
Managing users in WordPress is a fundamental task for website administrators. The built-in user management system allows you to add new users, assign roles, update permissions, reset passwords, and remove accounts when necessary.
By understanding WordPress user roles and following security best practices, you can maintain a secure, organized, and efficient website environment. Whether you’re managing a small blog or a large business website, proper user management helps ensure smooth operations and protects your valuable website resources.
For more WordPress tutorials and step-by-step guides,
visit our WordPress knowledge base: www.webystrata.com/blog/category/wordpress/
Related Articles