Latest Updates
How to Set Up Client Management in WHMCS
How to Set Up Client Management in WHMCS Managing clients efficiently is one of the most important aspects of running a successful web hosting or online service business. WHMCS provides a powerful Client Management…
How to Set Up Client Management in WHMCS
Managing clients efficiently is one of the most important aspects of running a successful web hosting or online service business. WHMCS provides a powerful Client Management system that allows administrators to organize customer information, manage services, monitor invoices, reset passwords, communicate with clients, and much more—all from a centralized dashboard.
In this guide, you’ll learn how to Set Up Client Management in WHMCS, understand its key features, and discover best practices for managing customer accounts efficiently.
What Is Client Management in WHMCS?
Client Management in WHMCS is a built-in feature that helps businesses store, organize, and manage customer information from the WHMCS admin area. Every client has a dedicated profile containing personal information, services, invoices, domains, support tickets, transactions, and activity logs.
When you Set Up Client Management in WHMCS, you gain complete control over customer records, allowing you to deliver better support and streamline daily operations.
Prerequisites
Before you Set Up Client Management in WHMCS, ensure you have:
- A working WHMCS installation
- Administrator access
- Configured products and services
- Payment gateways enabled
- Email templates configured
- Basic understanding of the WHMCS admin dashboard
Step 1: Log In to the WHMCS Admin Area
Open your WHMCS Admin URL and log in using your administrator credentials.
Example:
https://yourdomain.com/admin
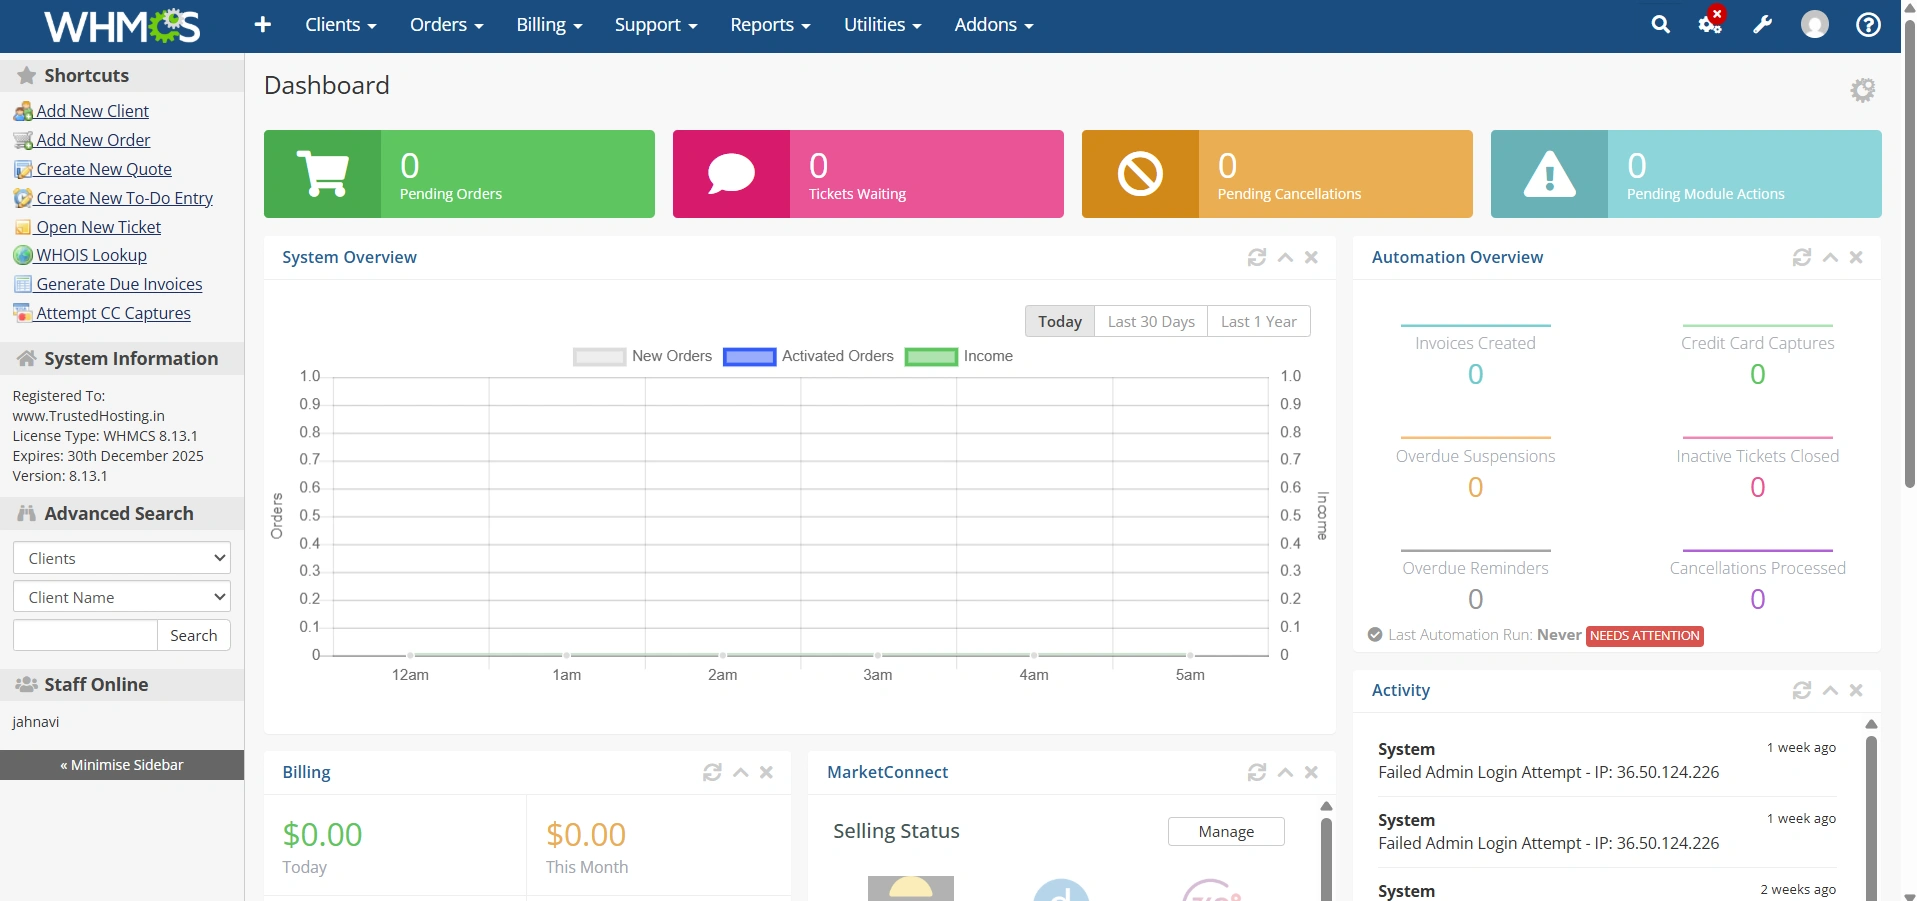
After logging in, you’ll see the Admin Dashboard.
Step 2: Add a New Client
To create a client manually:
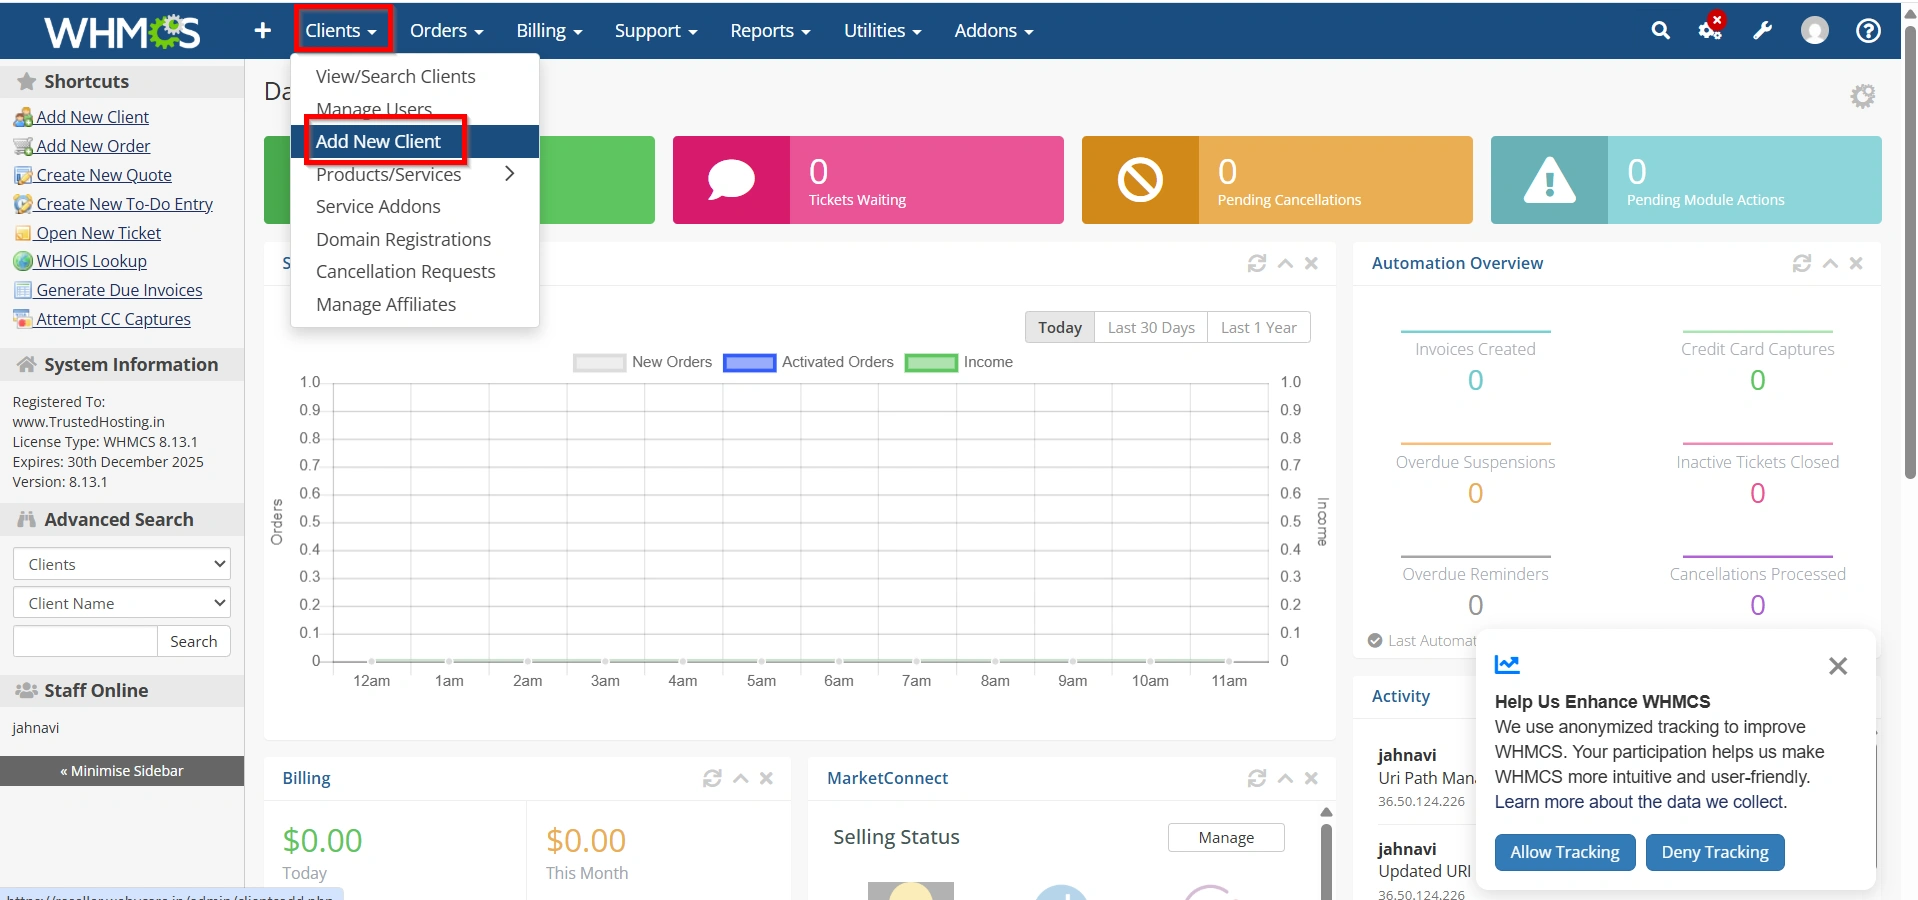
From the Top menu:
Clients → Add New Client
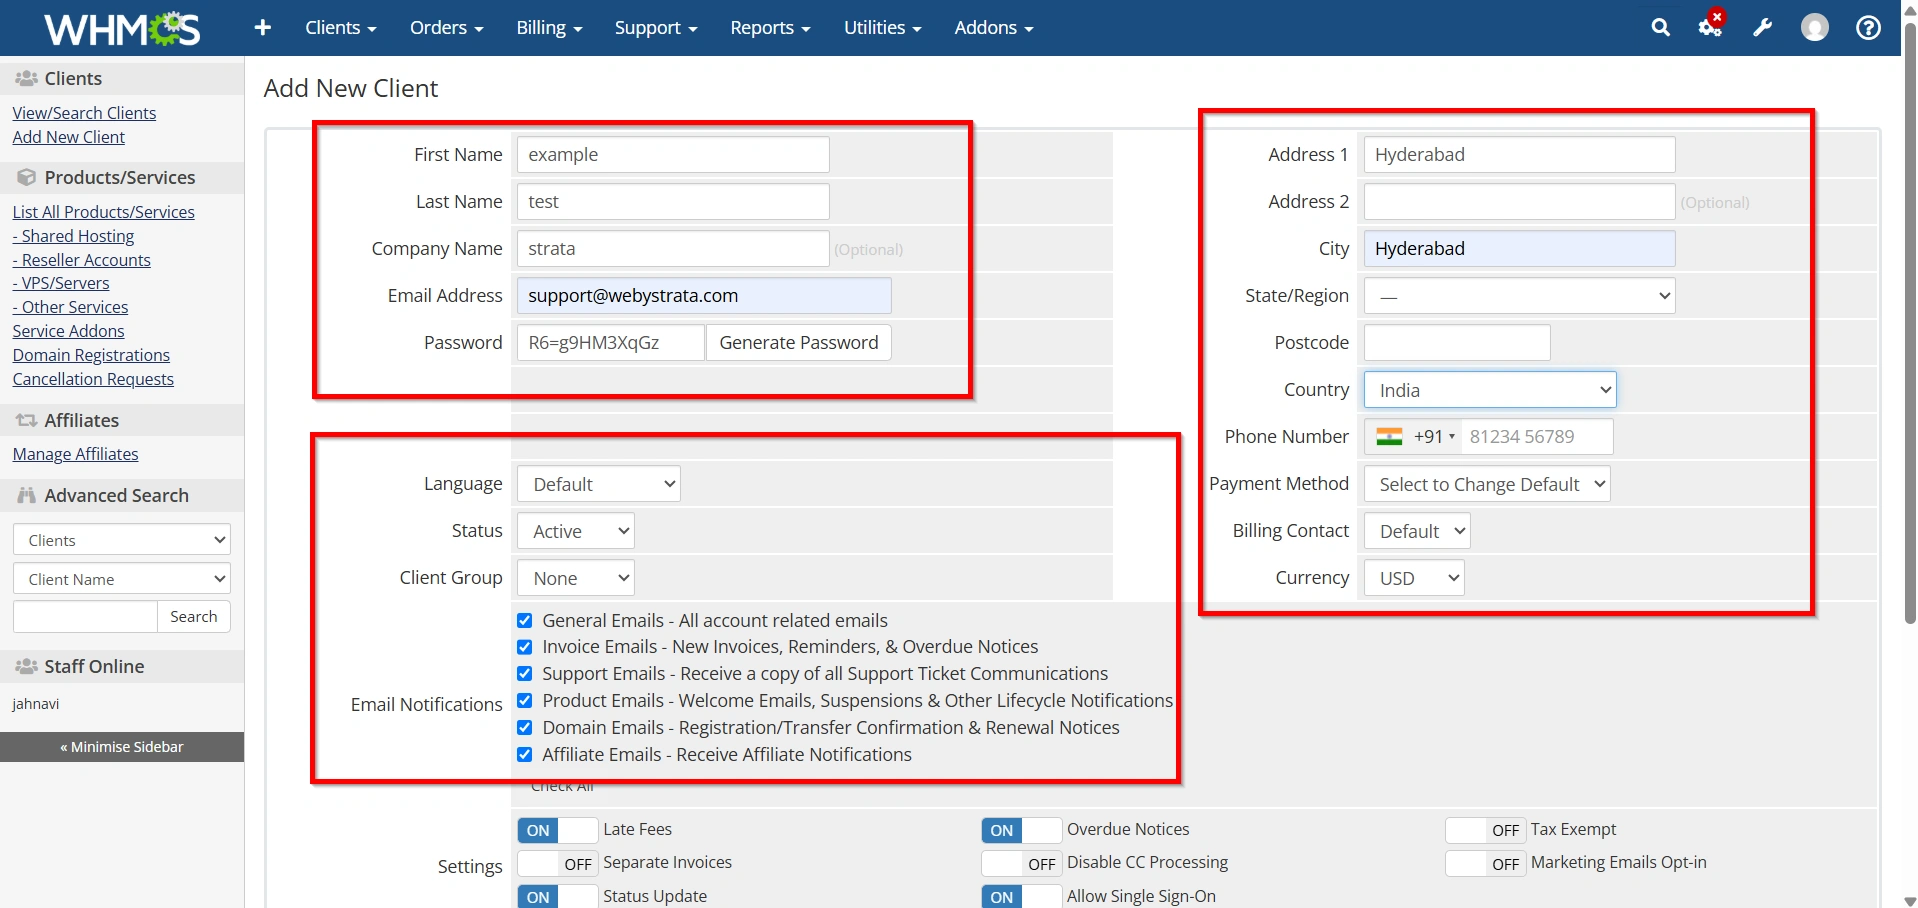
- Enter the client’s:
- First Name
- Last Name
- Company Name (optional)
- Email Address
- Phone Number
- Address
- City
- State
- ZIP Code
- Country
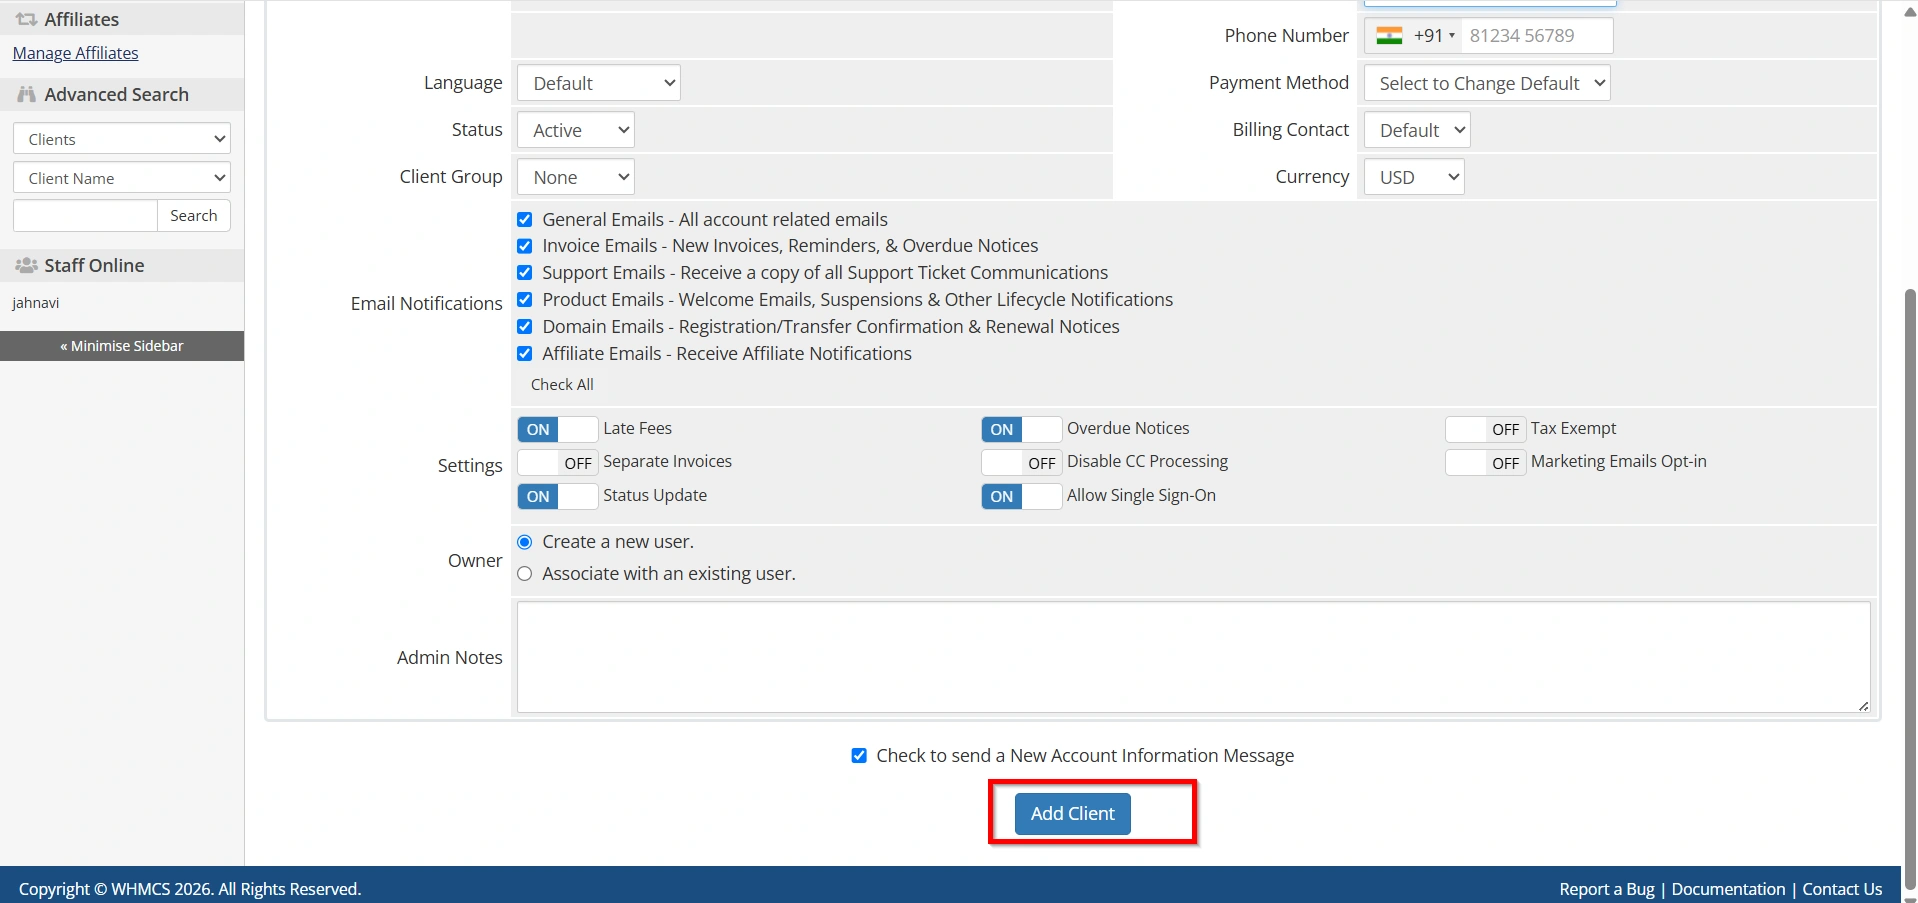
- Choose the preferred language.
- Configure account security settings.
4. Click Add Client.
The new customer account is now available in your client database.
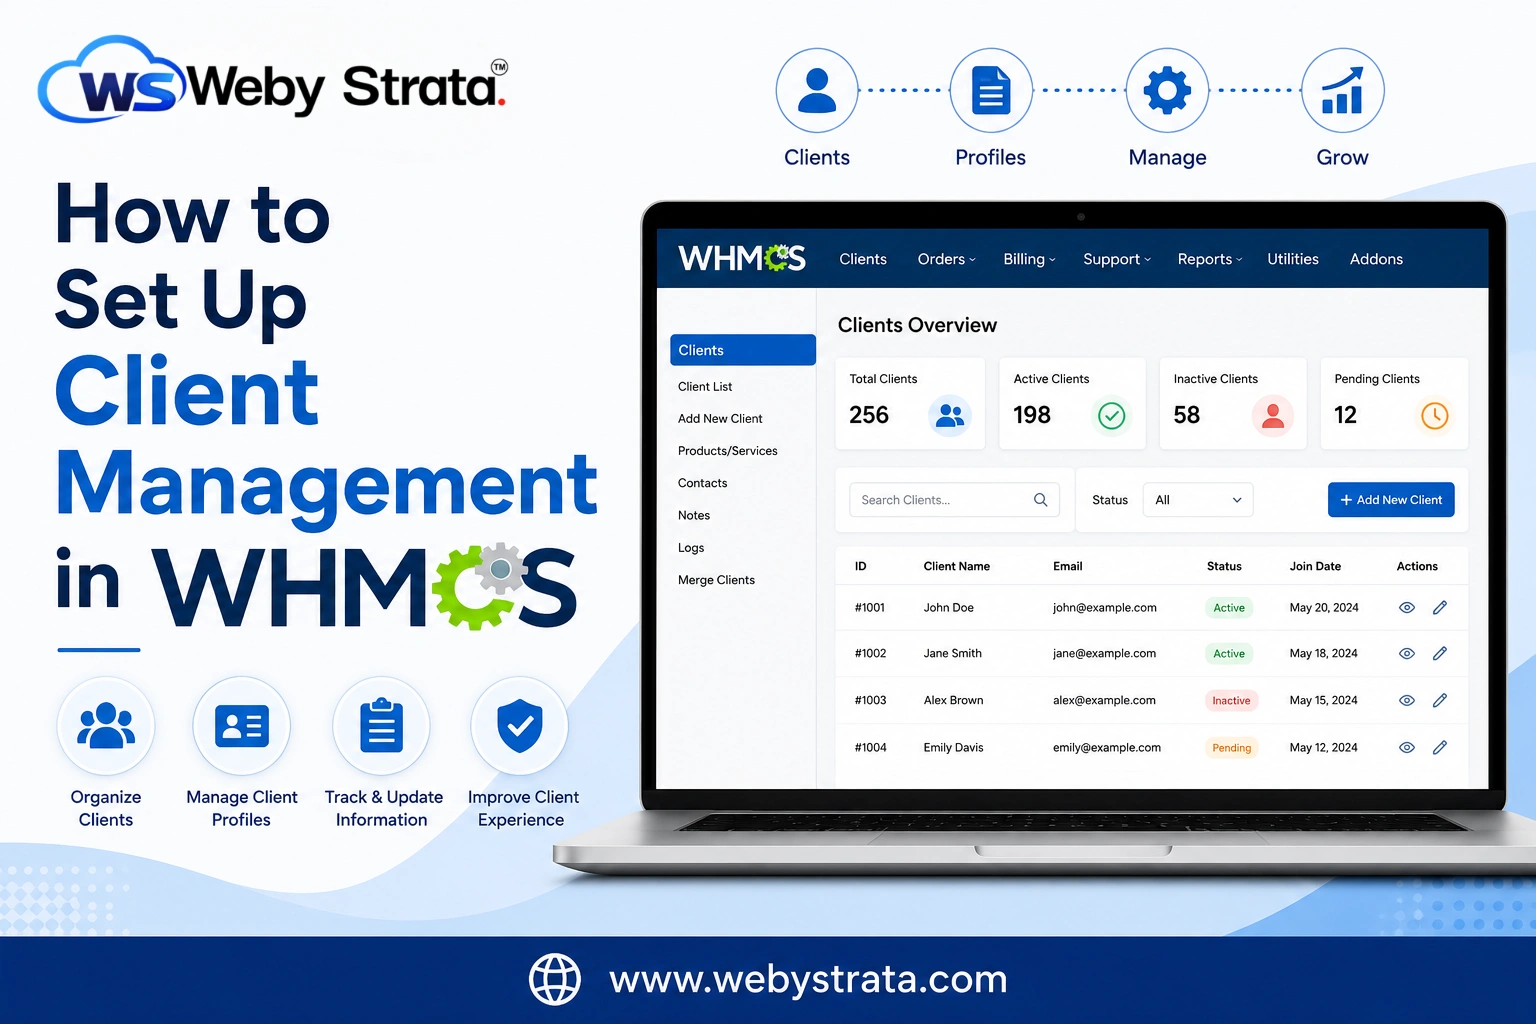
Step 3: Open the Clients Section
From the Top menu:
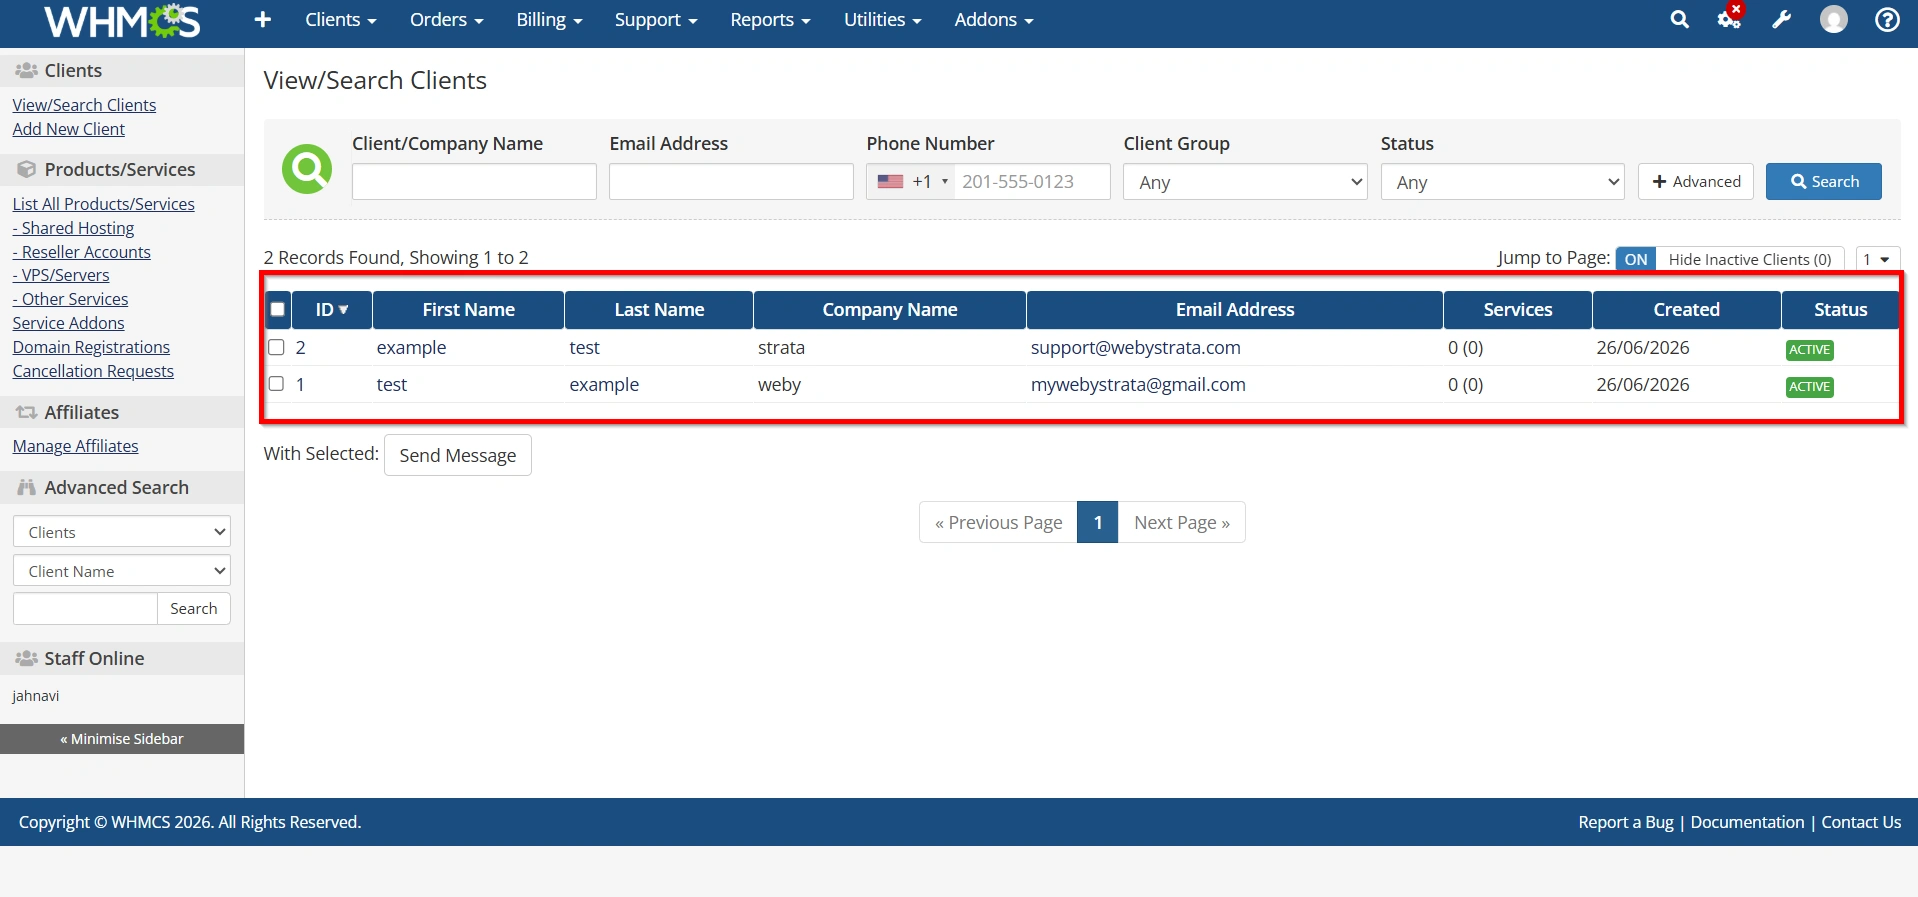
Clients → View/Search Clients
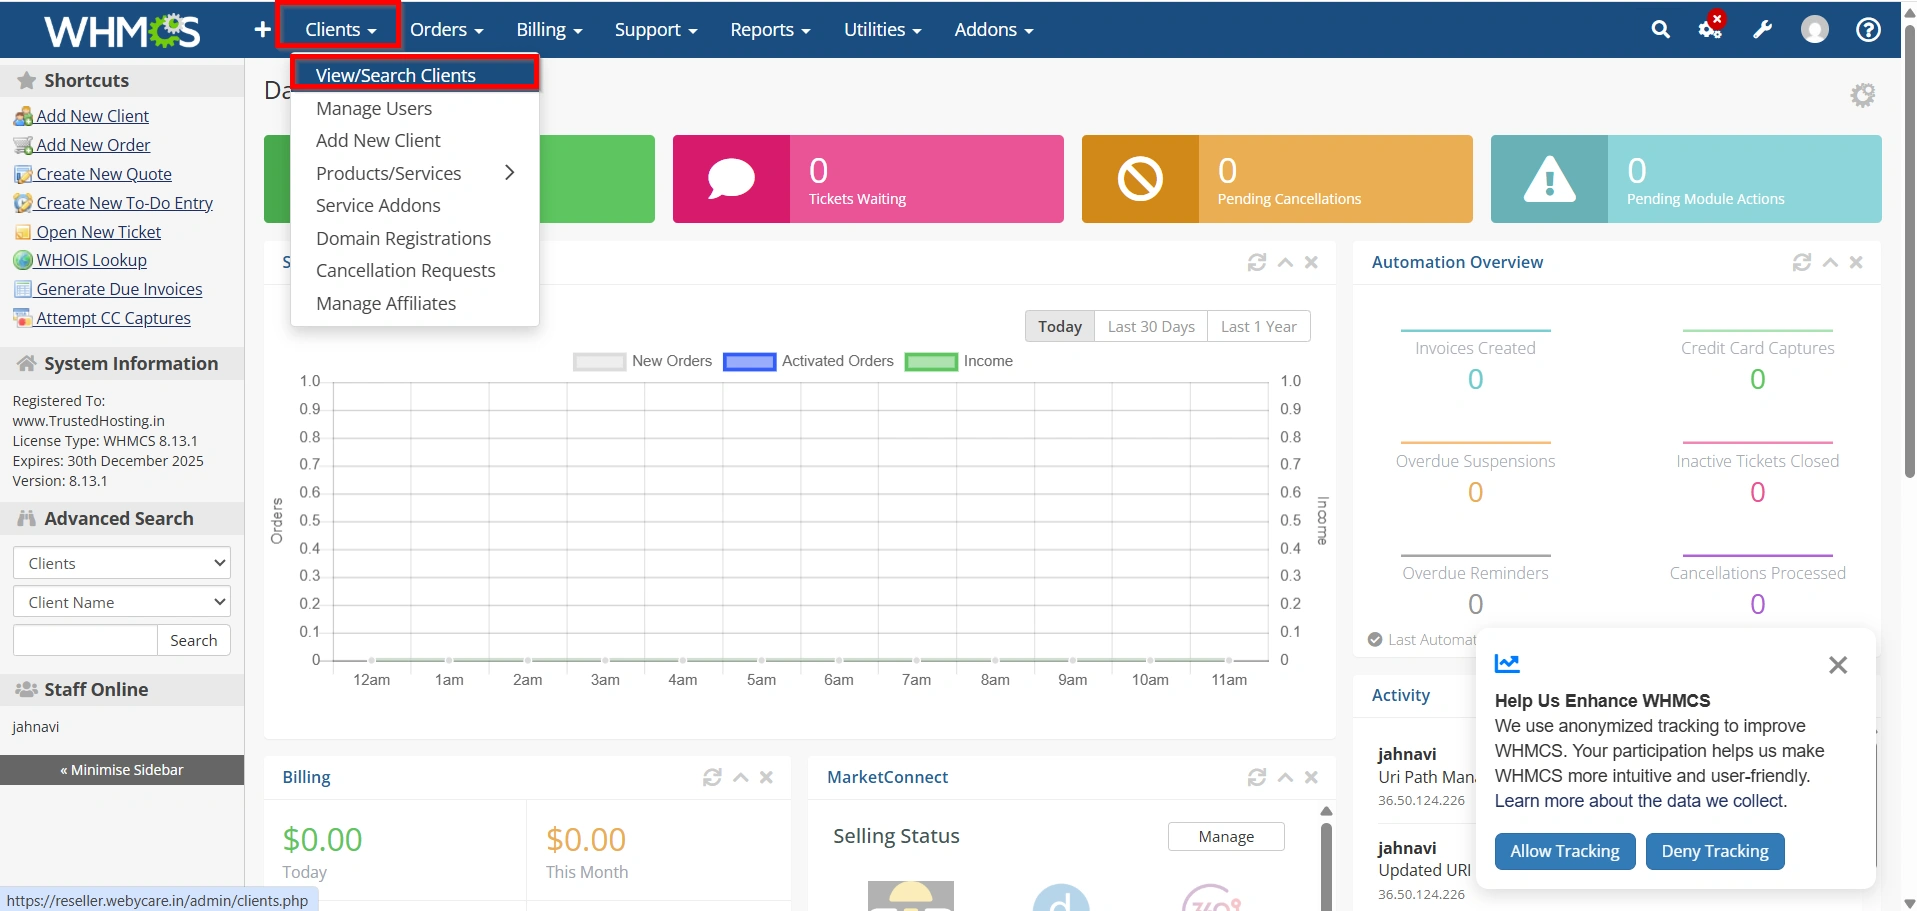
This page displays every customer registered in your WHMCS installation.
You can:
- View all clients
- Search clients
- Filter clients
- Edit existing accounts
- Create new client profiles
This is the main area you’ll use after you Set Up Client Management in WHMCS.
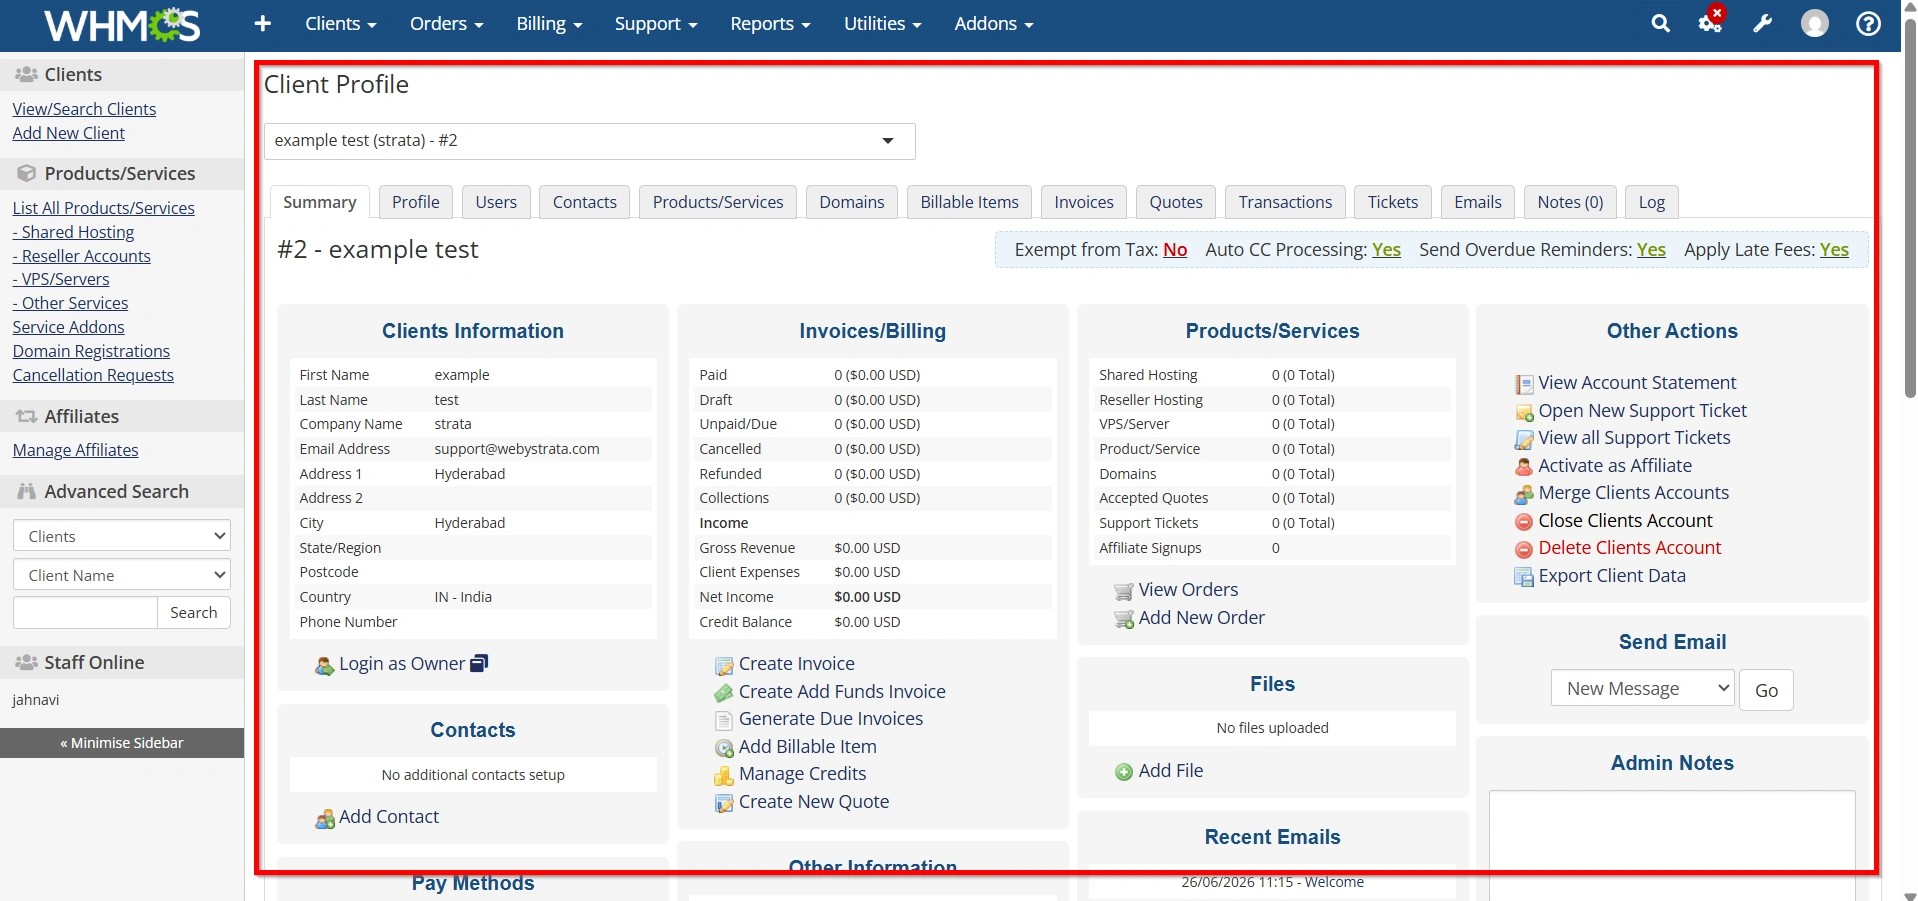
Step 4: Manage Client Profile Information
Open any client profile to manage:
- Contact Information
- Login Details
- Email Address
- Password Reset
- Status
- Credit Balance
- Notes
- Tax Settings
Updating customer information ensures accurate billing and communication.
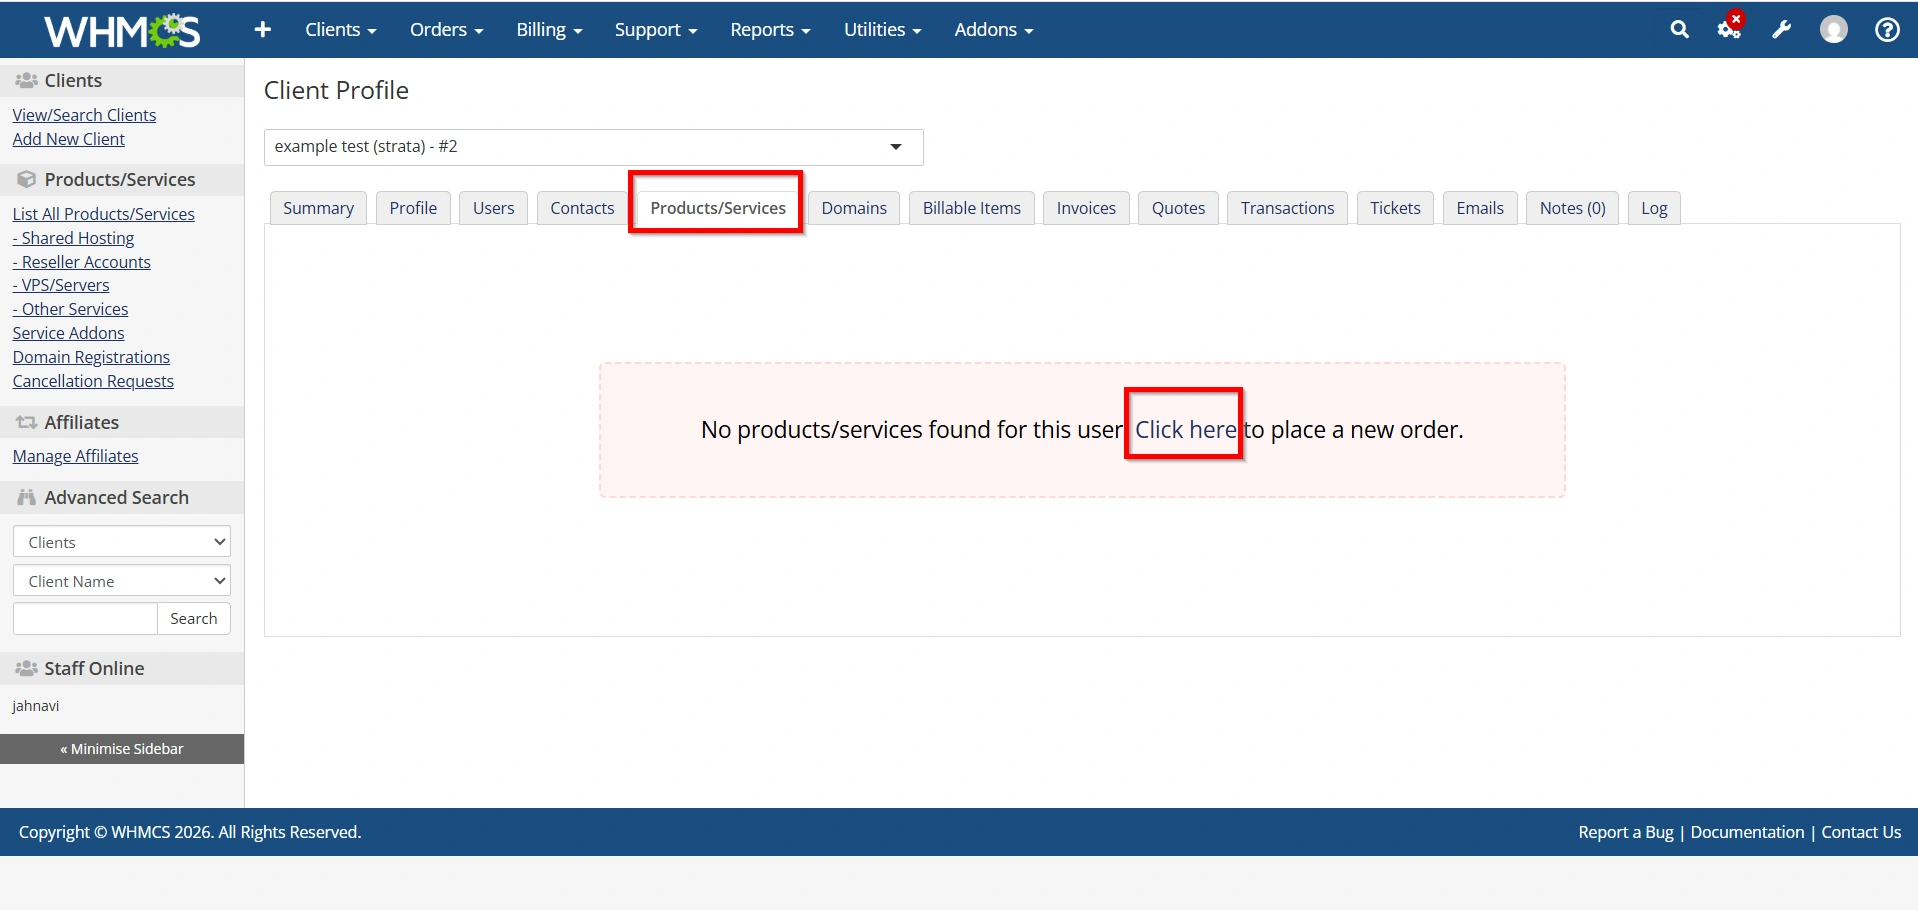
Step 5: Manage Client Services
Inside the client profile, select the Products/Services tab.
Here you can:
- View hosting accounts
- Suspend services
- Unsuspend services
- Upgrade or downgrade packages
- Change billing cycles
- Modify usernames and passwords
- Reset control panel passwords
Managing services directly from the client profile makes administration much easier.
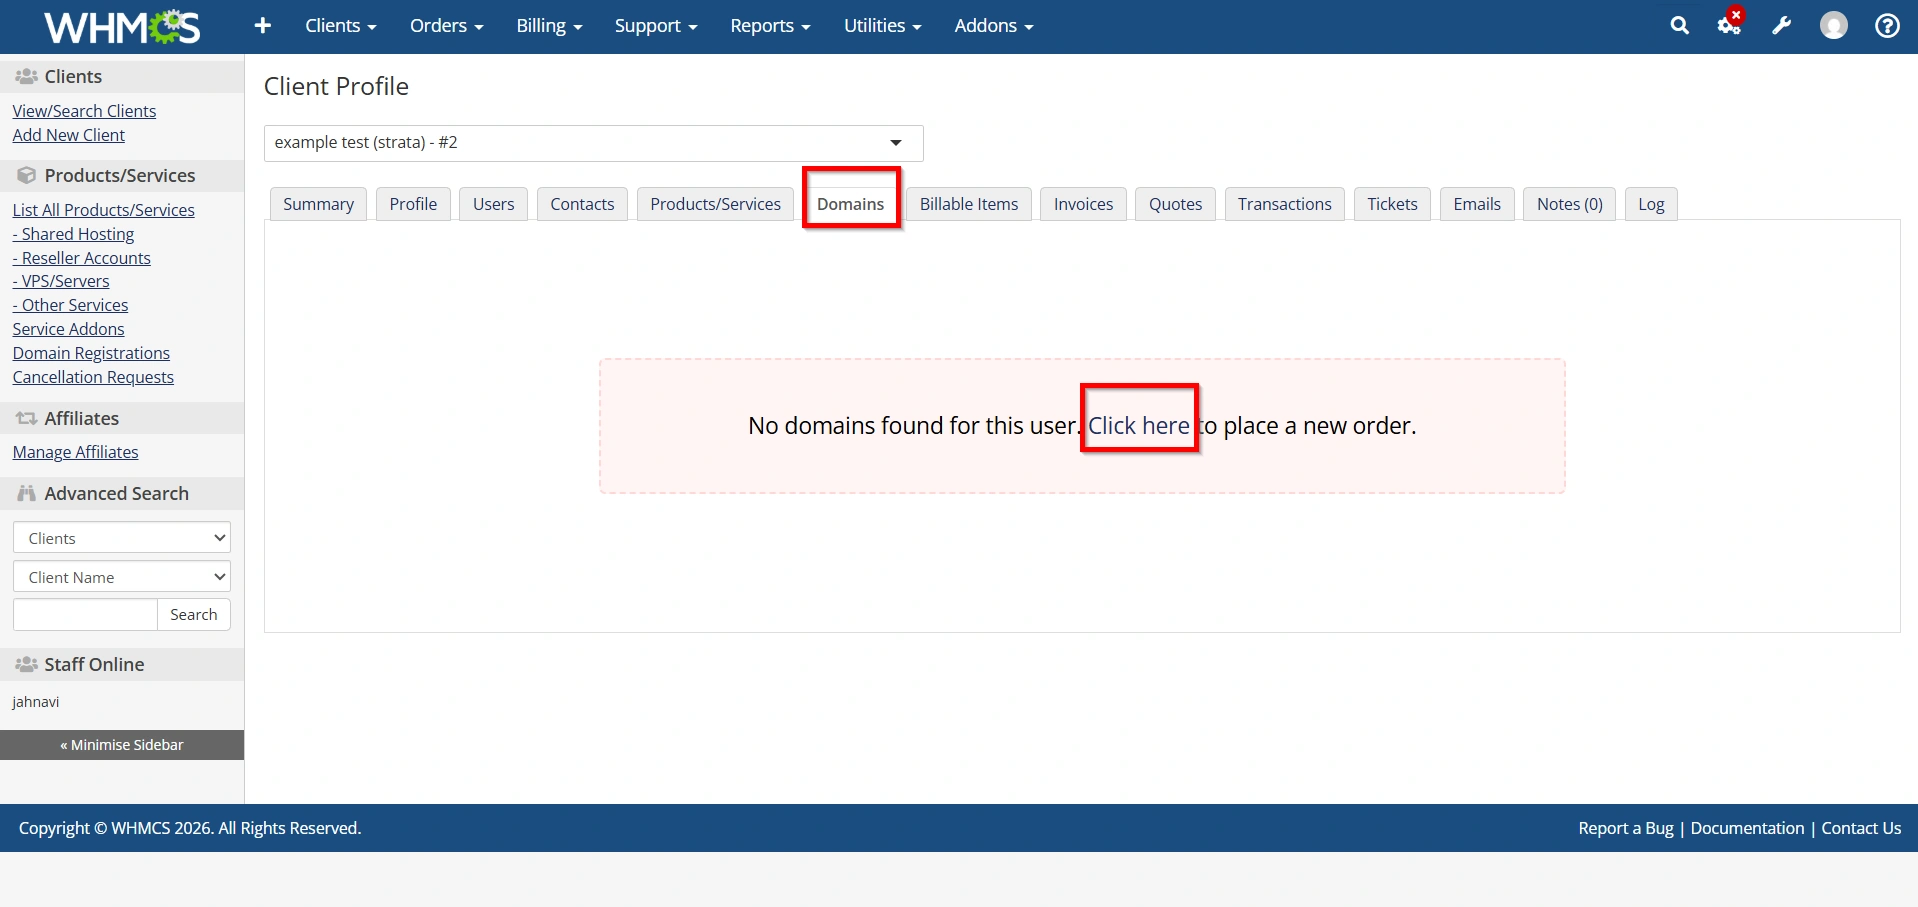
Step 6: Manage Client Domains
Select the Domains tab.
You can:
- Register domains
- Renew domains
- Transfer domains
- Update nameservers
- Lock or unlock domains
- Modify WHOIS information
- Check expiry dates
Keeping domain information updated helps prevent service interruptions.
Step 7: Manage Client Invoices
Open the Invoices tab.
Here you can:
- View invoices
- Generate new invoices
- Mark invoices as paid
- Send payment reminders
- Apply credits
- Cancel invoices
Proper invoice management ensures smooth billing operations.

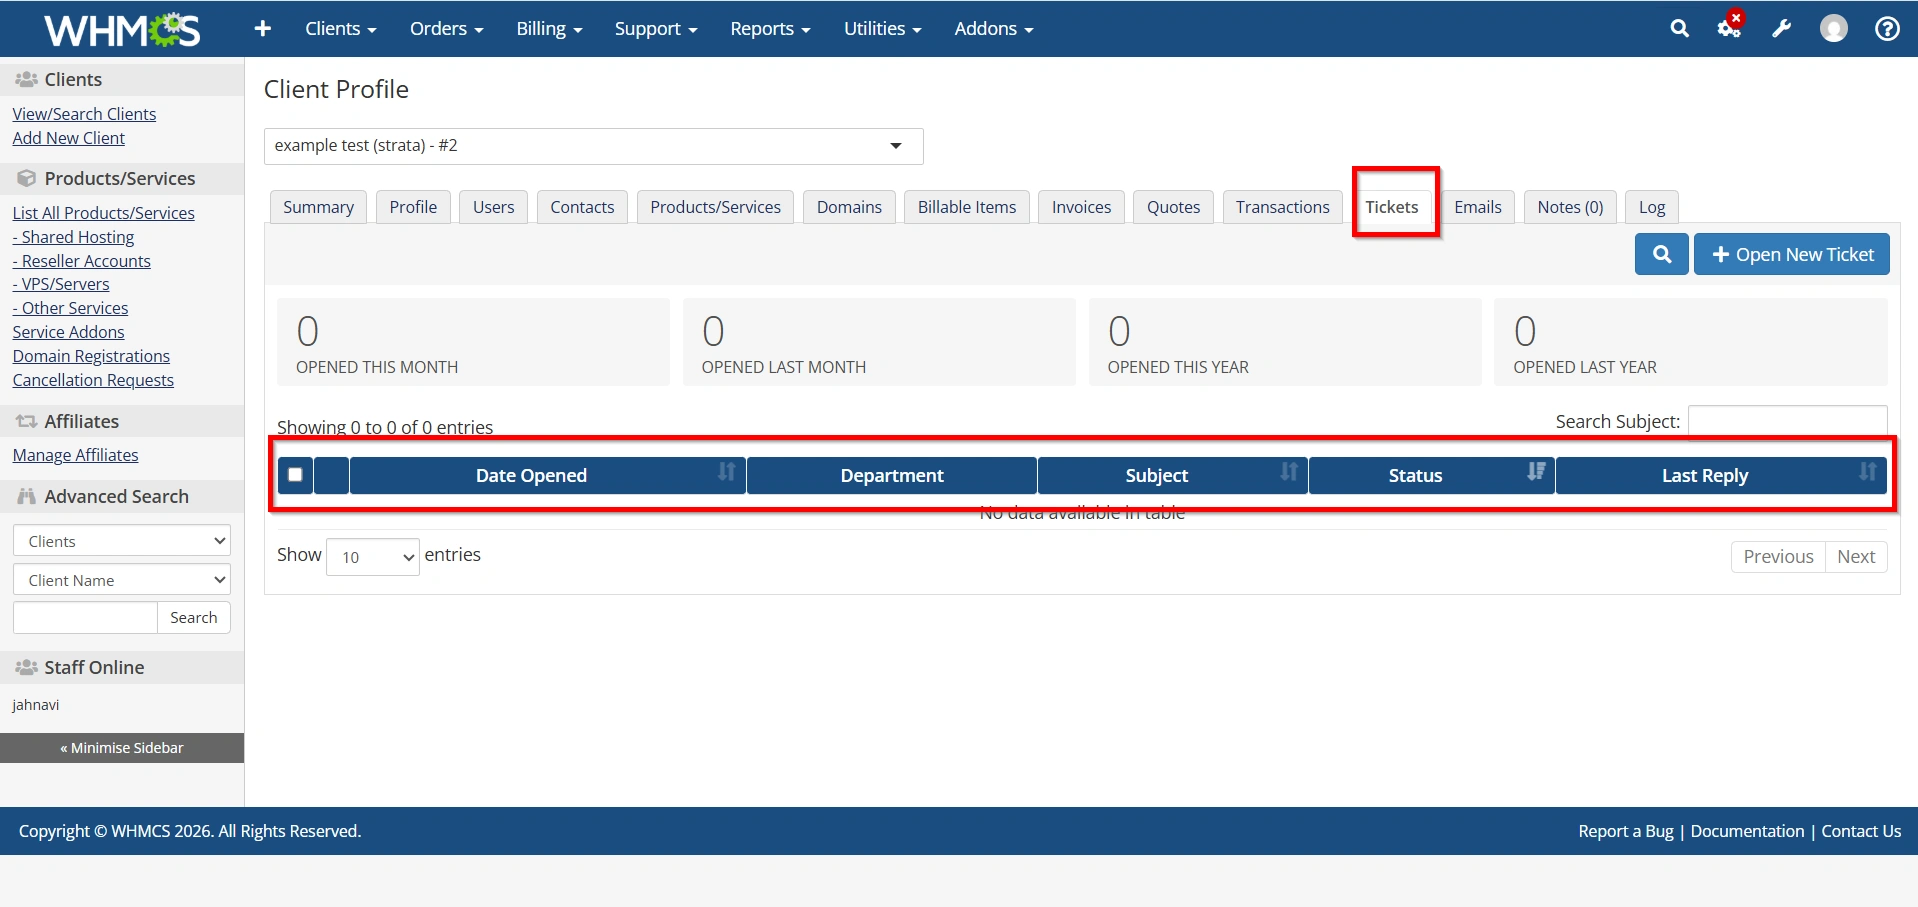
Step 8: Manage Support Tickets
Navigate to the Support section within the client profile.
Administrators can:
- View all tickets
- Reply to tickets
- Assign departments
- Change priorities
- Close resolved issues
Keeping support history inside the client profile provides better customer service.
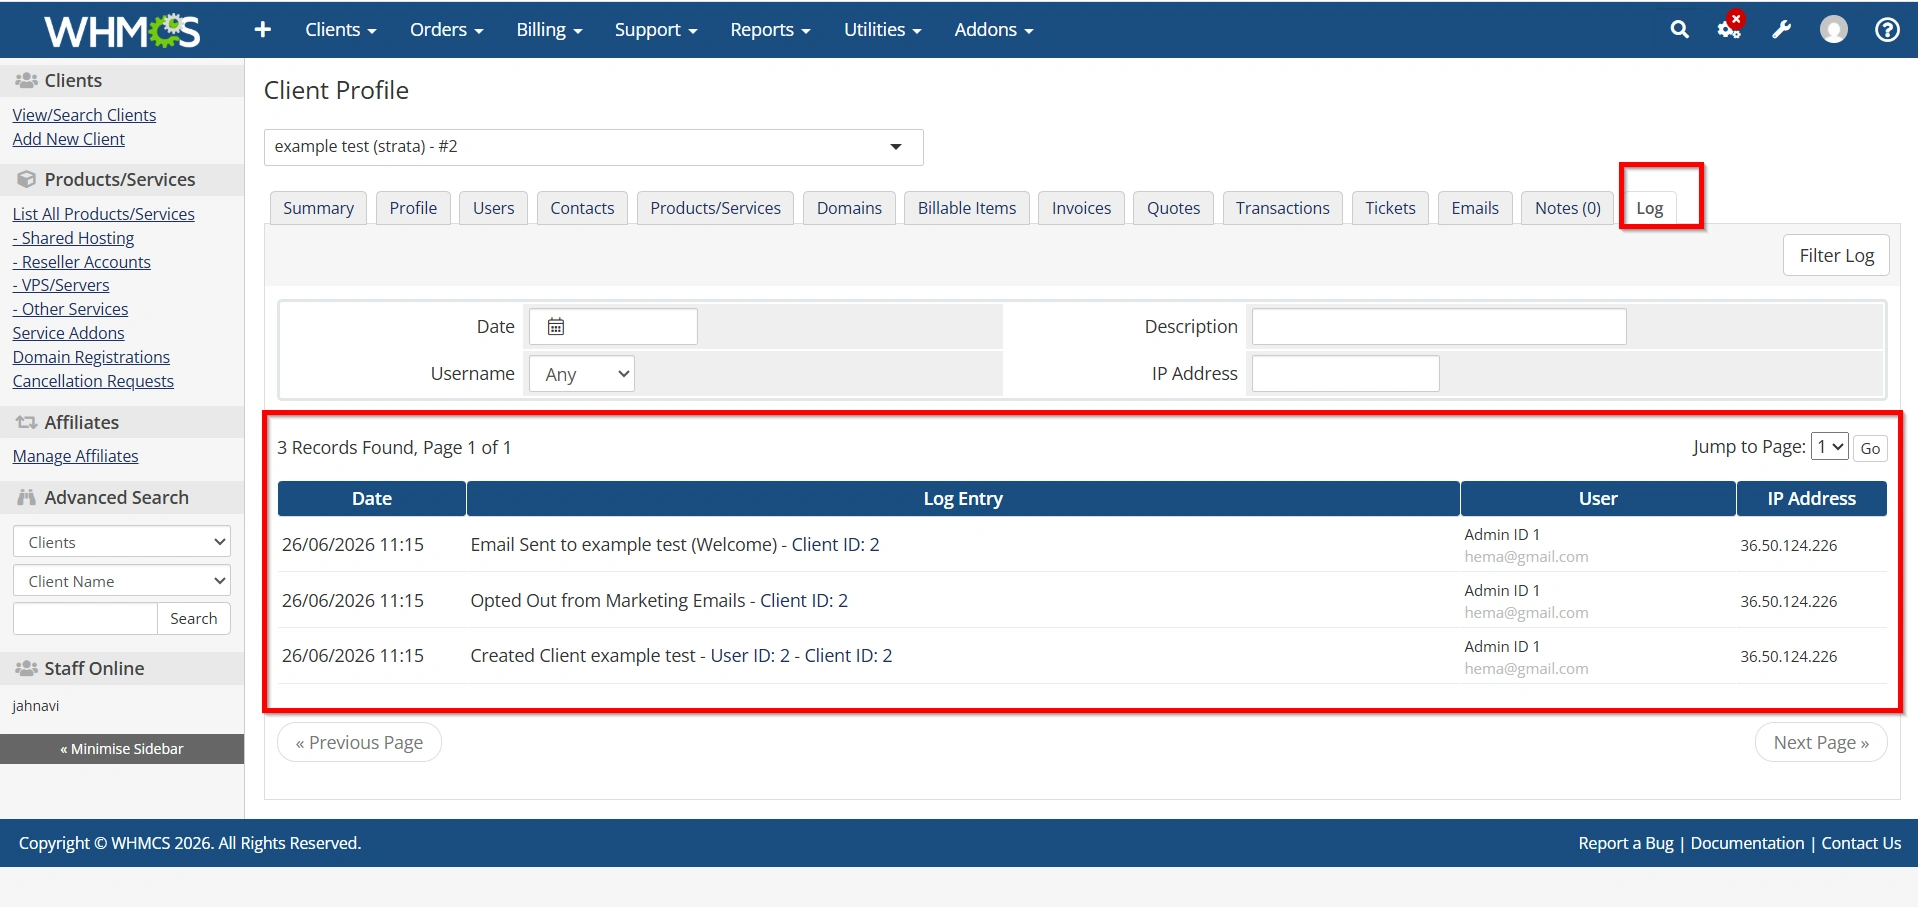
Step 9: Review Client Activity
The Activity Log records every important event related to the customer.
Examples include:
- Login attempts
- Invoice payments
- Service changes
- Email notifications
- Password updates
- Order placements
This log is useful for troubleshooting and auditing account activity.
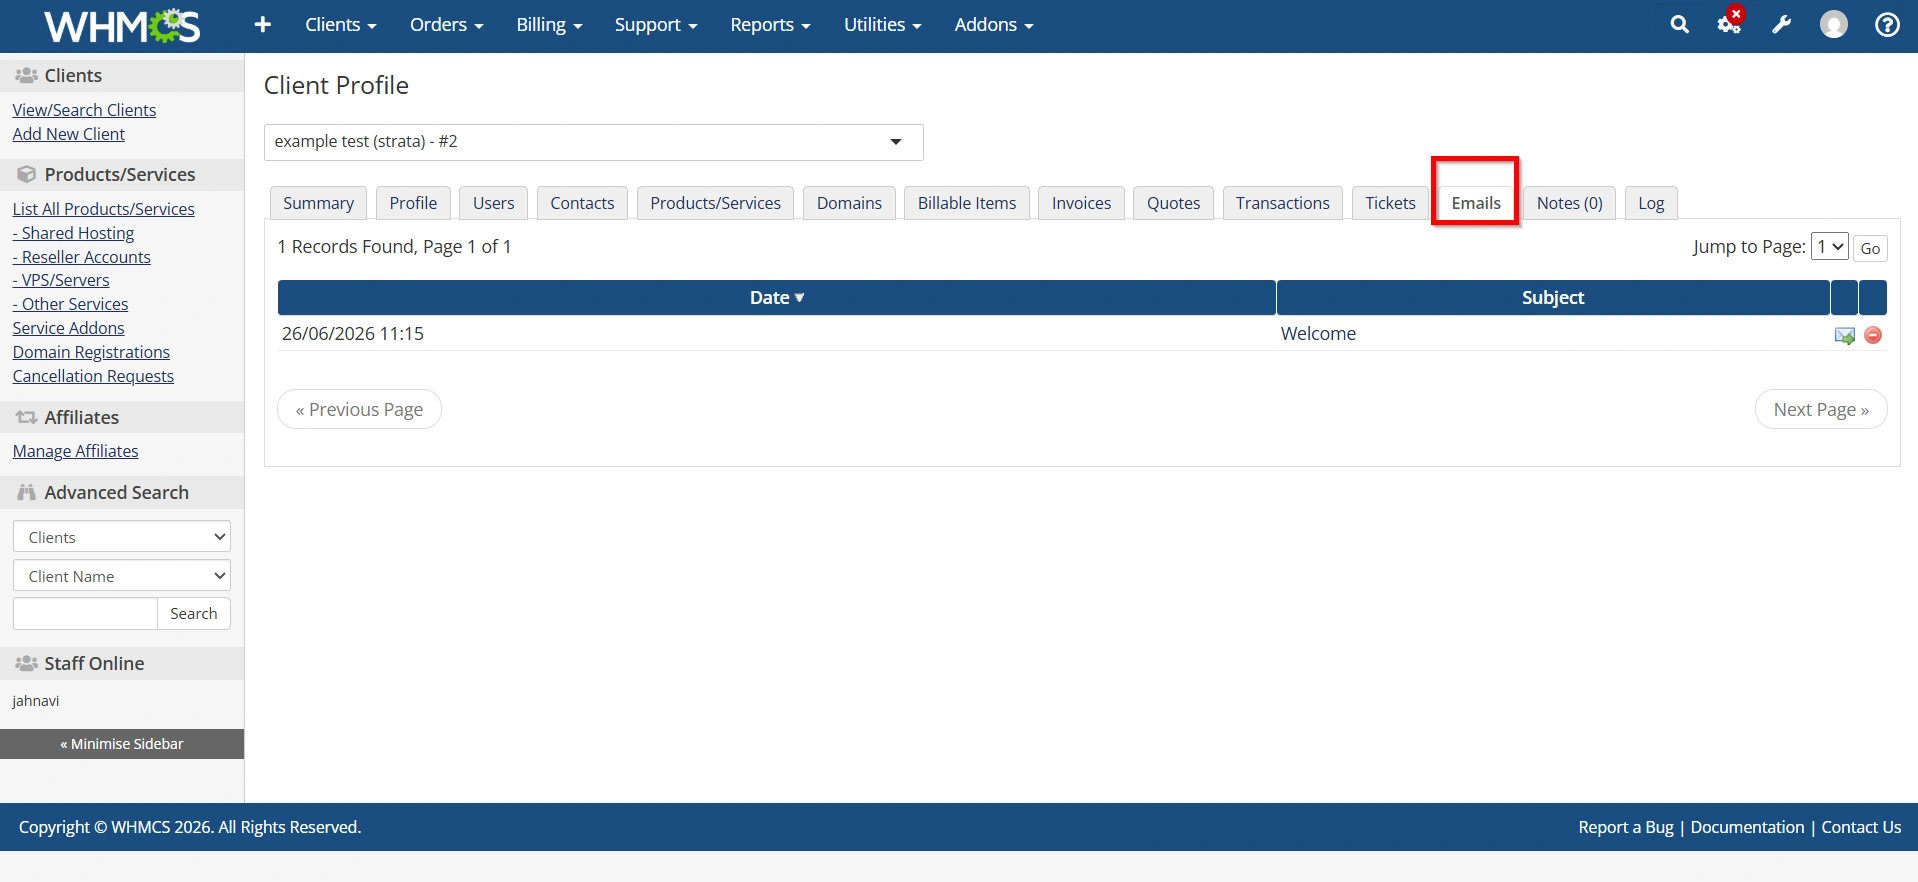
Step 10: Communicate with Clients
WHMCS allows administrators to send emails directly from the client profile.
You can:
- Send welcome emails
- Billing reminders
- Suspension notices
- Renewal notifications
- Custom announcements
Using email templates ensures consistent communication.
Best Practices for Client Management
To keep your WHMCS installation organized:
- Keep customer information updated
- Use descriptive admin notes
- Archive inactive accounts when appropriate
- Review unpaid invoices regularly
- Monitor support response times
- Enable automated reminders
- Audit administrator permissions periodically
- Back up your WHMCS database regularly
These practices improve both efficiency and customer satisfaction.
Benefits of Client Management in WHMCS
Setting up Client Management offers several advantages:
- Centralized customer database
- Easy management of hosting services and domains
- Quick invoice and payment tracking
- Simplified communication with customers
- Better support ticket management
- Secure client authentication
- Complete activity history
- Faster account administration
These features help businesses improve customer satisfaction while reducing administrative workload.
Conclusion
Learning how to Set Up Client Management in WHMCS is essential for hosting providers, resellers, and online businesses that want to manage customers efficiently. WHMCS provides a centralized platform for handling client profiles, services, domains, invoices, support tickets, and communications—all from a single dashboard.
By following the steps outlined above, you can Set Up Client Management in WHMCS with confidence, streamline administrative tasks, improve customer support, and deliver a professional experience for every client.
Related Articles