Latest Updates
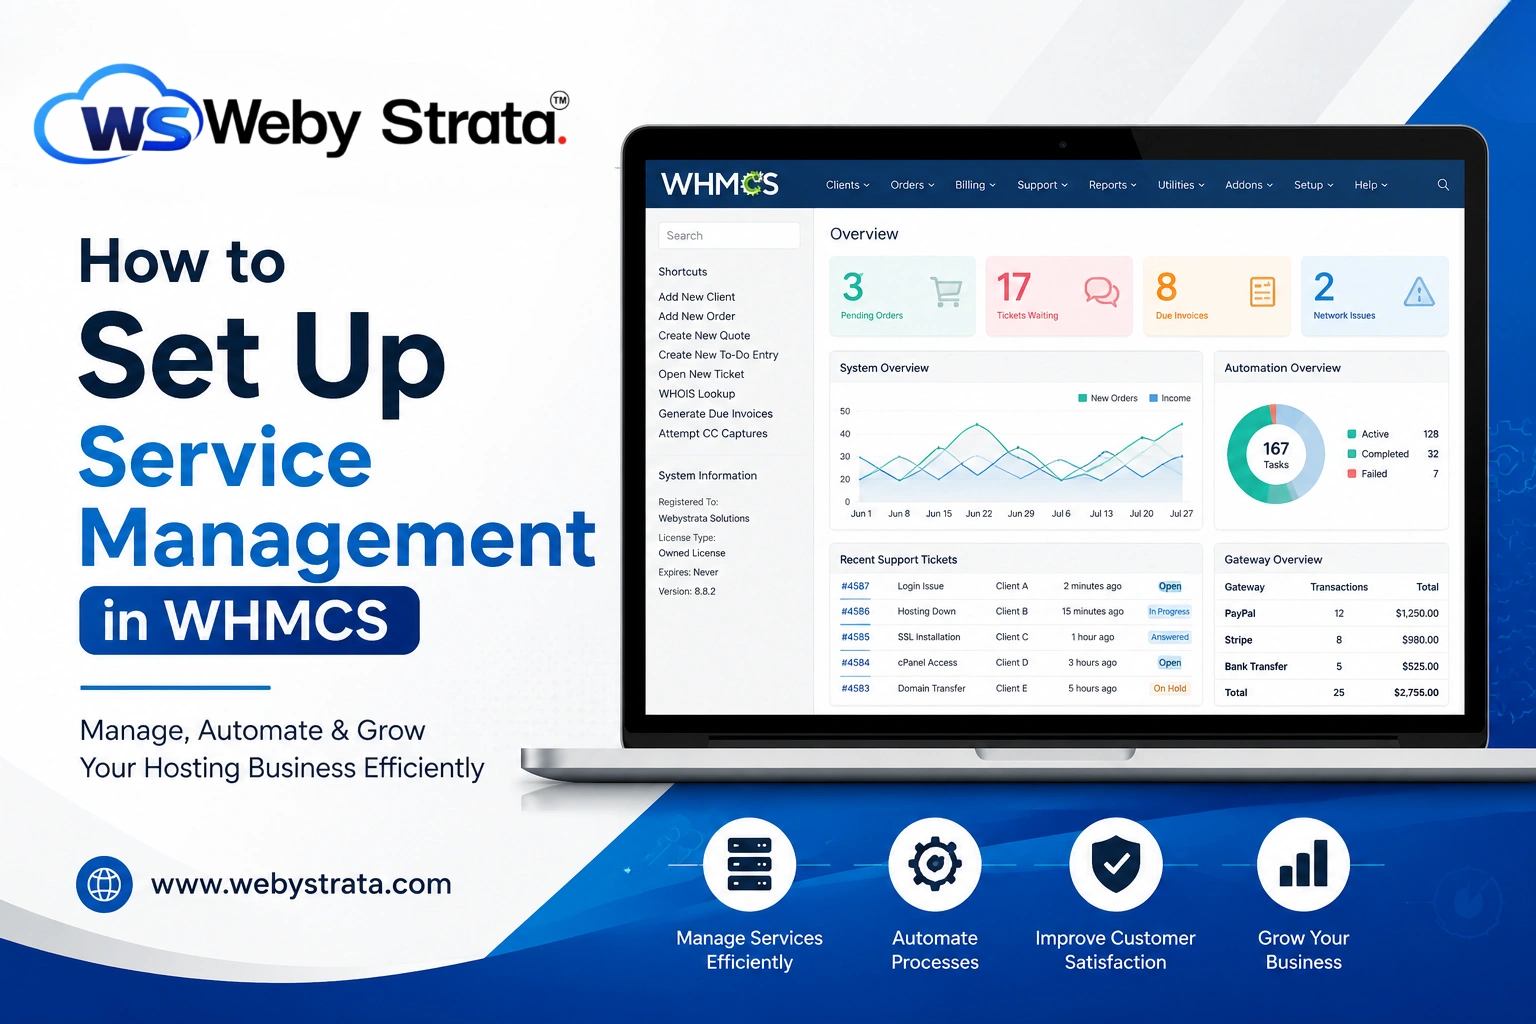
How to Set Up Service Management in WHMCS
How to Set Up Service Management in WHMCS Managing customer services efficiently is one of the most important aspects of running a hosting, VPS, domain, or SaaS business. WHMCS provides a powerful Service Management…
How to Set Up Service Management in WHMCS
Managing customer services efficiently is one of the most important aspects of running a hosting, VPS, domain, or SaaS business. WHMCS provides a powerful Service Management system that allows administrators to create, monitor, modify, suspend, unsuspend, and terminate customer services from a single dashboard.
Whether you sell shared hosting, reseller hosting, VPS, dedicated servers, SSL certificates, or custom services, learning how to Set Up Service Management in WHMCS helps automate operations while improving customer satisfaction. Proper service management also reduces manual work, minimizes errors, and keeps client accounts organized throughout the service lifecycle.
In this guide, you’ll learn how to Set Up Service Management in WHMCS, configure products, assign services to clients, manage service status, and use automation to simplify daily administrative tasks.
What is Service Management in WHMCS?
Service Management in WHMCS refers to the process of managing all customer products and services after purchase. Every hosting account, VPS, reseller package, SSL certificate, or custom service appears under the client’s Services section.
Administrators can:
- View active services
- Modify service details
- Upgrade or downgrade plans
- Suspend services
- Unsuspend suspended accounts
- Terminate services
- Change billing cycles
- Reset passwords
- View login credentials
- Monitor service history
- Manage recurring invoices
The centralized dashboard makes it easy to handle hundreds or even thousands of customer services.
Prerequisites
Before beginning, ensure you have:
- WHMCS Administrator access
- Products already created
- Payment gateways configured
- Server module configured (cPanel, Plesk, DirectAdmin, etc.)
- Cron job working properly
Step 1: Log in to the WHMCS Admin Area
- Log in to your WHMCS Admin Area.

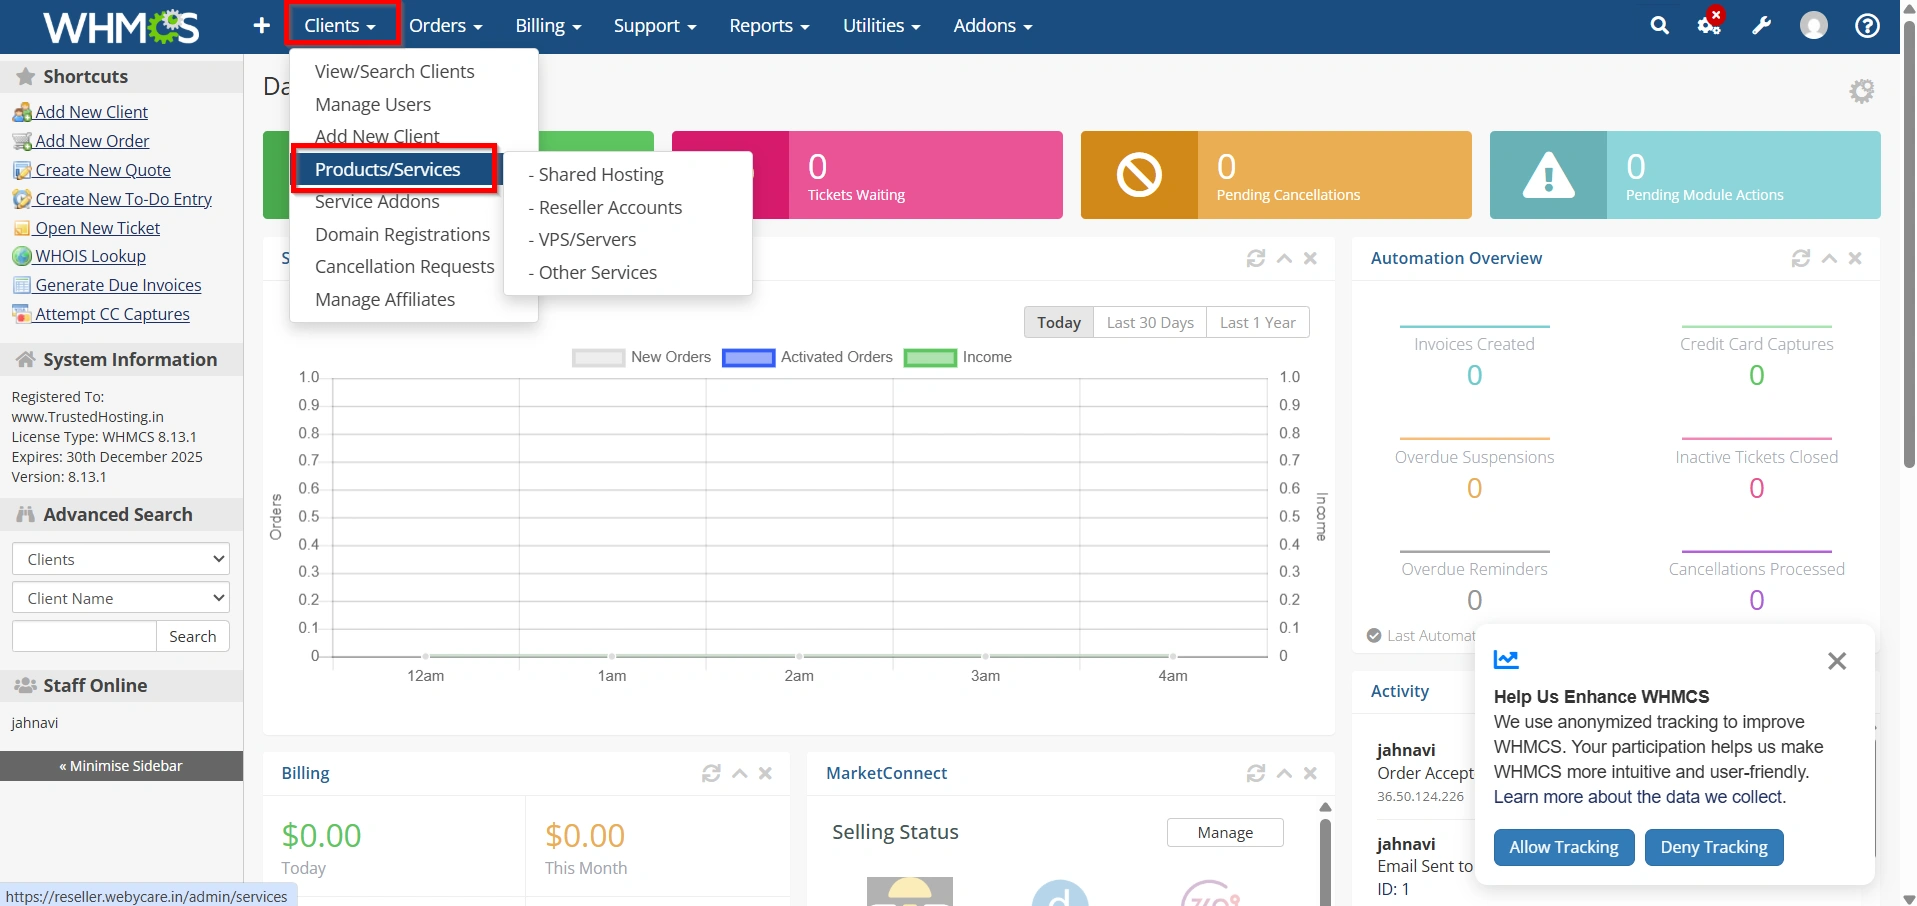
Step 2: Create a Product
Navigate to:
- Configuration Icon → System Settings
![]()
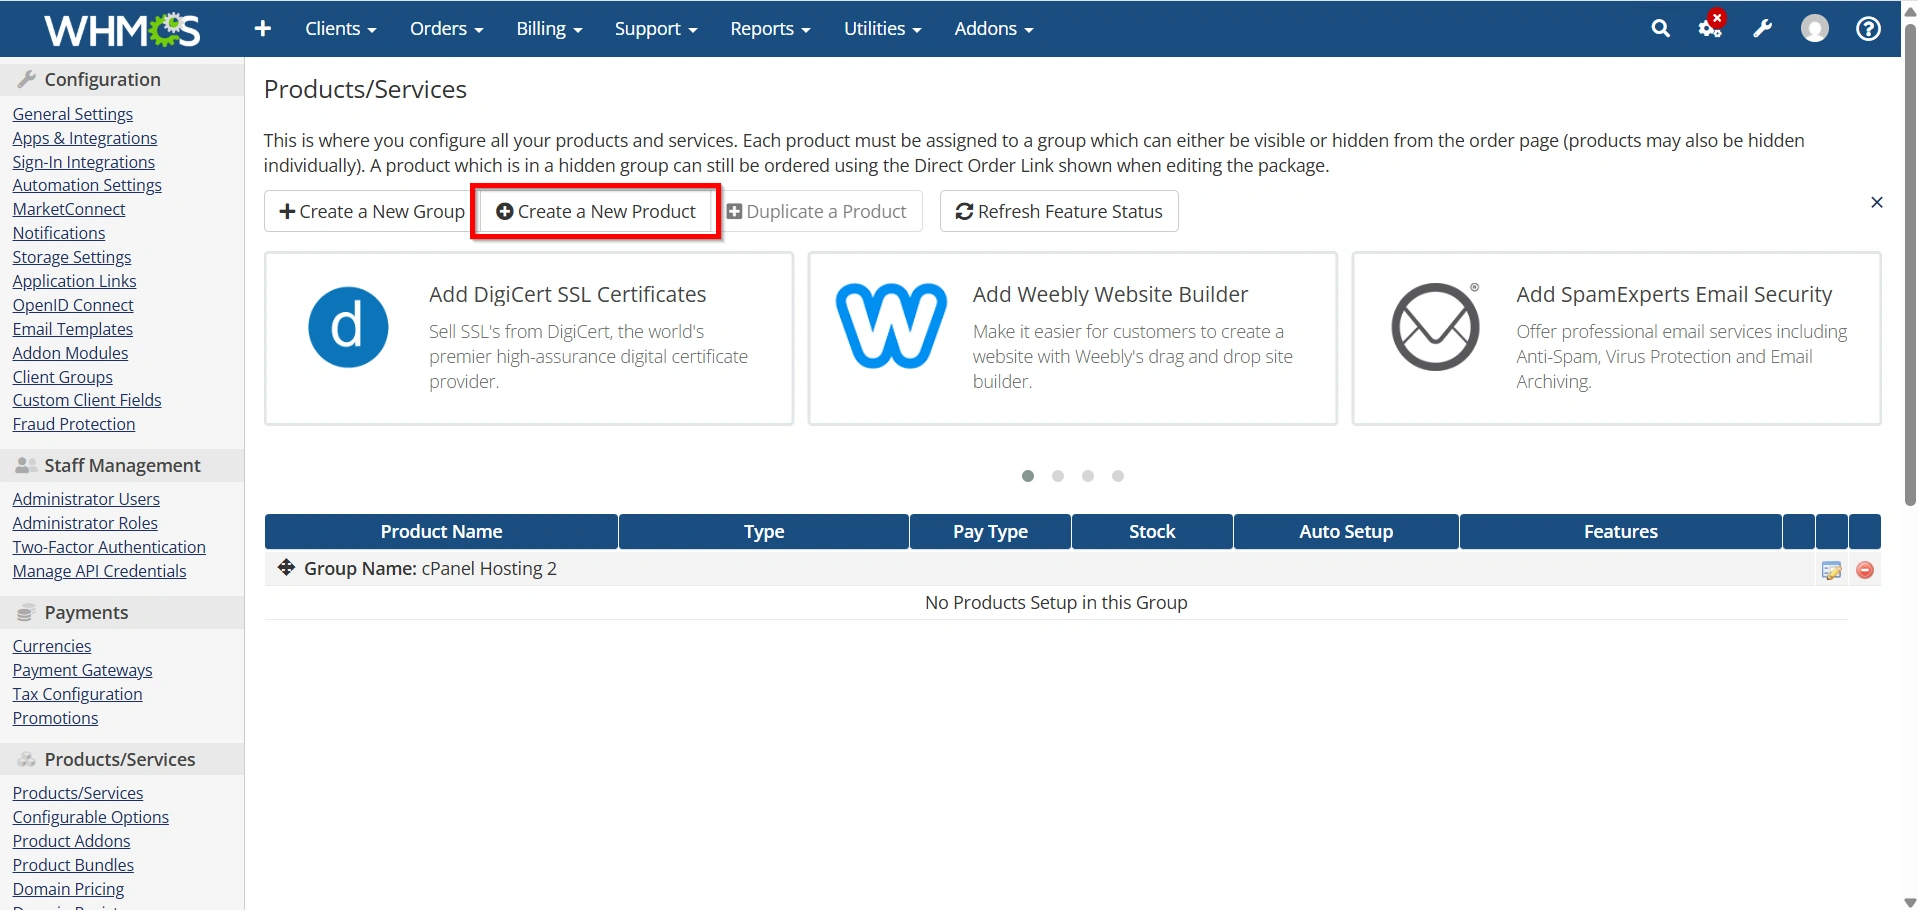
- Select Products/Services
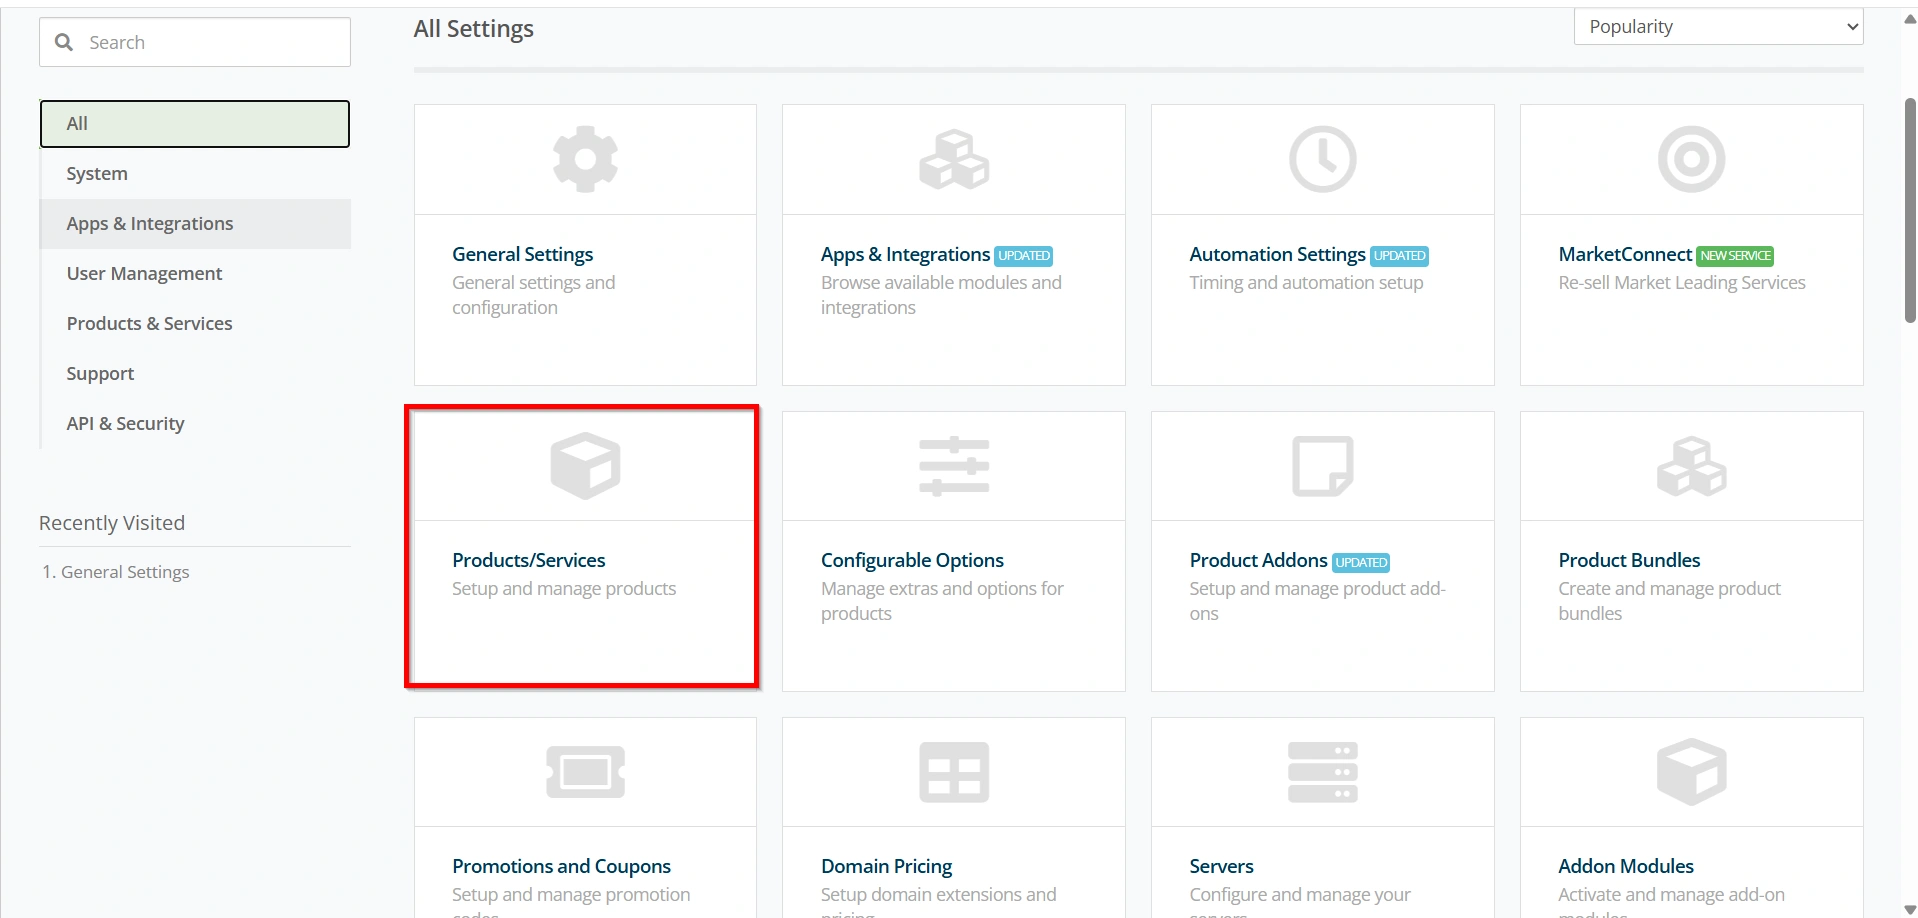
Click:
Create a New Product
Configure:
- Product Name
- Product Group
- Product Type
- Module
- Pricing
- Billing Cycle
Save the product.
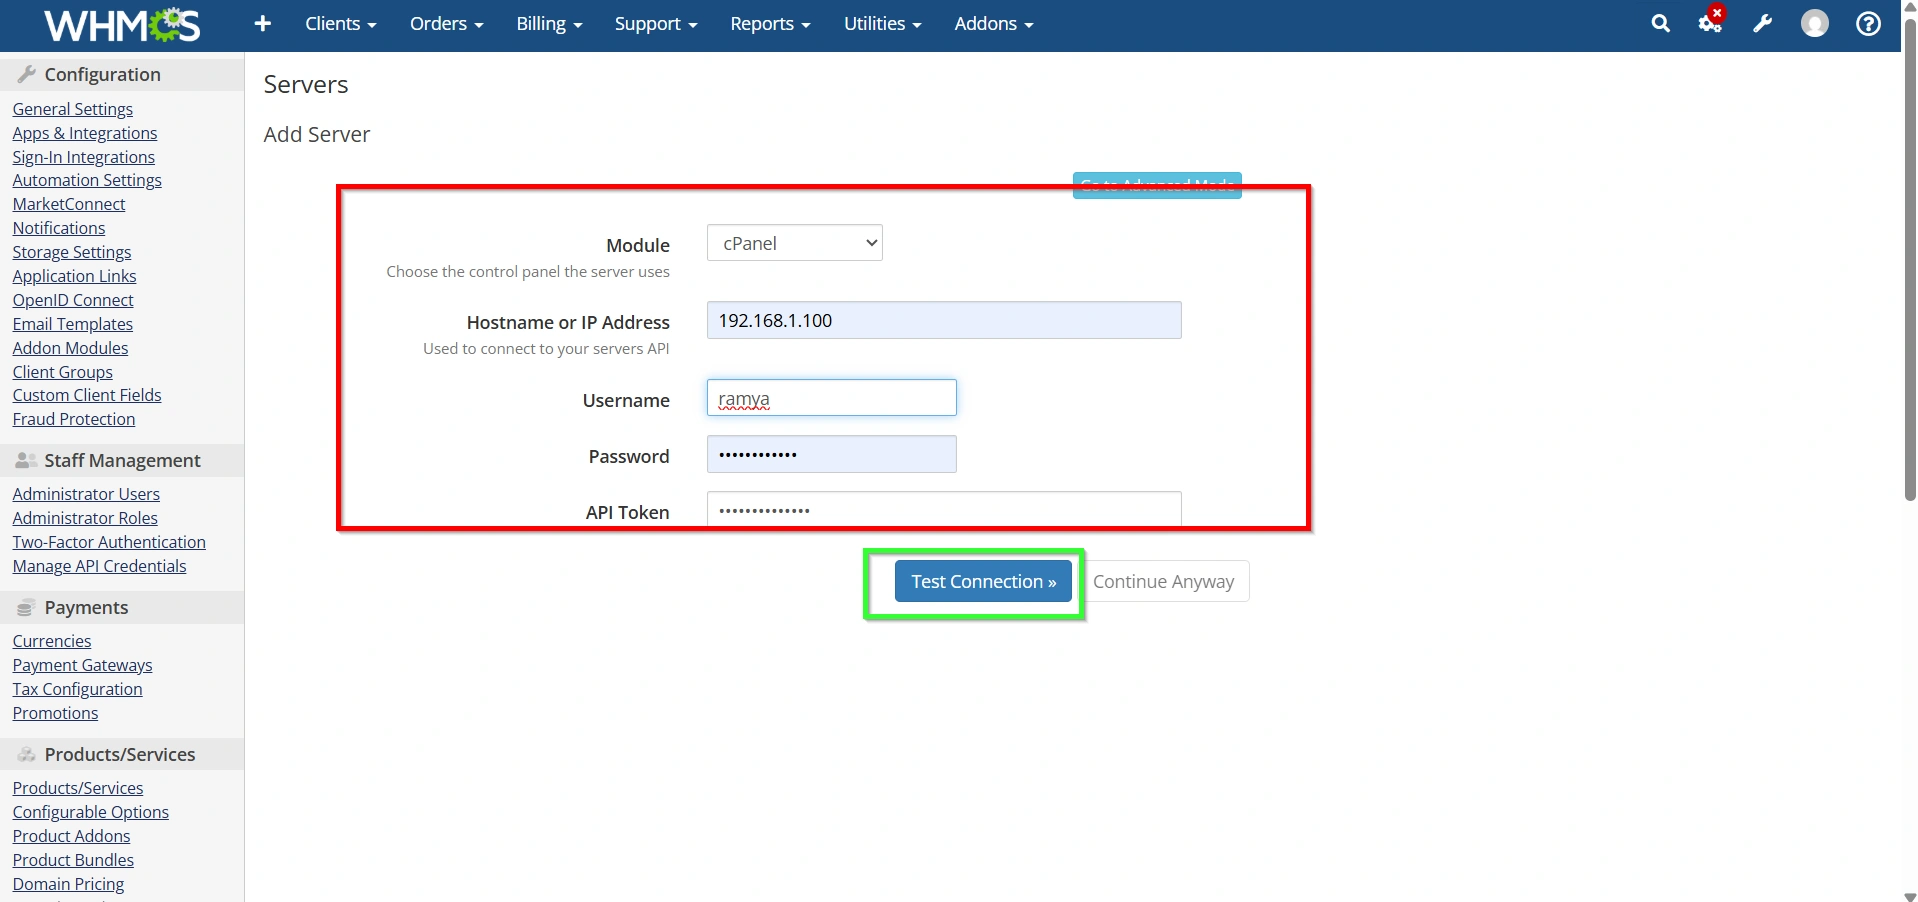
Step 3: Configure Server Module
If you’re selling hosting:
Navigate to:
Configuration Icon → System Settings → Servers

Add your server information.
Enter:
- Hostname
- IP Address
- Username
- API Token or Access Hash
- Nameservers
Click Test Connection.
Save the server.
Now assign this server to your hosting product.
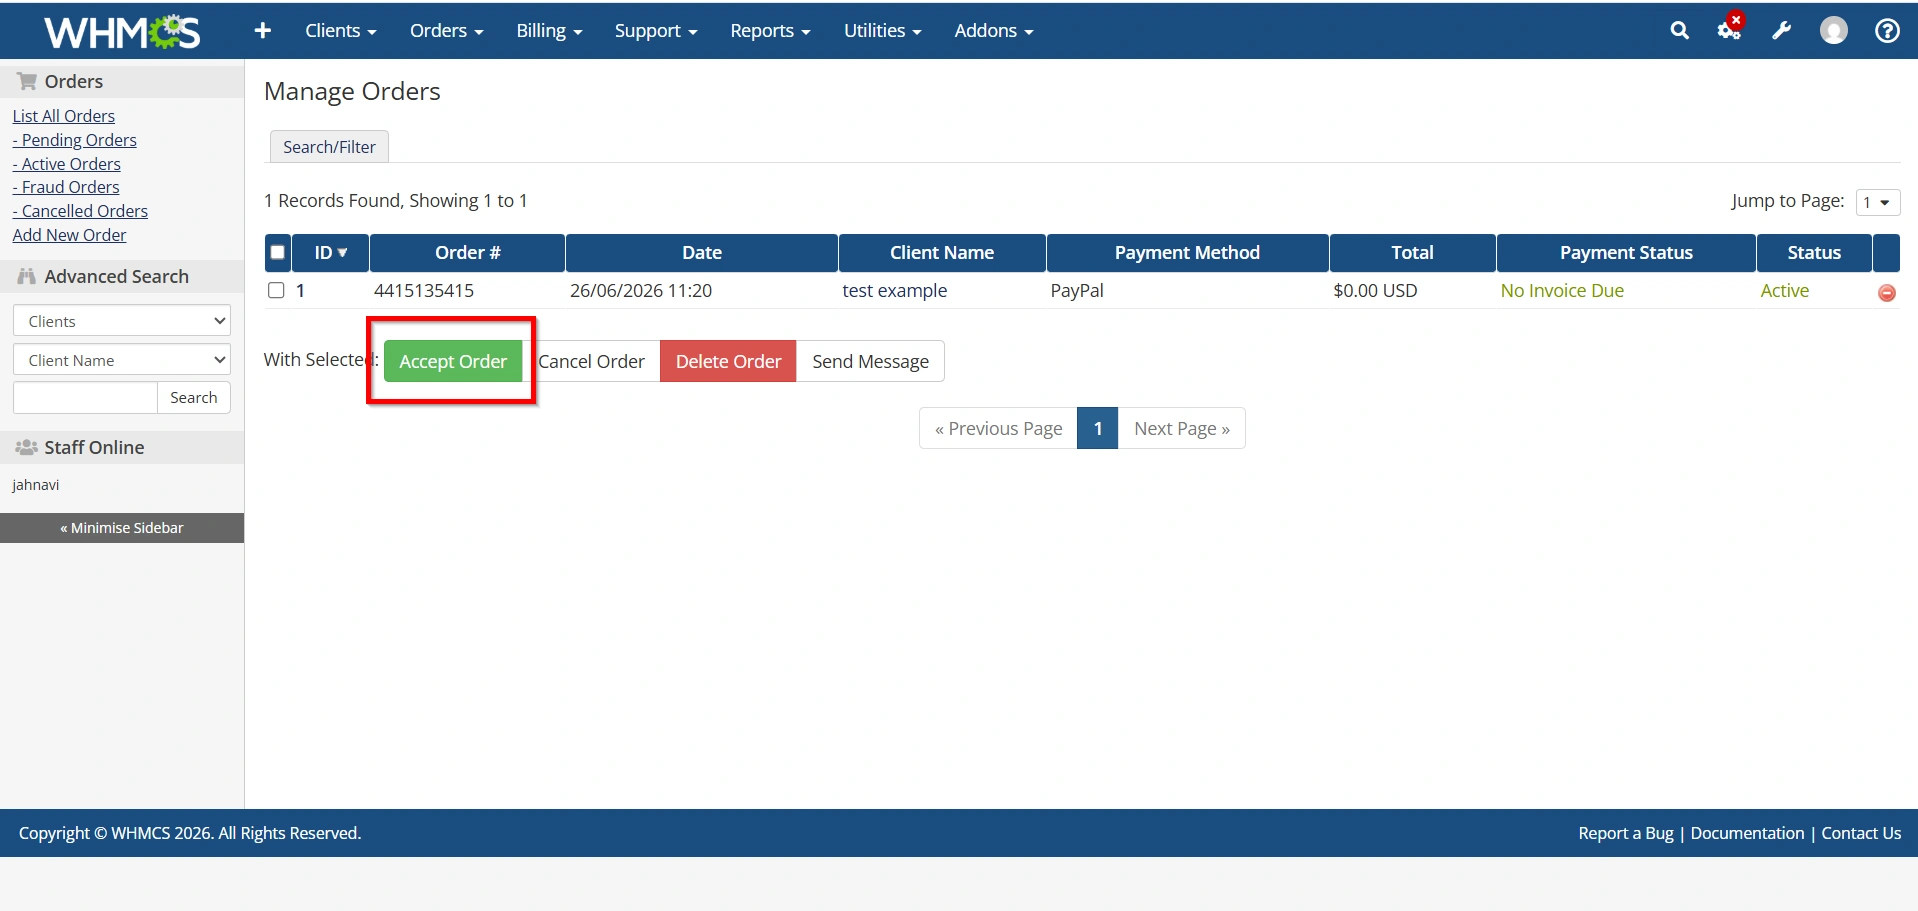
Step 4: Accept a Client Order
When a customer places an order:
Navigate to:
Orders → List All Orders
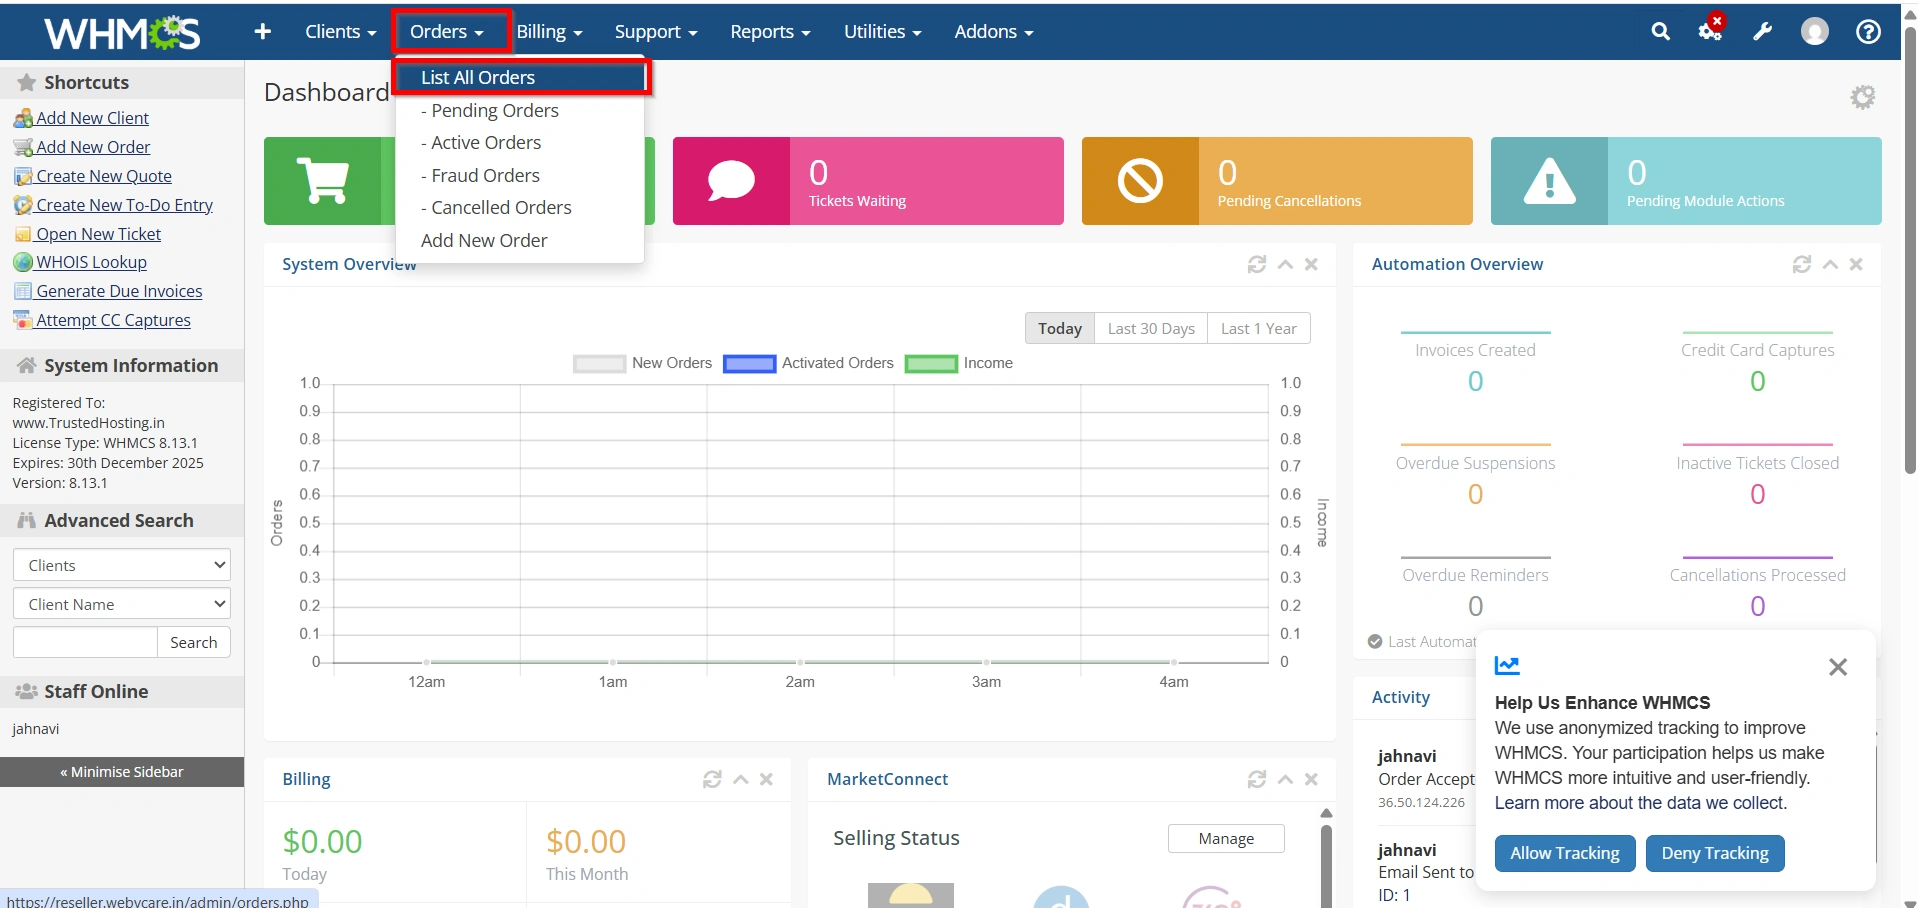
Open the order.
Review:
- Client information
- Selected product
- Billing cycle
- Payment status
Click:
Accept Order
WHMCS can automatically create the hosting account if module automation is enabled.
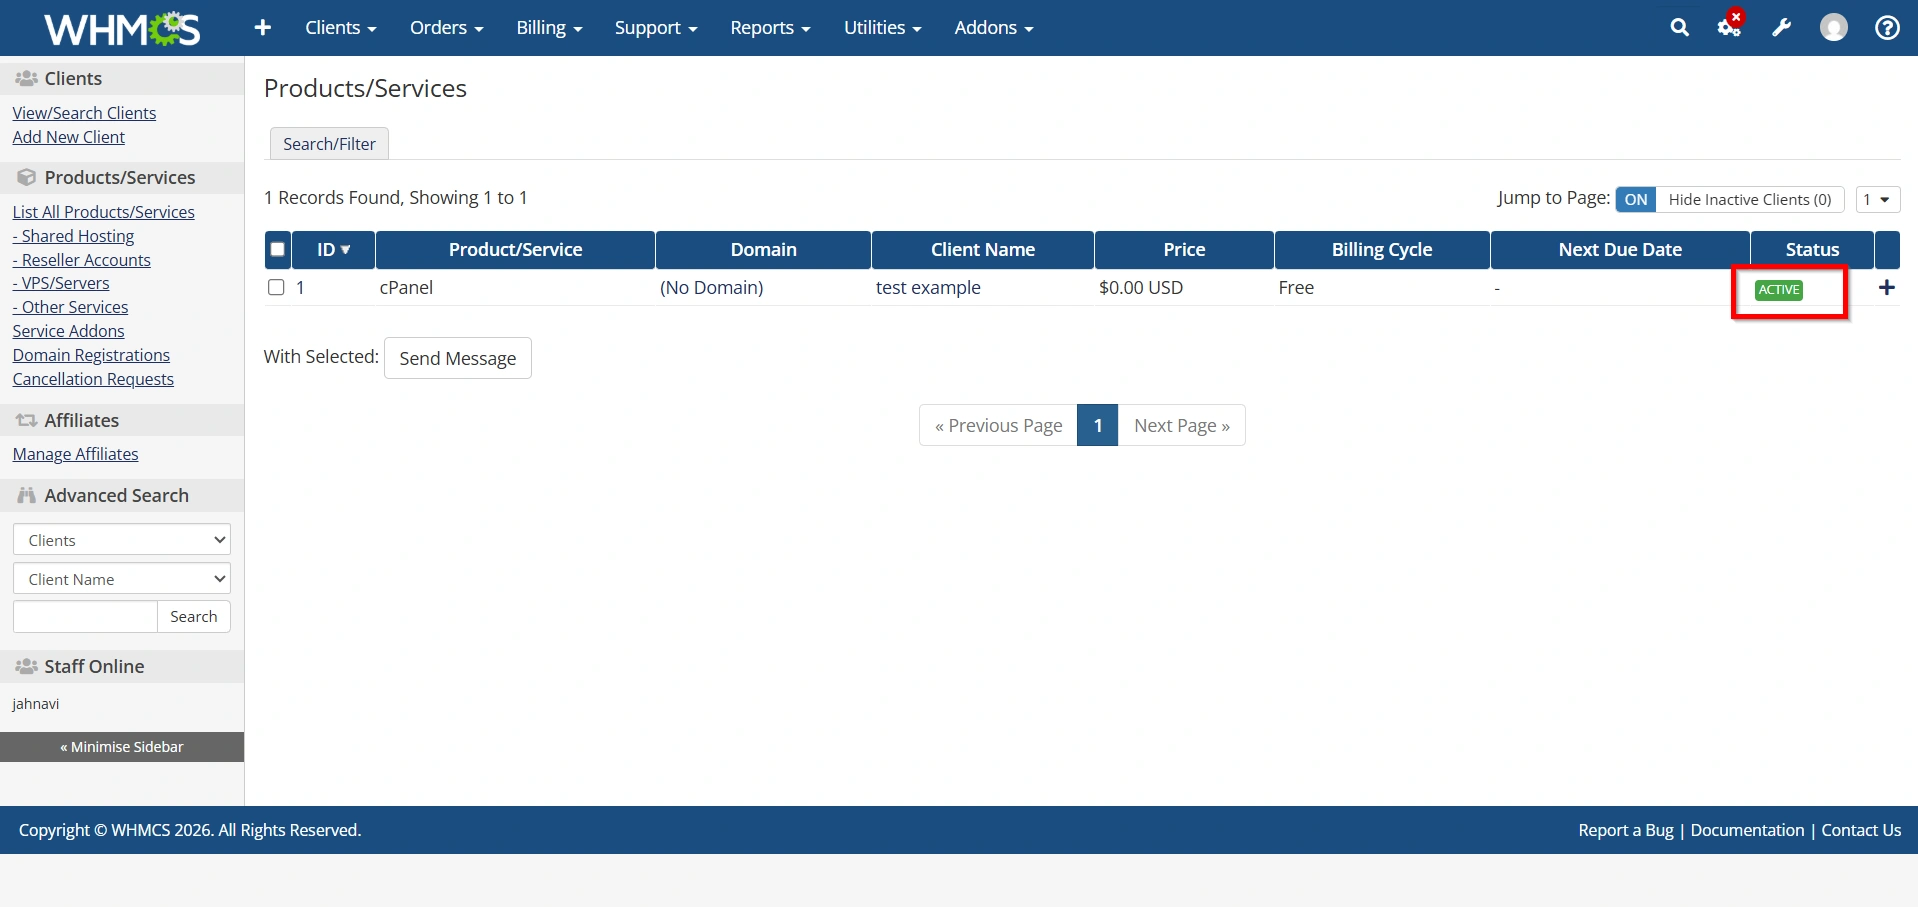
Step 5: View Client Services
Navigate to:
Clients → View/Search Clients
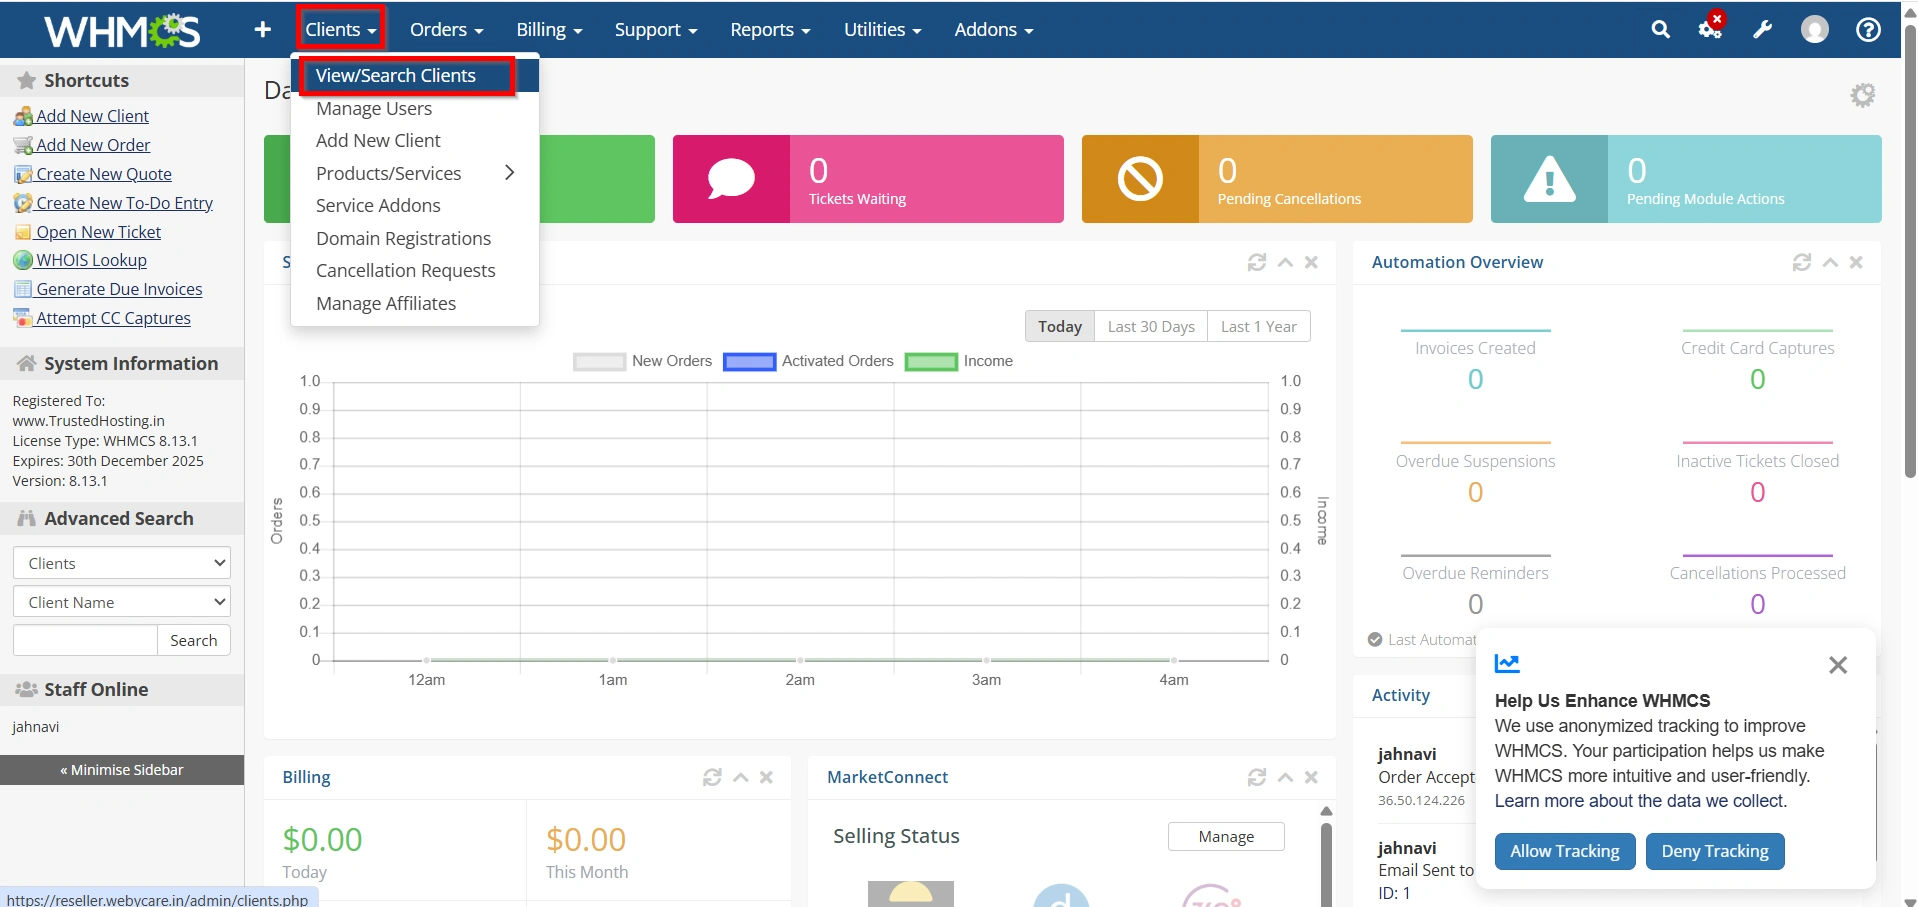
Open any client profile.
Click the:
Products/Services tab.
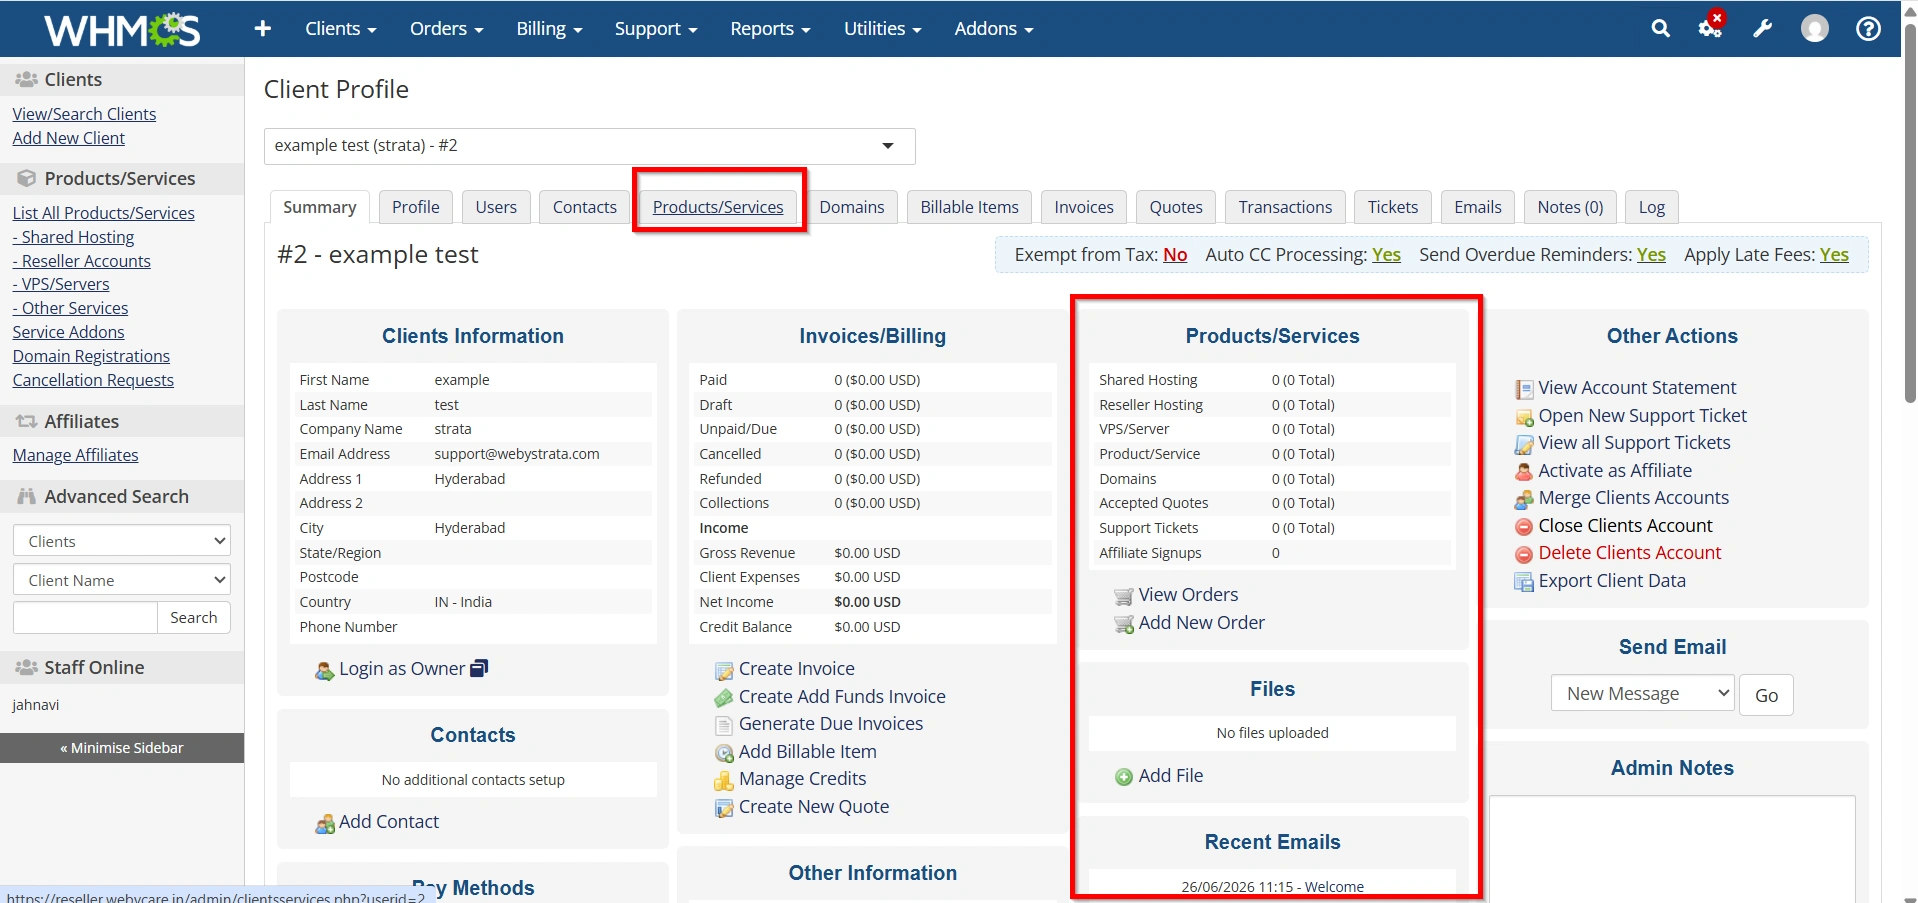
Here you’ll find:
- Service Status
- Username
- Domain
- Billing Cycle
- Registration Date
- Next Due Date
- Server
- Module Commands
This page is the primary Service Management interface.
Step 6: Edit Service Details
Open the desired service.
You can modify:
- Product
- Username
- Password
- Dedicated IP
- Billing Cycle
- Next Due Date
- Recurring Amount
- Notes
- Custom Fields
Save changes.
Step 7: Monitor Active Services
Go to:
Clients → Products/Services
Use filters to locate:
- Active services
- Suspended services
- Pending services
- Expired services
- Cancelled services
Administrators can quickly locate customer accounts.
Best Practices
To maximize efficiency after you Set Up Service Management in WHMCS, follow these recommendations:
- Enable daily cron jobs.
- Configure automatic provisioning.
- Review suspended services regularly.
- Keep server modules updated.
- Monitor failed automation tasks.
- Use descriptive internal notes.
- Verify product pricing periodically.
- Test module commands before deployment.
- Back up your WHMCS database regularly.
- Review overdue invoices weekly.
Why Service Management Matters
Proper service management improves operational efficiency and customer satisfaction. Administrators can quickly activate new services, manage existing subscriptions, process upgrades, suspend unpaid accounts, and automate repetitive tasks. As your business grows, a well-configured service management workflow helps reduce support requests, improve billing accuracy, and maintain consistent service delivery.
Benefits of Setting Up Service Management in WHMCS
When you Set Up Service Management in WHMCS, you gain several advantages:
- Centralized service administration
- Faster customer support
- Automated provisioning
- Automated suspension for overdue invoices
- Automated termination policies
- Easy upgrades and downgrades
- Reduced manual workload
- Better customer experience
- Improved business efficiency
Conclusion
Learning how to Set Up Service Management in WHMCS is essential for businesses that want to automate customer service administration and streamline daily operations. From creating products and provisioning hosting accounts to suspending overdue services and managing upgrades, WHMCS provides everything needed to oversee the complete service lifecycle.
By following the steps in this guide and applying automation wherever possible, you can Set Up Service Management in WHMCS efficiently, reduce manual effort, improve customer satisfaction, and ensure your hosting or service business runs smoothly as it scales.
Related Articles