Latest Updates
How to Set Up WHMCS Branding and Logo
How to Set Up WHMCS Branding and Logo A professional-looking client portal builds trust and strengthens your company's identity. One of the first things every hosting provider should customize after installing WHMCS is the…
How to Set Up WHMCS Branding and Logo
A professional-looking client portal builds trust and strengthens your company’s identity. One of the first things every hosting provider should customize after installing WHMCS is the branding. Completing your WHMCS Branding and Logo Setup ensures that your business logo, colors, and company details appear consistently throughout the client area, invoices, order forms, and email communications.
If you’re looking to Set Up WHMCS Branding and Logo, customizing your WHMCS installation is one of the first steps toward creating a professional hosting business. When you Set Up WHMCS Branding and Logo, your company identity appears consistently across the client area, invoices, emails, and order forms, helping build customer trust and brand recognition.
By replacing the default WHMCS branding with your own, customers immediately recognize your company whenever they log in, receive invoices, or place orders. This simple customization creates a more professional experience and reinforces your brand at every customer touchpoint.
In this guide, you’ll learn everything you need to know about WHMCS Branding and Logo Setup, including uploading your company logo, changing the website title, editing company information, and customizing templates.
Why WHMCS Branding Matters
Choosing to Set Up WHMCS Branding and Logo ensures your hosting business presents a consistent and professional image across every customer interaction.
Proper branding helps you:
- Build customer trust
- Create a professional appearance
- Increase brand recognition
- Improve customer experience
- Make your hosting business look established
- Keep invoices and emails consistent
- Differentiate your company from competitors
Without proper branding, customers may still see generic WHMCS elements, making your website appear unfinished.
Prerequisites
Before you Set Up WHMCS Branding and Logo, make sure you have your company logo, administrator access, and business information ready.
- Administrator access to WHMCS
- Your company logo (PNG recommended with transparent background)
- Company name
- Website URL
- Company address
- Support email address
- Company phone number
Steps to Set Up WHMCS Branding and Logo
Step 1: Log in to WHMCS Admin Area
Access your WHMCS administration panel using your administrator credentials.
After logging in, you’ll have access to all configuration settings.

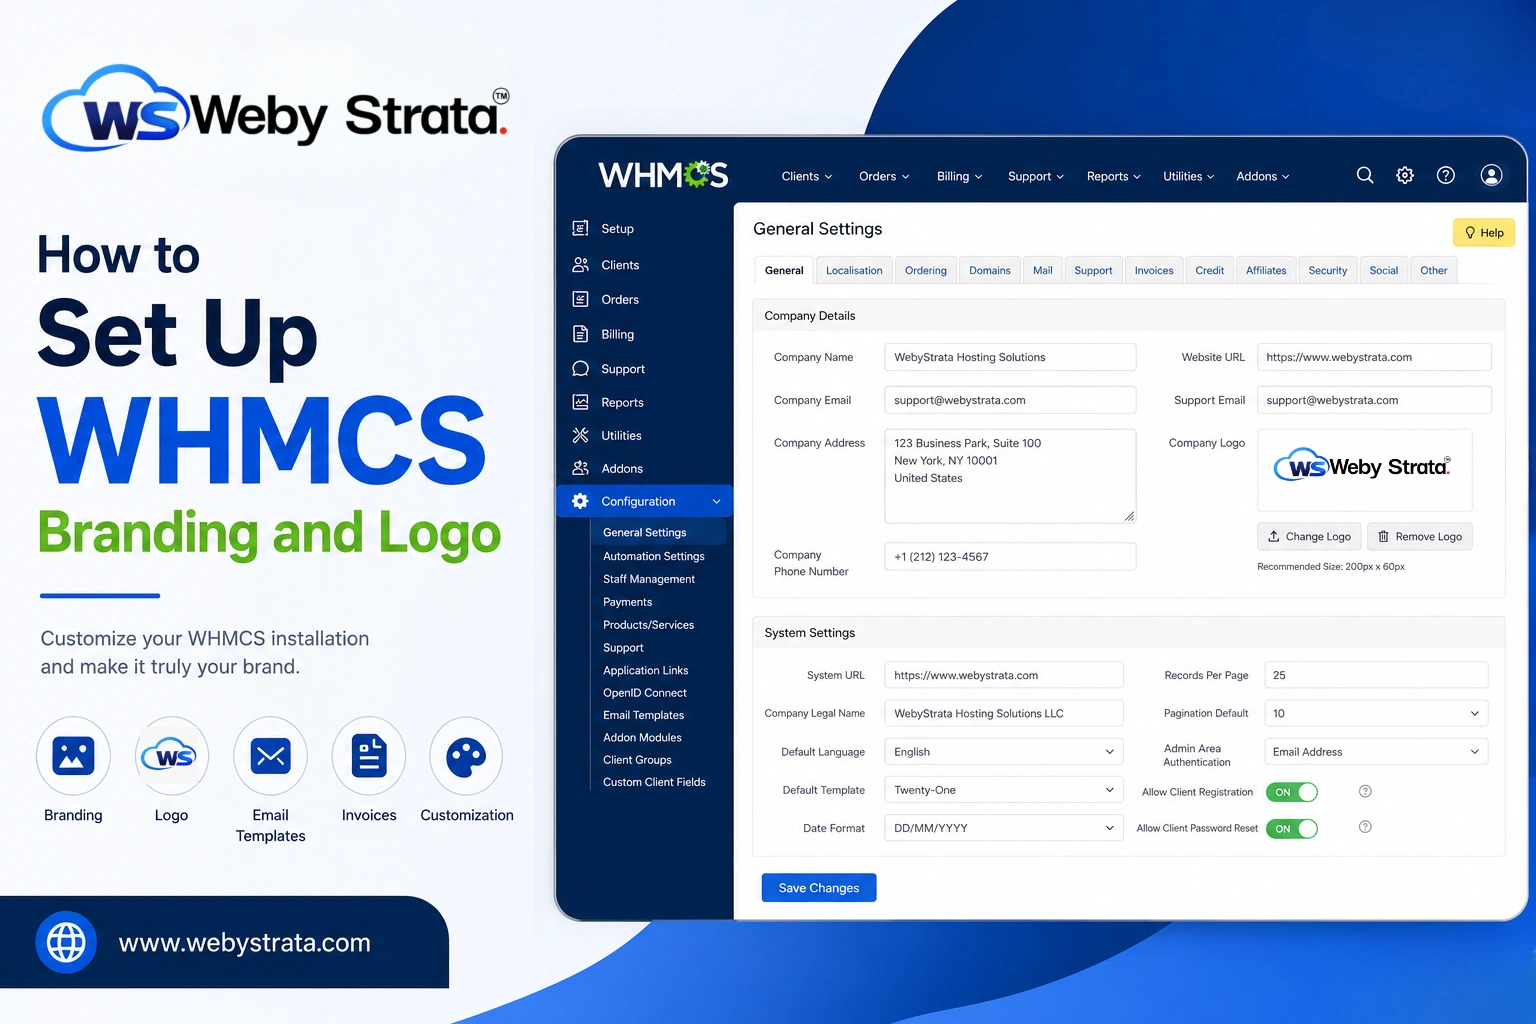
Step 2: Open General Settings
Navigate to:
- Configuration Icon → System Settings
![]()
- Select General Settings.
This page contains all your company’s branding information.

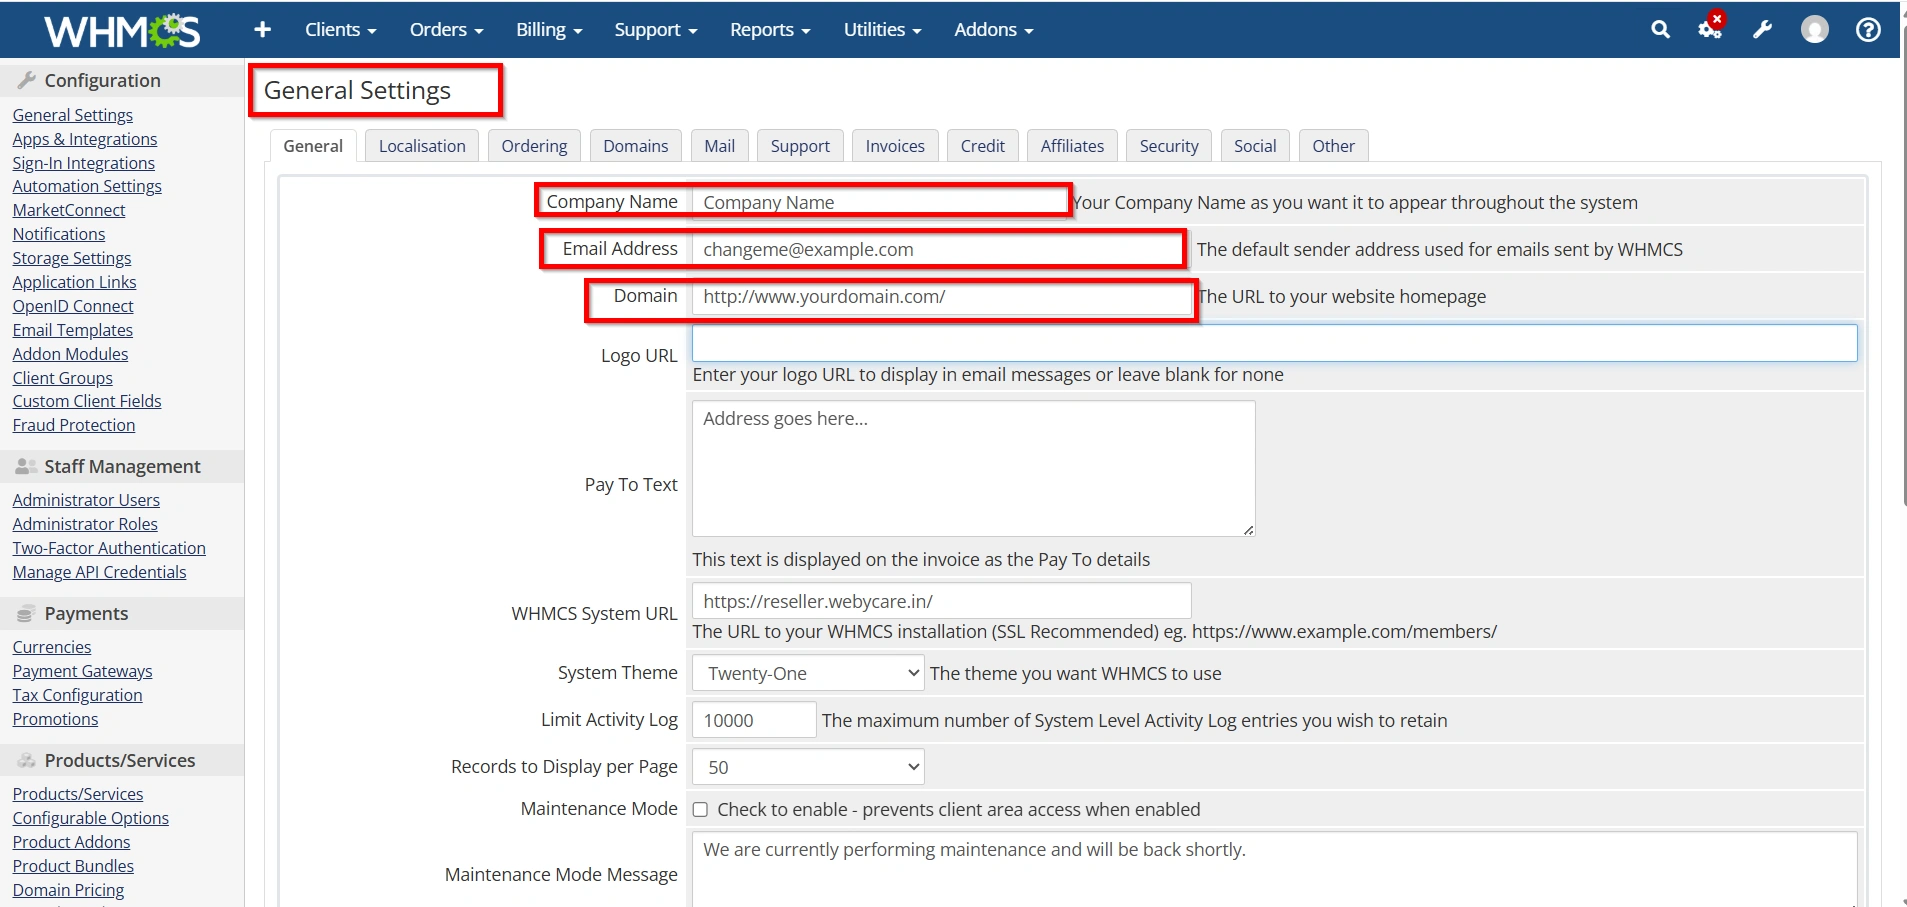
Step 3: Configure Company Information
Inside the General Settings page, update:
- Company Name
- Company Email
- Company Address
- Telephone Number
- Website URL
- Support Email
- VAT or Tax Number (if applicable)
These details automatically appear on:
- Client Area
- PDF Invoices
- Email Templates
- Quotes
- Receipts
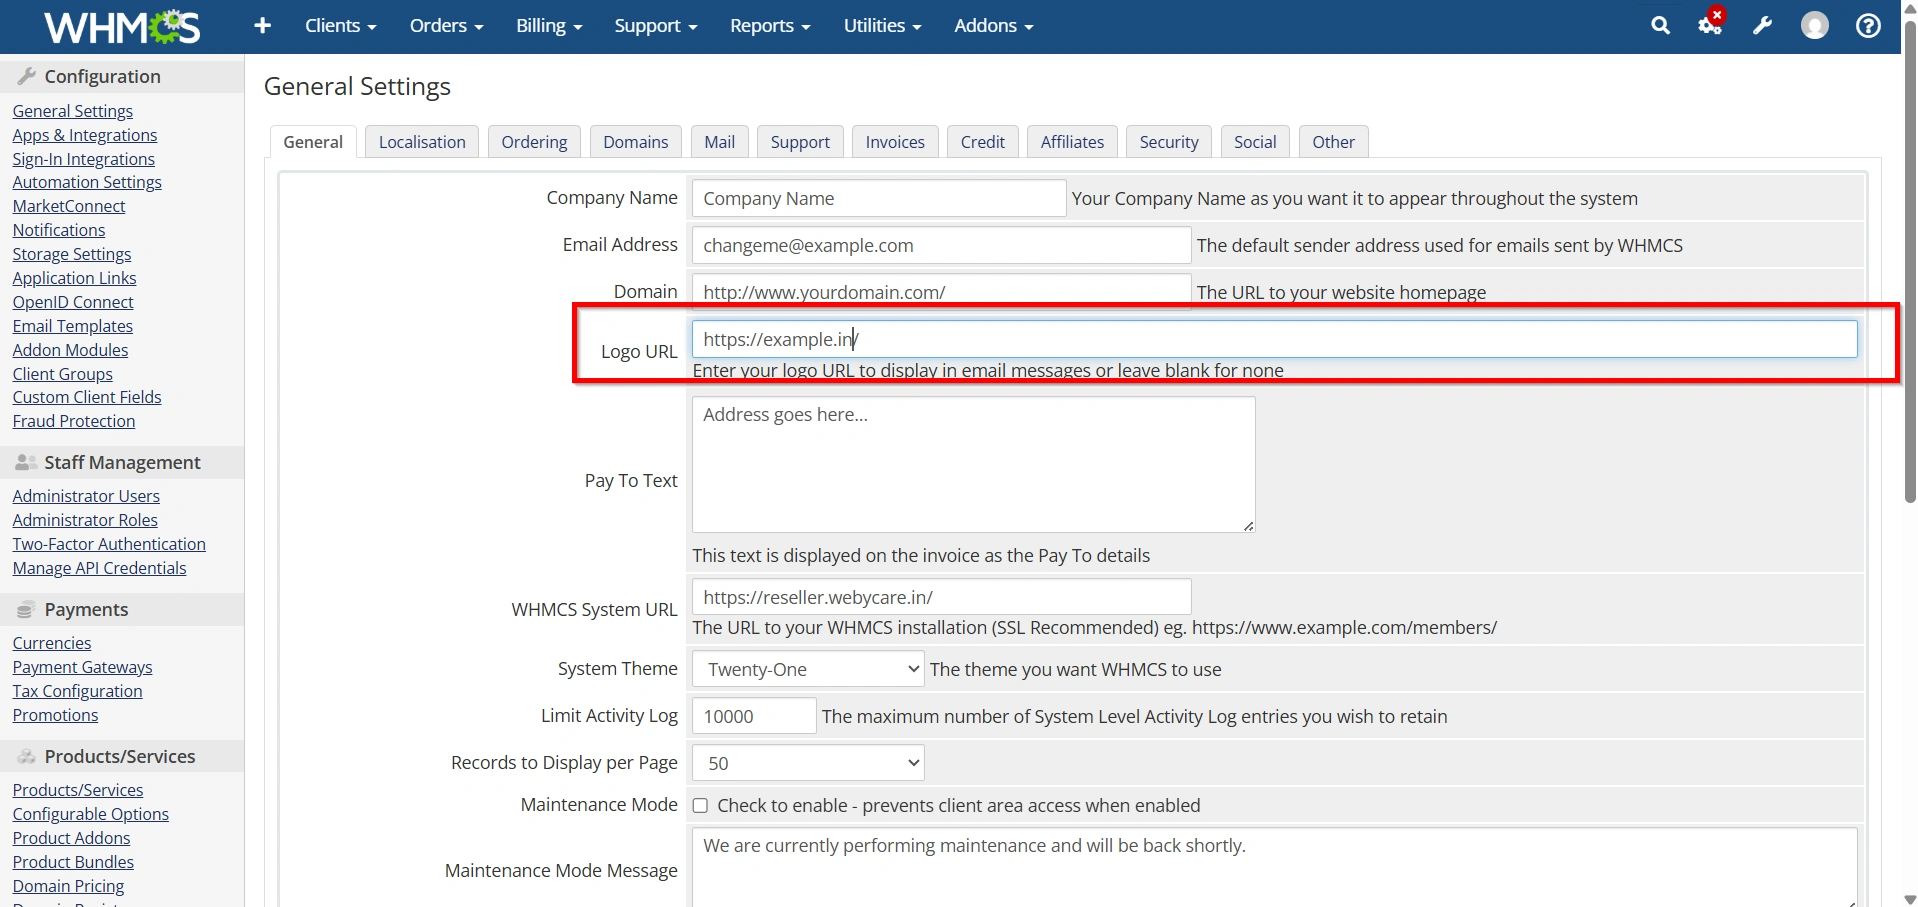
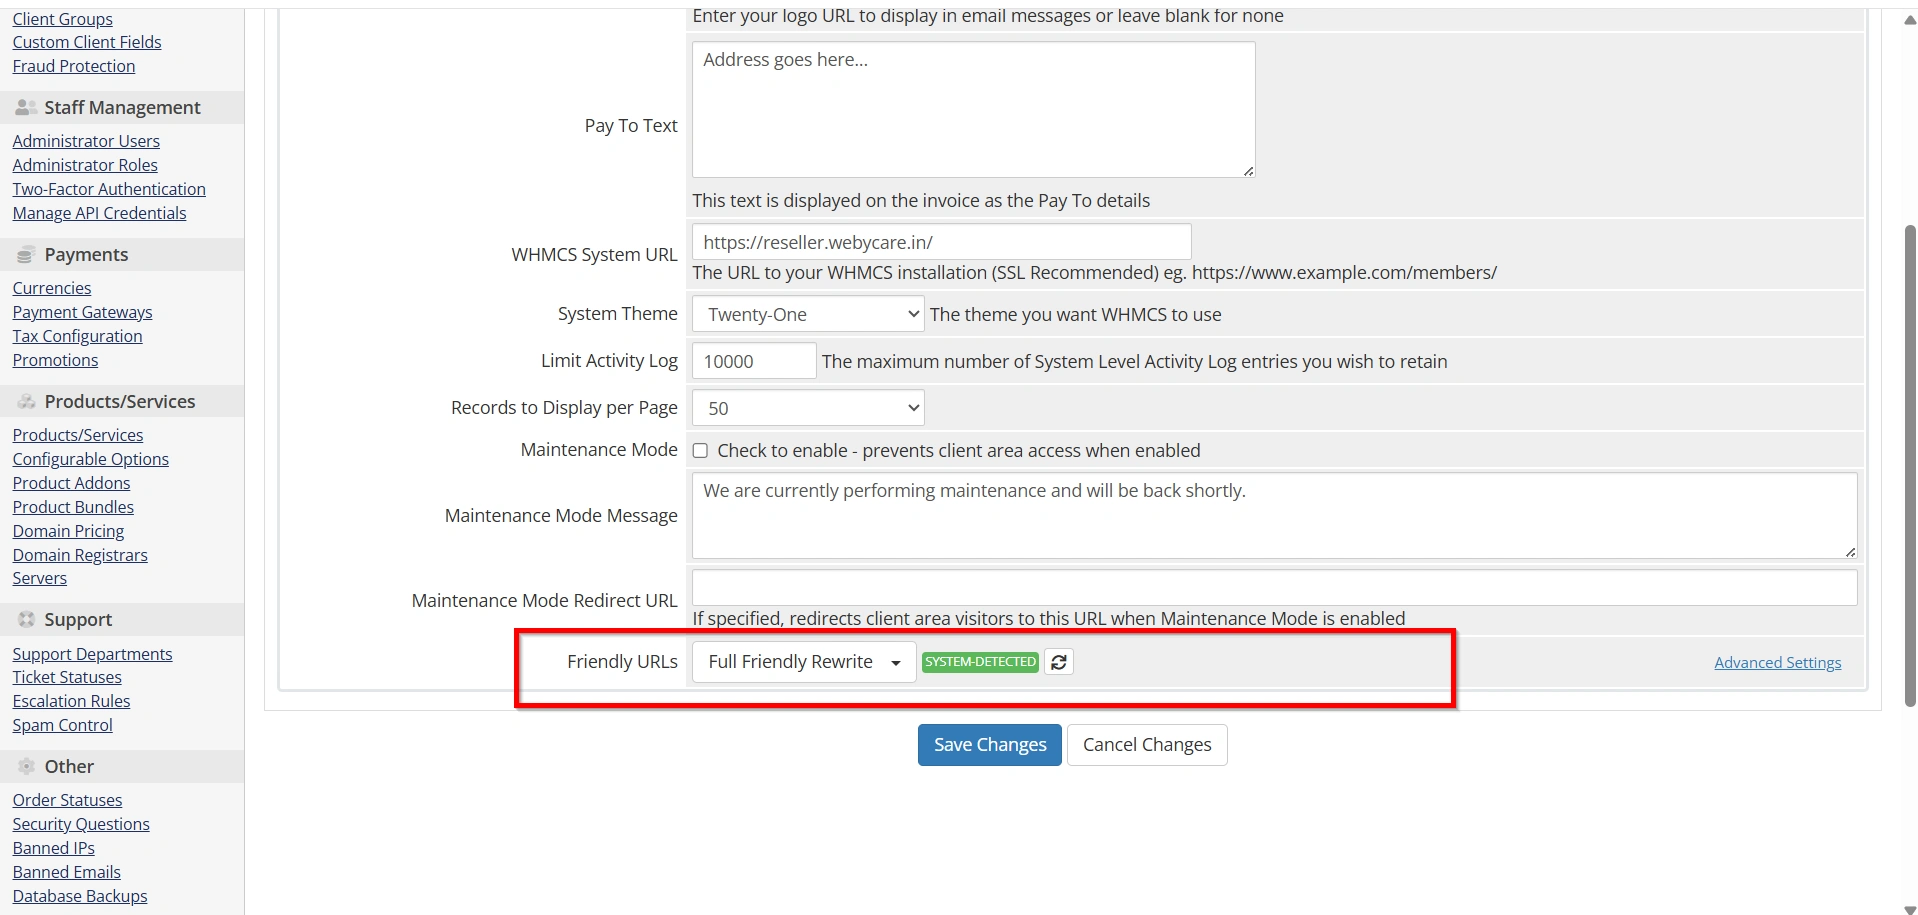
Step 4: Configure Your Company Logo
Within General Settings, locate the Logo section.
- Paste your logo url
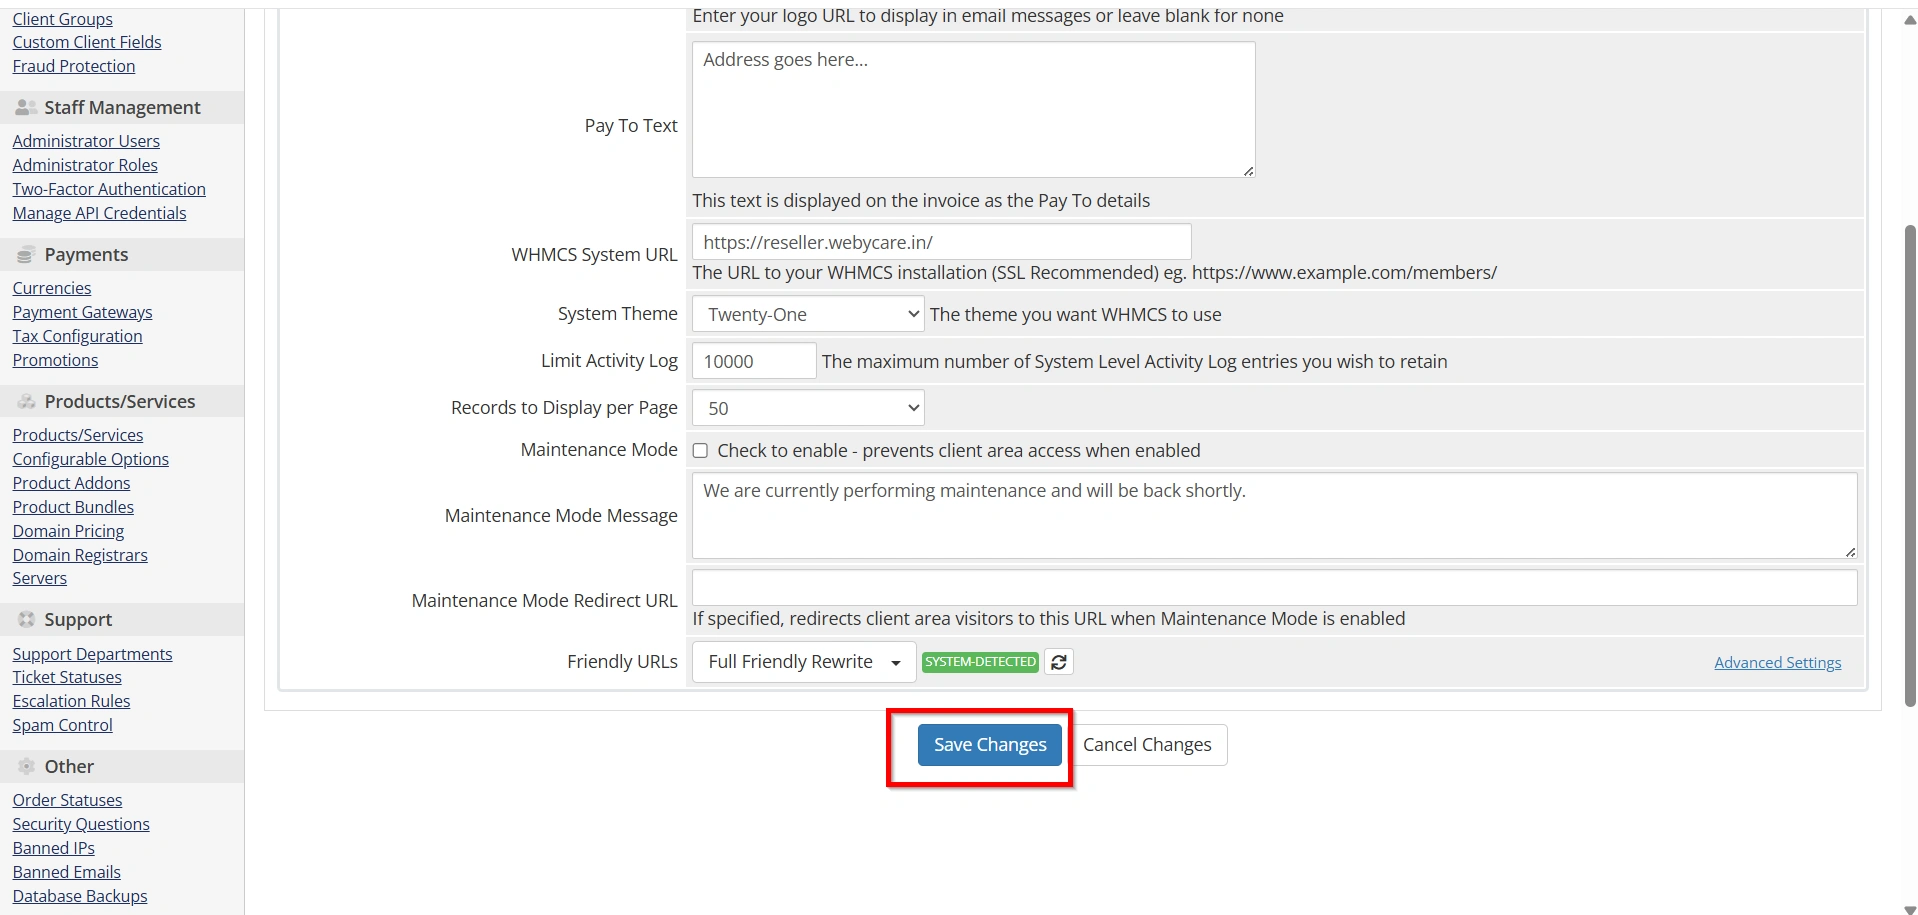
- Save Changes
After uploading, your logo replaces the default WHMCS logo throughout the client area.
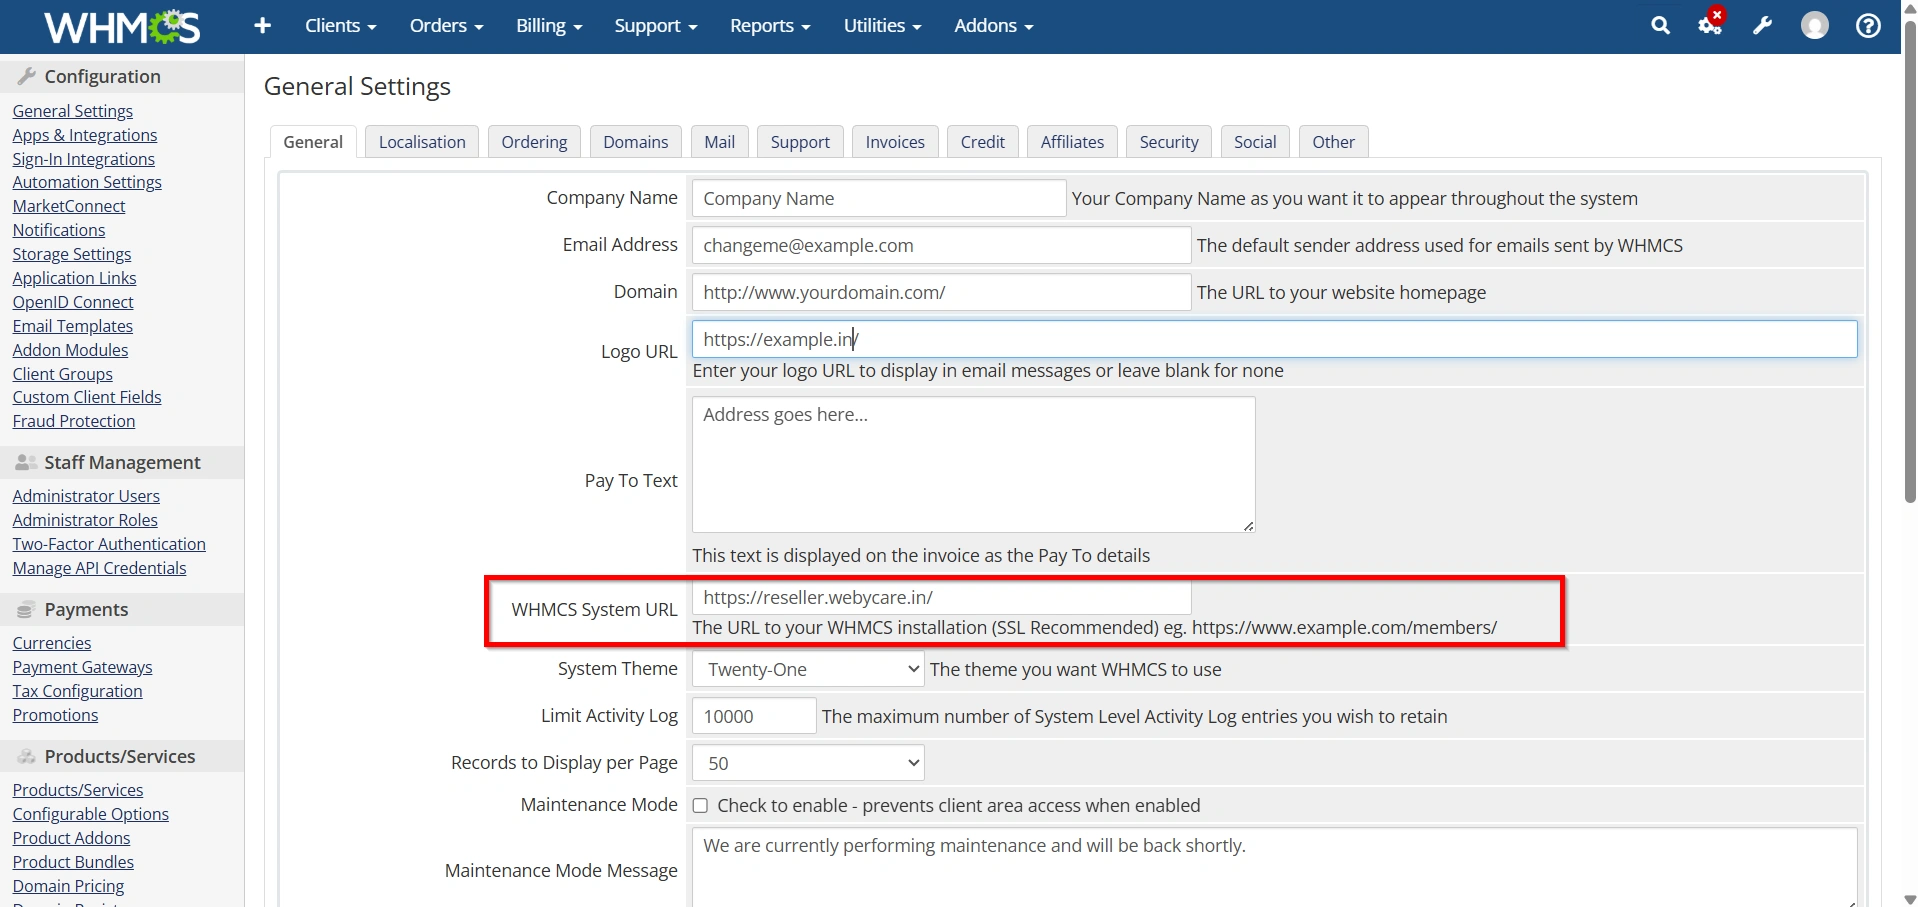
Step 5: Customize the Website Title
Still inside General Settings, update:
- System URL
- Company Name
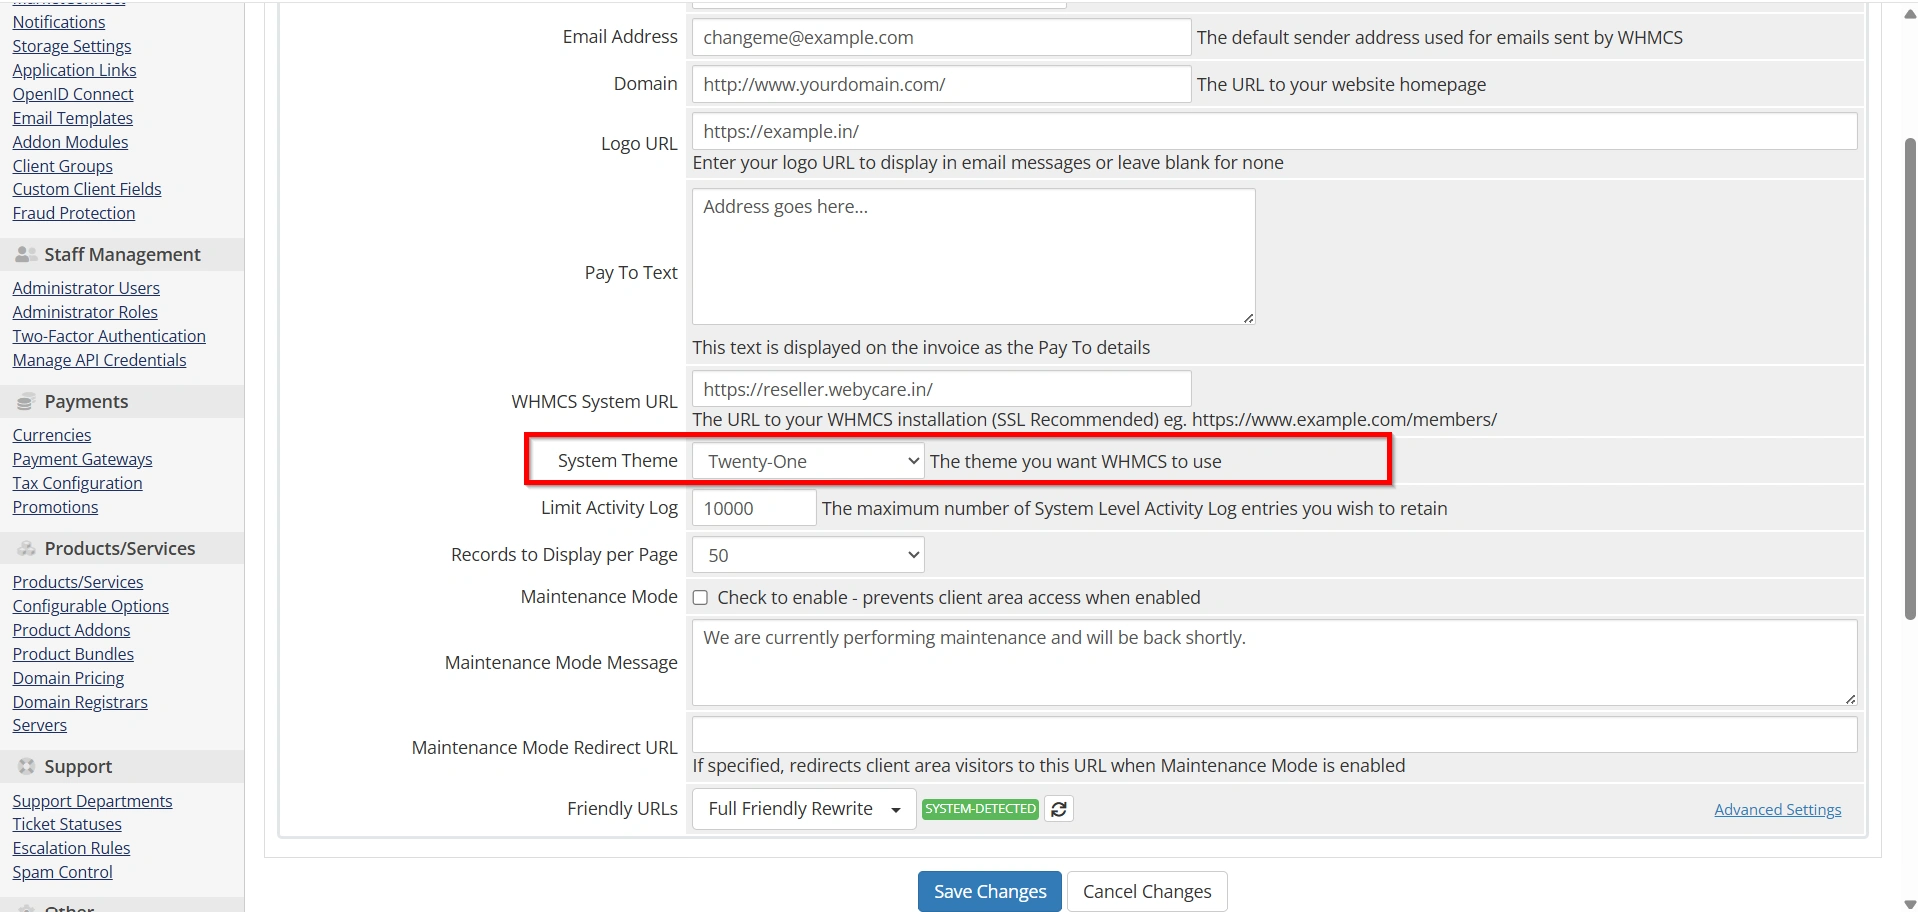
- Default Language
- Default Template
Your company name becomes visible across multiple pages.
Example:
Instead of:
WHMCSDisplay:
WebyStrata Hosting Solutions
Step 6: Customize Client Area Branding
WHMCS allows template customization.
Navigate to:
Popular templates include:
- Twenty-One
- Six
You can modify:
- Header
- Footer
- Navigation
- Homepage
- Login Page
- Colors
- Fonts
- Buttons
Avoid editing core files directly. Instead, customize your active theme to preserve changes during updates.
Step 7: Customize the Login Page
Your login page is often the first impression customers have.
You can customize:
- Logo
- Welcome message
- Background image
- Button colors
- Footer
- Copyright text
This creates a branded and professional login experience.
Step 8: Add Social Media Links
Include links to your business profiles in your client area or email templates, such as:
- X (Twitter)
- YouTube
This increases brand visibility and makes it easier for customers to connect with your business.
- Click Save Changes.
Step 9: Test Your Branding
After completing your WHMCS Branding and Logo Setup, verify that your branding appears correctly across:
- Client Area
- Login Page
- Order Forms
- Shopping Cart
- Email Templates
- PDF Invoices
- Password Reset Emails
- Support Tickets
Also test on desktop, tablet, and mobile devices.
Best Practices for WHMCS Branding and Logo Setup
For the best results:
- Use a high-quality PNG logo with a transparent background.
- Keep your branding consistent across all customer-facing pages.
- Ensure your logo looks good on both light and dark backgrounds.
- Match button and link colors to your brand identity.
- Update contact information whenever it changes.
- Test your branding after every WHMCS update.
- Keep image file sizes optimized for faster page loading.
Following these practices will help you maintain a professional and consistent appearance.
Benefits of WHMCS Branding and Logo Setup
Businesses that Set Up WHMCS Branding and Logo create a more trustworthy client experience and reinforce their brand identity with every interaction.
- Creates a professional hosting business image
- Builds customer trust and credibility
- Improves brand recognition
- Delivers a consistent customer experience
- Enhances invoices and email communications
- Makes your client portal look unique
- Strengthens your overall brand identity
Conclusion
A well-executed WHMCS Branding and Logo Setup is one of the easiest ways to make your hosting business look more professional and trustworthy. By customizing your company logo, client area, login page, email templates, invoices, and branding elements, you create a consistent experience that customers recognize and trust.
Taking the time to Set Up WHMCS Branding and Logo helps transform a default WHMCS installation into a fully branded customer portal. Whether you’re launching a new hosting company or refreshing your existing website, it’s important to Set Up WHMCS Branding and Logo correctly to provide a professional, consistent, and memorable experience for your clients.
Related Articles