Latest Updates
How to Setup and Install WordPress Postie Plugin
How to Setup and Install WordPress Postie Plugin Managing content efficiently is important for any WordPress website. If you frequently create posts while traveling, working remotely, or collaborating with multiple contributors, you may want…
How to Setup and Install WordPress Postie Plugin
Managing content efficiently is important for any WordPress website. If you frequently create posts while traveling, working remotely, or collaborating with multiple contributors, you may want a simpler way to publish content without constantly logging into your WordPress dashboard. One useful solution is the Postie plugin.
The Setup and Install WordPress Postie Plugin process allows website owners to publish WordPress posts directly from an email account. Instead of creating content through the WordPress editor, you can simply send an email and have it automatically converted into a post, page, or draft. This can save time and streamline content management for bloggers, businesses, and organizations.
In this guide, you will learn everything you need to know about the Setup and Install WordPress Postie Plugin process, including installation, configuration, benefits, and best practices.
What Is the WordPress Postie Plugin?
Postie is a powerful WordPress plugin that monitors a designated email inbox and converts incoming emails into WordPress content. The plugin supports both POP3 and IMAP email protocols and can automatically publish posts, upload attachments, and assign categories or tags.
Some key features of Postie include:
- Publish WordPress posts through email.
- Automatically upload and attach images.
- Support for POP3 and IMAP mailboxes.
- Create drafts, pages, or published posts.
- Assign categories and tags automatically.
- Support multiple authors and contributors.
- Schedule content based on email submissions.
The ability to Setup and Install WordPress Postie Plugin can significantly simplify content workflows, especially for websites that receive content from multiple contributors.
Prerequisites
Before you begin the Setup and Install WordPress Postie Plugin process, ensure that you have:
- A functioning WordPress website.
- Administrator access to WordPress.
- A dedicated email account for Postie.
- POP3 or IMAP access enabled.
- Mail server credentials.
- Basic familiarity with WordPress administration.
Using a dedicated email account is highly recommended because it prevents unrelated emails from being imported into WordPress.
How to Setup and Install WordPress Postie Plugin
Follow the steps below to complete the installation.
Step 1: Log in to Your WordPress Dashboard
Begin by accessing your WordPress administration area.
Open your web browser and visit:
https://yourdomain.com/wp-admin
Enter your administrator username and password, then click Log In.
Once logged in, you will be redirected to the WordPress Dashboard.
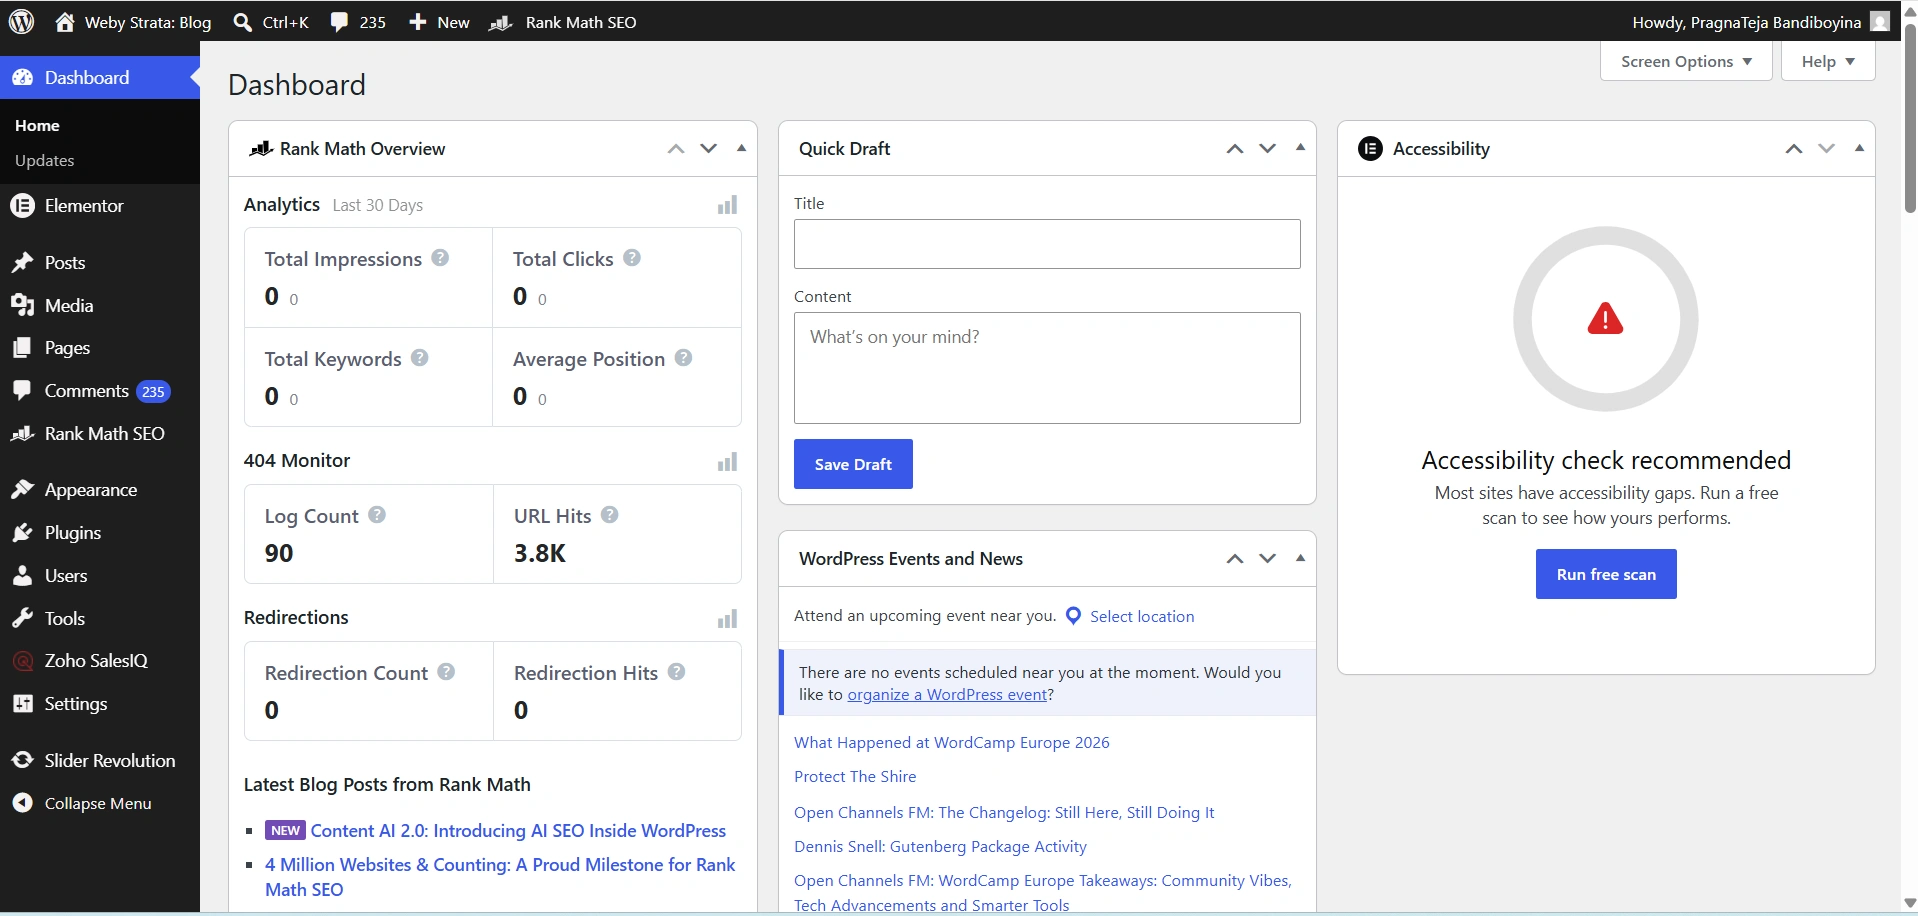
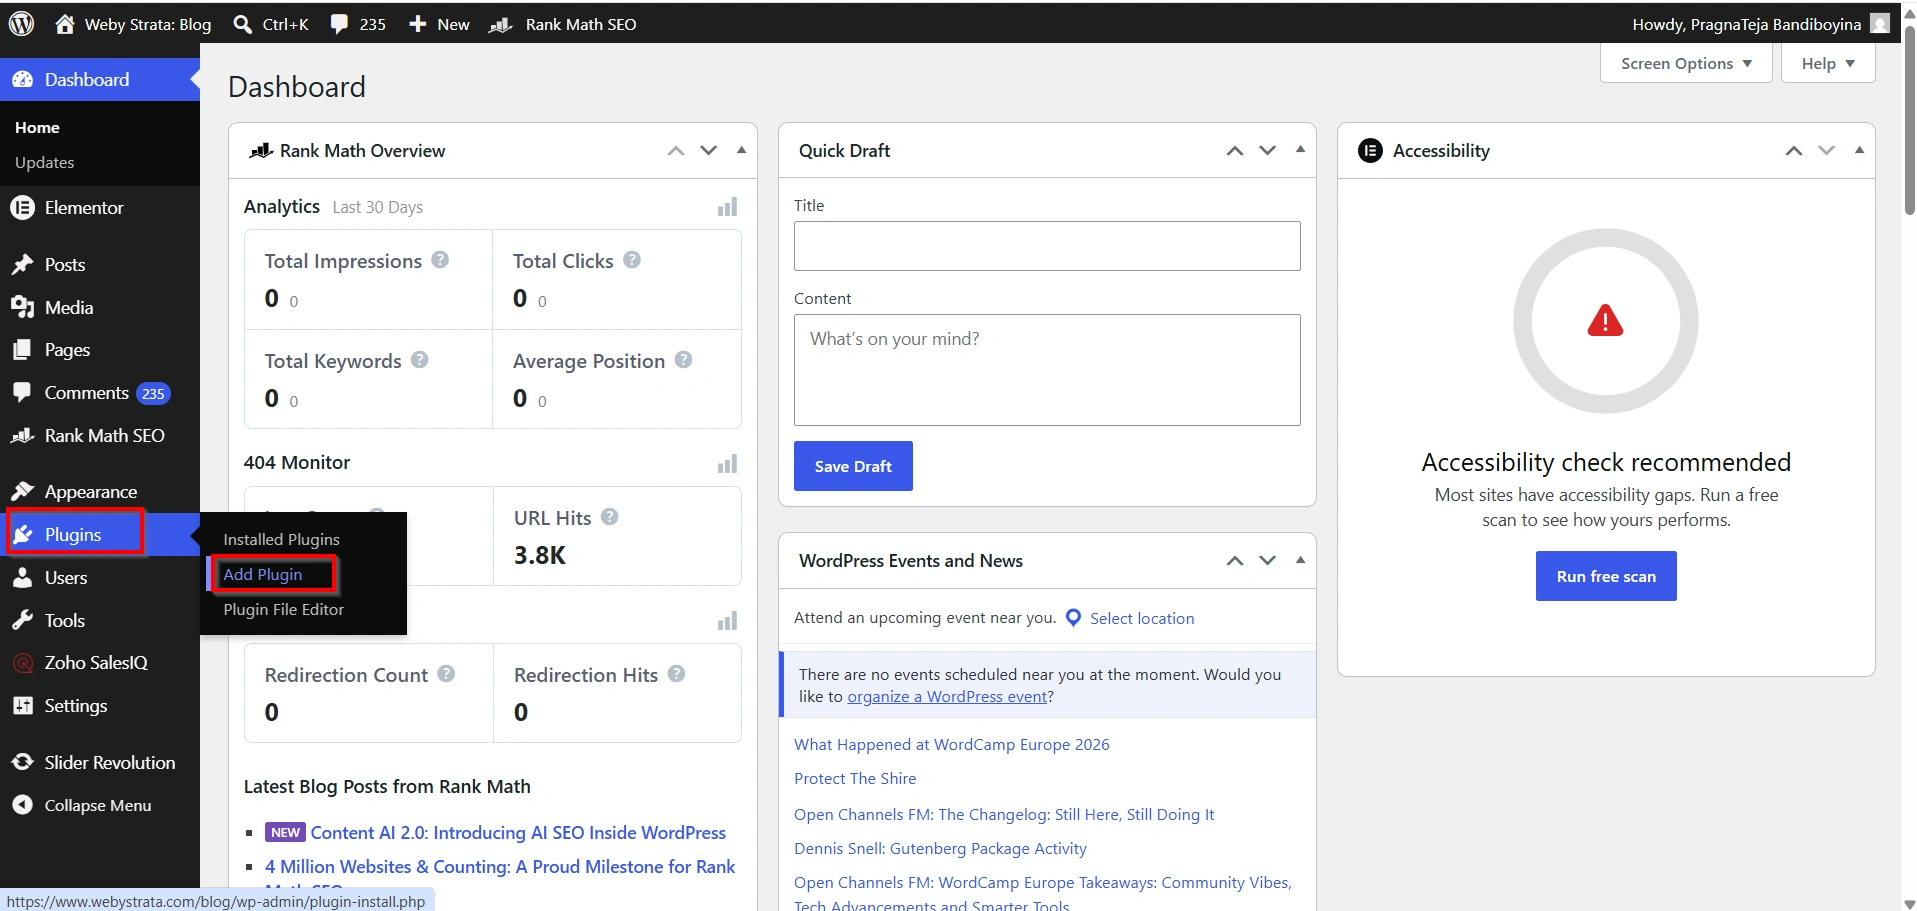
Step 2: Navigate to Plugins
From the left navigation menu, select:
Plugins → Add New Plugin
This page allows you to search and install plugins directly from the WordPress repository.
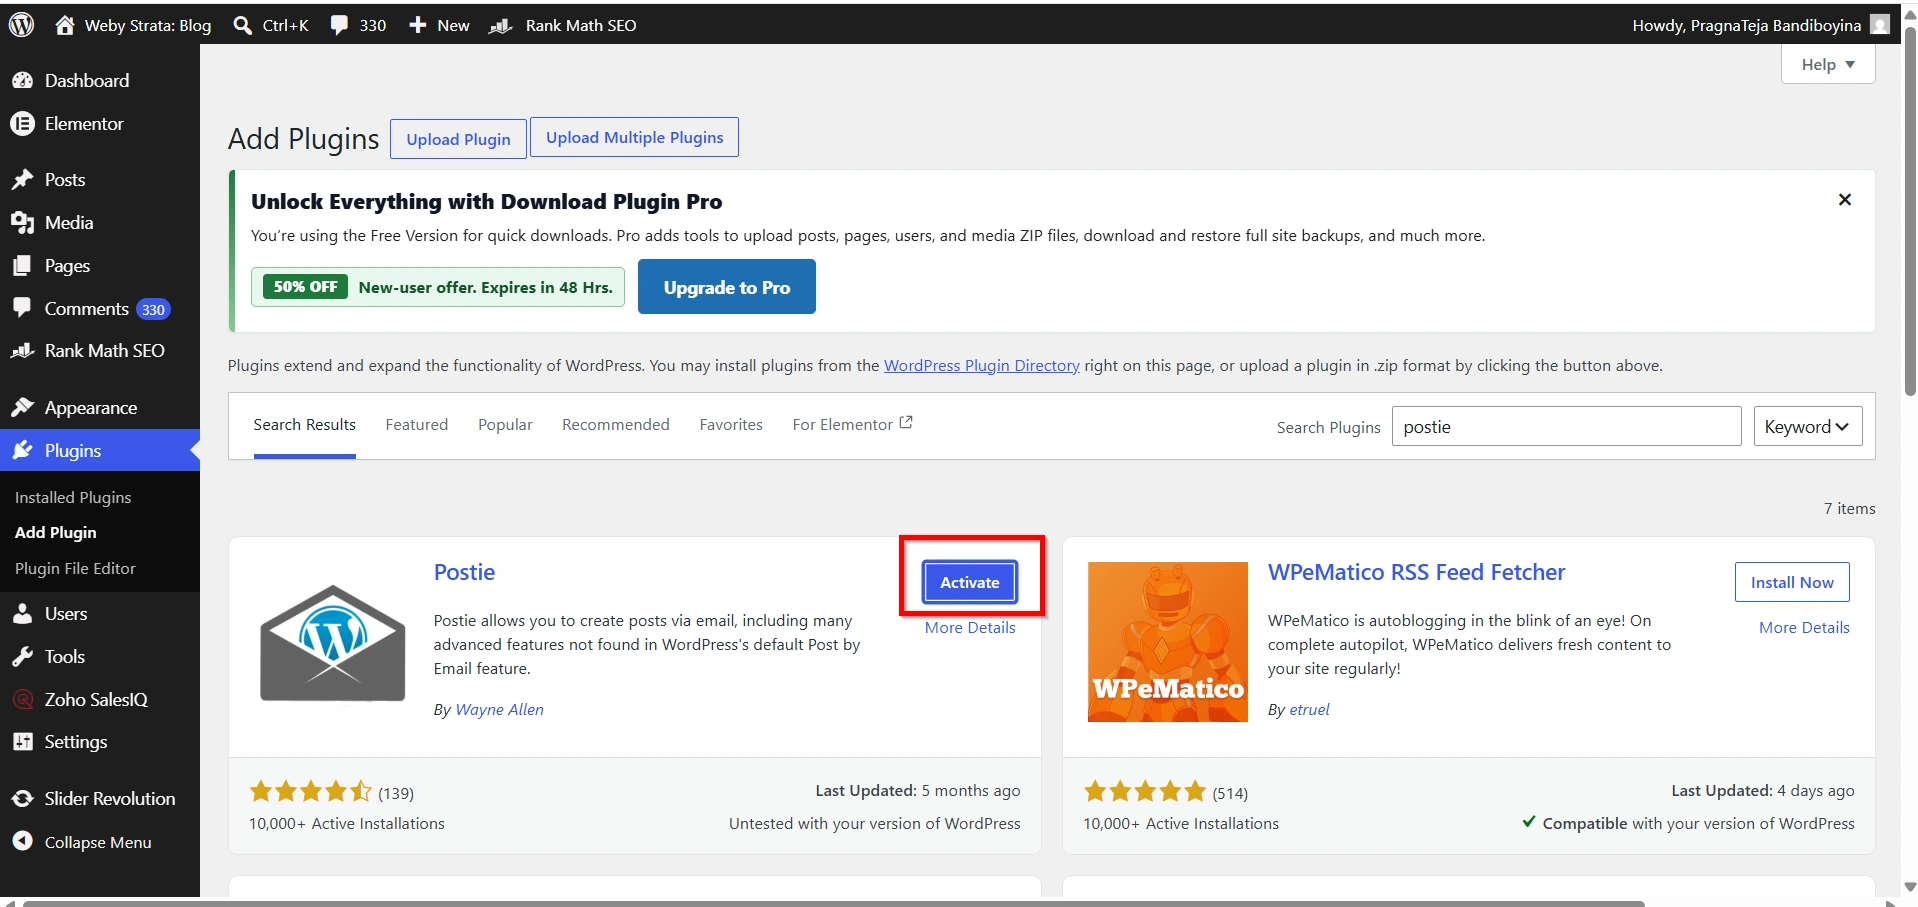
Step 3: Search for Postie
In the search field, type:
Postie
Locate the Postie plugin in the search results.
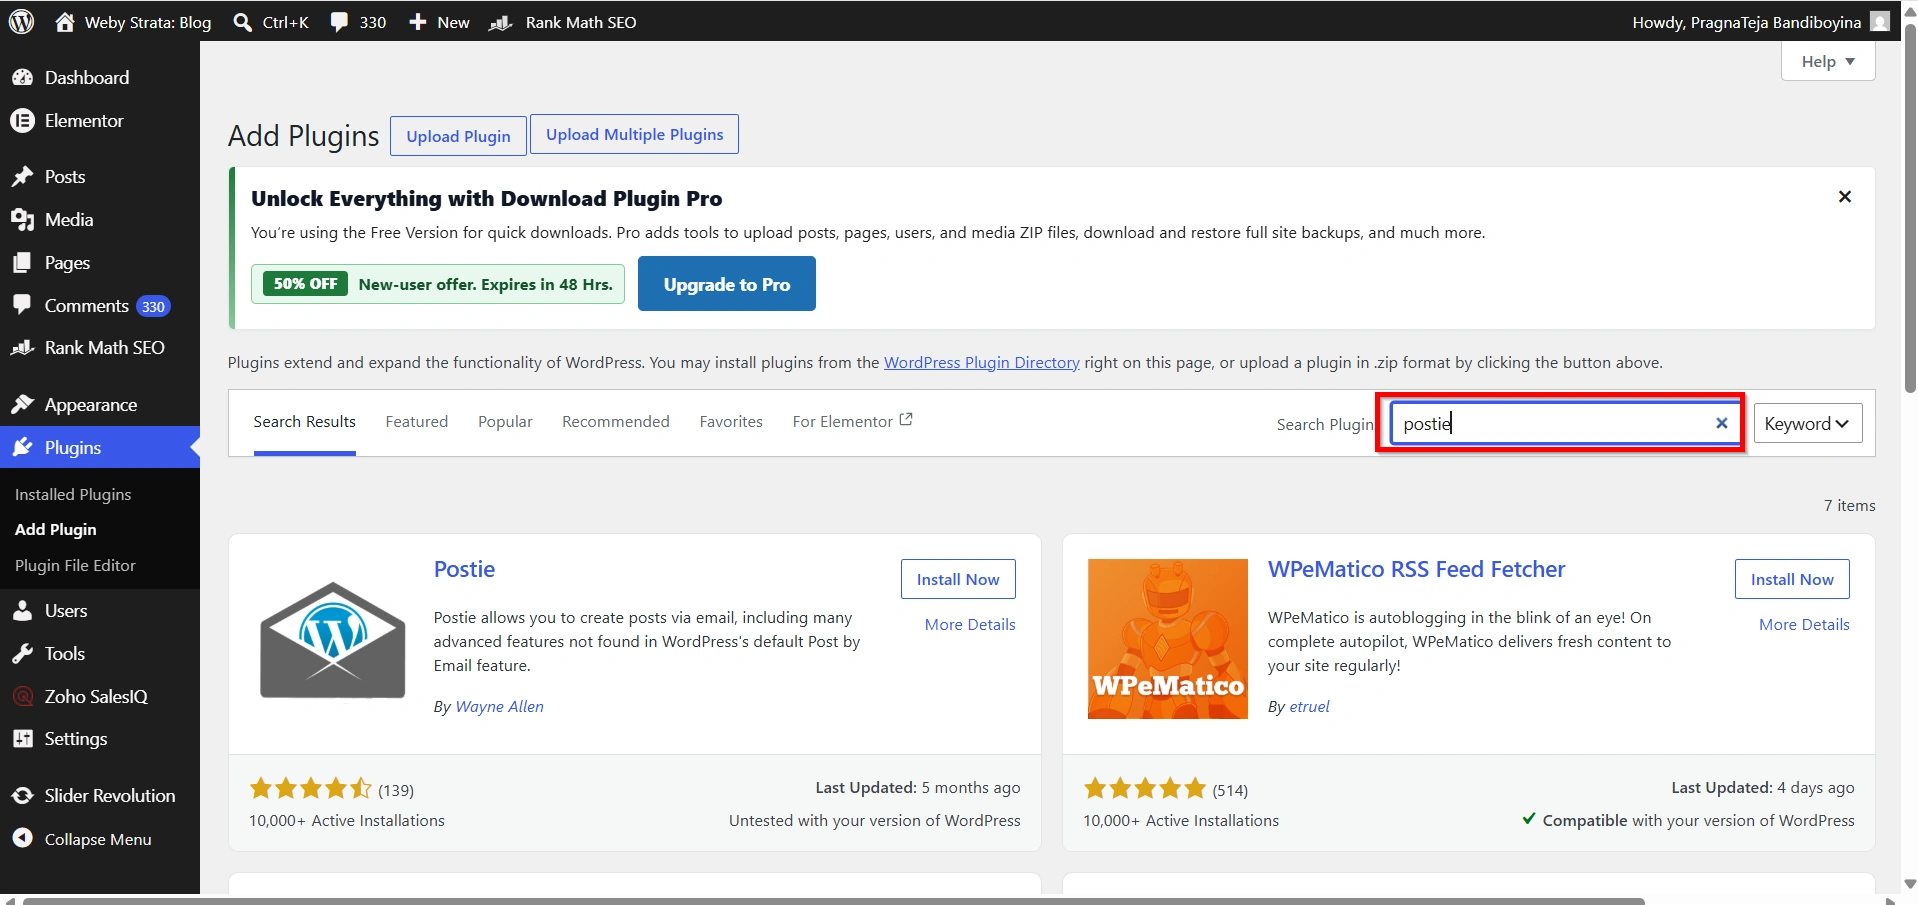
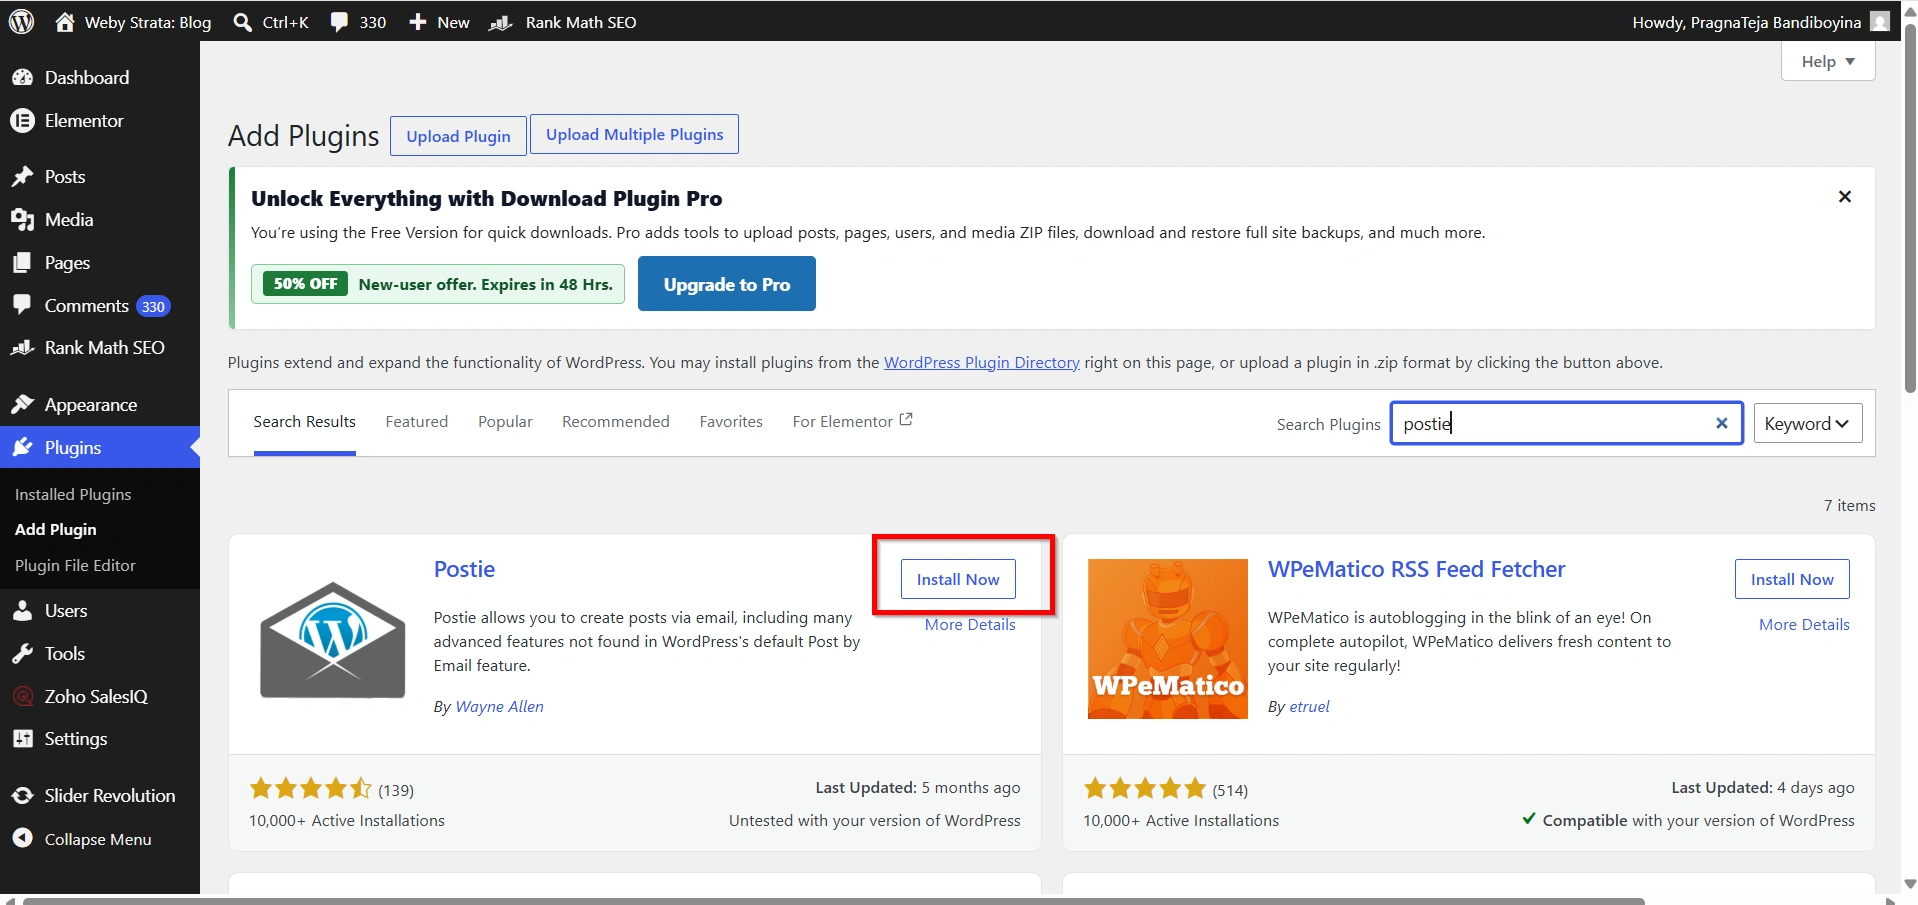
Step 4: Install the Plugin
Click the Install Now button next to the Postie plugin.
WordPress will automatically download and install the plugin.
Step 5: Activate the Plugin
After installation completes, click Activate.
The plugin will now be available in your WordPress settings area.
At this stage, you have successfully completed the first part of the Setup and Install WordPress Postie Plugin process.
Configure Postie Plugin Settings
Installation alone is not enough. You must configure the plugin so it can connect to your email account.
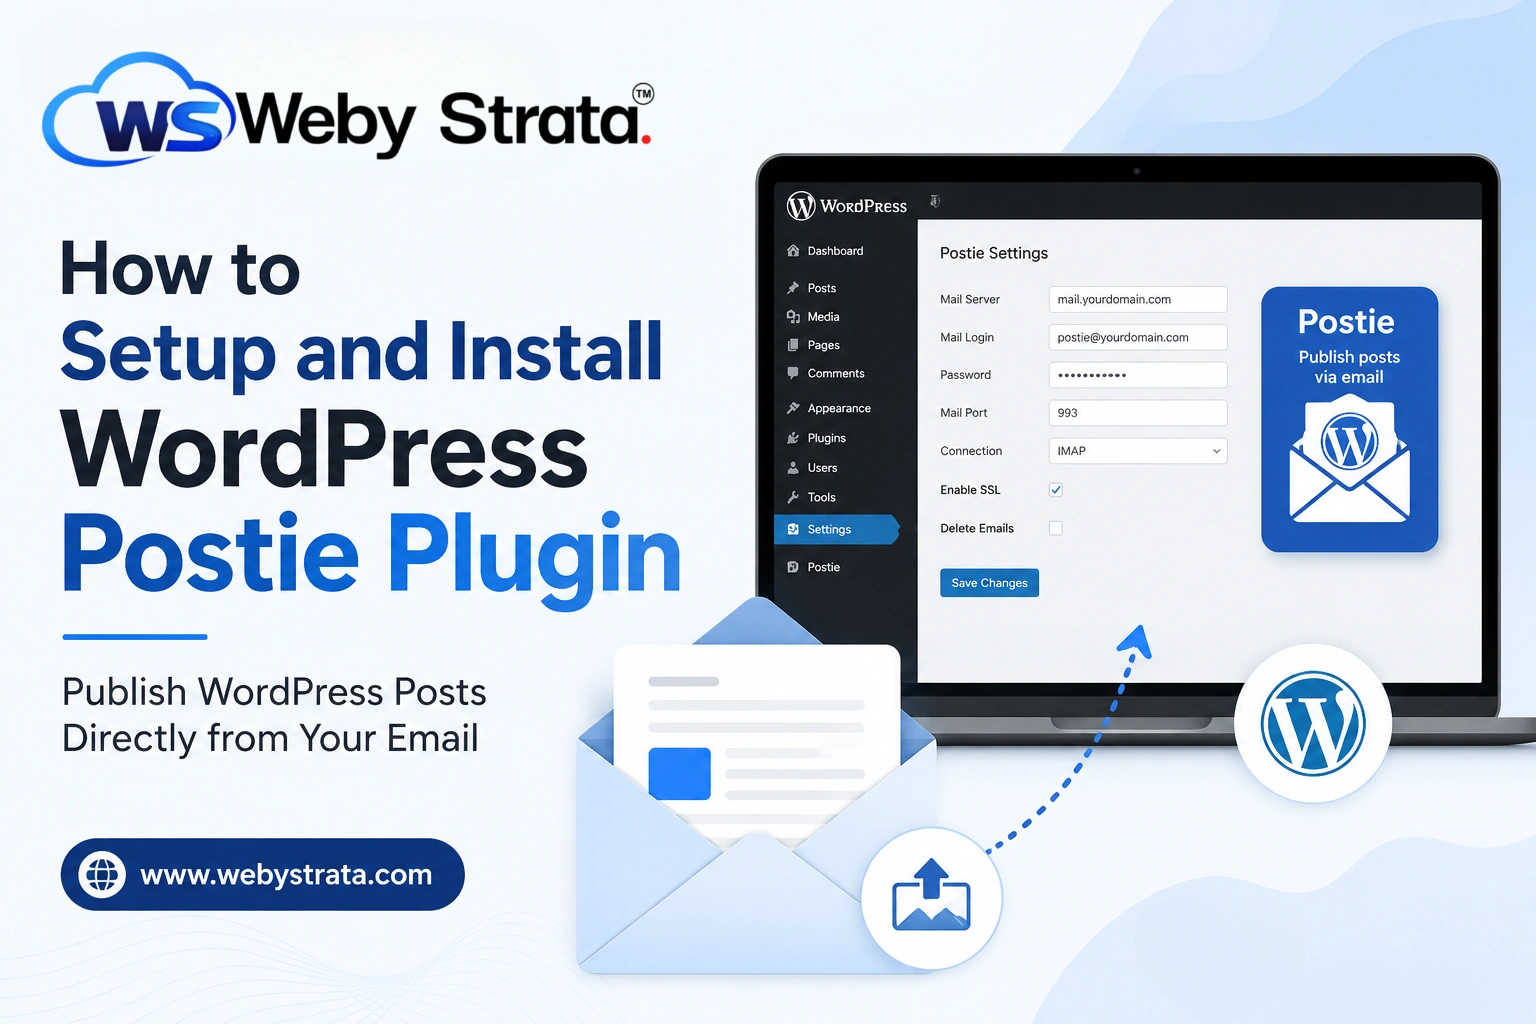
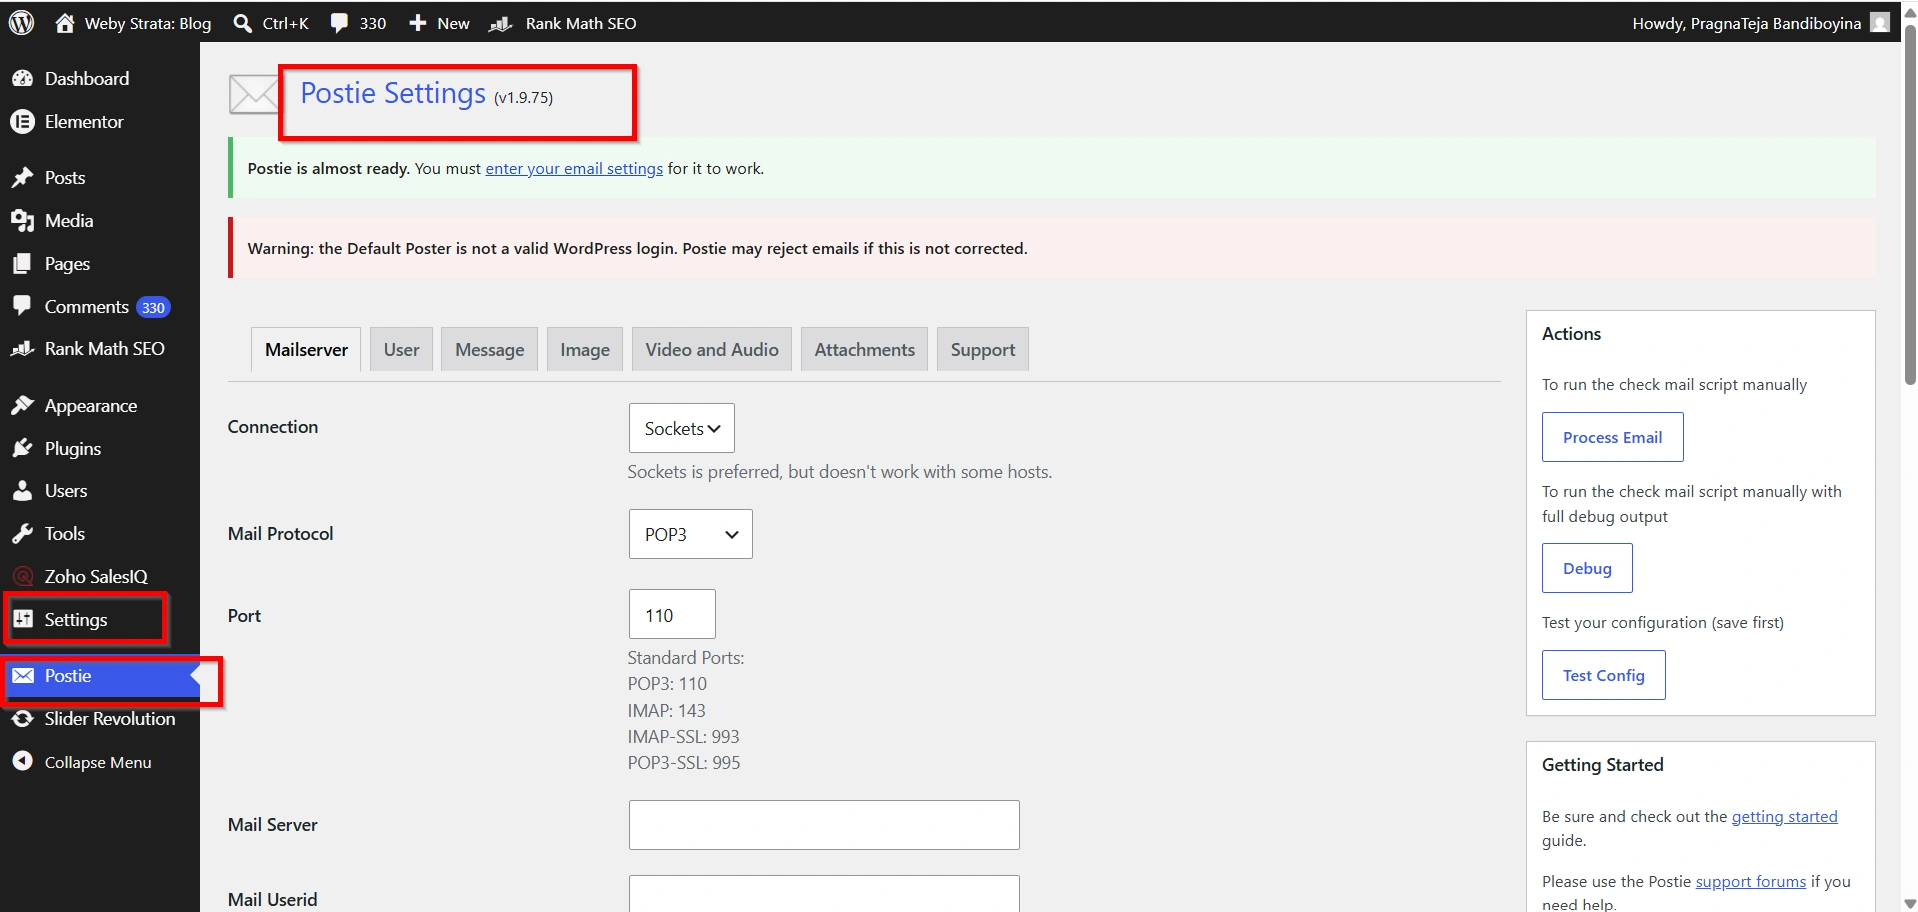
Step 1: Open Postie Settings
Navigate to:
Settings → Postie
The Postie configuration dashboard will appear.
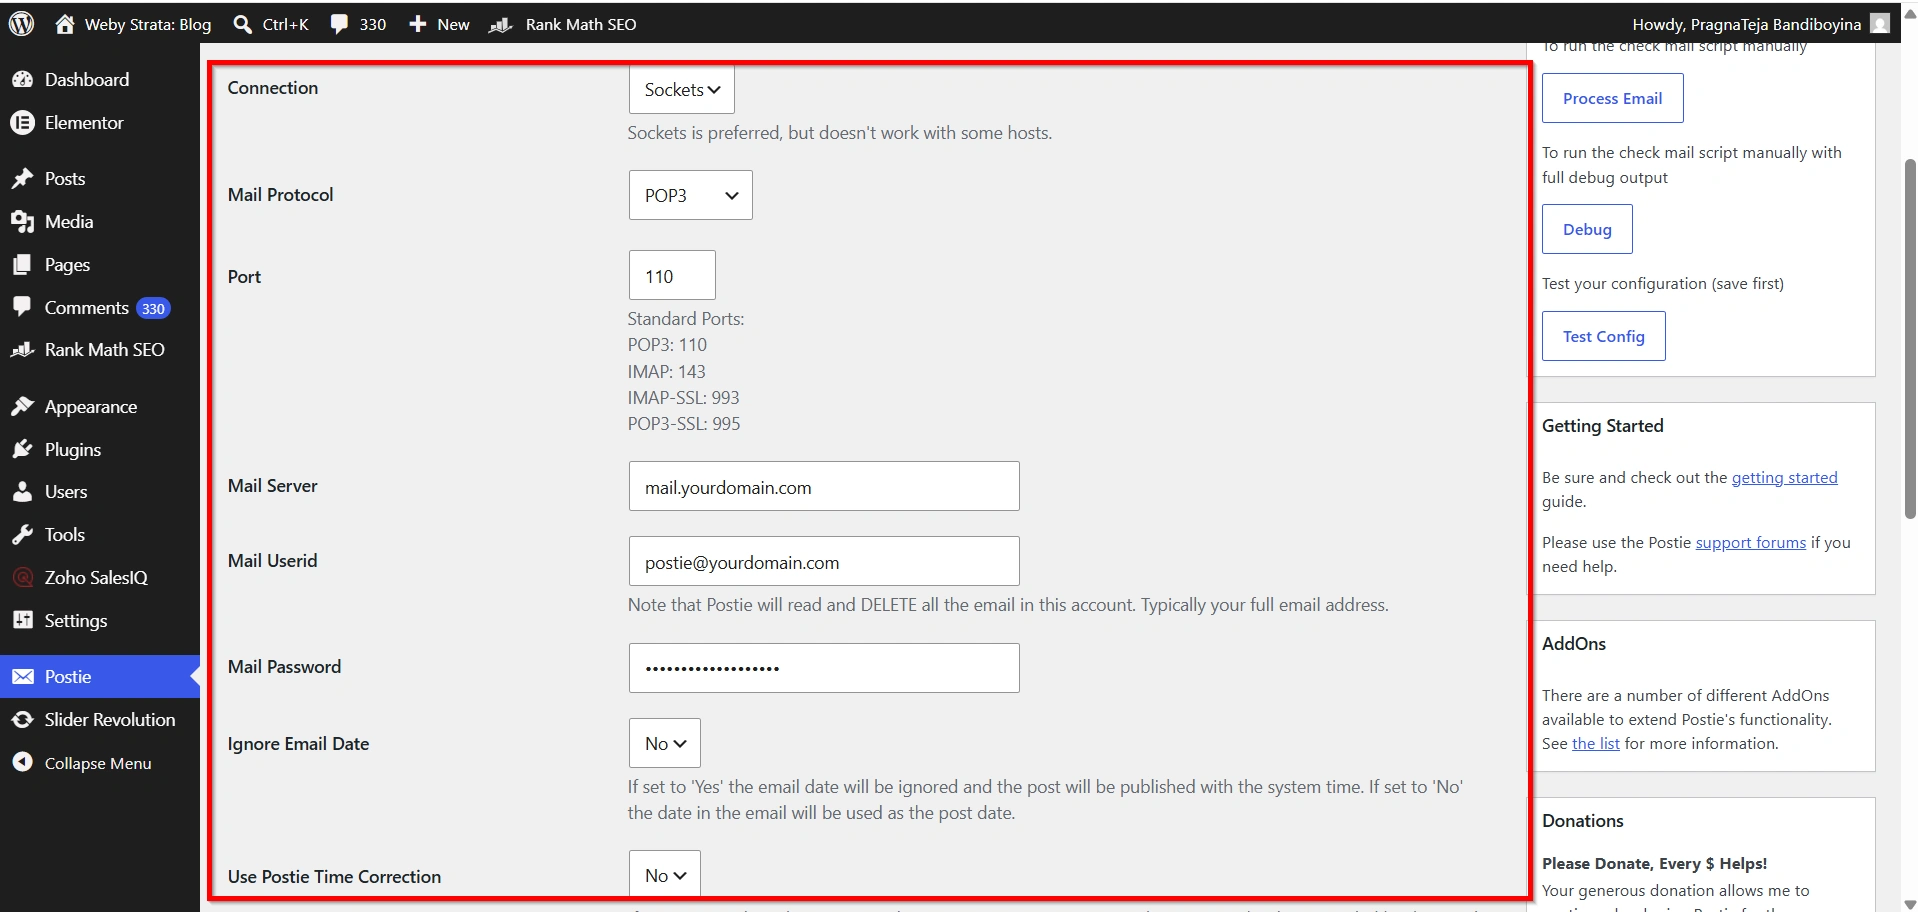
Step 2: Enter Mail Server Details
Provide the required email information:
- Mail Server Name
- Email Address
- Username
- Password
- Port Number
- Connection Type
Example:
- Mail Server: mail.yourdomain.com
- Email: postie@yourdomain.com
- Username: postie@yourdomain.com
- Password: Your Password
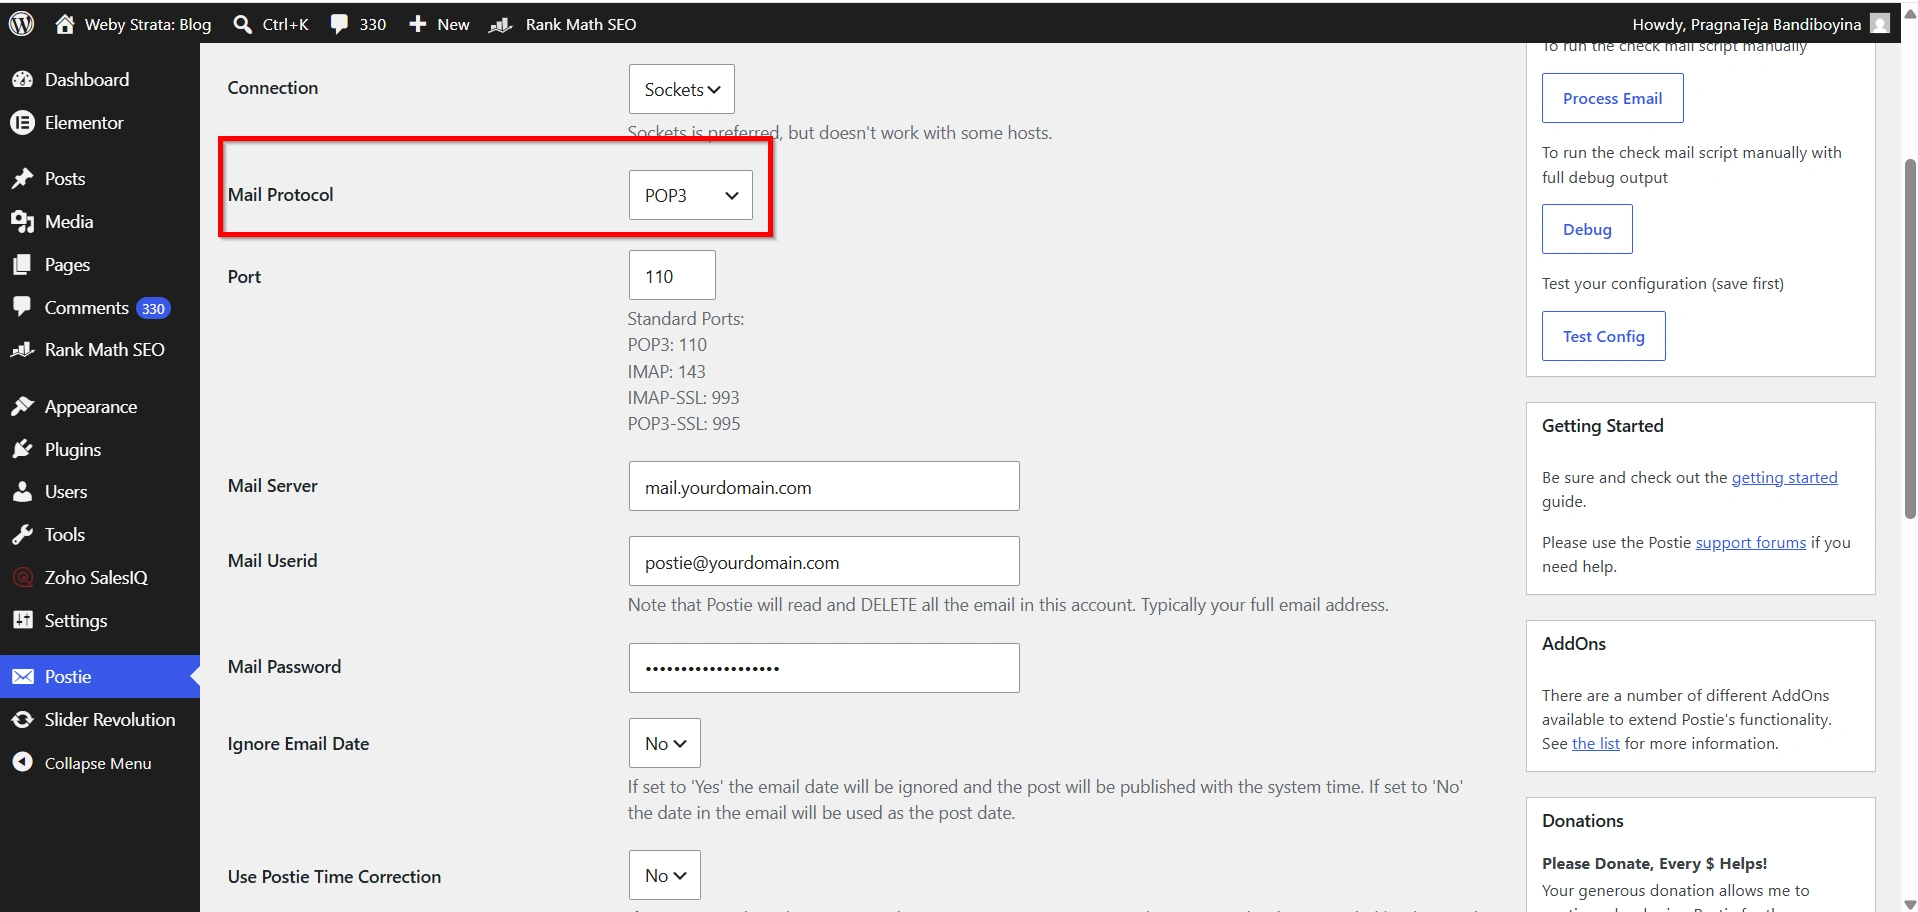
Step 3: Select Email Protocol
Choose one of the following:
- POP3
- IMAP
IMAP is generally recommended because it provides better mailbox synchronization and reliability.
Step 4: Enable Security
If your hosting provider supports encrypted email connections, enable:
- SSL
- TLS
Secure connections help protect your credentials and email communications.
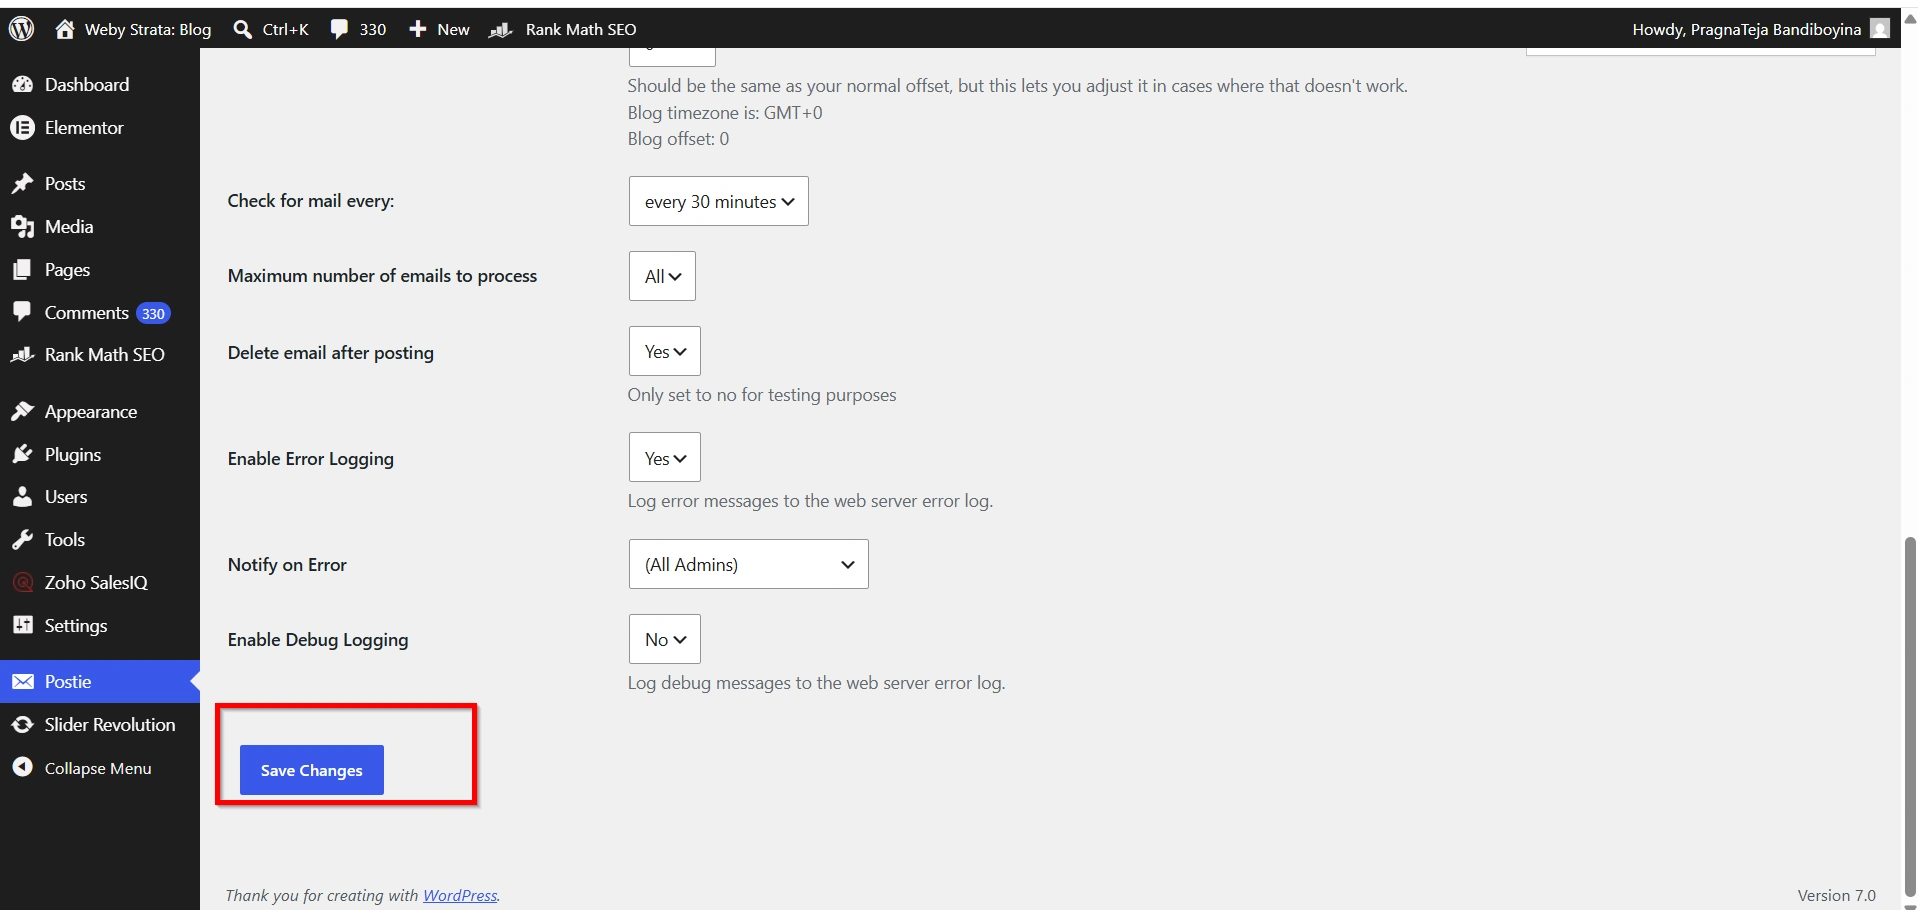
Step 5: Save Settings
Click Save Changes to apply your configuration.
Test the Email Connection
After you Setup and Install WordPress Postie Plugin, testing the mailbox connection is important.
Step 1: Locate the Test Option
Step 2: Run Test Config
Step 3: Verify Results
If successful, Postie will display a confirmation message showing that it can access the mailbox.
If errors occur:
- Verify your email credentials.
- Confirm server hostnames.
- Check port numbers.
- Ensure POP3 or IMAP access is enabled.
- Review firewall restrictions.
Why Use the Postie Plugin?
Many website owners choose to Setup and Install WordPress Postie Plugin because it provides flexibility and convenience.
- Publish Content from Anywhere
- Reduce Administrative Tasks
- Support Multimedia Content
- Improve Team Collaboration
- Flexible Publishing Controls
Benefits of Using the Postie Plugin
Once you successfully Setup and Install WordPress Postie Plugin, you can enjoy several benefits.
- Faster Content Publishing
- Increased Productivity
- Better Collaboration
- Automated Workflows
- Mobile-Friendly Publishing
Conclusion
The Setup and Install WordPress Postie Plugin process is a practical solution for website owners who want to publish content directly from email. By connecting a dedicated mailbox to WordPress, you can automate content creation, improve team collaboration, and simplify publishing workflows. Whether you manage a personal blog, business website, or collaborative publishing platform, Postie offers an efficient and convenient way to keep your website updated with minimal effort.
By following the steps outlined in this guide, you can successfully Setup and Install WordPress Postie Plugin and begin publishing WordPress content through email in just a few minutes.
Related Articles