Latest Updates
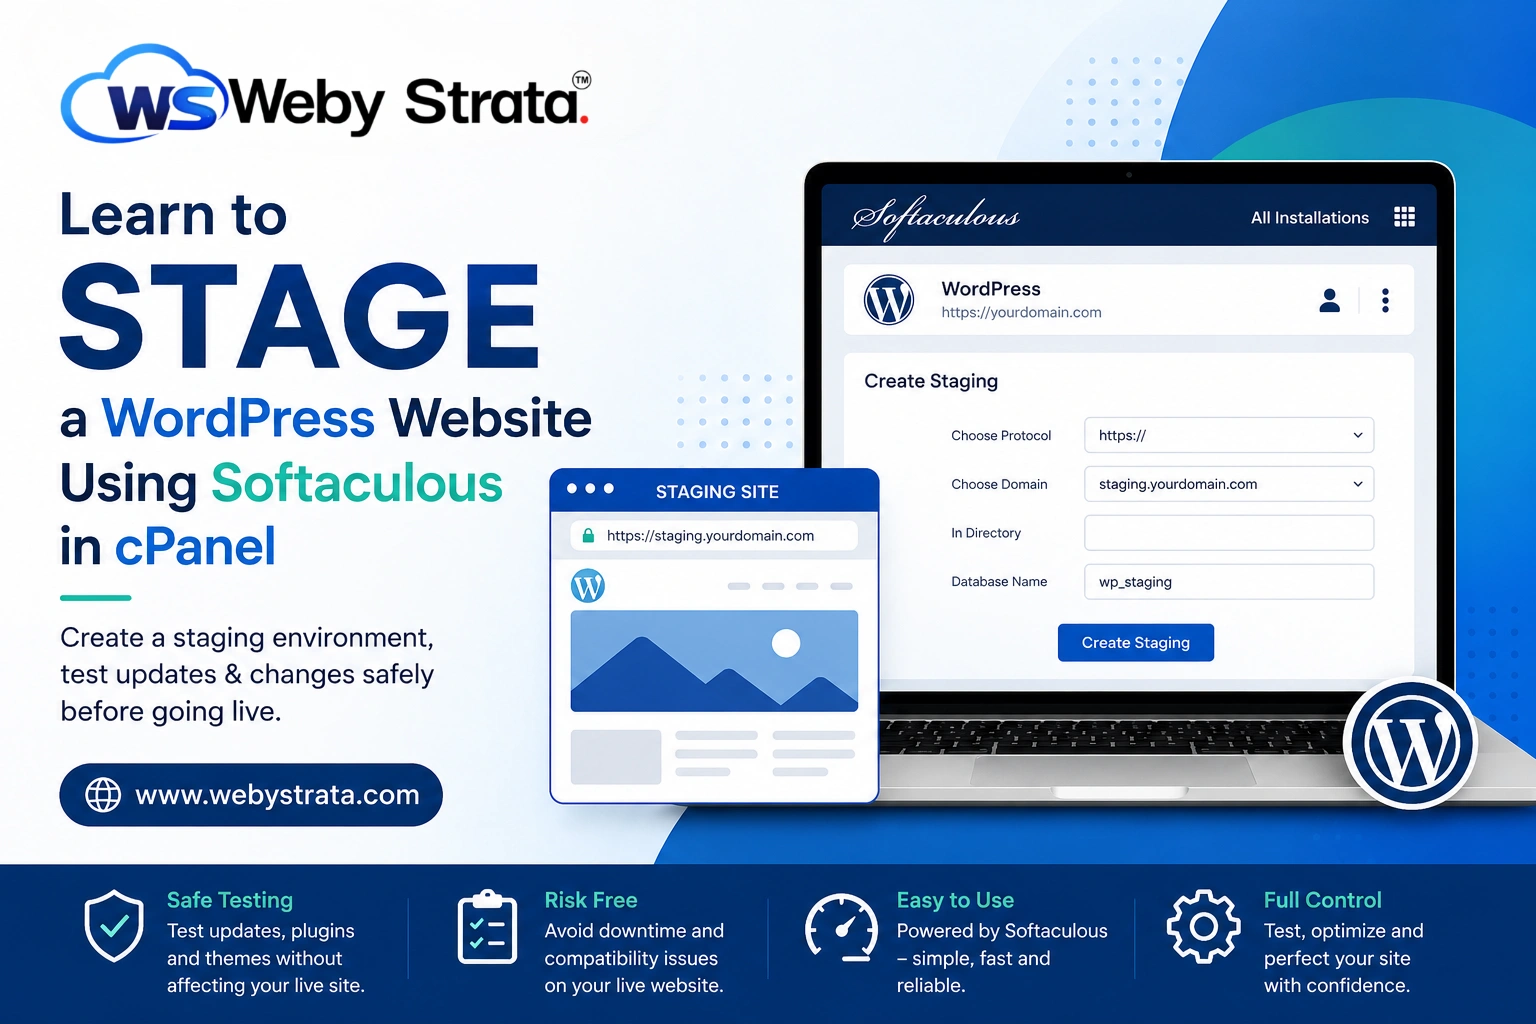
Learn to Stage a WordPress Website via Softaculous in cPanel
Learn to Stage a WordPress Website via Softaculous in cPanel Managing a WordPress website involves much more than simply publishing content. Website owners frequently update themes, install new plugins, optimize performance, modify layouts, and…
Learn to Stage a WordPress Website via Softaculous in cPanel
Managing a WordPress website involves much more than simply publishing content. Website owners frequently update themes, install new plugins, optimize performance, modify layouts, and apply WordPress core updates. While these changes are essential for maintaining a secure and modern website, making them directly on a live website can be risky. A single incompatible plugin update or coding mistake can cause website errors, broken functionality, or even downtime.
This is where a WordPress staging website becomes extremely useful. A staging site acts as a duplicate of your live website, allowing you to test changes safely before applying them to the production environment. Fortunately, if your hosting account includes Softaculous in cPanel, creating a staging site is quick and straightforward.
In this guide, you will learn how to stage a WordPress website using Softaculous in cPanel, understand the benefits of staging, and learn how to push tested changes back to your live website.
What Is a WordPress Staging Site?
A WordPress staging site is a clone of your live website placed in a separate environment. It contains the same themes, plugins, content, media files, and database information as your production website.
Typically, a staging site is hosted on a subdomain such as:
- staging.yourdomain.com
- dev.yourdomain.com
- test.yourdomain.com
Since the staging site is separate from your live website, visitors cannot see the changes you make. This allows developers, website administrators, and business owners to experiment freely without impacting the user experience.
Prerequisites Before Creating a Staging Site
Before creating a WordPress staging website, make sure you have:
- Access to your cPanel account
- Softaculous App Installer enabled
- A WordPress website installed through Softaculous
- A dedicated staging subdomain
- A recent backup of your live website
Creating a backup before any major website modification is always recommended.
Create a Subdomain for Staging
Before creating the staging website, you should create a subdomain that will host the staging copy.
For example:
| Live Website | Staging Website |
|---|---|
| yourdomain.com | staging.yourdomain.com |
To create a subdomain:
- Log in to cPanel.
- Open the Domains section.
- Click Create a New Domain or Subdomains depending on your hosting configuration.
- Enter your preferred subdomain name.
- Click Create.
Once the subdomain is ready, you can proceed with the staging process.
Steps to Stage a WordPress Website via Softaculous in cPanel
Softaculous includes a built-in staging feature that automatically copies your website files and database.
Follow these steps carefully.
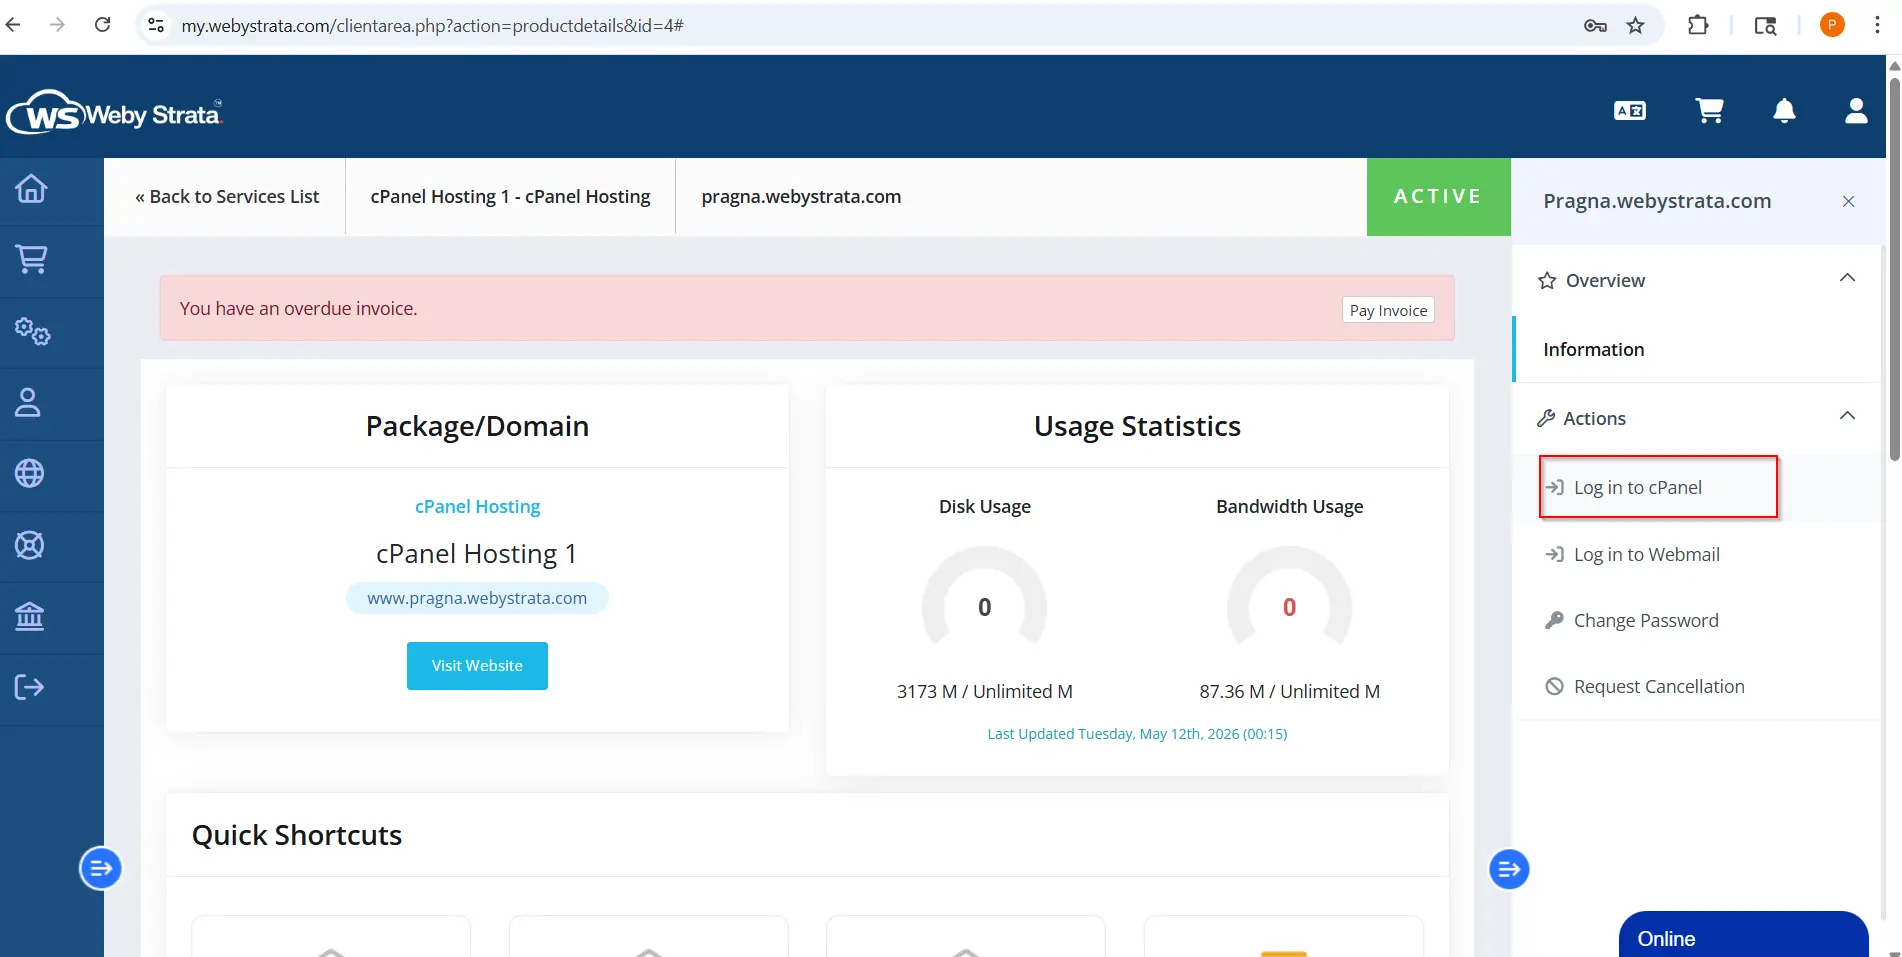
Step 1: Login to cPanel from WebyStrata Client Area
First, visit the WebyStrata website and log in to your client area account using your registered email address and password.
official Website www.webystrata.com
After logging in:
- Go to Services
- Click on My Services
- Select your active hosting service
- Click on Login to cPanel
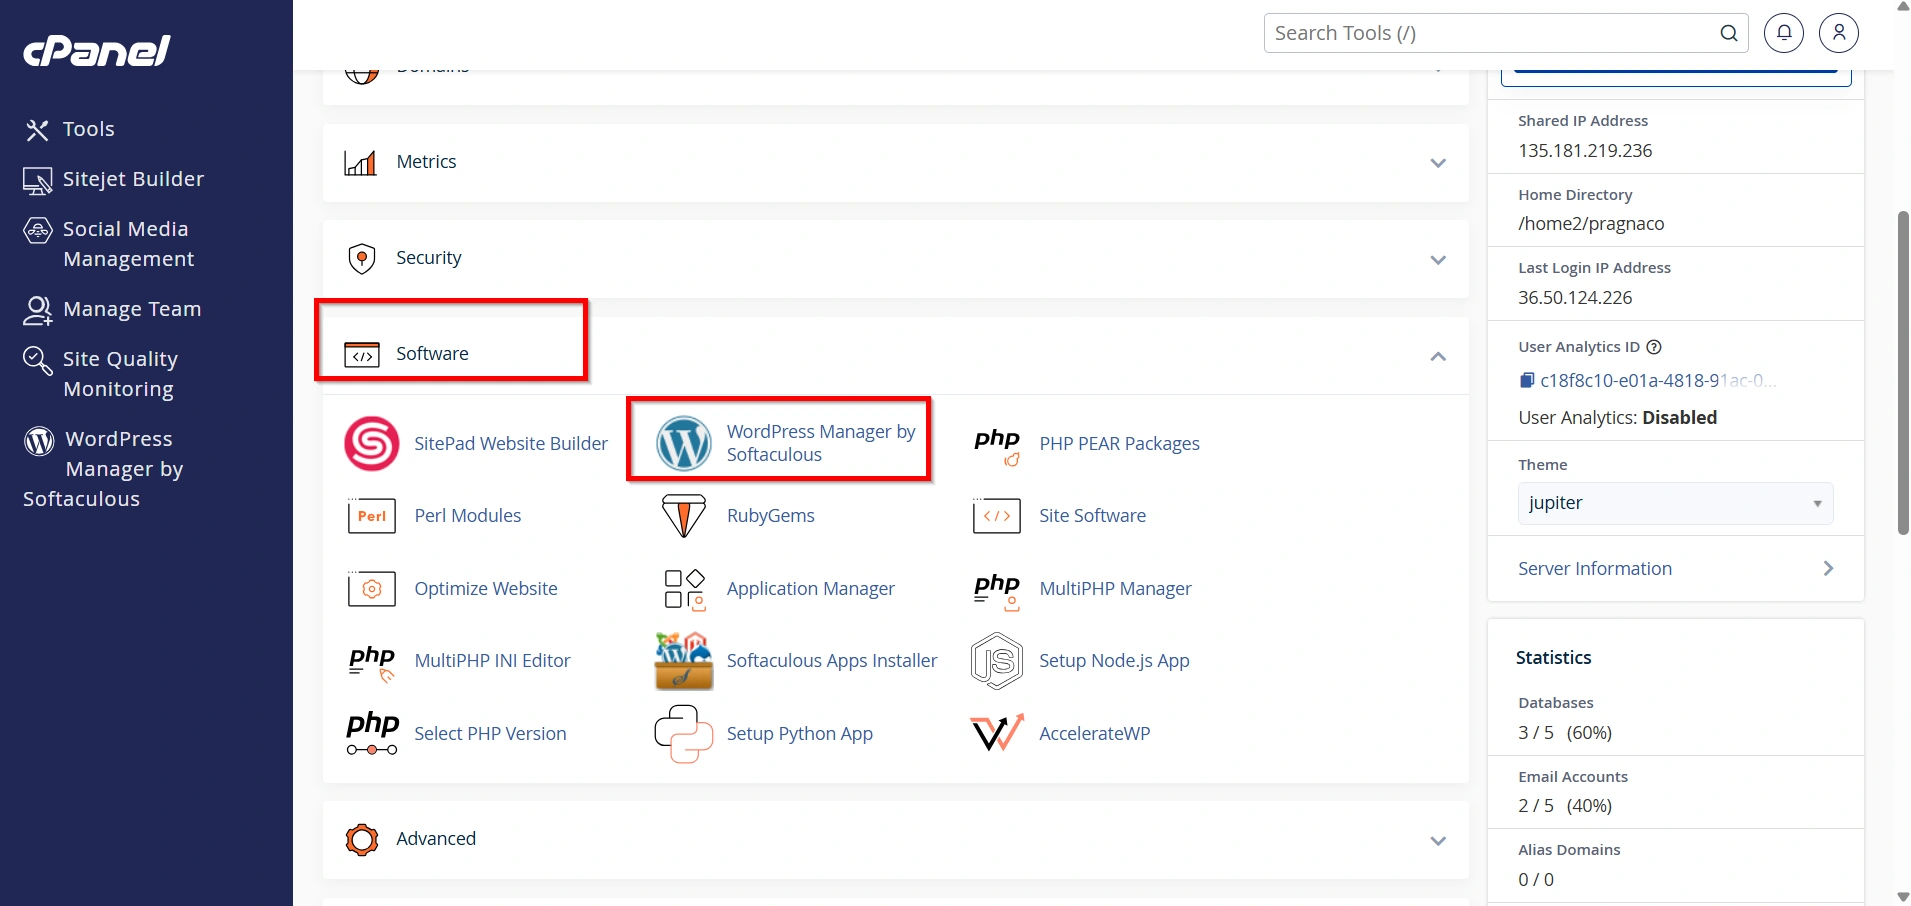
Step 2: Open Softaculous Apps Installer
Locate the Software section and click WordPress Manager by Softaculous .
Softaculous provides management tools for all applications installed through its platform.
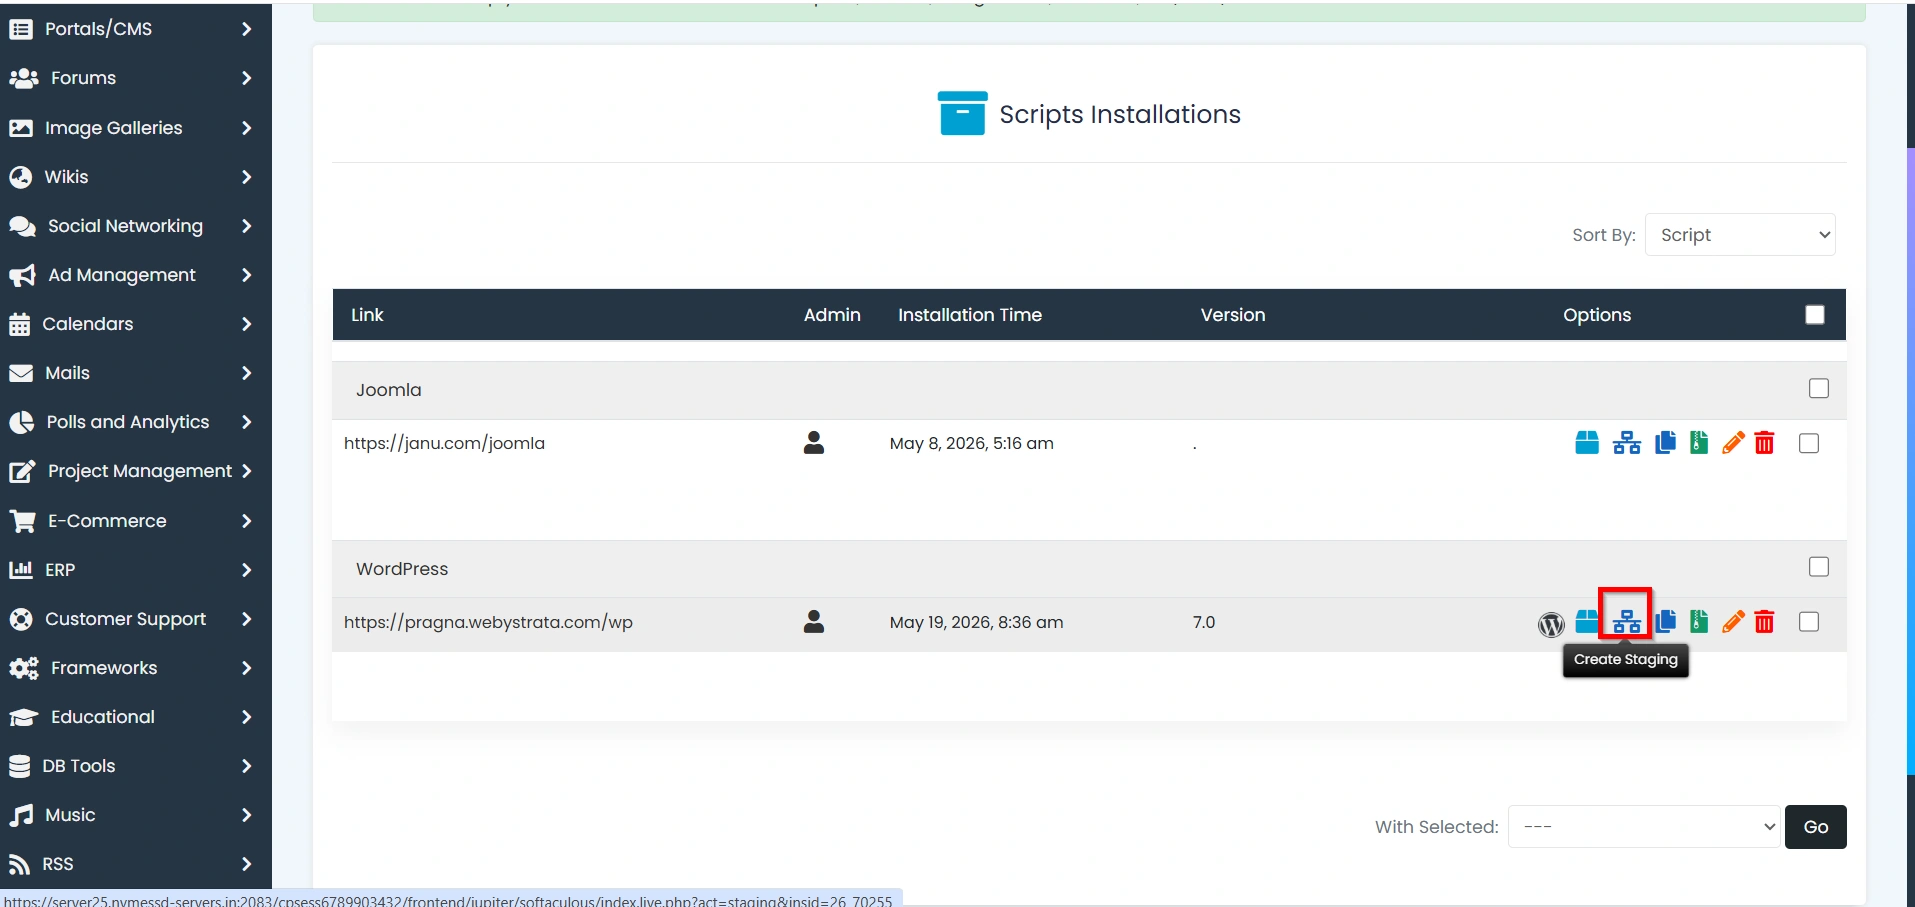
Step 3: Access All Installations
In the top-right corner, click All Installations.
This page displays every WordPress installation available in your hosting account.
![]()
Step 4: Select the Website to Stage
Find the WordPress installation you want to duplicate.
Click the Create Staging icon next to the selected installation.
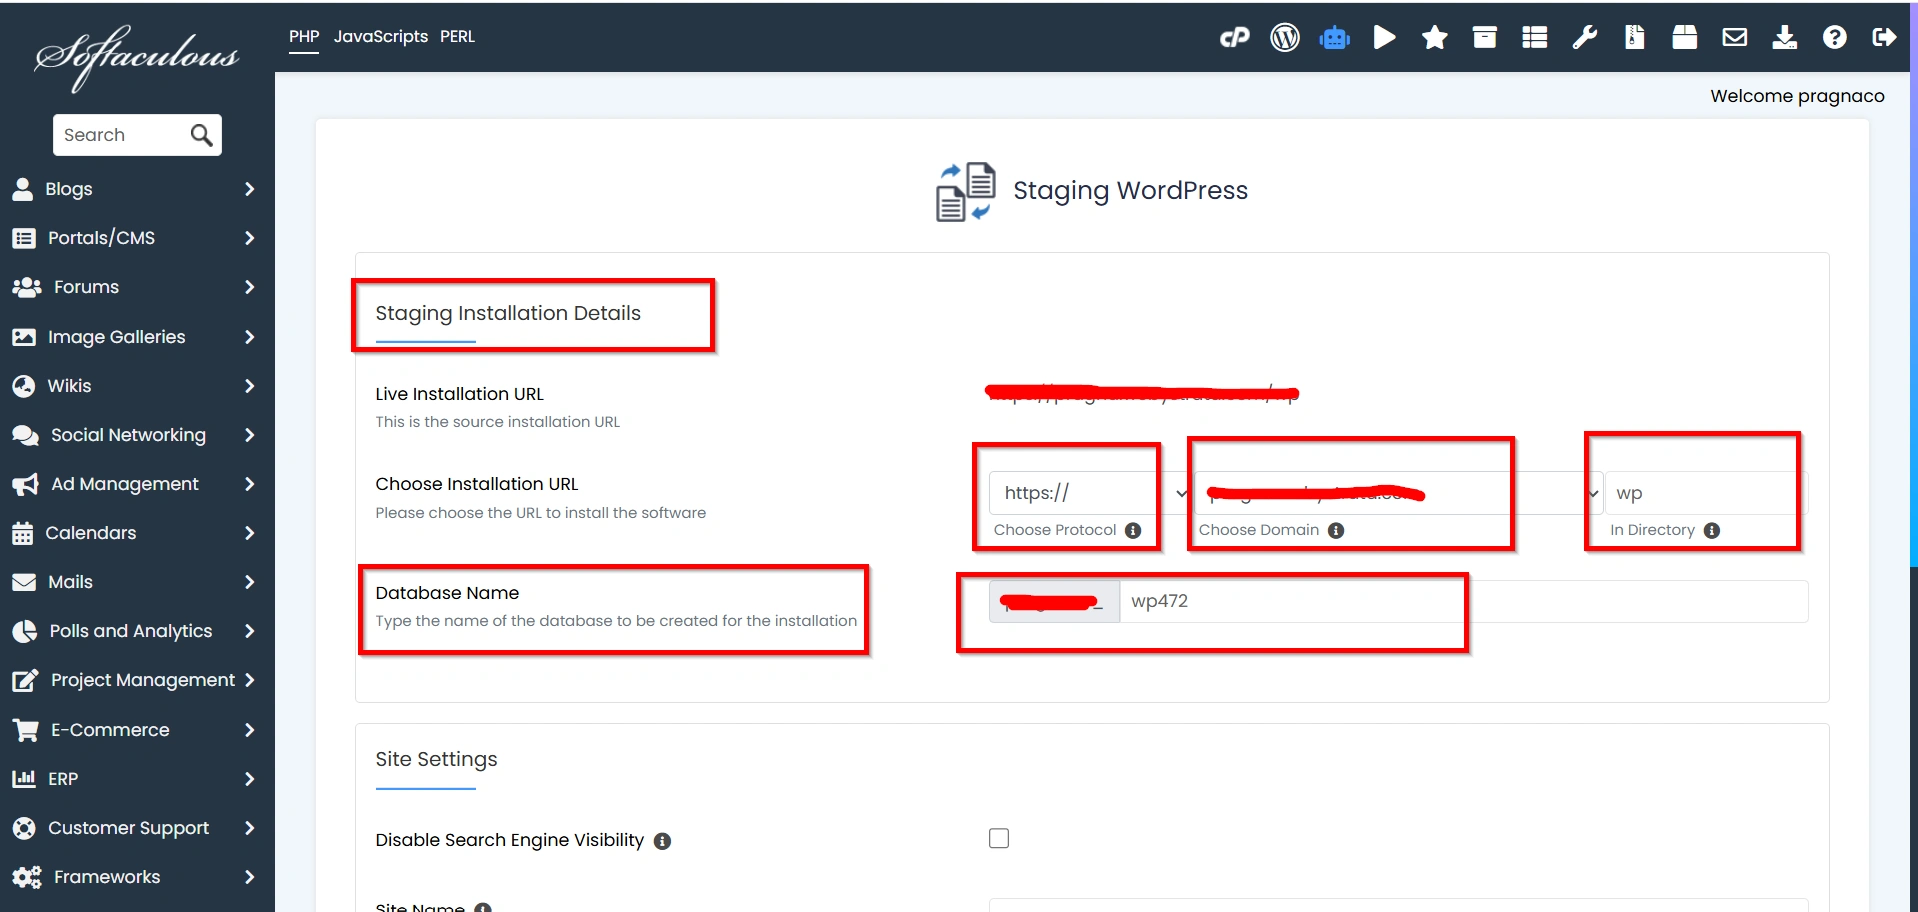
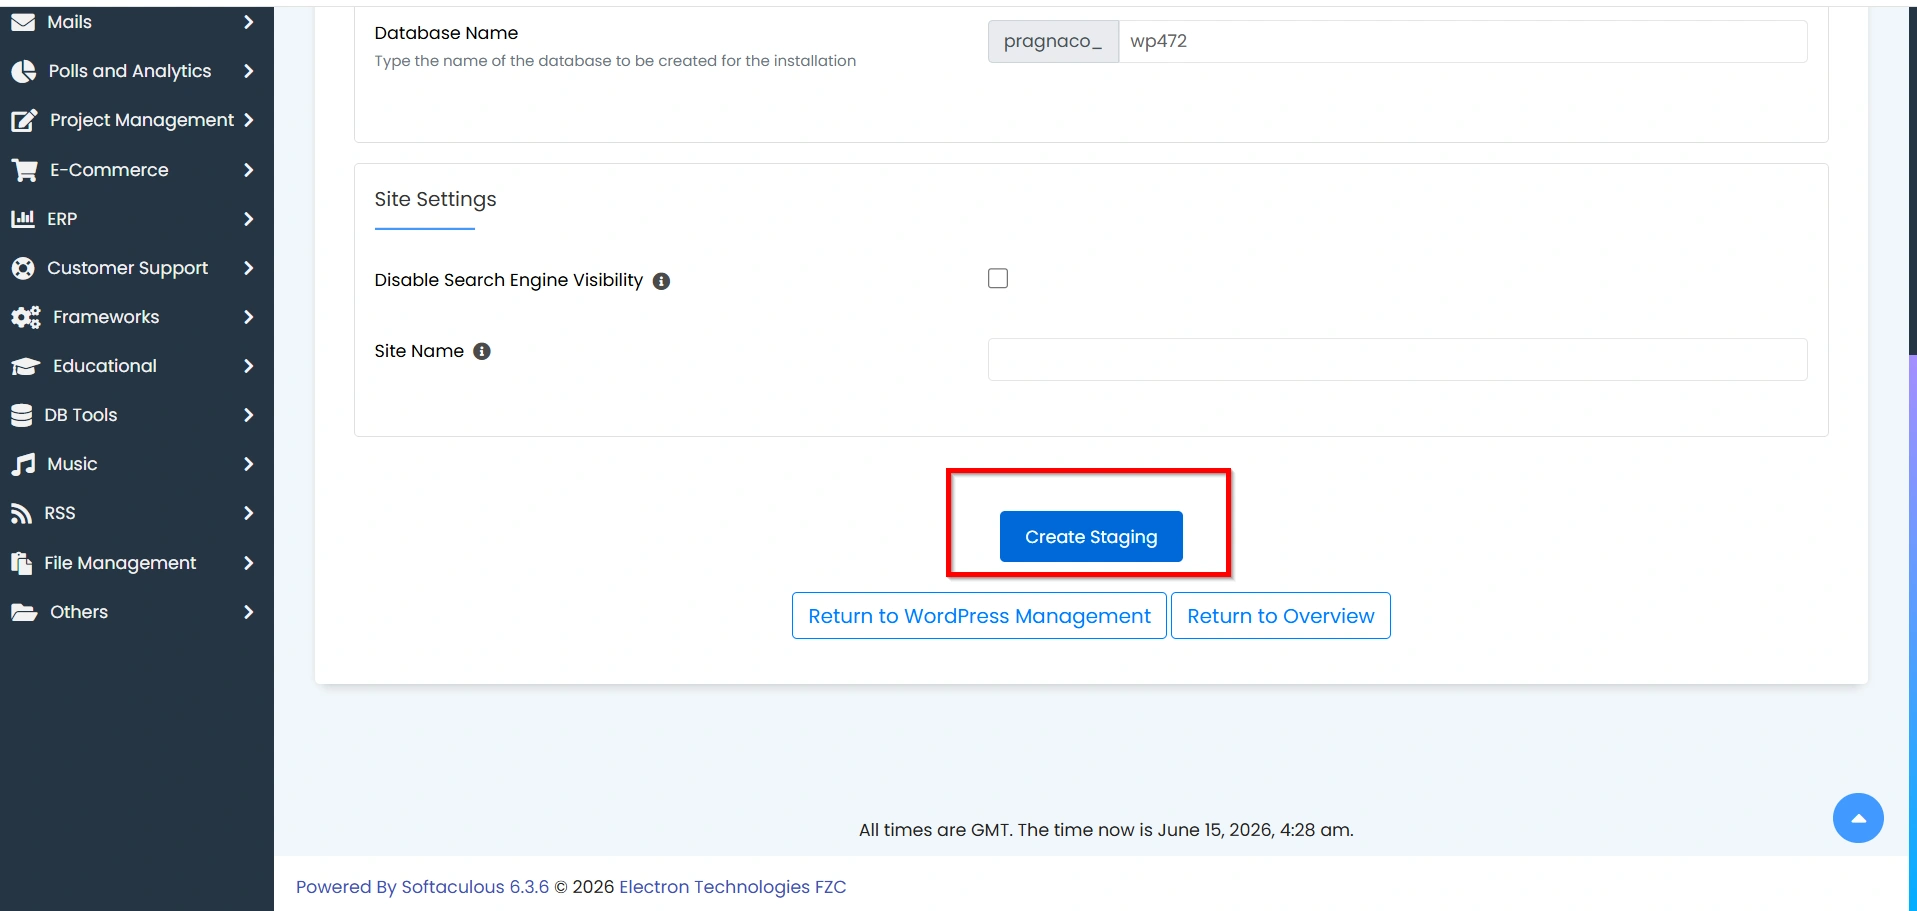
Step 5: Configure Staging Details
You will now see the staging configuration page.
Provide the following information:
Choose Protocol
Select the preferred protocol:
- http://
- https://
- http://www
- https://www
HTTPS is recommended whenever SSL is available.
Choose Domain
Select the staging subdomain you created earlier.
Example:
staging.yourdomain.com
In Directory
Leave this field blank if you want the staging site installed directly on the subdomain.
Database Name
Softaculous automatically generates a database name. You may keep the default value or customize it.
Step 6: Create the Staging Site
Click the Create Staging button.
Softaculous will begin copying:
- WordPress files
- Themes
- Plugins
- Images and media
- Database content
- Website settings
Depending on the size of your website, the process may take a few minutes.
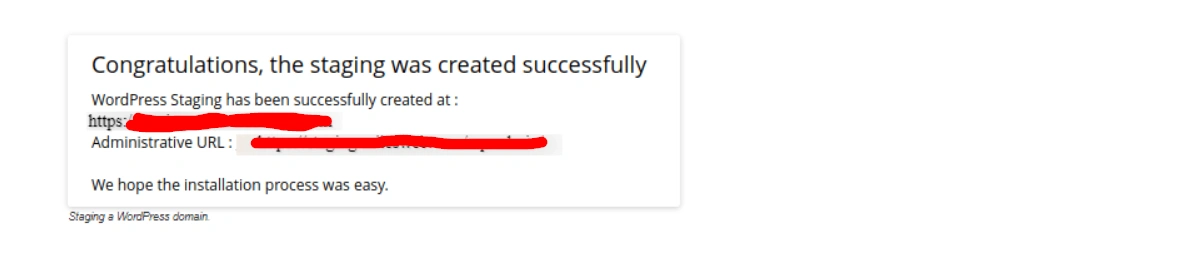
Step 7: Verify the Staging Website
After completion, Softaculous displays a success message.
Visit the staging URL and log in using the same WordPress administrator credentials as your live website.
Verify that:
- Pages load correctly
- Images display properly
- Menus work correctly
- Plugins function as expected
- Theme settings are preserved
You now have a fully functional staging website ready for testing.
What Can You Test on a Staging Website?
A staging website allows you to safely perform various tasks such as:
- Plugin Testing
- Theme Updates
- WordPress Core Updates
- Design Changes
- Performance Optimization
- Security Configurations
Best Practices for WordPress Staging
To maximize the benefits of staging, follow these recommendations:
- Always create a full backup before pushing changes live.
- Test every update thoroughly.
- Keep staging and live environments organized.
- Use HTTPS on staging sites whenever possible.
- Restrict public access to staging websites.
- Delete unused staging environments to conserve server resources.
- Document major changes before deployment.
Conclusion
A WordPress staging site is one of the most valuable tools for website maintenance and development. Instead of making risky changes directly on your production website, you can safely test updates, plugins, themes, and custom code in a separate environment.
Softaculous simplifies the entire process by allowing you to create a staging website, test modifications, and push approved changes to your live website with just a few clicks. Whether you manage a personal blog, business website, or eCommerce store, using a staging environment helps reduce downtime, prevent errors, and ensure a smooth user experience.
By following the steps outlined above, you can confidently stage your WordPress website using Softaculous in cPanel and maintain a stable, professional, and secure online presence.
Related Articles