Latest Updates
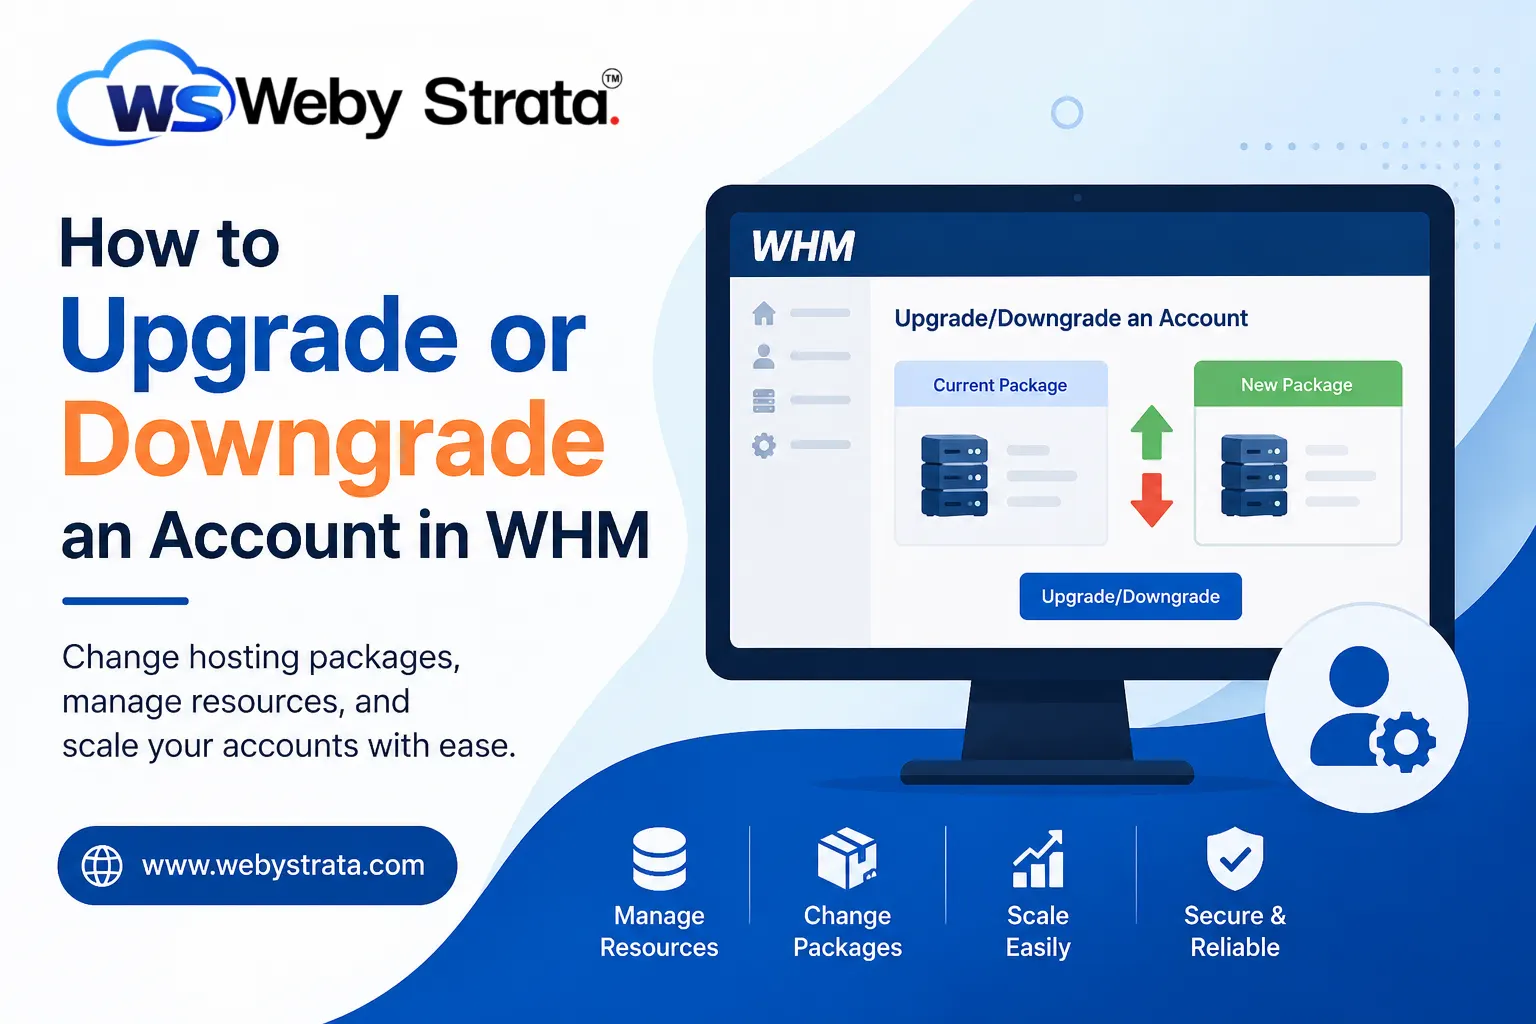
How to Upgrade or Downgrade an Account in WHM
How to Upgrade or Downgrade an Account in WHM Managing web hosting accounts efficiently is one of the most important responsibilities of a server administrator or hosting reseller. As websites grow, their resource requirements…
How to Upgrade or Downgrade an Account in WHM
Managing web hosting accounts efficiently is one of the most important responsibilities of a server administrator or hosting reseller. As websites grow, their resource requirements often increase, requiring more disk space, bandwidth, email accounts, databases, or other hosting features. On the other hand, some customers may need fewer resources and prefer a more affordable hosting package.
WHM (Web Host Manager) provides a simple way to upgrade or downgrade hosting accounts without recreating accounts or migrating website data. By changing the hosting package assigned to an account, administrators can instantly adjust resource limits and available features.
In this guide, you’ll learn how to upgrade or downgrade an account in WHM, when to perform these changes, and the best practices to ensure a smooth transition.
What Does Upgrading or Downgrading an Account Mean?
In WHM, every cPanel account is typically associated with a hosting package. A package defines the resources and features available to the account, including:
- Disk space allocation
- Monthly bandwidth limits
- Number of email accounts
- FTP accounts
- MySQL databases
- Addon domains
- Subdomains
- Parked domains
- Mailing lists
- Feature lists
When you upgrade an account, you move it to a package that offers more resources and capabilities.
When you downgrade an account, you assign a package with lower resource limits and fewer features.
The website files, databases, and emails remain intact, but the account will be governed by the settings of the new package.
Prerequisites
Before upgrading or downgrading an account, ensure the following:
- You have administrative or reseller access to WHM.
- The target hosting package already exists.
- The account is in good standing.
- A recent backup has been created.
- Resource usage has been reviewed.
Creating a backup before making any account-level changes is strongly recommended.
How to Upgrade or Downgrade an Account in WHM
Follow these steps to modify an account package.
Step 1: Log in to WHM
Start by accessing your WHM dashboard.
Common WHM login URLs include:
Enter your WHM username and password to log in.
Once authenticated, you will be directed to the WHM home page where all server management tools are available.
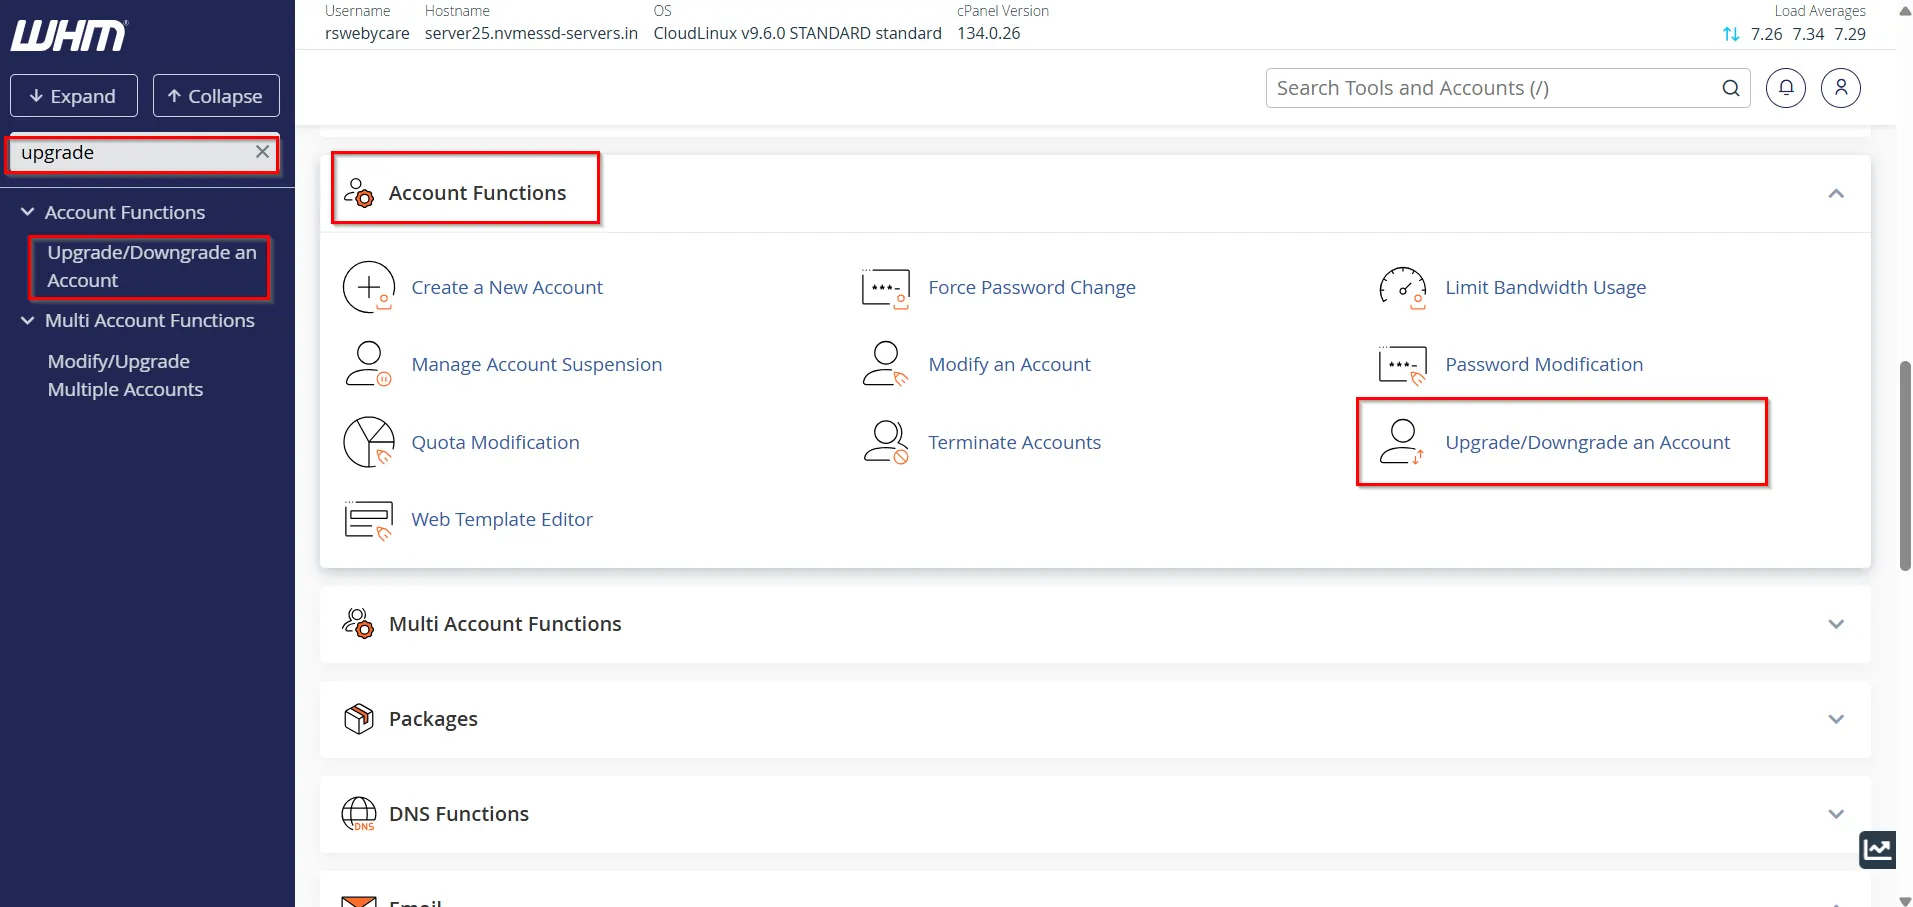
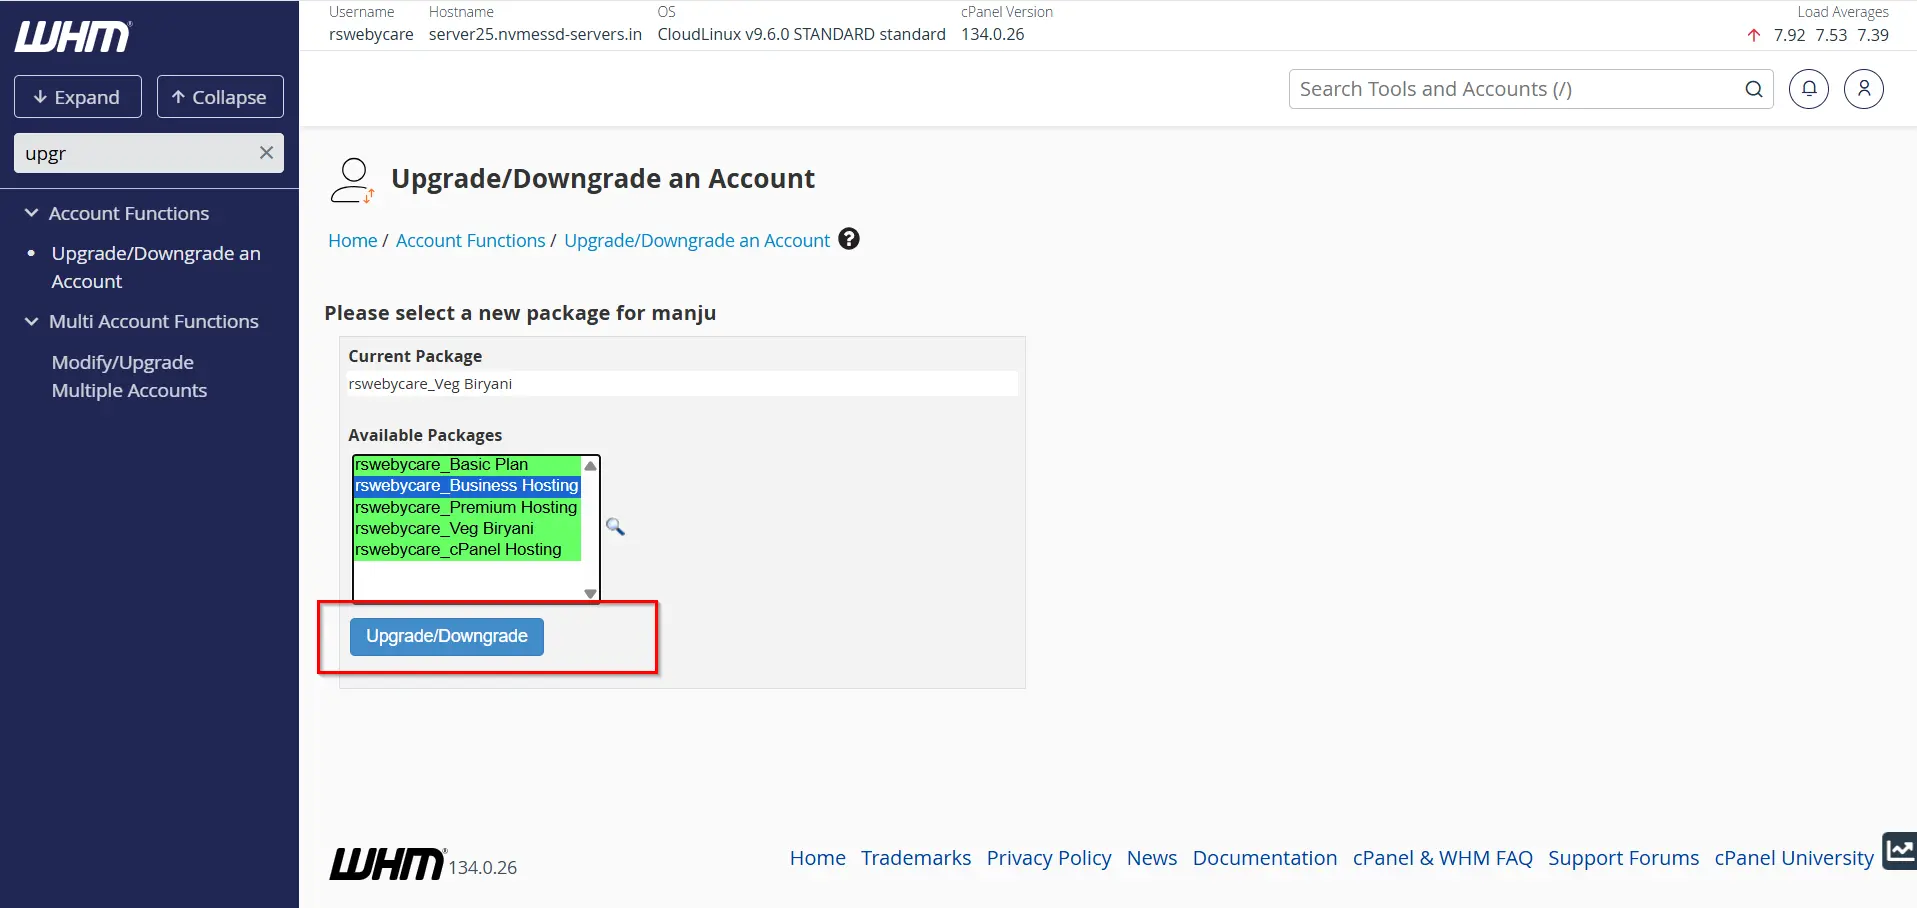
Step 2: Locate the Upgrade/Downgrade Tool
In the WHM search box located on the left side of the dashboard:
- Type “Upgrade”.
- Select Upgrade/Downgrade an Account under the Account Functions section.
This feature allows you to change the hosting package assigned to any account under your management.
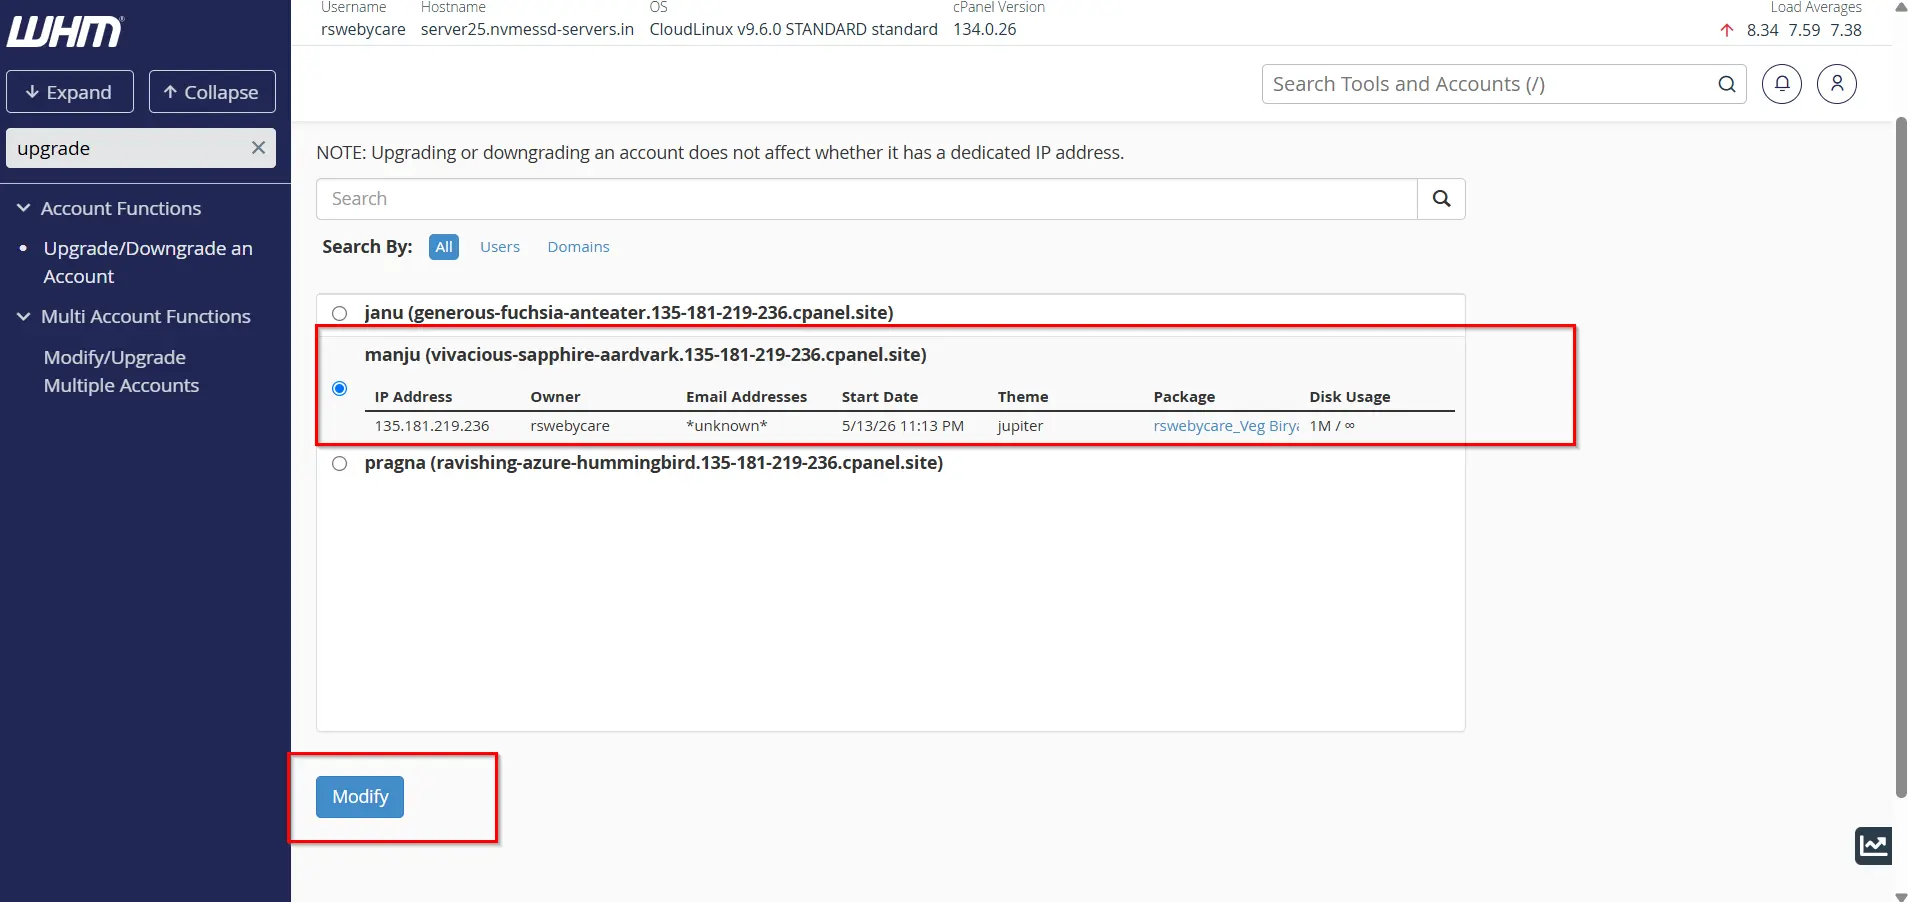
Step 3: Select the Account
WHM will display a list of available hosting accounts.
- Locate the account you want to modify.
- Select the desired account.
- Click Modify.
The system will display the account’s current package and available package options.
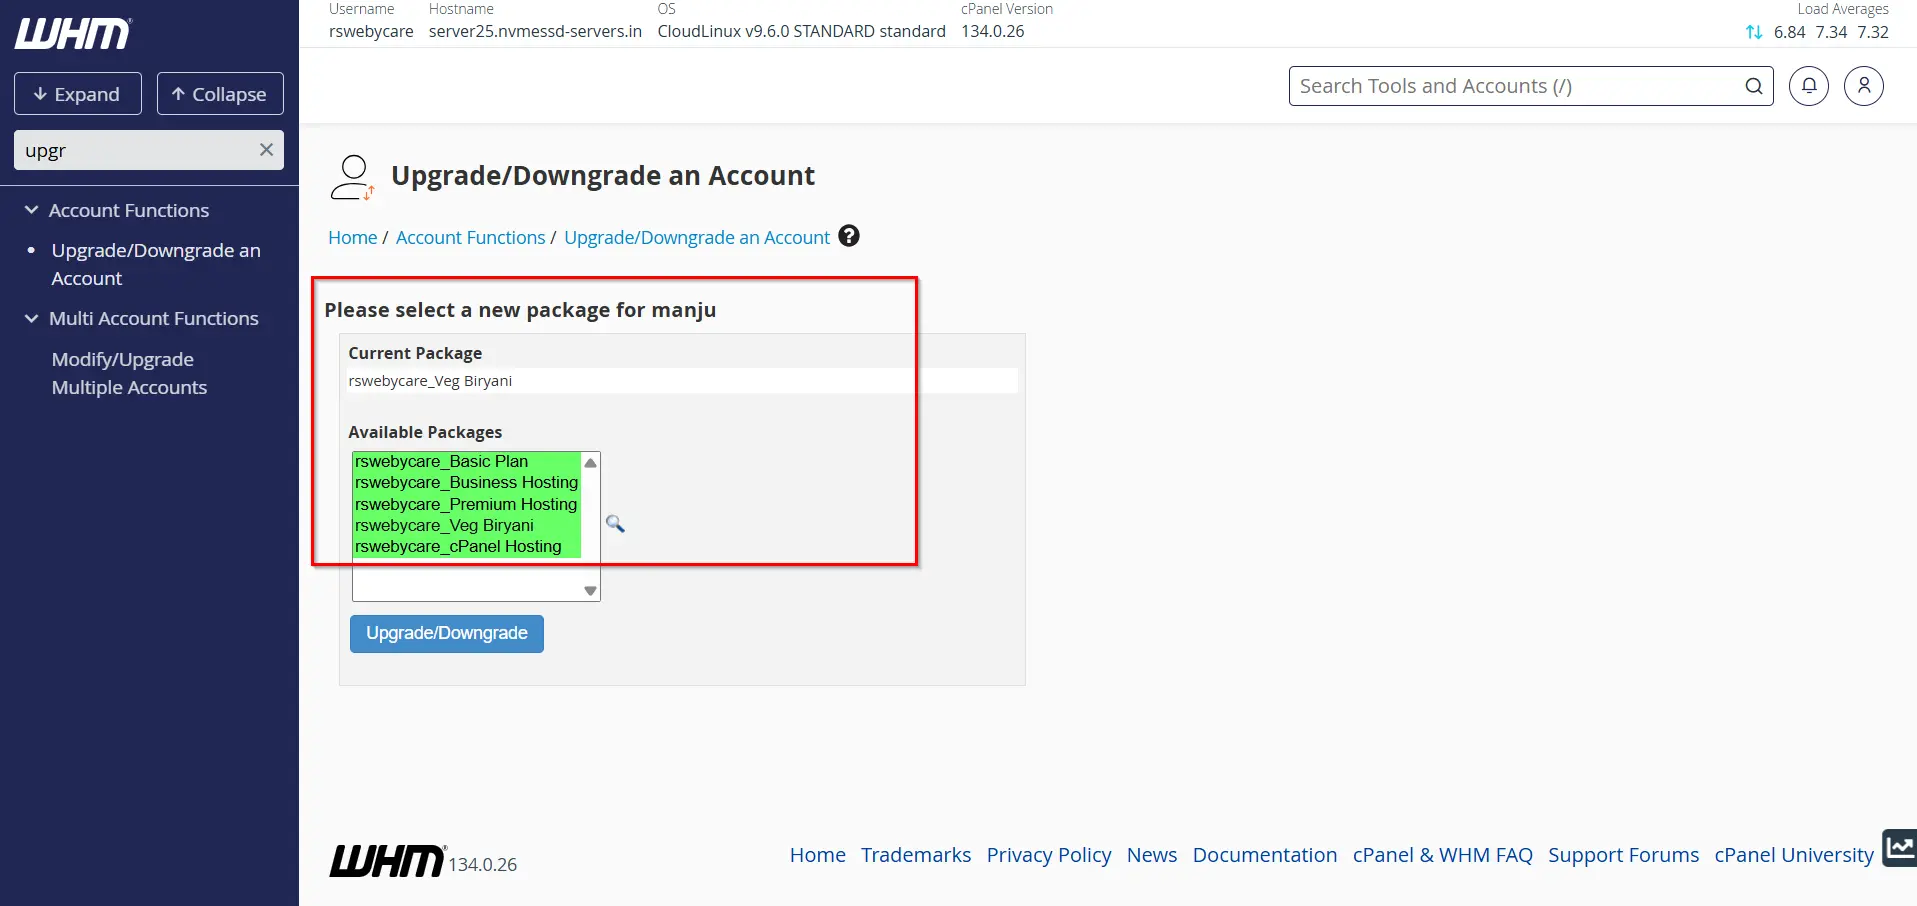
Step 4: Choose a New Hosting Package
Select the hosting package you want to assign to the account.
Examples may include:
- Starter Hosting
- Basic Hosting
- Business Hosting
- Professional Hosting
- Premium Hosting
Review the package details carefully before proceeding.
Step 5: Review Resource Allocations
Before applying changes, compare the existing package with the new package.
Pay attention to:
- Disk quota
- Monthly bandwidth
- Email account limits
- FTP account limits
- Database limits
- Domain limits
This review helps prevent unexpected restrictions after the change.

Step 6: Apply the Upgrade or Downgrade
Once you have confirmed the package selection:
- Click Upgrade/Downgrade.
- WHM will process the request.
- The account will automatically inherit the limits and features of the new package.
A confirmation message will appear when the operation is completed successfully.
Verifying the Account After the Change
After modifying the account package, verify that the changes were applied correctly.
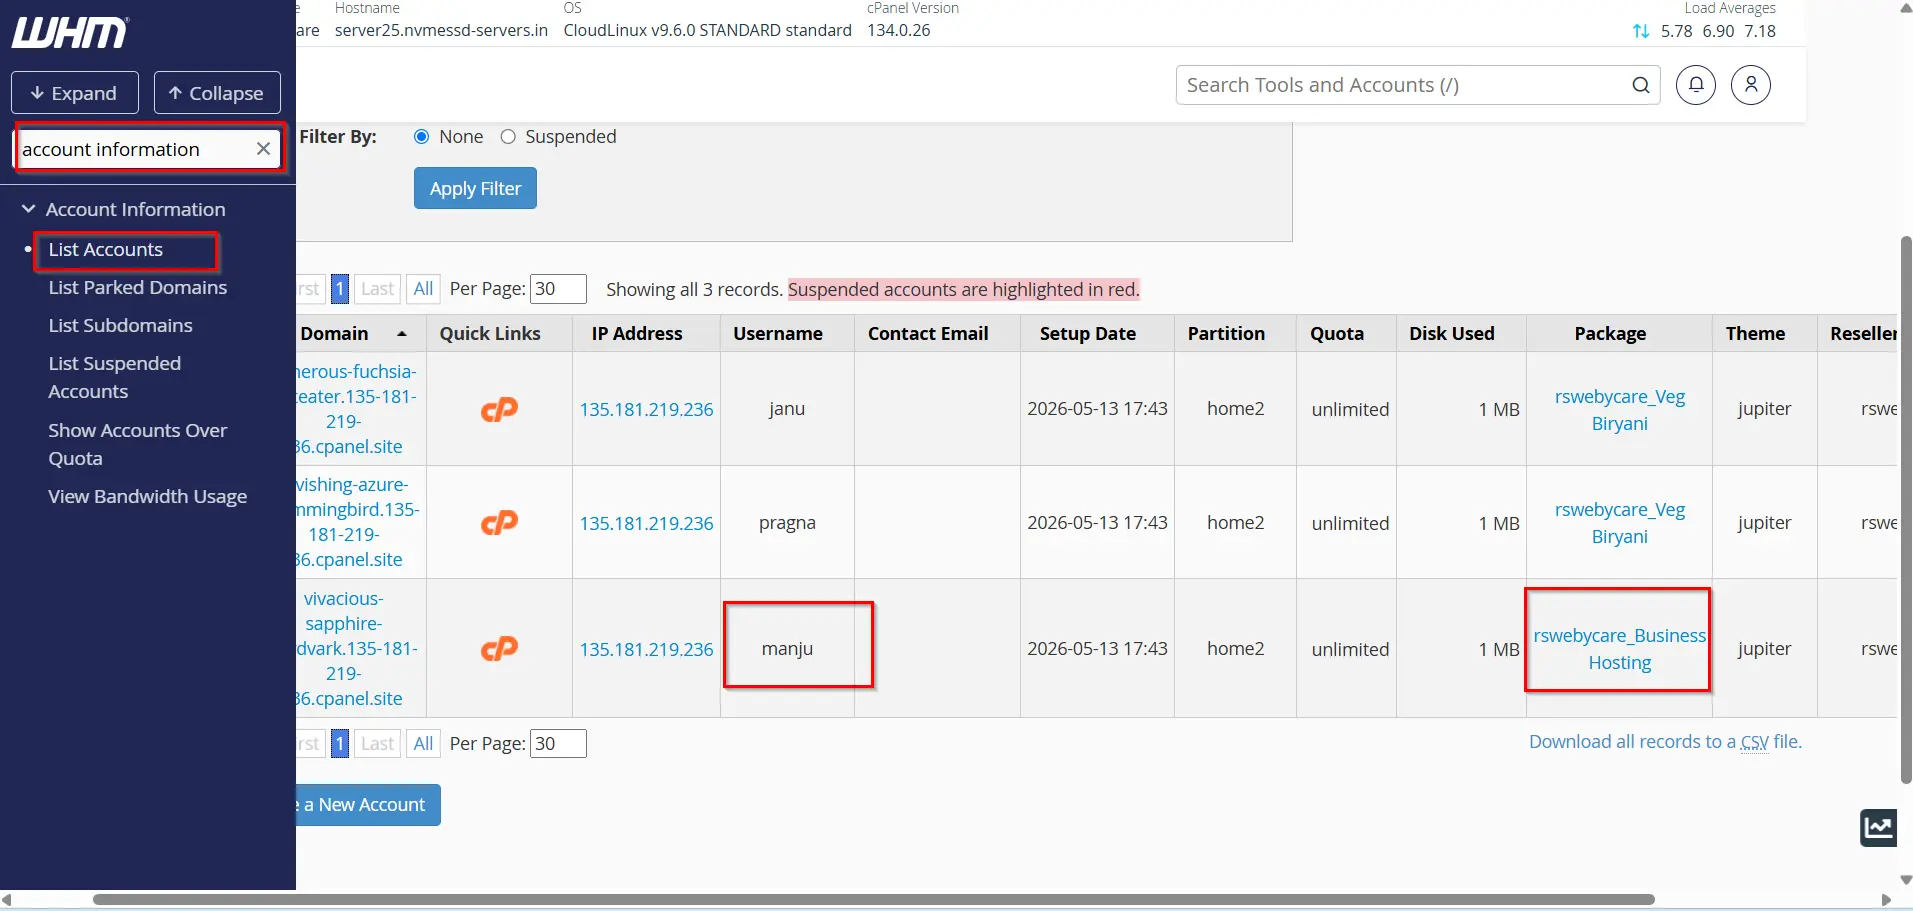
Check Package Assignment
Navigate to:
Account Information → List Accounts
Confirm that:
- The correct package is assigned.
- Resource limits match the selected package.
- The account status is active.
Test Website Functionality
Visit the hosted website and verify:
- Pages load correctly.
- Email services are functioning.
- Databases are accessible.
- SSL certificates remain valid.
Benefits of Upgrading an Account
Upgrading an account can help when:
- A website experiences increased traffic
- Additional storage is required
- More email accounts are needed
- Customers need advanced hosting features
- Businesses are scaling their online operations
Common upgrade scenarios include moving from:
- Basic Hosting → Business Hosting
- Business Hosting → Premium Hosting
- Shared Hosting → Reseller Hosting
Benefits of Downgrading an Account
Downgrading may be necessary when:
- Resource usage has decreased
- Customers want to reduce hosting costs
- Unused features are no longer required
- Temporary projects have ended
Before downgrading, ensure that current usage does not exceed the limits of the target package.
Conclusion
WHM makes it easy to upgrade or downgrade an account by simply assigning a different hosting package. Whether you’re increasing resources for a growing website or reducing costs with a smaller plan, the Upgrade/Downgrade Account feature allows administrators to make changes quickly and efficiently.
By reviewing resource usage, selecting the appropriate package, creating backups, and verifying functionality after the change, you can ensure a seamless experience for both administrators and hosting customers. Proper account management not only improves server organization but also helps deliver reliable hosting services that meet changing customer needs.
For more WHM management tutorials and step-by-step guides, visit our WHM knowledge base: www.webystrata.com/blog/category/whm-panel/
Related Articles